Updated October 4, 2023
How to Connect Database in Java?
While writing an IT application using any programming language, data flow from and to the application serves the core functionality. If the data flow is somehow affected, it can adversely affect the application functionality and may cause a significant loss to the business. Different methods are available today for connecting your program to a database to provide users with the information they request, collect information from users, delete the information as required by the user, and update data to the database daily. We will look into one such approach by using Java as our programming language, JDBC as a database connectivity method, and following the object-oriented approach.
What is JDBC?
JDBC stands for Java Database Connectivity, and it helps a Java program to perform different kinds of operations over the database, such as create, read, update, and delete. Also, JDBC is a Java API.
By using JDBC, a programmer should be able to:
- Establish a connection with the database
- Run SQL commands by sending them to the database
- Interprets the results that come from a database
Creating a Database to Connect Databases in Java
Before working with JDBC, it is required to have a database to connect to it. We will be making use of the Oracle Database for the sake of our illustration. Please download the Oracle 11g express edition from the below link.
I already have the Oracle 10g installer ready with me, as you can see below:

Source: From my desktop
- Please double-click the installer; the below screen will pop up. Click next.
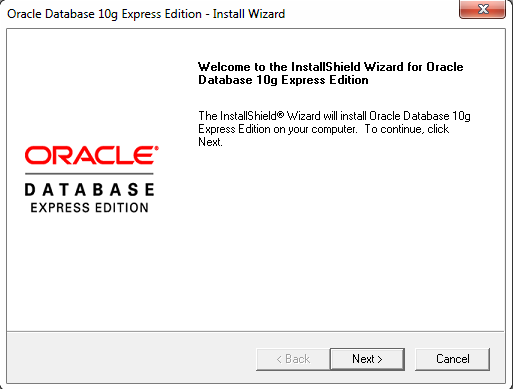
Source: From my desktop
- Please accept the license agreement and click on next.

Source: From my desktop
- Please keep the default settings as they are and click on next.
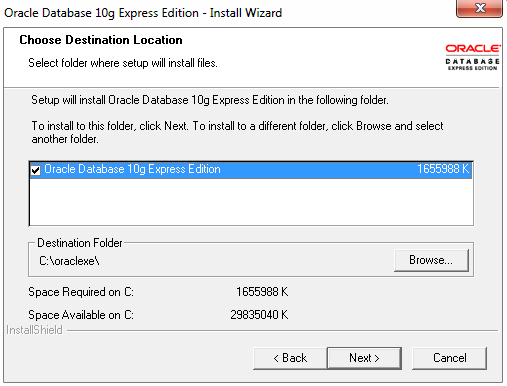
Source: From my desktop
- It will ask for a password that will be required when you log in to Oracle 11g instance. Please provide the password and click on next.

Source: From my desktop
- After you provide the password, the installation process will begin. Once the installation is finished, a shortcut icon shall be created on your desktop screen. If you cannot find it, please go to Windows Start and search for Oracle; you should get it. Click on it to open a thin client for you via a browser. Log in to the instance. Please note that the username will be the same for the Oracle DB, i.e., the system. The password will be the one you provided while configuring the database.

Source: From my desktop
- Now once you log in, the very first screen that you will see will look like the below:

Source: From my desktop
- Now let’s create a table. Please click on the SQL module from the above screen and run the below query.
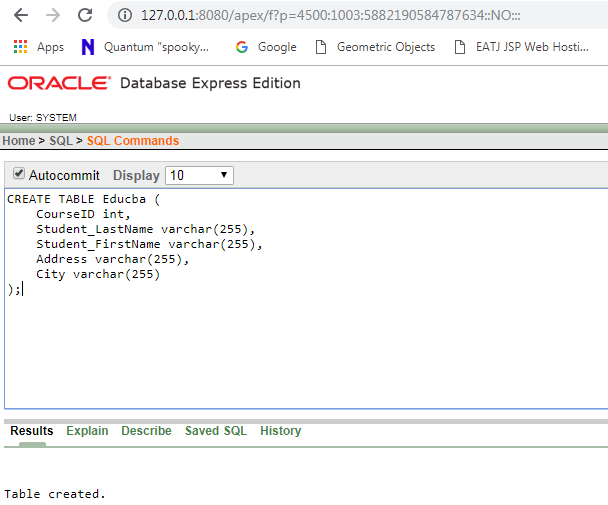
Source: From my desktop
- As you can see, we have successfully created a table named Educba.
Connect Database in Java
A few interfaces and classes are used to connect to a database and perform operations using JDBC API.
We will explain one by one, but let me first present to you the below program:


Source: From my desktop
Below are the interfaces that we will be using to connect to the database and perform operations over it:
- Driver Manager
- Connection
- Statement
- Result set
- Prepared statement
Let us look at the operations we can perform as a part of the JDBC operation.
- Store the data from an entity to a database, i.e., they create an operation.
- Retrieve the data to the entity or a bean from a database
- Update the data for the entity or the bean in the database
- Delete or remove the data on the entity or a bean from the database.
No matter what operation we perform, some basic steps would remain the same:
- Load the driver.
class.forName("oracle.jdbc.driver.OracleDriver");- Create a URL string
String url="jdbc:oracle:thin:@172:.26.132.40:1521:orclilp";- Use the driver manager to create a connection
con=DriverManager.getConnection(URL, USERNAME, PASSWORD);- Use Connection reference to create a statement
stmt = conn.createStatement();- Use a statement to execute the query

6. Process the result set ( optional, depends )
7. Release the resources in the final block.

Illustration
As we use the Oracle database in our illustration, we need to have the required driver that Oracle should provide. The driver class is usually in the form of a jar file with the name ojdbc14.jar. This driver should be imported to your Java program as a part of “Referenced Libraries” if it is not there.
If you have installed Oracle 11g in your C folder, it can ideally be found in the below path: ( If it is not there, it can be easily downloaded from here )
C: \ oraclexe\ app\ oracle\ product\ 10.2.0\ server\ jdbc\ lib

Source: From my desktop
Many jar files should be available; however, ojdbc14.jar is the latest. The same can be used for our purpose. This jar should be added to the classpath of the project. Please check the below image.

Source: From my desktop
Let us create an artist table with the following attributes: You can directly run the SQL command line as a separate module of Oracle Express Edition. But first, you need to connect, and you can execute the “connect” command to connect to the database.
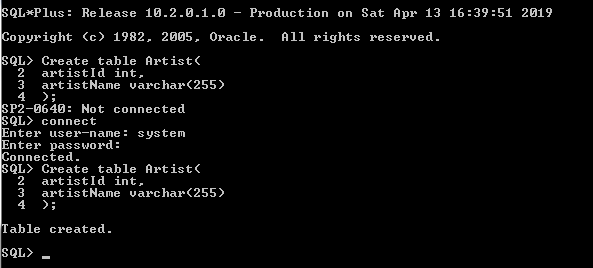
Source: From my desktop
As a part of this illustration, we would be creating three Java classes, i.e., Artist.java, CreateTable.java, and ArtistManagementDao.java, to achieve this.
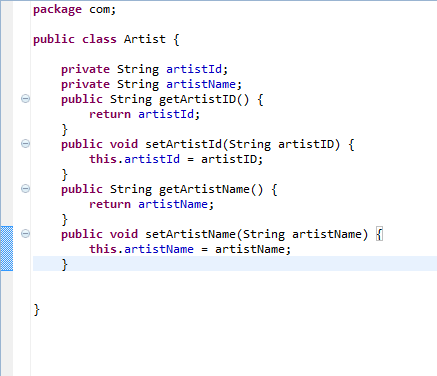
Also, we must create a class called Artist Bean in the Java layer. This class should have attributes of the Artist with the above context. It will look like below:
Artist.java
Let us create two other Java classes with the name ArtistManagementDao and CreateTable.java.
ArtistManagementDao.java
package com;
import java.sql.Connection;
import java.sql.DriverManager;
import java.sql.PreparedStatement;
import java.sql.SQLException;
public class ArtistManagementDao {
private final static String DRIVERNAME="oracle.jdbc.driver.OracleDriver";
private final static String URL="jdbc:oracle:thin:@LENOVO-PC:1521:XE";
private final static String USERNAME="System";
private final static String PASSWORD="Your DB password";
private Connection con =null;
public void addArtist(Artist a)
{
try {
Class.forName(DRIVERNAME);
String sql="insert into Artist1 values (?,?)";
con=DriverManager.getConnection(URL, USERNAME, PASSWORD);
PreparedStatement pst=con.prepareStatement(sql);
pst.setString(1, a.getArtistID());
pst.setString(2, a.getArtistName());
pst.executeUpdate();
} catch (ClassNotFoundException e) {
// TODO Auto-generated catch block
System.out.println(e);
} catch (SQLException e) {
System.out.println(e);
}
}
}
Explanation:
- The Dao class helps us to isolate the application/business layer from the persistence layer. This is usually the relational database.
- We have created a DB URL with your computer name and DB port number ( ideally 1521 ), preceded by JDBC:oracle:thin:@. Then, we created a username and password to pass these attributes during the Database connection. It is highly recommended to encrypt these values in the production environment.
- Inside the addArtist method, we tried to establish our connection by following the steps we learned earlier using a conn statement.
- We have used the insert method to push values from attributes to the database.
- In the next statement, to test, we have the get statement to retrieve values from the database.
- We have also tried to catch block for catching any exceptions and throwing out the same.
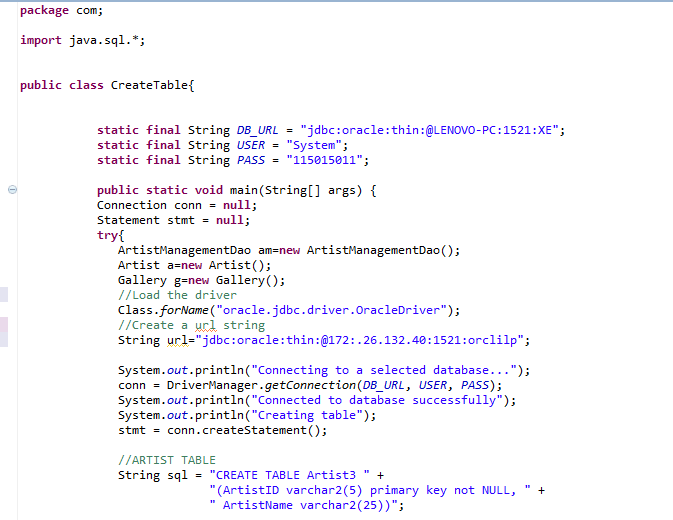
CreateTable.java
package com;
import java.sql.*;
public class CreateTable{
static final String DB_URL = "jdbc:oracle:thin:@LENOVO-PC:1521:XE";
static final String USER = "System";
static final String PASS = "Your DB Password";
public static void main(String[] args) {
Connection conn = null;
Statement stmt = null;
try{
ArtistManagementDao am=new ArtistManagementDao();
Artist a=new Artist();
Class.forName("oracle.jdbc.driver.OracleDriver");
System.out.println("Connecting to a selected database...");
conn = DriverManager.getConnection(DB_URL, USER, PASS);
System.out.println("Connected to database successfully");
System.out.println("Creating table");
stmt = conn.createStatement();
//ARTIST TABLE
String sql = "CREATE TABLE Artist3 " +
"(ArtistID varchar2(5) primary key not NULL, " +
" ArtistName varchar2(25))";
stmt.executeUpdate(sql);
System.out.println("Created table in given database...");
a.setArtistId("abc");
a.setArtistName("ankit");
am.addArtist(a);
System.out.println("\nArtistID="+a.getArtistID()+"\nArtistName="+a.getArtistName());
}catch(SQLException se){
se.printStackTrace();
}catch(Exception e){
e.printStackTrace();
}finally{
try{
if(stmt!=null)
conn.close();
}catch(SQLException se){
}
try{
if(conn!=null)
conn.close();
}catch(SQLException se){
se.printStackTrace();
}
}
}
}
Explanation:
- We have created a DB URL with your computer name and DB port number ( ideally 1521 ), preceded by JDBC:oracle:thin:@. Then, we created a username and password to pass these attributes during the Database connection. It is highly recommended to encrypt these values in the production environment.
- In the CreateTable.java class, we created the objects “am” and “a” of the ArtistManagementDao.java and Artist.java class, respectively.
- Then we tried to establish our connection by following the steps we learned earlier using a conn statement.
- Then we created a table with the name Artist3 and updated the database or pushed this to the database using the execute the statement.
- If we would like to assign values to the attributes, we will use the object we created for the artist class and note that this class will not insert the value into the database; it will be ArtistmanagementDao class. We already have stored values in attributes and will see in the day class how to push this to the database.
- Finally, we have used the “am” object from ArtistManagementDao to pass this object “a” to the method addArtist() of the ArtistManagementDao java class.
- We have also tried to catch block for catching any exceptions and throwing out the same.
Recommended Articles
This has been a guide on how to connect databases in Java. Here we have discussed how to connect the database in Java and the interfaces and classes used to connect a database. You may also look at the following articles to learn more –
