Updated August 21, 2023
Group Worksheets in Excel
We use Group Worksheets in Excel to perform the same type of process in all or selected worksheets. For example, suppose we want to paste some data from different sources to multiple worksheets in the same cells. In that case, we can first group the worksheet by holding the Ctrl key and then selecting each worksheet one by one, or else, if we need to group all the worksheets, then click right on any of the worksheet names and choose to Select All Sheets.
How to Group Worksheets in Excel?
Below are examples of Group and Ungroup Worksheets in Excel:
Example #1
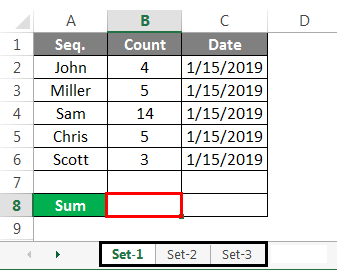
Consider 2 or 3 worksheets of the same format. They may have different data sets, but the format should be the same. Here, we have 3 worksheets, all with data in the same format as shown below. Also, we have named all 3 sheets, Set-1, Set-2, and Set-3, as shown below.
Group Selected Worksheet:
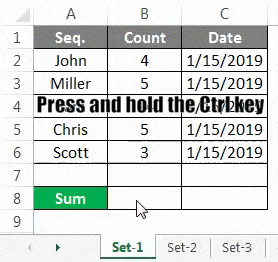
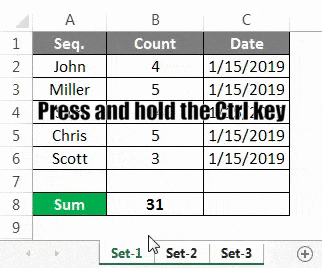
To group all the worksheets together, press and hold the Ctrl key and click on the sheet you want to select. By this, selected worksheets will be grouped. And the tabs will be embossed, as shown in the below screenshot.
You are ready if you want to perform any task in these grouped worksheets. For example, let’s sum the count shown against all respective sequences.
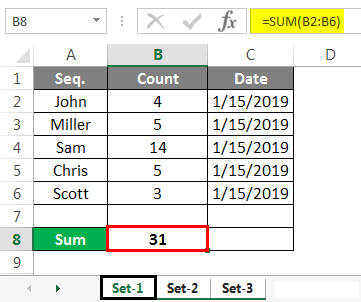
Set-1
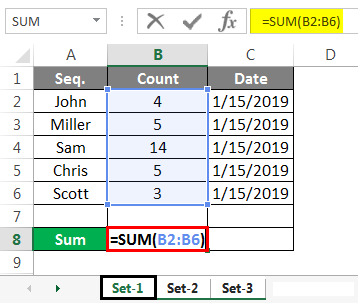
As shown in the above screenshot, we have summed column B in the Set-1 worksheet. Now let’s check whether the same formula is copied in other selected grouped sheets.
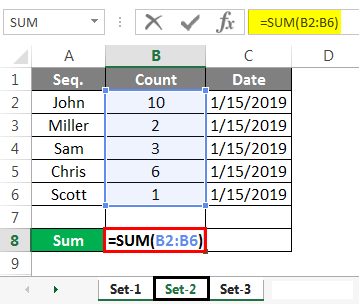
Set-2
Set-3
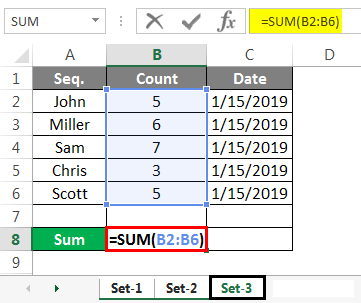
The above screenshots of Set-2 and Set-3 have the sum we have applied in the Set-1 sheet.
Set-1
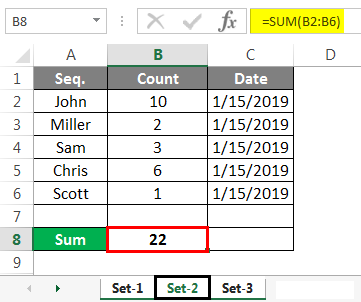
Set-2
Set-3
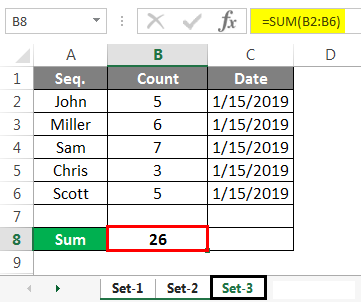
And the above screenshots have the actual summed value of column B in cell B8 in respective worksheets.
Ungroup Selected Worksheet
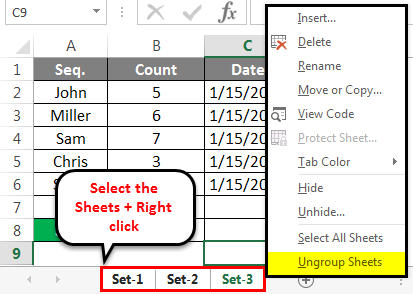
To ungroup the worksheets, press and hold the Ctrl key and select the sheet you want to ungroup.
Now right-click on any of these sheets to see a list of options. That at the end of it, click on Ungroup Sheets.
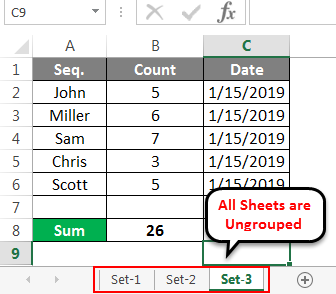
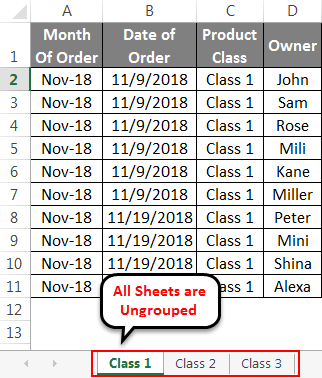
Once you select the Ungroup Sheets option, all the grouped sheets will return to normal mode.
This can perform for 2 or more 2 worksheets.
Example #2
Let’s consider another example. Here we got the sales data of some executives for a month.
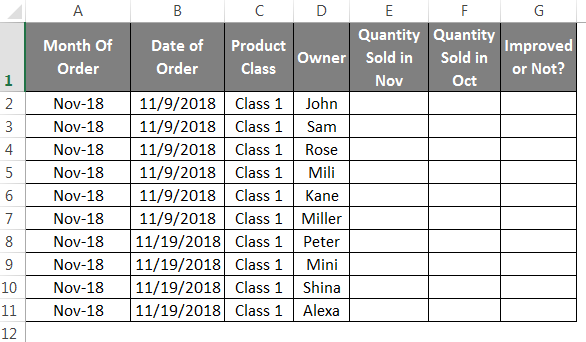
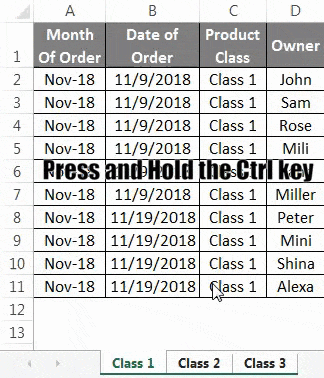
And these data are divided into 3 Product Classes. Class 1, 2, and 3 are in the same format.

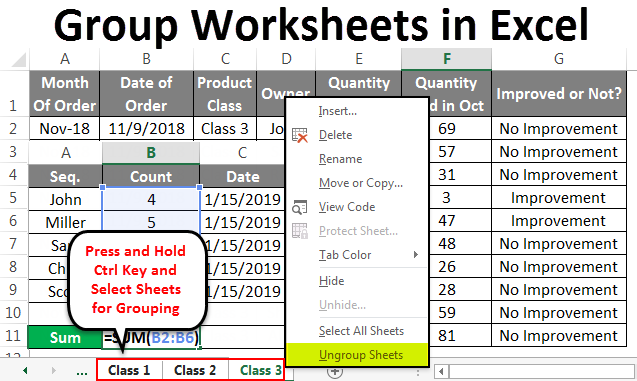
Press and Hold the Ctrl keys and select all sheets. After that, sheets will be grouped together, as shown below.

Now apply a formula for comparing the data in columns E and F and drag in all the rows as shown below.

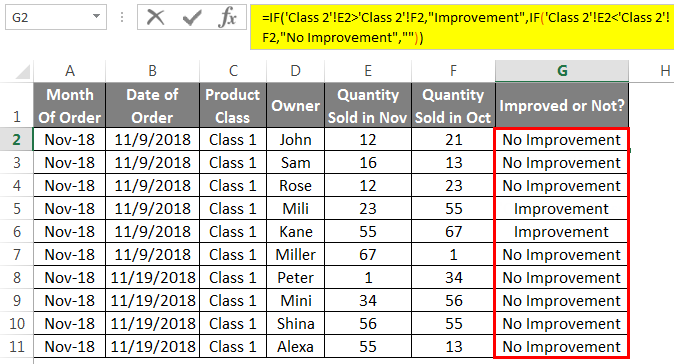
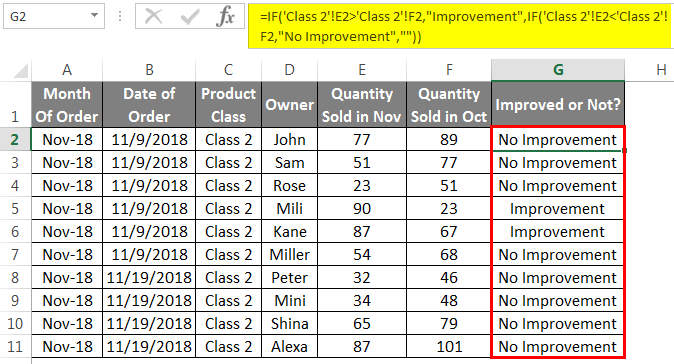
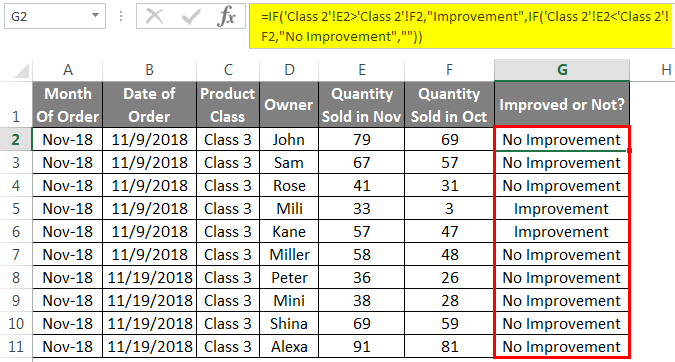
Once the formula is copied in all rows, it will compare whether the sale is improved, as shown in the screenshots below. If there is any improvement in the sale from the previous month, column G will reflect “Improvement”; if there is a decline or no improvement in the sale from the prior month, column G will reflect “No Improvement”.
Class 1
Class 2
Class 3
Now for Ungrouping the worksheets, select all the sheets by pressing and holding Ctrl and selecting the sheet or right click on any sheet and selecting All Sheets; then, right-click on any of the sheets shown below.
Or
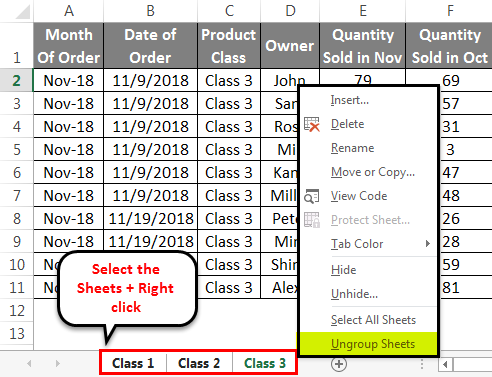
This will ungroup the selected worksheets.
Pros of Group Worksheet
- It saves time by not doing the same task in multiple sheets.
Things to Remember
- Ensure that any edits you wish to make in all worksheets are in the same format to ensure their implementation.
- Ungroup all the worksheets to be used later with different functions. And it will not give any errors over it.
Recommended Articles
This has been a guide to Group Worksheets in Excel. Here we discuss the How to Group and Ungroup worksheet in Excel with examples and downloadable Excel templates. You may also look at these useful functions in Excel –
