EDUCBA

EDUCBA

MENUMENU
  • Free Tutorials
  • Free Courses
  • Certification Courses
  • 280+ Courses All in One Bundle
  • Login
Home Design Design Tutorials Design Basic Tutorial GIMP resize image
Secondary Sidebar
Design Basic Tutorial
  • GIMP
    • What is GIMP
    • GIMP Versions
    • GIMP brushes
    • GIMP line tool
    • GIMP blend tool
    • GIMP clone tool
    • GIMP magic wand tool
    • GIMP 3D Text
    • GIMP healing tool
    • GIMP Layers
    • GIMP Fonts
    • GIMP Toolbox
    • Blur Effect in GIMP
    • GIMP Change Background Color
    • GIMP Floating Selection
    • GIMP?batch processing
    • GIMP Crop
    • GIMP Filters
    • GIMP GMIC
    • GIMP?opacity
    • Animation in GIMP
    • GIMP import image
    • GIMP replace color
    • GIMP text outline
    • GIMP video editing
    • GIMP Alternatives
    • GIMP vector graphics
    • GIMP text shadow
    • GIMP resize image
    • GIMP pixel art
    • GIMP invert colors
    • GIMP GIF
    • GIMP move selection
    • GIMP normal map
    • GIMP remove background
    • GIMP rotate
    • GIMP grid
    • GIMP text effects
    • GIMP erase to transparent
    • GIMP resize layer
    • GIMP Patterns
    • GIMP extensions
    • GIMP blur background
  • Basics and Advanced
    • Pro Tools Version
    • What is Autodesk BIM?
    • Animation Character
    • Autodesk Pixlr
    • Sketch plugins
    • Graphic designer requirements
    • Online Gaming Platforms
    • InDesign eyedropper tool
    • InDesign rounded corners
    • InDesign align
    • InDesign resize image
    • InDesign scripts
    • InDesign export to word
    • InDesign newsletter templates
    • InDesign Magazine
    • InDesign Missing Fonts
    • InDesign line spacing
    • InDesign Fonts
    • InDesign Preview Shortcut
    • InDesign Extension
    • InDesign columns
    • InDesign overset text
    • InDesign data merge
    • InDesign grid template
    • InDesign layers
    • InDesign reset preferences
    • InDesign master pages
    • InDesign layout
    • InDesign portfolio template
    • InDesign invoice template
    • InDesign word count
    • InDesign underline
    • InDesign superscript
    • InDesign presentation templates
    • InDesign drop cap
    • InDesign how to add page numbers
    • InDesign resume template
    • InDesign import pdf
    • InDesign table of contents
    • InDesign change page size
    • InDesign book templates
    • InDesign link text boxes
    • InDesign vertical text
    • InDesign Bullet Points
    • InDesign center text vertically
    • InDesign newspaper template
    • InDesign shortcuts
    • InDesign gap tool
    • InDesign paragraph styles
    • InDesign Grid
    • InDesign margins
    • InDesign highlight text
    • InDesign Wrap Text
    • ZBrush ZRemesher
    • Animation Software
    • Principles of Animation
    • 3d Animation Software
    • 3D Modeling Software
    • 3D Software Design
    • 2D Animation Software
    • 10 Quick Tips For Adobe InDesign Users
    • ADOBE FLASH CS6
    • Affinity Photo Brushes
    • Adobe Lightroom For Free
    • Lightroom Background Color
    • Lightroom?Shortcuts
    • Lightroom XMP
    • Lightroom editing
    • Masking Layers in Adobe After Effects
    • Adobe Premiere Pro Plugins
    • Adobe Speedgrade
    • Install Adobe Creative Cloud
    • Install Adobe Premiere Pro
    • What is Adobe Creative Cloud
    • What is Adobe Illustrator
    • Adobe InDesign Templates
    • What is Adobe InDesign
    • Adobe Indesign Uses
    • InDesign Background Color
    • What is Adobe Lightroom
    • What is Adobe Muse
    • What is Adobe Prelude
    • What is Adobe Premiere Pro
    • Careers in 3D
    • Careers in 3D Modeling
    • Careers in 3D Printing
    • Best Editing Software
    • Video Editing Application
    • Video Editing Tools
    • Career In Designing
    • Careers in Game Development
    • 3D Printing Models
    • Adobe Editing Softwares
    • Types of Adobe
    • Types of Illustration
    • What is Graphic Design
    • Best Graphic Design Software
    • Best Photo Editors
    • Game Testing Interview Questions
    • VFX Softwares
    • Unity Scripting
    • Unity Principle of Design
    • Unity JSON
    • Unity webGL
    • Unity 2D
    • Unity 3D Games
    • VFX Companies
    • How To Use Indesign
    • New Features InDesign CS6
    • What is Houdini?
    • Advantages of 3D Printing
    • What is Autodesk
    • Autodesk Character Generator
    • Autodesk Vault
    • Autodesk Viewer
    • Autodesk Navisworks
    • Autodesk Desktop Connector
    • Designers and Architects
    • 2D and 3D Shapes
    • Keyboard Shortcuts for Premiere Pro
    • Unreal Engine Tutorial
    • Best Audio Editors
    • Digital Image Processing
    • What is Motion Graphics
    • What is Digital Design
    • Design Pattern Interview Questions
    • Graphic Design Interview Questions
    • UX designer Interview Questions
    • Is Unreal Engine Free
    • What Is Design Pattern
    • What is VFX
    • What is Audacity
    • What is Unreal Engine
    • What is CATIA
    • What is Blueprint
    • Sony Vegas Pro for Free
    • 3D Graphics Software
    • Best Online Photo Editor
    • Photo Editing App
    • Vector Graphics Editor
    • ArchiCAD
    • ArchiCAD Shortcuts
    • Audacity Keyboard Shortcut
    • Davinci Resolve Shortcuts
    • What is pixel art?
    • Picmonkey Alternatives
    • Adobe Flash Player Alternative
    • Pro tools shortcuts
    • Pro Tools Plugins
    • Architectural Design Software
    • Architectural Design Principles
    • Architecture Design Types
    • Architectural design tools
    • Application of Digital Image Processing
    • Digital Image Processing Fundamentals
    • OpenGL Versions
    • Revit Keyboard Shortcuts
    • Revit plugins
    • Indesign version
    • What is DirectX?
    • DirectX Versions
    • Cinema 4D Plugins
    • Cinema 4d shortcuts
    • Godot Engine
    • Godot tilemap
    • Krita Animation
    • Krita Software
    • Krita Shortcuts
    • Krita eraser
    • Krita brushes
    • Krita Pixel Art
    • Krita Plugins
    • Skencil
    • Fusion 360 Keyboard Shortcuts
    • Anim8or
    • Affinity photo plugins
    • What is Affinity Photo?
    • FL Studio Plugins
    • Vectorworks
    • Architectural Design Elements
  • Inkscape
    • What is Inkscape?
    • Inkscape layers
    • Inkscape Crop
    • Inkscape text
    • Inkscape G-code
    • Inkscape mirror
    • Inkscape rounded rectangle
    • Inkscape EPS
    • Inkscape image to vector
    • Inkscape unlock
    • Inkscape Curved Text
    • Inkscape laser cutting
    • Inkscape background color
    • Inkscape arrow
    • Inkscape vector
    • Inkscape animation
    • Inkscape 3D
    • Inkscape SVG
    • Inkscape Dark Theme
    • Inkscape trace bitmap
    • Inkscape gradient
    • Inkscape Greek Letters
    • Inkscape shadow
    • Inkscape snap to grid
    • Inkscape Fonts
    • Inkscape extensions
    • Inkscape PNG to SVG
    • Inkscape Art
    • Inkscape transparent background
    • Inkscape Alternatives
    • Inkscape Remove Background
    • Inkscape text to path
    • Inkscape logo
  • Figma
    • Figma Libraries
    • Figma fonts
    • Figma Plugins
    • Figma grid
    • Figma Alternatives
  • SketchUp
    • SketchUp Keyboard Shortcuts
    • SketchUp geolocation
    • SketchUp animation
    • SketchUp Change Dimensions
    • SketchUp Import
    • SketchUp 2D
    • SketchUp rendering
    • Sketch software
    • Figma Shortcuts
    • SketchUp Layers
    • SketchUp landscape design
    • SketchUp group
    • SketchUp intersect faces
    • SketchUp Rotate
    • SketchUp Architecture
    • SketchUp 3D Models
    • SketchUp Vray
    • SketchUp Units
    • SketchUp garden design
    • SketchUp Layout
    • SketchUp Mirror
    • SketchUp Extensions
    • SketchUp Unhide
    • SketchUp kitchen
    • SketchUp background
    • SketchUp library
    • SketchUp dynamic components
    • SketchUp CutList
    • SketchUp Array
    • SketchUp Woodworking
    • SketchUp resize component
    • SketchUp Ungroup
    • SketchUp Deck Design

Related Courses

Maya Course

Photoshop course

After Effects Course

GIMP resize image

GIMP resize image

Introduction to GIMP resize image

Resize image term can understand by the scaling up or down width and height of an image for a different type of end-use purposes of that image so, in GIMP, we use resize features and tools for resizing of image with a lossless property of image quality. We will also get knowledge about the interpolation word, which is a very important term during resizing of the image. We resize image for two purposes: there are two platforms where you will use your resized image; the first one is on a web page and the second one is for print purpose. Both have different settings so let us discuss them.

All in One Design Bundle(280+ Courses, 100+ projects)
AutoCADHoudiniAdobe Premiere ProPhotoshop
SolidworksVFX Visual EffectsCorelDrawUnreal Engine
Price
View Courses
280+ Online Courses | 100+ projects | 2000+ Hours | Verifiable Certificates | Lifetime Access
4.6 (64,654 ratings)

How to resize image in GIMP?

In the introduction part of this article, you heard a new word which was Interpolation. When you scale up or scale down any image, it loses some quality due to pixel losses, so the transition between resizing of image is called interpolation. We will learn some option through which we can have maximum command on not to lose the quality of our image or have less pixelating effect during resizing.

Start Your Free Design Course

3D animation, modelling, simulation, game development & others

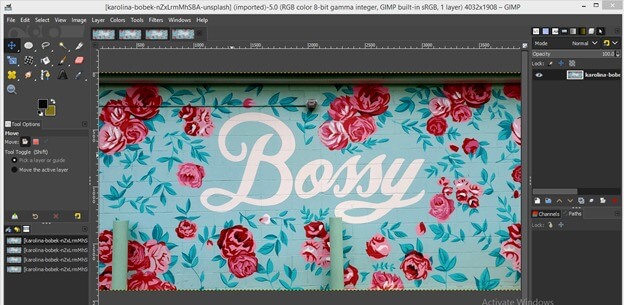
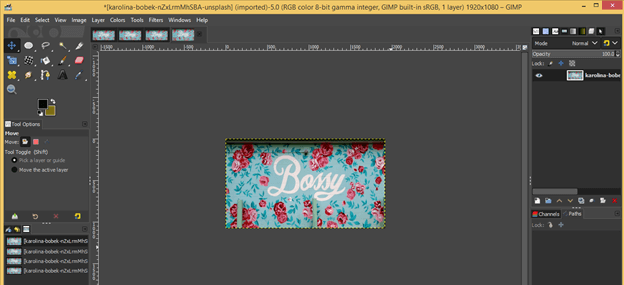
Now take an image which is taken by the camera. You can download it from the internet. I take this image; it has a very large size; you can see the size of the image at the top of the user screen, which is 4032 x 1908.

GIMP resize image output 1

Methods of resize an image in GIMP

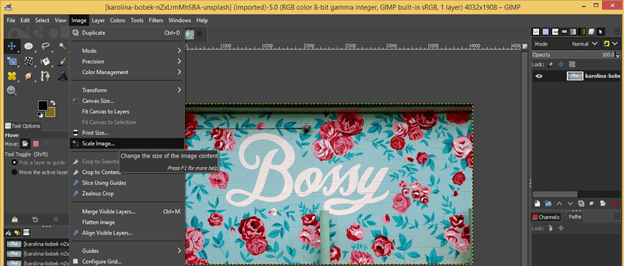
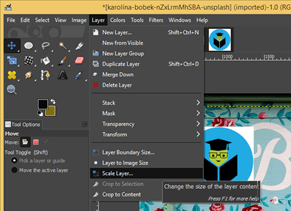
We have two ways to resize an image in GIMP. The first is to go Image menu of the menu bar and click on the scale image option of scroll down list.

GIMP resize image output 2

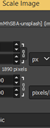
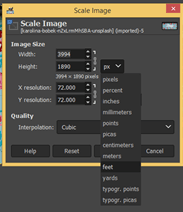
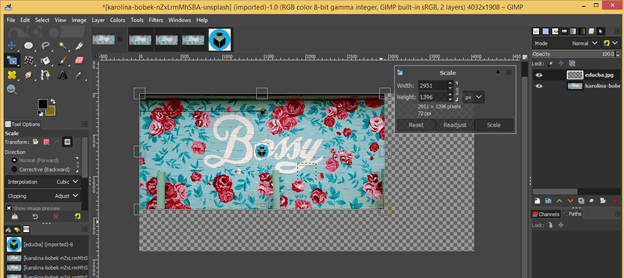
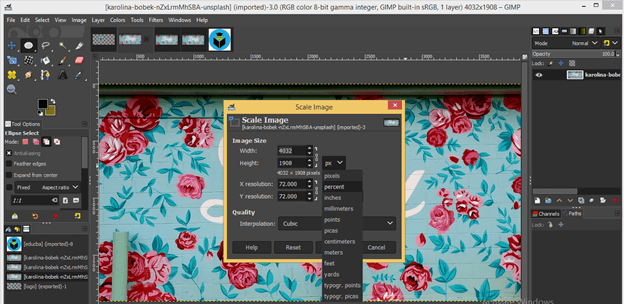
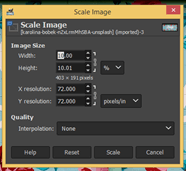
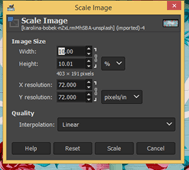
And you will have this type of scale image dialog box. You can change the value of width and height of this image by entering a value of them.

GIMP resize image output 3

If you want to change the width and height of the image separately, then uncheck the Chain link.

GIMP resize image output 4

You can choose a unit during this process from this option.

GIMP resize image output 5

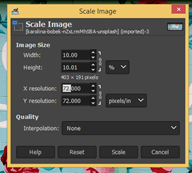
We also have a resolution for web and print purpose for our image. We generally use 72 pixels/in for web purpose and 300 pixels/in for the print purpose. We, for print, use more pixel/in to preserve image quality and not get pixelate much.

GIMP resize image output 6.1

GIMP resize image output 6.2

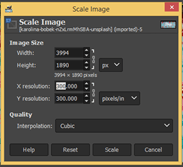
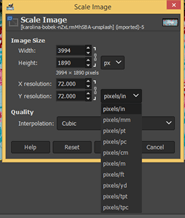
You can also choose a resolution unit from this list.

GIMP resize image output 7

I will take 1920 x 1080 as the scale value for this image and hit on ok button.

GIMP resize image output 8

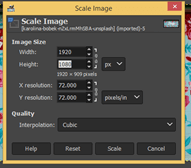
And it will scale down like this.

GIMP resize image output 9

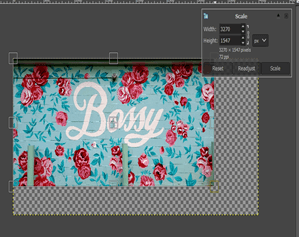
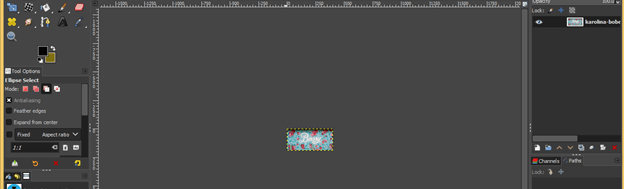
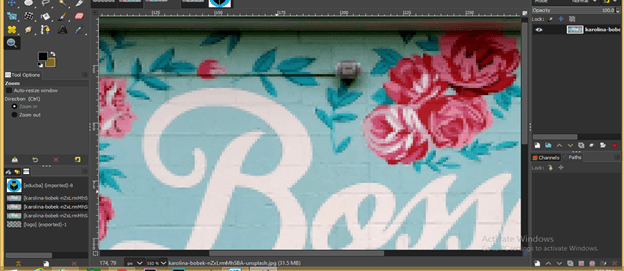
The next method is to go to the tool panel and take the scale tool.

GIMP resize image output 10

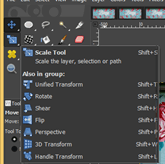
And click on the image. Once you click on the image, you will have a scale bounding box around your chosen image with a scale parameter box.

GIMP resize image output 11

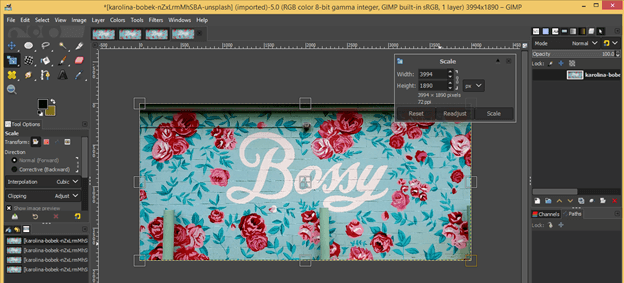
You can enter any value here through keyboard entry.

GIMP resize image output 12

Or just hold any anchor point of the bonding box with the mouse button and starts to resize your image. You can scale it up or scale it down. The proportion of width and height of the image will be maintained because the chain-link button is On.

GIMP resize image output 13.1

GIMP resize image output 13.2

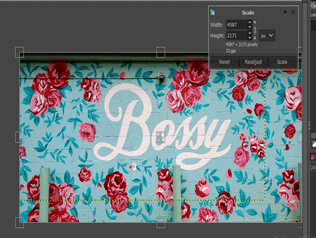
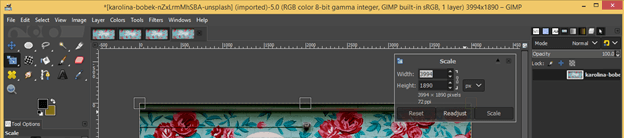
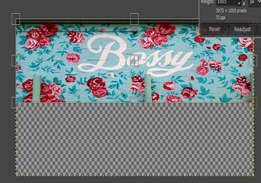
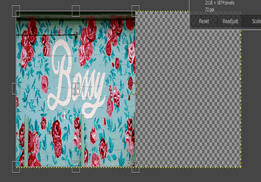
If you want to change width or height separately, then off chain-link button.

GIMP resize image output 14

And change width or height according to you.

GIMP resize image output 15

GIMP resize image output 15.2

Now let us have a logo on this image on a new transparent layer. I have this EDUCBA official logo for this purpose, and I want to place it at the corner of this image, but how can I resize it? Let us find out.

GIMP resize image output 16

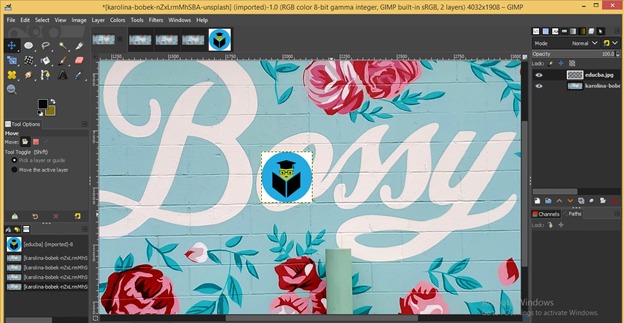
Now choose any one of resizing image option which we discussed above.

I will take the scale tool and make click on the logo image, but you will notice we haven’t any resizing bounding box around our EDUCBA log. In fact, it gives us a bounding box around the image, although we have our logo layer selected.

GIMP resize image output 17

So what to do now? It is just a simple choose Layer option in the parameters panel of scale too.

GIMP resize image output 18

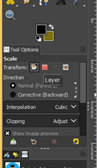
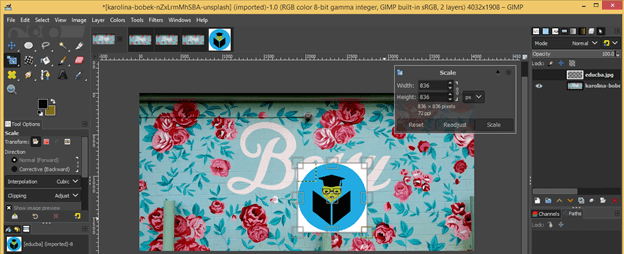
Now again, click on the image and this time, it will select our logo for resizing. Now I am free to resize my logo.

GIMP resize image output 19

You can also do this by choosing the Scale layer option from the Layer menu of the menu bar.

GIMP resize image output 20

Lossless resizing of image:

Let us find out how we can reserve the maximum quality of our image during resize our image. Now choose the scale image option from the Image menu and choose the percentage option in-unit option of width and height of this box.

GIMP resize image output 21

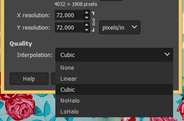
Now the term Interpolation has come. We have a number of option for interpolation. In this list, from top to bottom, you will have better quality management with each option. So let find the effect of each one of this list.

GIMP resize image output 22

First, choose the None option, and I will scale down this image as 10% of its original size.

GIMP resize image output 23.1

output 23.2

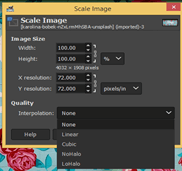
I will take 72 as pixels/in.

output 24

It will scale down like this.

output 25

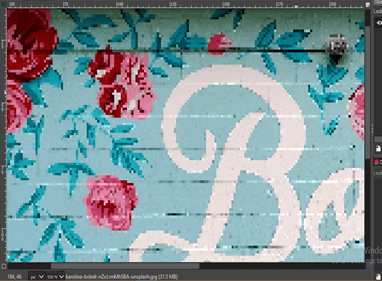
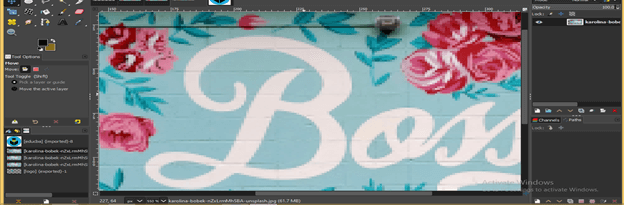
Now zoom this out up to 550 percent, and you can see it goes pixelated.

output 26

Now choose the Linear option with the same scaling percentage.

output 27

See, it has better quality than the None option.

output 28

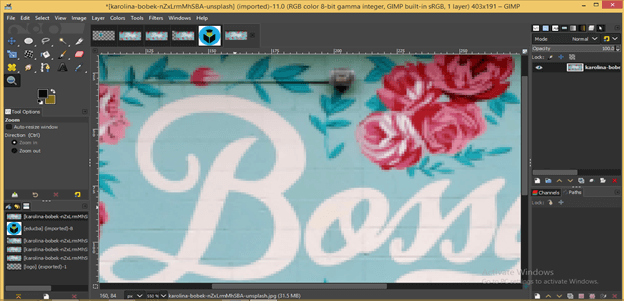
Cubic will also give you almost the same effect as Linear.

output 29

Now let us see the effect of NoHalo and LoHalo. Repeat all the steps above for both options with 10 % scaling down and 550 % of zoom in. Here you will find the almost same result in both options, but these two will give you a much better result in comparison with the above three options.

output 30

Now let us scale up the EDUCBA logo and see the effect of None and NoHolo interpolation options.

output 31

I will scale it up to 200 % of its original size.

output 32

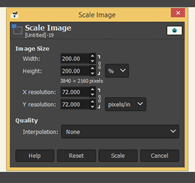
This is an effect of the None option of scaling up of this logo. It starts pixelating a little bit because we just take 200 %.  Scaling will depends on your computer system space.

output 33

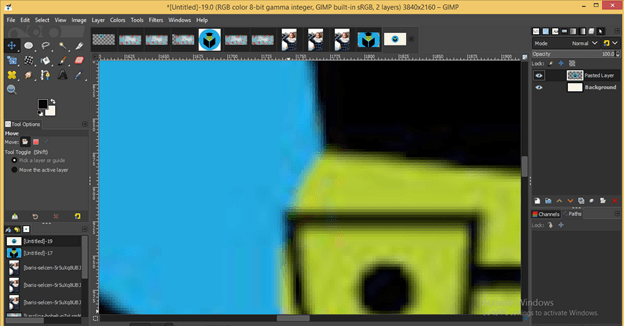
Now do the same for the NoHalo option.

output 34

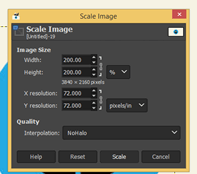
See the effect. It has a much better result.

output 35

This way, you can resize any image for different purposes with a lossless feature.

Conclusion

Wasn’t it a very good feature of GIMP software because it helps you in many ways for having a perfect size of your image for different platforms. Now go through the different parameters of resizing image tools and feature of this software for getting more and more knowledge about it.

Recommended Articles

This is a guide to GIMP resize image. Here we discuss the different parameters of resizing image tools and features of this GIMP resize image to get more knowledge. You may also have a look at the following articles to learn more –

  1. GIMP Alternatives
  2. Best Photo Editors
  3. Design Web Page in HTML
  4. CorelDRAW Logo Design
Popular Course in this category
Maya Training (10 Courses, 7+ Projects)
  10 Online Courses |  7 Hands-on Projects |  100+ Hours |  Verifiable Certificate of Completion
4.7
Price

View Course

Related Courses

Photoshop Training (10 Courses, 12+ Projects)4.9
After Effects Training (3 Courses, 3+ Projects)4.8
0 Shares
Share
Tweet
Share
Primary Sidebar
Footer
About Us
  • Blog
  • Who is EDUCBA?
  • Sign Up
  • Live Classes
  • Corporate Training
  • Certificate from Top Institutions
  • Contact Us
  • Verifiable Certificate
  • Reviews
  • Terms and Conditions
  • Privacy Policy
  •  
Apps
  • iPhone & iPad
  • Android
Resources
  • Free Courses
  • Photoshop Tutorial
  • 3ds Max Tutorial
  • All Tutorials
Certification Courses
  • All Courses
  • Design Course - All in One Bundle
  • Photoshop Course
  • Maya Course
  • Unreal Engine Course
  • Unity Course
  • DaVinci Resolve Course
  • Pro Tools Course

ISO 10004:2018 & ISO 9001:2015 Certified

© 2022 - EDUCBA. ALL RIGHTS RESERVED. THE CERTIFICATION NAMES ARE THE TRADEMARKS OF THEIR RESPECTIVE OWNERS.

EDUCBA
Free Design Course

Banner Creation, Object Selection, Sky Replacement, Advance Filters & others

*Please provide your correct email id. Login details for this Free course will be emailed to you

By signing up, you agree to our Terms of Use and Privacy Policy.

EDUCBA Login

Forgot Password?

By signing up, you agree to our Terms of Use and Privacy Policy.

EDUCBA
Free Design Course

3D animation, modelling, simulation, game development & others

*Please provide your correct email id. Login details for this Free course will be emailed to you

By signing up, you agree to our Terms of Use and Privacy Policy.

EDUCBA

*Please provide your correct email id. Login details for this Free course will be emailed to you

By signing up, you agree to our Terms of Use and Privacy Policy.

Let’s Get Started

By signing up, you agree to our Terms of Use and Privacy Policy.

This website or its third-party tools use cookies, which are necessary to its functioning and required to achieve the purposes illustrated in the cookie policy. By closing this banner, scrolling this page, clicking a link or continuing to browse otherwise, you agree to our Privacy Policy

Loading . . .
Quiz
Question:

Answer:

Quiz Result
Total QuestionsCorrect AnswersWrong AnswersPercentage

Explore 1000+ varieties of Mock tests View more