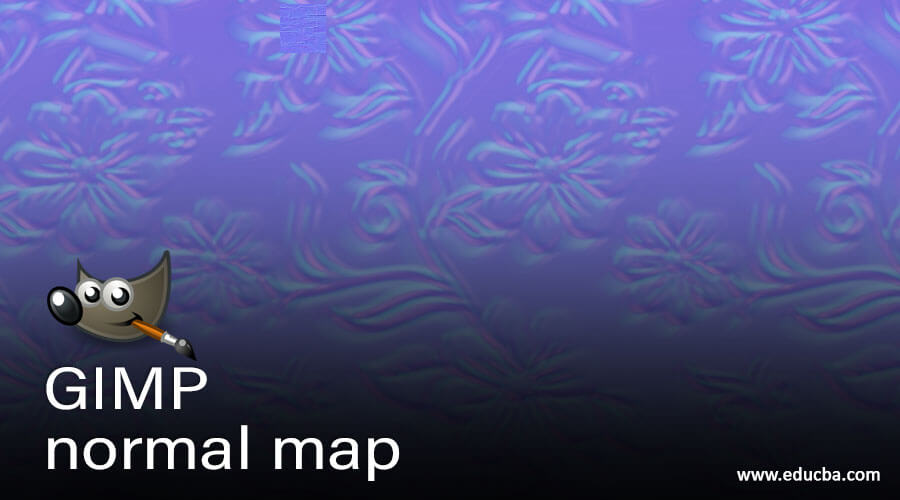
Introduction to GIMP Normal Map
Normal Map is a feature of GIMP through which we can increase the detailing of any plain texture for getting natural highlight on the material of that text which we use later in the 3d models of other 3d designing software. In GIMP, we have not any inbuilt feature of the normal map, so we have to get a plugin for the normal map in GIMP. Today in this article, we will understand how to increase the detailing of texture on marble brick wall by using a normal map plugin, and we also learn how we can install this plugin in GIMP. So what are you waiting for let us start?
How to perform Normal Map in GIMP?
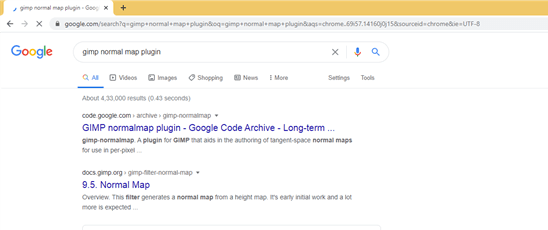
Before learning how to use a normal map, we must have a plugin of Normal map in GIMP. So let go on the browser first and search for ‘GIMP Normal map plugin.
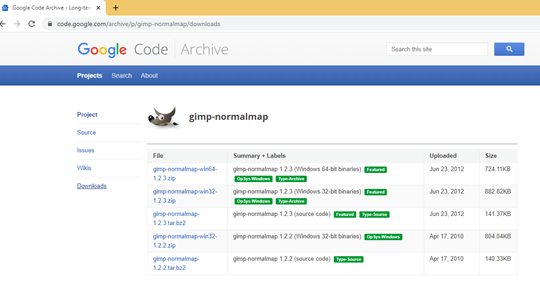
Click on the first link of search and go to the Downloads tab, then download anyone of the setup of this plugin according to your operating system of the computer.
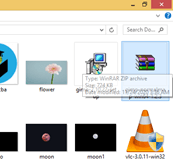
You will have a zip file of this plugin.
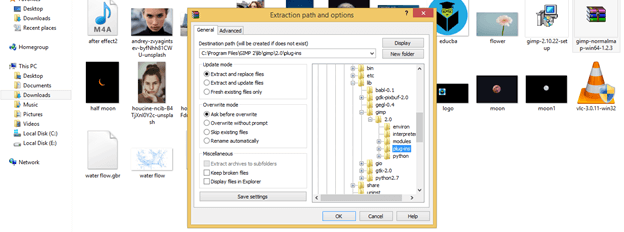
Now extract it in the Plugins folder of GIMP. For that Go to C Drive > Programs Files > GIMP 2 > lib > gimb > 2.0 > plug-ins and hit on Ok button.
Now select these three files from the plug-ins folder of GIMP and copy them.
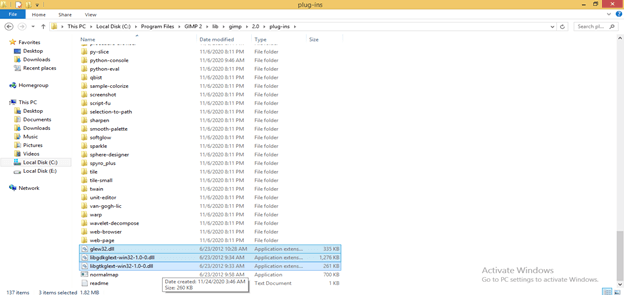
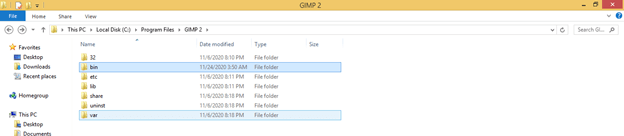
And paste it into the bin folder of GIMP.
Now restart GIMP software.
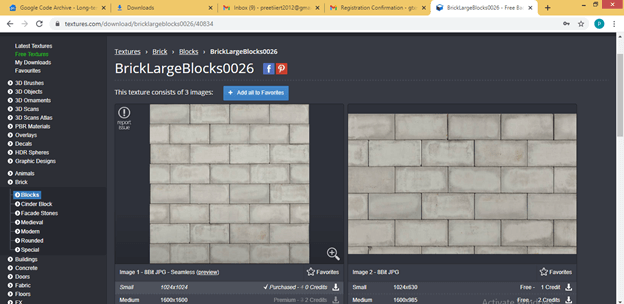
Now let us have a texture for applying a normal map for texture search texture on browsers.
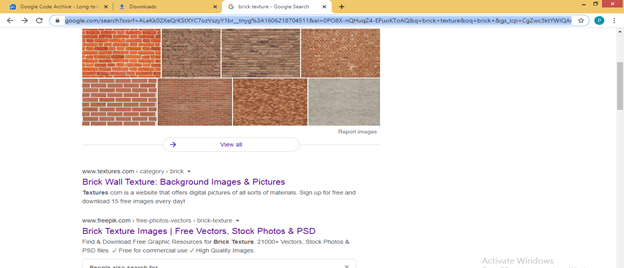
I will download this marble brick block.
Now go to the GIMP user interface and click on the File menu of the menu bar. Click on the Open option for having this texture in GIMP.
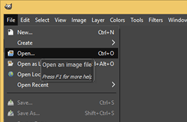
Choose your desired folder, and then the desired file of texture hit on Open button.
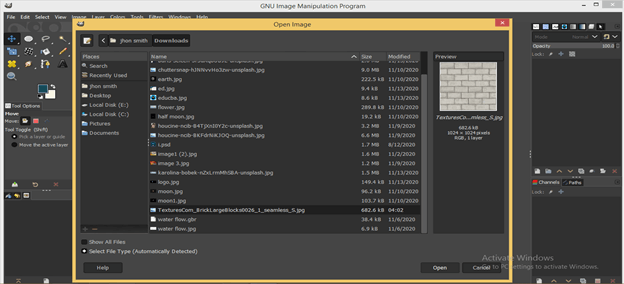
Now we have this texture.
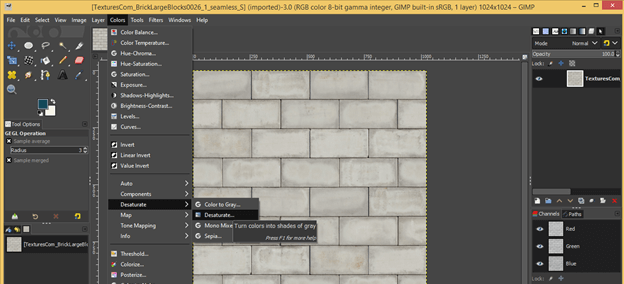
Let us make it more black and white to see the normal map effect on it. Go to the Colors menu of a menu bar, then go on Desaturate and click on Desaturate option of the new scroll down list.
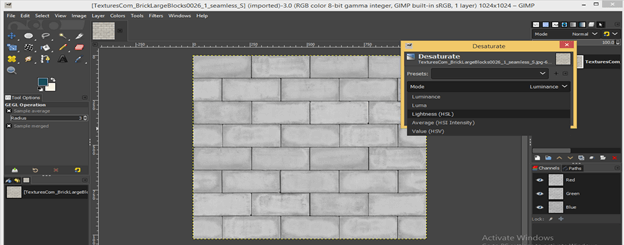
Now choose the Lightness option in the Mode option of desaturating dialog box and hit ok.
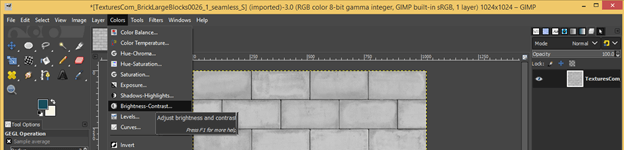
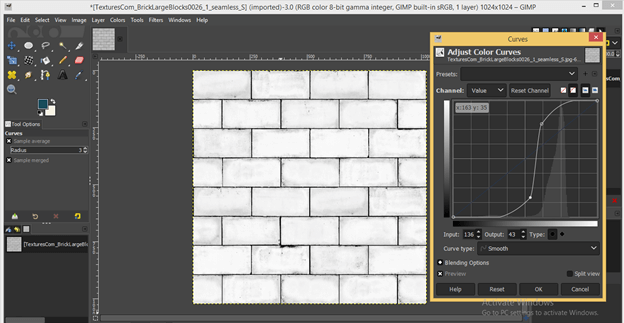
Now let us make the bright area brighter and the dark area darker of this texture image. You can go with any one of the options for doing this that is Brightness-Contrast, Levels, or Curves. I will go with Curves.
Now drag this area of the curve in the upper direction for increasing brightness of bright areas of this image.
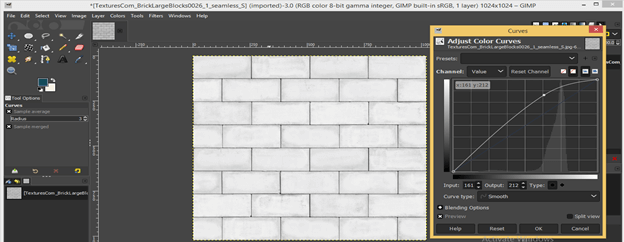
Drag the left area of the curve in a downward direction for making the dark area of the image darker. We are doing this for having good contrast between the black and white colors of this image.
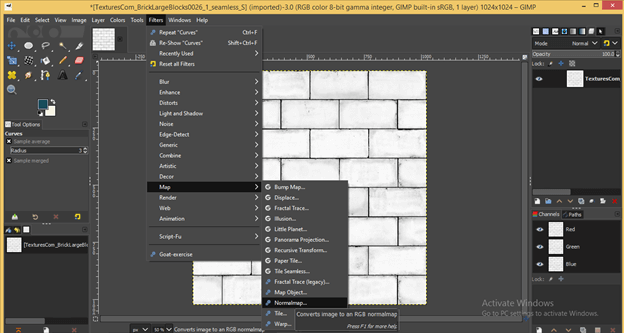
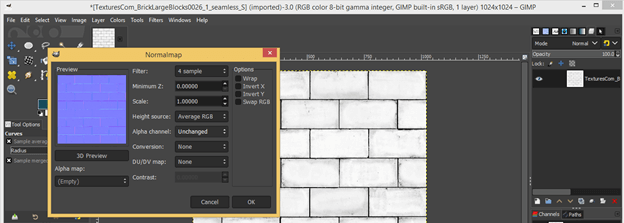
Now go to Filters menu of the Menu bar and go to Map option, then click on Normalmap option of new scroll down list. You will have this normal map option only in this list if you have installed this normal map plugin on your computer.
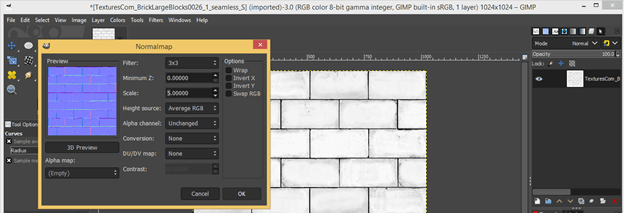
Once you click on this option, you will have this Normalmap dialog box.
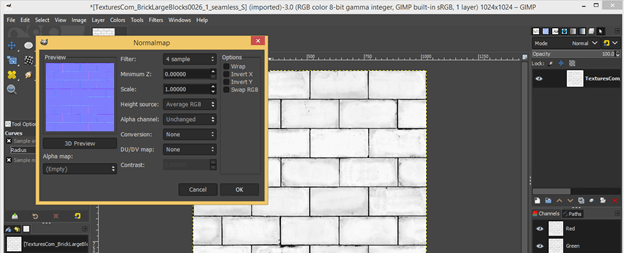
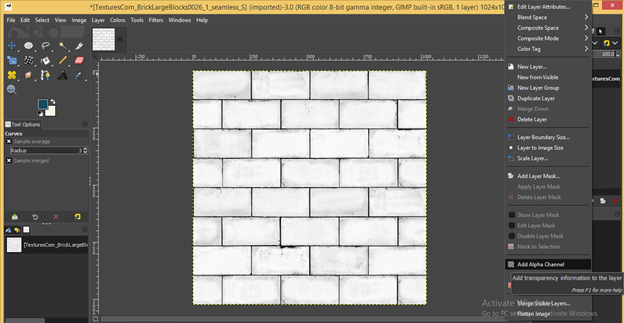
You can see Alpha channel and Height source option are disabled in this dialog box, so for enabling them, go to the layers panel of GIMP and make right-click on the texture layer, then click on Add Alpha channel option of the scroll-down list.
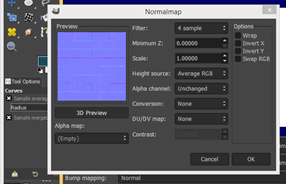
Now re-open this dialog box, and this time you will have this two option active like others.
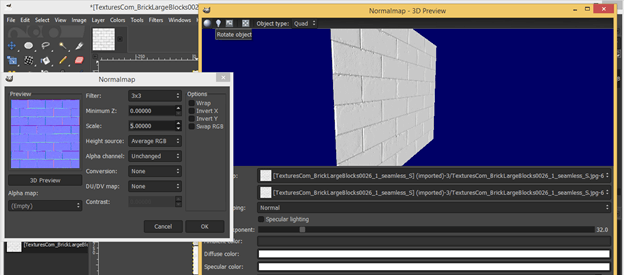
Now click on 3d Preview button of this dialog box for seeing the 3d preview of this texture.
This is the 3d preview dialog box.
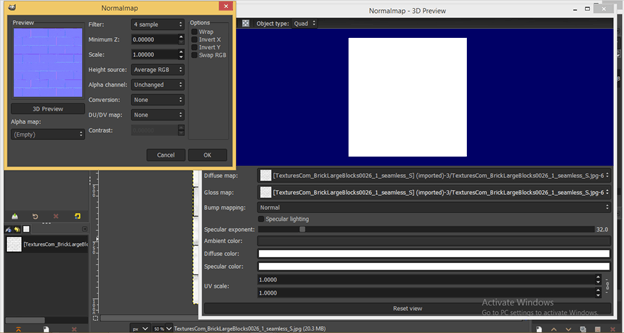
Hold this block in 3d preview box and rotate to see the texture on this plane. You can see now there is a brick shape on your texture plane.
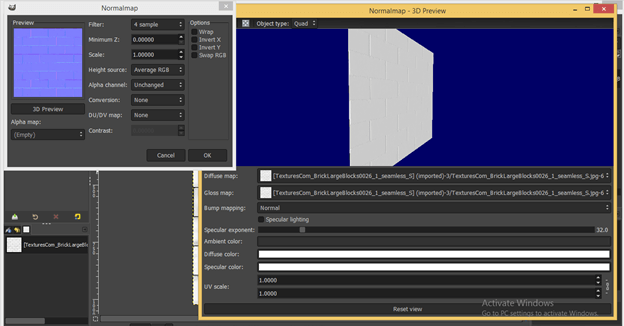
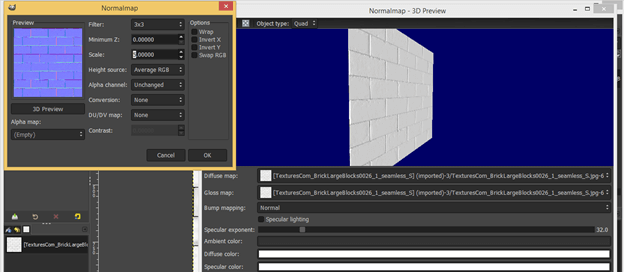
Now you can use any one of the Filters of Normal map boxes from this list to apply them to this texture for increasing details of material of texture. You can see the effect of every filter of this list one by one on your texture.
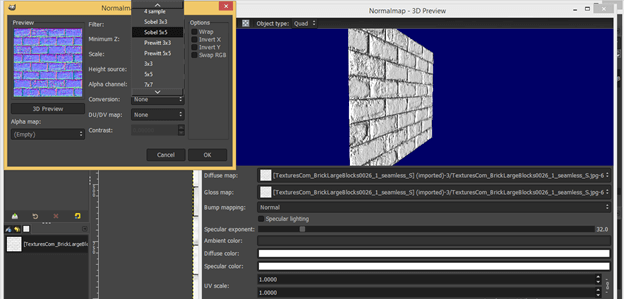
I will choose a 3 x 3 filter that will adjust RGB values in 3 x 3 pixels of this texture and embossed its details. Increase the value of scale for enhancing more details.
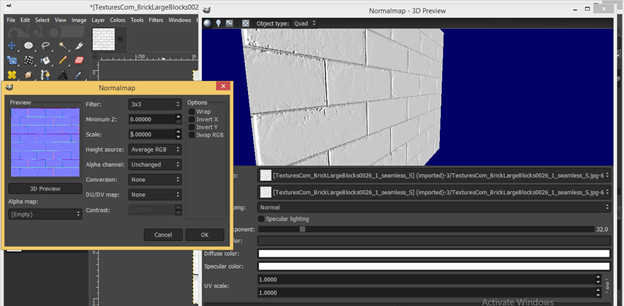
You can hold the keyboard’s Alt key, then make the right click of the mouse and hold it; also then move the mouse to zoom in or zoom out this object in the preview window. Now enable the Invert X option of this dialog box and see its effect on embossed details. It will go in the inward direction of the plane.
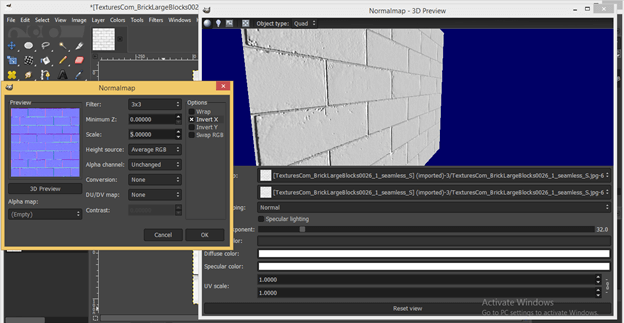
And once you disable it, you can see it will come in the outward direction of the plane. So you can go with this option according to your choice.
We have some option at the top of this preview window. Let us analyze them also for better handling on a normal map. The first button is ‘Rotate object’; click on it for enabling it, and you can rotate your texture object.
Next is Rotate Light button; click on it for selecting it.
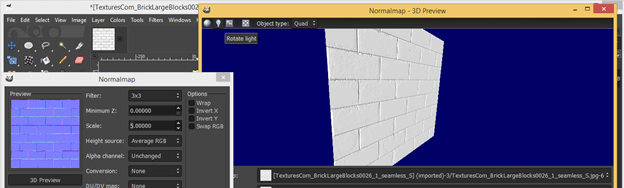
You can increase light or decrease light on your texture.
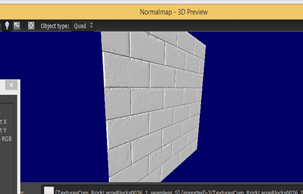
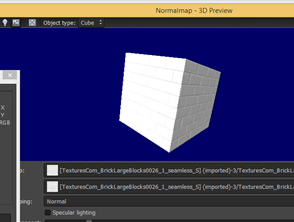
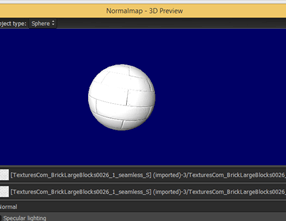
You can also see your preview in another 3d shape. Choose anyone from this list.
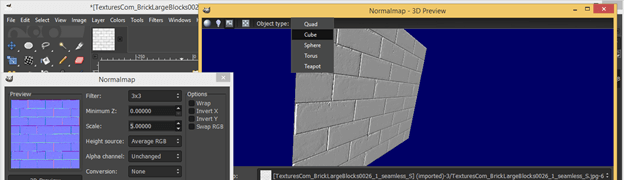
You can choose the Cube, Sphere or any other which you want. It will give you an idea of how it will look when you use it on the 3d model.
Once you have done all your desired settings, hit on the Ok button of the normal map dialog box.
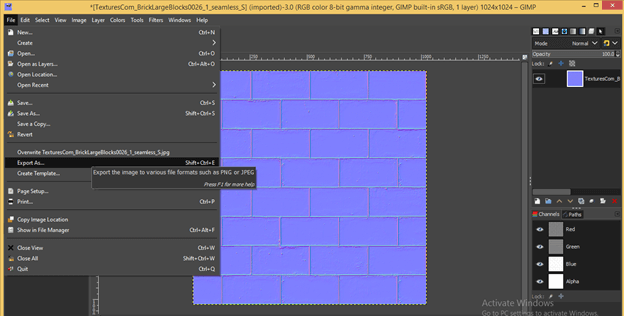
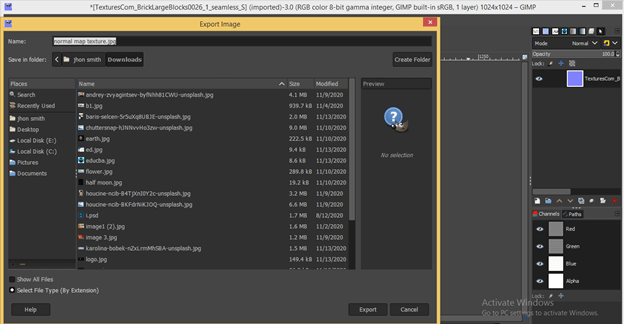
And you will have your normal map on your texture with your set parameters of the normal map. Now export this as a PNG or JPEG file for using it in any other 3d modeling software. So for that, go to the File menu of the menu bar and click on the Export As option.
Save it at your desired location with the desired file extension.
Conclusion – GIMP normal map
In this article, you must found that a normal map is a very exciting and useful feature for enhancing details of material of any texture, which you will use on 3d models as its material. Now you can easily manipulate parameters of the normal map for having an effective result on your texture.
Recommended Articles
This is a guide to GIMP normal map. Here we discuss the useful feature of the GIMP normal map for enhancing details of material of any texture. You may also look at the following articles to learn more –
