Updated July 4, 2023
What is the Excel IF Function?
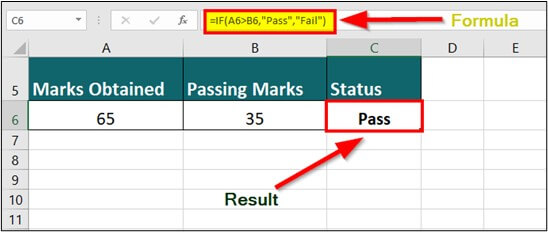
The IF() function is a logical function in Excel that evaluates a specific condition and provides a certain value if the condition is True and another value if it’s False.
For example, the formula =IF(A6>B6,” Pass”,” Fail”) displays the output as Pass if the marks obtained (A6) are greater than the passing marks (B6); otherwise, display the output as Fail.
The Excel IF function is found in Excel’s Logical Functions library. We can use the function to analyze data, calculate salaries, prepare student academic reports, etc.
Excel IF Function Syntax
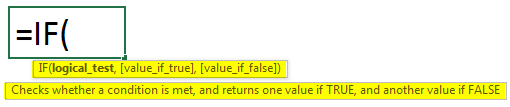
The syntax for the IF function is-
Explanation:
- Logical_test: Test/ compare values using logical operators
- Value_if_true: Value to be returned if the condition is satisfied
- Value_if_false: Value to be returned if the condition is not satisfied
Key Highlights
- The operators in the logical_test argument of the IF function may be:
= Equals to
<> Not Equals to
> Greater than
>= Greater than or equal to
< Less than
<= Less than or equal to
- Every conditional test must contain at least one comparison operator.
- The IF function allows Excel spreadsheets to make decisions when analyzing data.
- The IF function can have more than one logical test in one formula.
How to Use Excel IF Function?
To understand the use of the IF function in Excel, consider the below-given example.
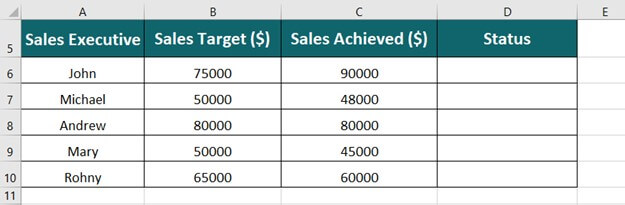
The table below shows the sales achieved by five sales representatives along with their monthly target. We want to find who has achieved the target and who has not achieved the target using the Excel IF function.
Solution:
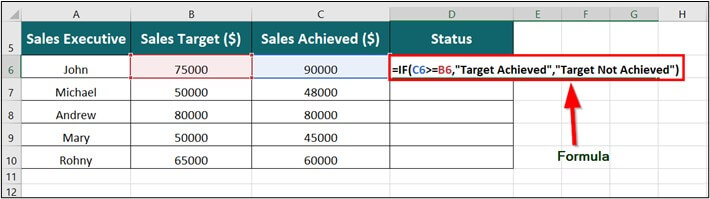
Step 1: Place the cursor in cell D6 and enter the formula,
Explanation:
- C6>=B6: It represents the criteria for displaying the corresponding result if the Sales Achieved are greater than or equal to the sales target.
- The output to display when the criteria are met is “Target Achieved.”
- “Target Not Achieved” is the output to display when the criteria are unmet.
Step 2: Press Enter key to get the below result
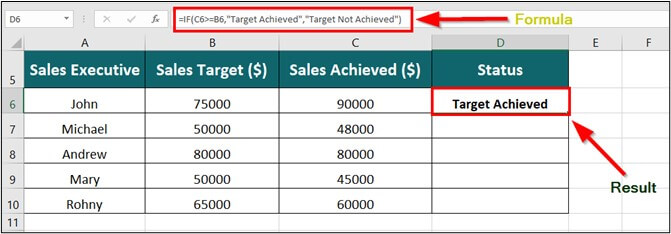
The IF function analyzes and finds that Sales Achieved (90000) exceed the Sales Target (75000) and displays the output Target Achieved.
Now, to get the status of the remaining Sales representatives,
Step 3: Drag the formula into the other cells
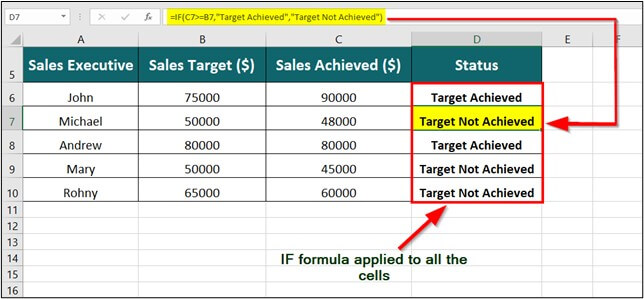
In the above table, the sales achieved by Michael, i.e., 48000 (C7), are not greater than or equal to the sales target, i.e., 50000 (B7), which means the given criteria are not met. Therefore, the IF function displays the status of Micheal as Target Not Achieved (highlighted in yellow).
Nested IF Statements
When there is more than one IF function in a formula to test certain conditions, it is known as a Nested IF statement. We can use Nested IF statements (formulas) to test more than one condition, giving more than one possible result. Consider the example below to understand the use and work of Nested IF functions.
Example #1
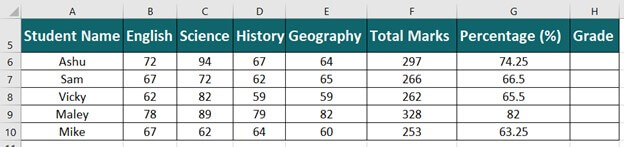
The below table shows the marks, total marks, and the percentage of five students in the subjects- English, Science, History, and Geography. We want to evaluate the student’s respective grades based on their percentages using the Nested IF function.
Solution:
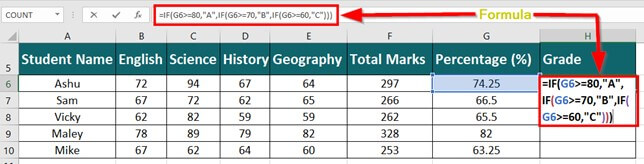
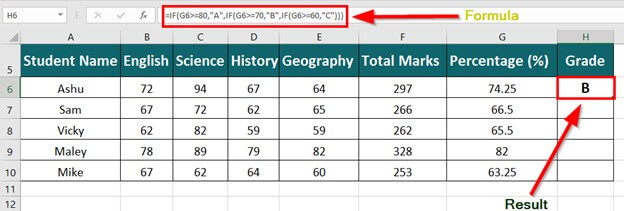
Step 1: Place the cursor in cell H6 and enter the formula,
Explanation:
The formula states that:
- If the percentage (G6) is greater than or equal to 80, then display the grade as A.
- If the percentage (G6) is greater than or equal to 70, then display the grade as B.
- If the percentage (G6) is greater than or equal to 60, then display the grade as C.
Step 2: Press Enter key to get the below result
Explanation:
The percentage obtained by Ashu is greater than 70. Therefore, the IF function displays the output as B.
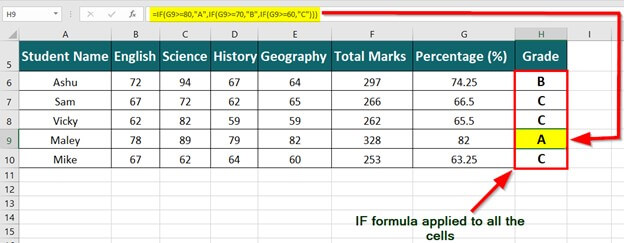
Now, to evaluate the grade obtained by other students
Step 3: Drag the formula to other cells
Example #2
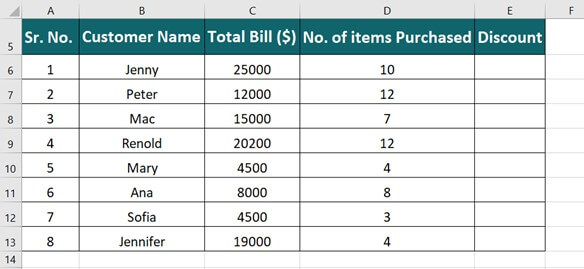
The table below shows a list of customers with the number of items they purchased and the total bill for each. If the total bill exceeds or equals $5000, the customers are offered a 10% discount on their purchase. We want to determine which customers are eligible for the discount using the Excel IF function.
Solution:
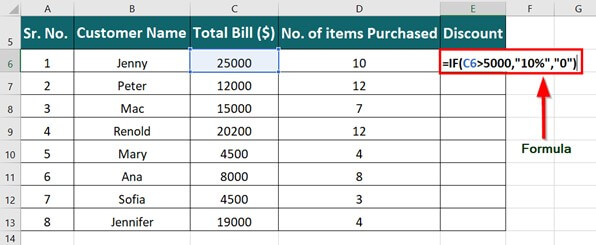
Step 1: Place the cursor in cell E6 and enter the formula,
Explanation:
- C6>5000: The criteria indicate that the customer is eligible for a discount if the Total Bill (C6) amount exceeds 5000.
- “10%”: The value to be displayed if the criteria are satisfied, i.e., the eligible customer will get a 10% discount.
- “0” is the value displayed if the criteria are not satisfied, i.e., the customer will not get a discount.
Step 2: Press Enter key to get the below result
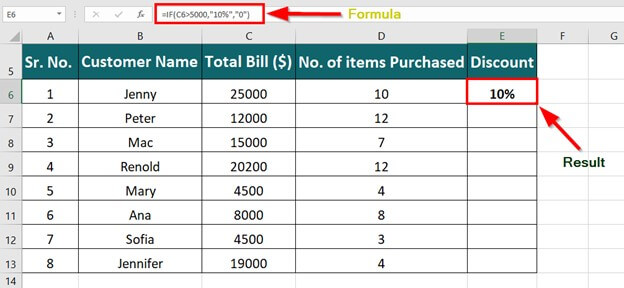
The IF function evaluates the criteria and finds that the Total Bill of Jenny exceeds 5000. Therefore, it provides the result of 10% (discount).
Now, to find eligibility for other customers
Step 3: Drag the formula to other cells to get the below result
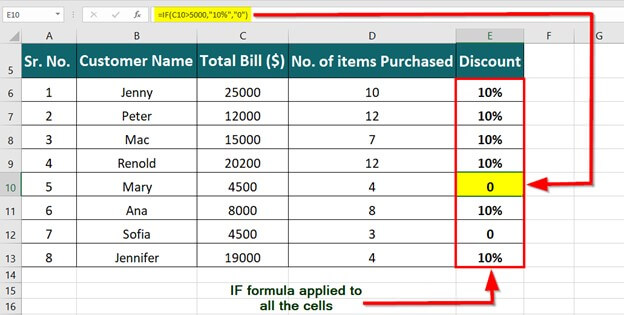
The IF function evaluates and finds that the Total Bill of Mary is not greater than 5000. Therefore, it provides the result of 0 (highlighted in yellow), which indicates Mary is not eligible for a discount.
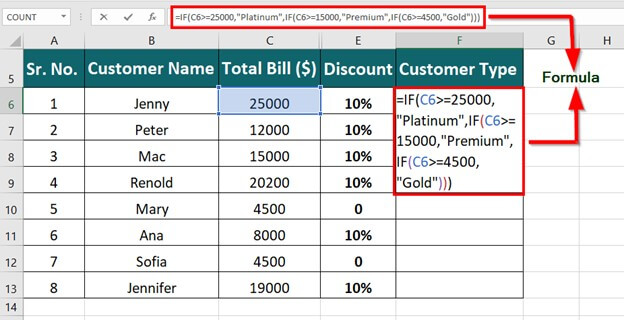
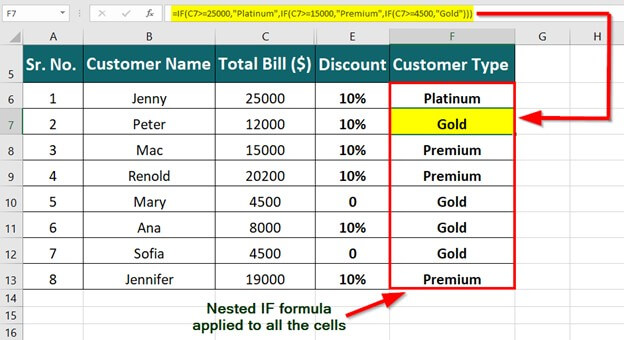
Based on the Total Bill amount, we want to categorize the customers as Premium, Gold, or Platinum using the Nested IF function.
Step 4: Place the cursor in cell F6 and enter the formula,
Explanation:
- C6>=25000, “Platinum”: It indicates that if the Total Bill (C6) is greater than or equal to 25000, then categorize the customer as Platinum.
- C6>=15000, “Premium”: It indicates that if the Total Bill (C6) is greater than or equal to 15000, then categorize the customer as Premium.
- C6>=4500, “Gold”: It indicates that if the Total Bill (C6) is greater than or equal to 4500, then categorize the customer as Gold.
Step 5: Press Enter key to get the below result
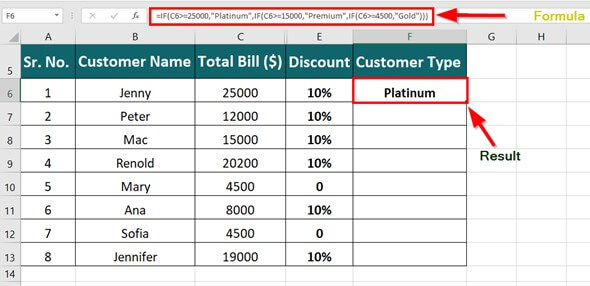
The IF function evaluates the criteria and finds that Jenny’s Total Bill (C6) amount equals 25000. Therefore, it provides the result as Platinum.
Step 6: Drag the formula in other cells to get the below result.
Example #3
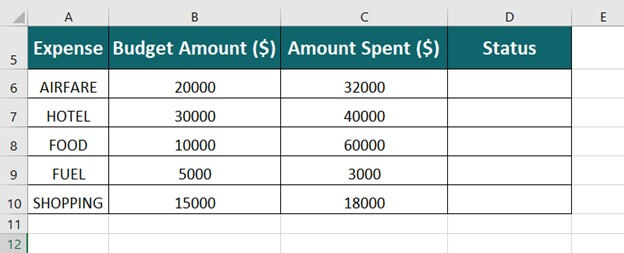
The table below shows the total budget and amount a traveler spends on expenses- Airfare, Hotel, Food, Fuel, and Shopping. We want to determine if he was Over Budget or In Budget using the Excel IF function.
Solution:
Step 1: Place the cursor in cell D6 and enter the formula,
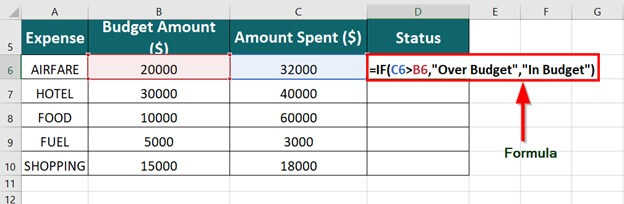
Explanation:
- C6>B6: It is the criteria that indicate if the Amount Spent (C6) is greater than Budget Amount (B6) and then provides a certain result.
- “Over Budget”: It is the value to display if the criteria are satisfied.
- “In Budget”: It is the value to display if the given criteria are unsatisfied.
Step 2: Press Enter key to get the below result
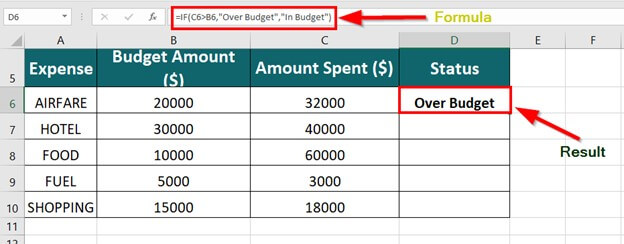
The IF function provides the result of Over Budget (D6) because the Amount Spent (C6) is greater than the Budget Amount (B6), i.e., the criteria are satisfied.
Step 3: Drag the formula into other cells to find the status of other expenses
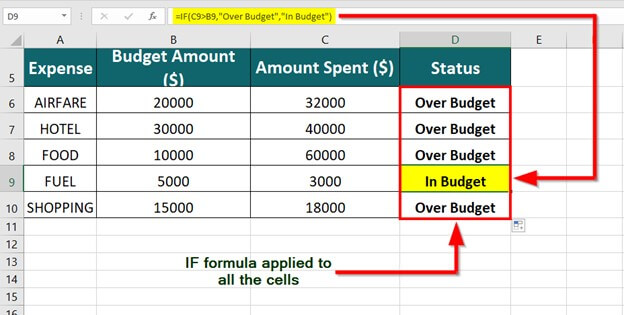
The IF function provides the status as In Budget (highlighted in yellow) for Fuel because the Amount Spent is less than the Budget Amount, i.e., the criteria are unsatisfied.
Things to Remember
- We can nest up to 64 IF functions using the Nested Formula when we use Nested IF.
- The function will evaluate each array element if we provide an array as arguments in the IF formula.
- If we use text values in the IF formula, we must enclose it with double quotes (e.g., “Pass”).
- We can combine the IF functions with logical functions like AND and OR to provide multiple criteria.
Frequently Asked Questions (FAQs)
Q1) What is the importance of the IF function?
Answer: The IF function is a decision-making statement that guides Excel to make calculative decisions based on the given criteria. The Excel IF function executes one code if it satisfies the given condition or executes another code if it does not satisfy the given condition.
Q2) What is the use of the IF function in Excel?
Answer: The IF function enables the logical comparison of values and provides specific results based on whether the condition is True or False. In addition, we can also use the IF function to identify blank data cells within the Excel worksheet. We can nest the ISBLANK function into the IF to find the blank cells. Identifying blank data cells can help prevent calculation errors by finding possible issues before doing the actual calculations.
Q3) What are the 3 parts of the IF function?
Answer: The 3 parts of the IF function are
- A logical test- To perform the logical comparison using an operator sign
- A value to return if the result of the logical test is TRUE;
- A value to return if the result of the logical test is FALSE.
Q4) How many IF functions are there?
Answer: We can nest up to 64 different Excel IF functions. However, maintaining multiple IF statements can be difficult; therefore, ensuring we nest the formula with 100% accuracy to give correct results is important.
Recommended Articles
The above article is a guide to the IF Function in Excel. To learn more about logic-based functions, EDUCBA recommends the below-given articles.
