Updated September 14, 2023
Introduction to ZBrush 3D Printing
ZBrush 3D Printing can understand as going through the process of printing our model that means making the necessary adjustment into our 3D model, which we have created in ZBrush, and getting it ready for printing software. Zbrush offers us an easy-to-use version of Decimation Master that optimize our model for 3D printing, and in this optimization, it reduces the number of polygons of our model without affecting the original quality of the model. So let me tell you what we have to do for 3D printing our model in step by step manner for deep analysis on this topic.
3D Printing of ZBrush Model
For taking your model to the 3d printer, you need to go through some steps for the proper printing result, and here I am going to tell you these steps.
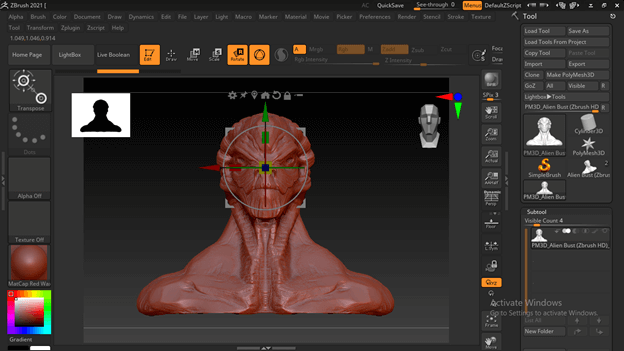
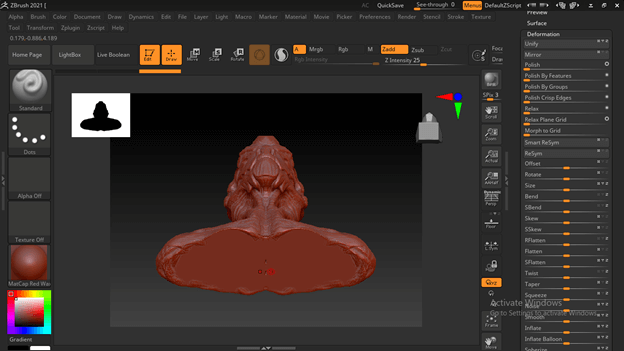
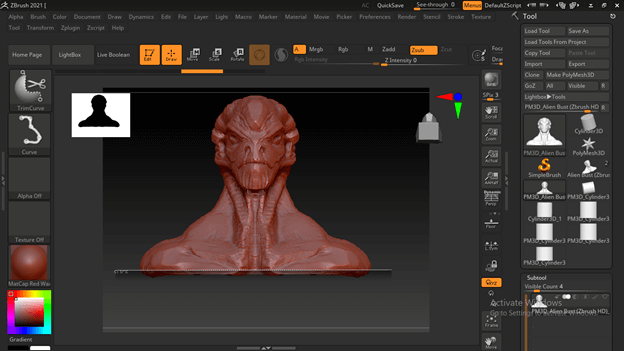
I will open a Zbrush model file here first. You can take you own model here for this purpose.
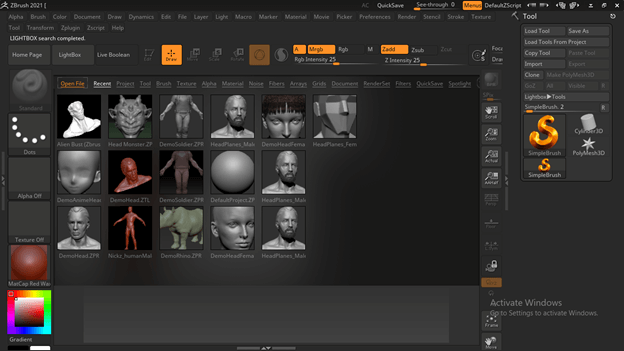
I have downloaded this model from the internet for explaining to you about this 3D printing topic.

I will go to the Subtool panel to show you that this model has one solid subtool element, and it is very necessary that your model should be in one piece because there should be no wholes in your model for taking it into the printer.
Let me tell you this in some major steps:
Step 1:
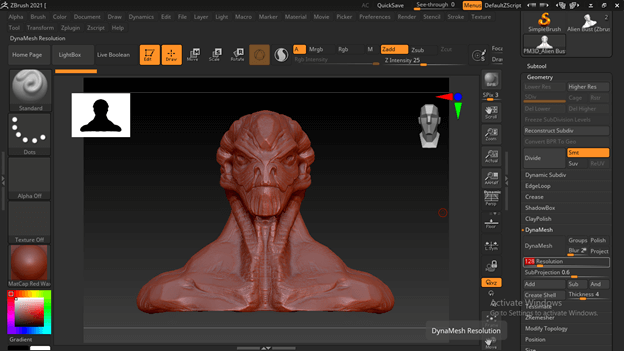
Avoid any whole or water flow area from your model. If you have a number of mesh in your model, go to the Geometry panel, click on the Dynamesh option, increase the Resolution value, and click on the Dynamesh button of the same option. It will convert your model into one piece.
Now the next step is about the orientation of you model.
Step 2:
The next thing is the orientation of the model. In Zbrush, the facing of our model is something different from the facing of the 3D printer. This is because the 3D printer works on the Z axis.
So for changing the orientation of your model, you can directly rotate it into 90 degrees in a forward direction or can go to the Deformation panel and then Rotate option of it. In the Rotate option, select the X axis.

Then here, enter -90 as the rotation value for rotating it into the Z axis.
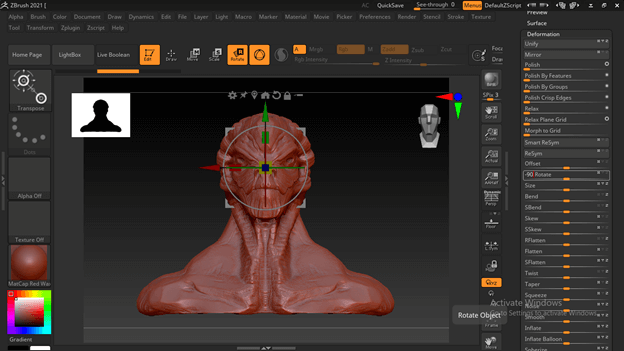
This is the right-facing for a printer.
You can now rotate it into the front face, but the orientation will be unaffected.
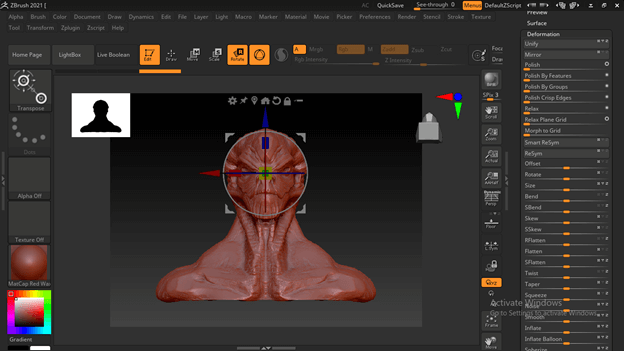
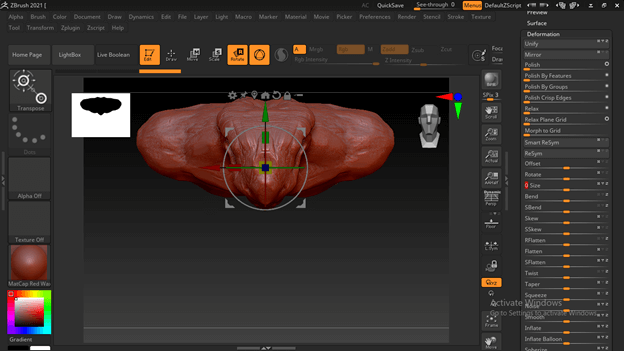
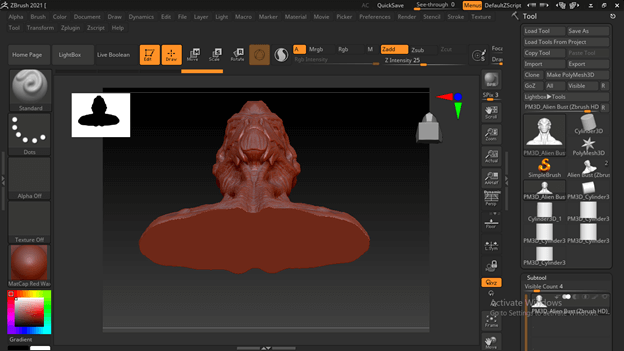
Now let us move to the next step, which is the base of the model should be flat.
Step 3:
Let me give you a quick view on how you can make a flat base. I will take this 3D cylinder model from the tool bar section of Zbrush.

Now go to the standard brush button and click on it. Then navigate for TrimCurve brush from the list. You can press the letter T of the keyboard for having brushes that name starts with the letter T.
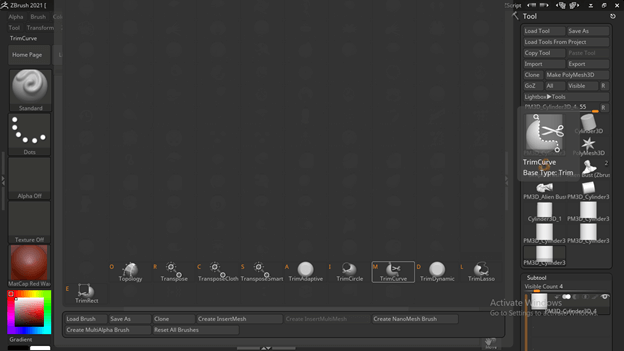
Now hold the Ctrl + Shift button of the keyboard and draw a slicing line on the surface of which you want to make slice.
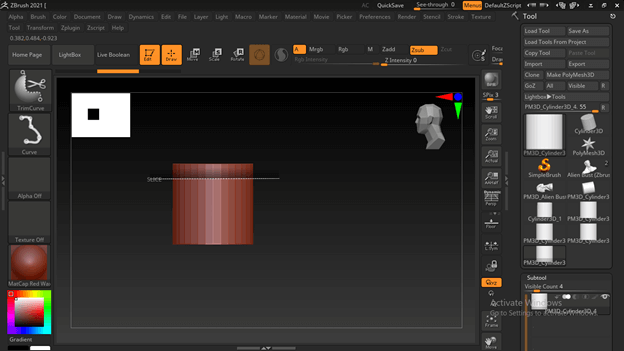
And after trim, it will give you a plain surface like this.

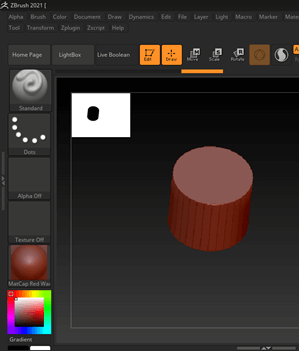
Now I will do the same with this model, or you can create a flat base for your model.
Now it has a flat base.
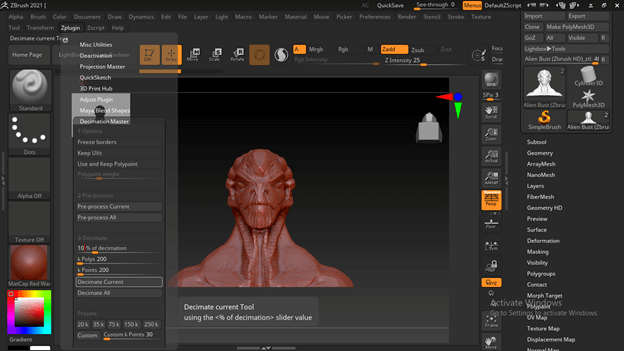
Step 4:
The next important step is the Decimation master, which helps us reduce the polygons count of our model to make it perfectly fit for printing purposes. The best thing about this is it will not affect the quality of our model.
You can find this plugin under the plugins of Zbrush.
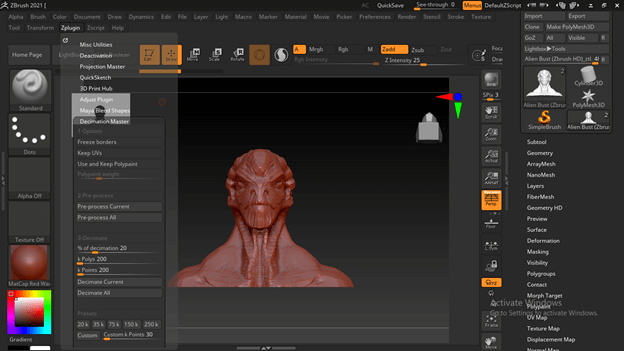
You can change the percentage of Decimations, which changes the number of polys and points of your model.
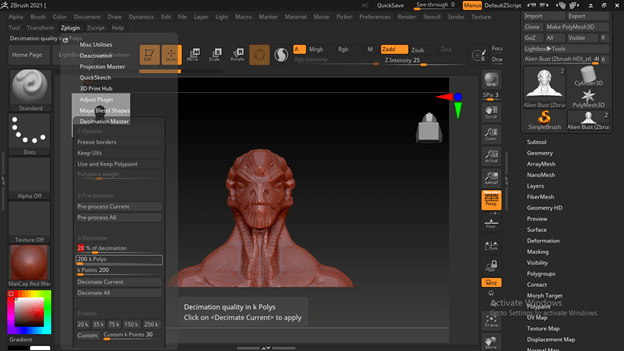
For changing it click on Pre Process current, and it will take some time to pre-compute it.

Then click on Decimate Current, and after that, click on Decimate All button of this panel for getting your result.
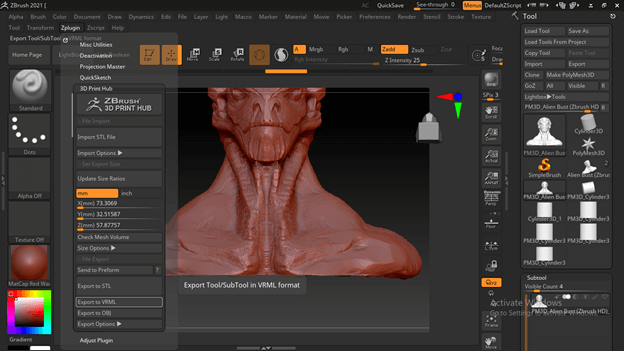
The next step is to set scale and 3D Print Hub parameters. So let us have a look on it too.
Step 5:
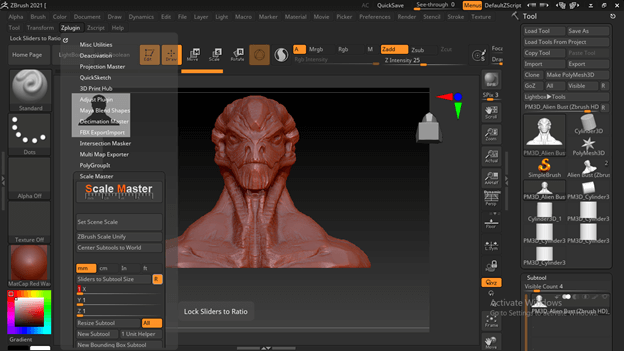
For having Scale Master go to Zplugin and click on this menu, and we will have different options in its drop-down list. I will click on Scale Mater.
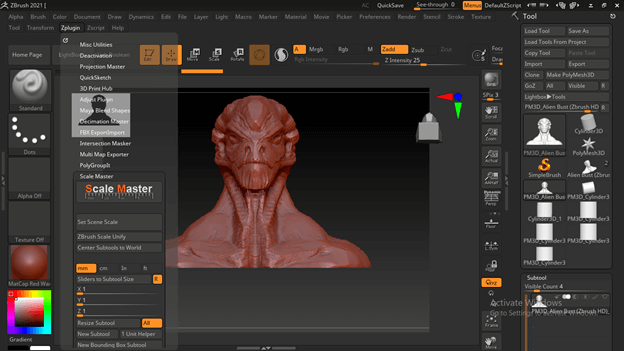
Here in this Scale Master panel, we have scale values for our mode’s X, Y, and Z axis, which you can change as per your requirement but make sure the R button is active, which maintains a ratio of scale in all three axis.
After changing the values, just click on Resize Subtool button of it. You can choose unit for dimensions here also.
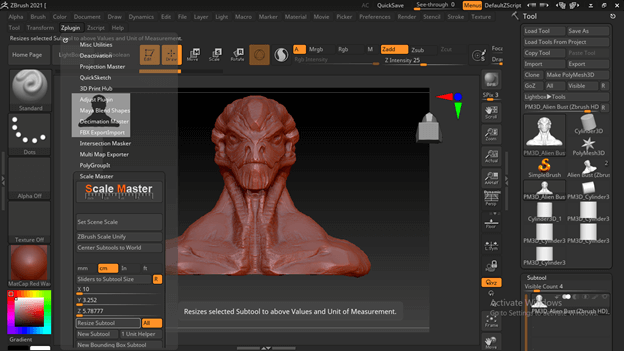
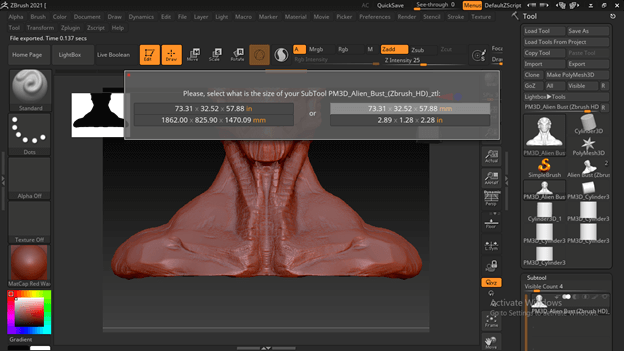
The next option is 3D print Hub, and we also adjust some parameters here. You can also change the X, Y, and Z axis’s value here and then click on the Update Size Ration button of this panel.
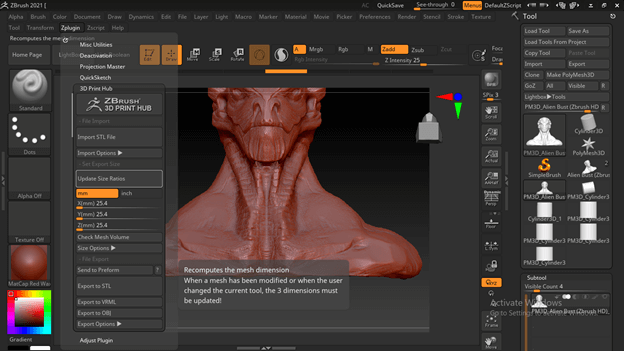
Once you click on it, it will show you your chosen value in all units. You can go with any of the shown unit values by selecting that in this popup dialog box. For selecting, just make click on your desired unit’s value.
From this same panel, we can export our model in a different file format that are supported by different software of 3D printing. The 3D printer companies provide this software for making several adjustments before taking our model through 3D printers. For example, if you want to export in STL format, click on the Export to STL button of this panel, and save it into your computer at your desired location.
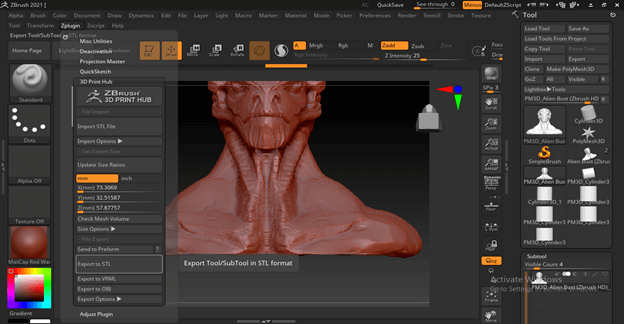
Or, if you want to save your model into VRML format, then you can click on the Export to VRML button, and the same way, you can go with other available format of this software.
These are some important steps through which you have to go before going through the 3D printing process.
Conclusion
Now you have knowledge what are the necessary steps through which you have to go for proper preparation of your model and getting it ready for 3D printing purposes. You can go through the parameters of the above-discussed steps and make a good analysis for a deep understanding of this topic.
Recommended Articles
This is a guide to ZBrush 3D Printing. Here we discuss the parameters and make a good analysis for a deep understanding of ZBrush 3D Printing. You may also have a look at the following articles to learn more –
