Updated July 19, 2023
What is Wrap Text in Excel?
Wrap Text is a feature in Microsoft Excel spreadsheets that wraps or fits the contents of a cell within the boundaries of the cell. It auto-sizes the row height and column width of the selected cell.
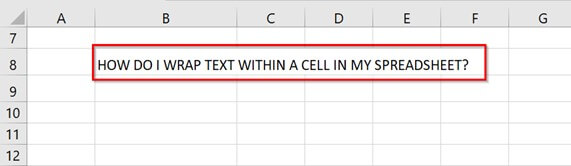
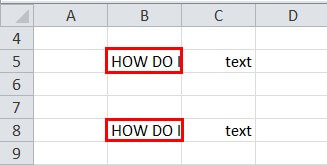
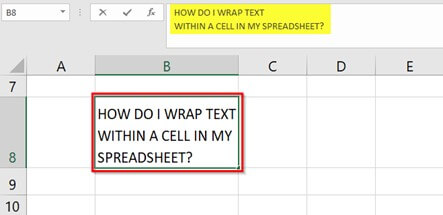
For example, the text in cell B8 – HOW DO I WRAP TEXT WITHIN A CELL IN MY SPREADSHEET? is spread across the columns C, D, E, and F if there is no text or content in adjacent cell C8.
OR
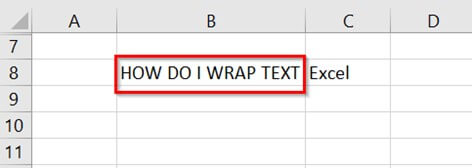
The cell is cut off since there is text “Excel” in adjacent cell C8 as shown below
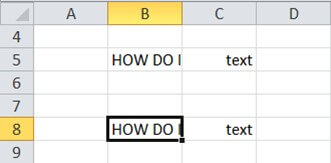
When we apply the WRAP Text feature, the text or content is contained within the boundaries of the cell as shown in the below image

Wrap Text wraps or fits the cell contents on multiple lines, rather than a single or one long line without overlapping the text content to another adjacent cell.
Key Highlights
- We can use Wrap text in Excel to wrap or enclose a long string of content in a single cell.
- Wrap text displays the first 1,024 characters in a cell. If the number of characters exceeds the limit, it is displayed as **
- We can toggle the Wrap Text option ON and OFF in Excel to apply and remove the feature to the selected cell content
- When we modify the column width, Microsoft Excel adjusts the text or content wrapping automatically
- We can also wrap texts in a cell by adjusting row height along with Autofit option in the Excel Ribbon
How to Wrap Text in Excel?
1] AUTOMATIC WRAP TEXT
METHOD 1: Wrap Text in Excel using Ribbon
Example #1
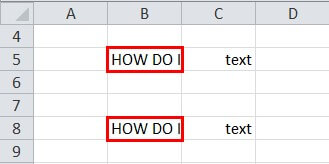
In the below table, there is a long string of text in cells B5 and B8. We want to wrap the text of cell B8 using the Excel Ribbon.
Solution:
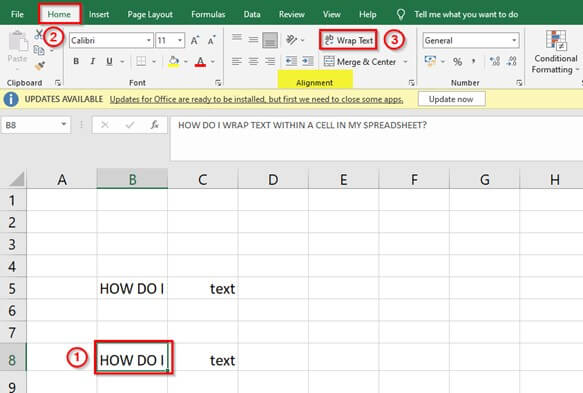
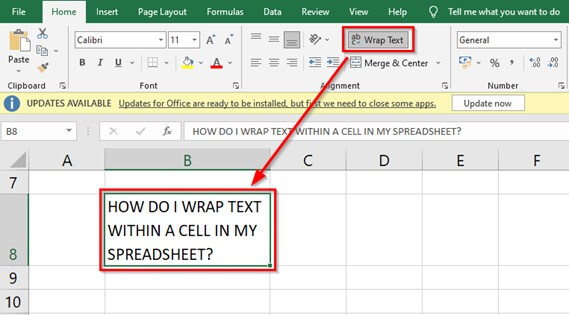
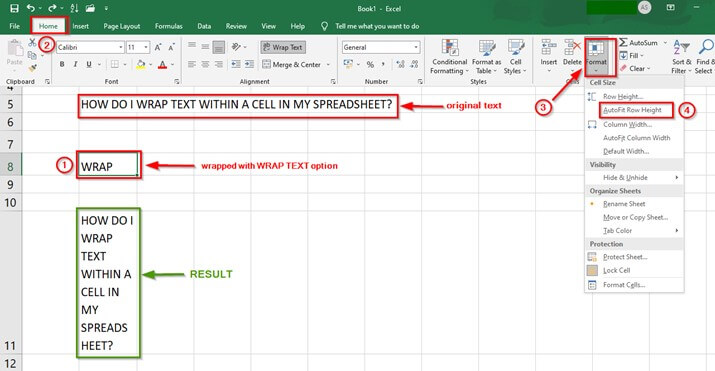
Step 1: Select cell B8
Step 2: Go to the Home tab and click Wrap Text in the Alignment Group as shown in the below image.
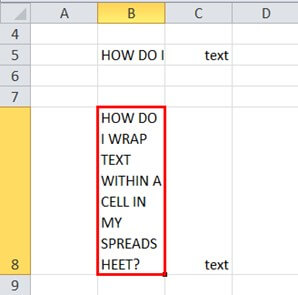
Wrap text feature wraps up the text- HOW DO I WRAP TEXT WITHIN MY SPREADSHEET within single cell B8 as shown below
Note:
- If we initially set the row height to a certain value or manually set a row height, or adjust column width by clicking on the right bottom border of a row header and dragging the separator towards left or right, there will be no change in the row height or column width when we click the Wrap Text option.
- If there is a change, then we must simply double-click the bottom border of a row header to fix this.
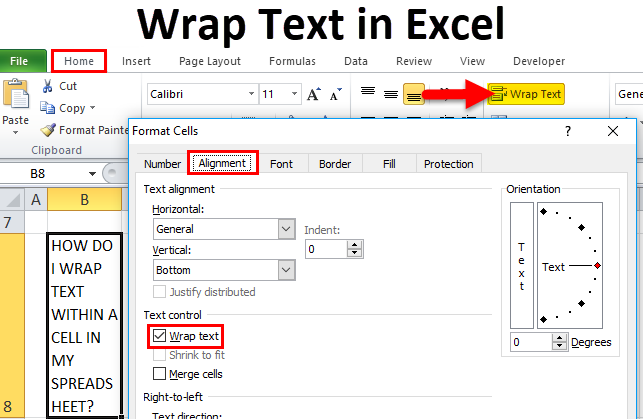
METHOD 2: WRAP Text in Excel using the FORMAT CELLS option
Example #2
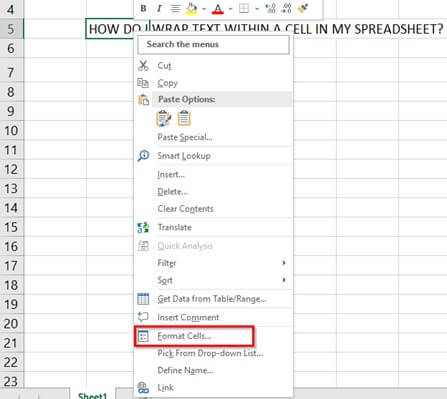
Consider the same example as above. Here, we want to wrap the text in cell B8 using the Format Cells option
Solution:
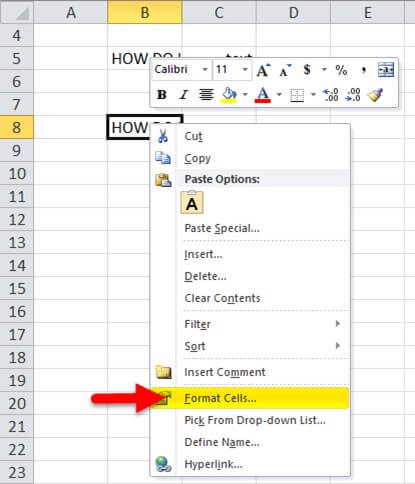
Step 1: Select the cell or group of cells that contain the long string of text.
Step 2: Right-click on the selected cell and go to the Format Cells option
OR
Select the dropdown option in the Font Group of the Home tab of the Excel ribbon.
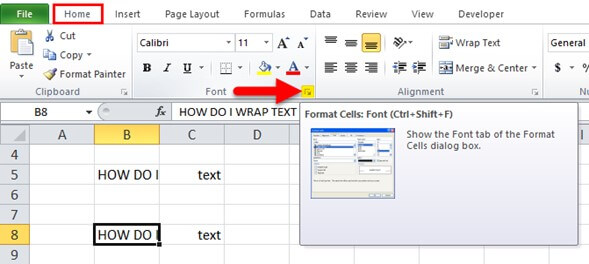
This opens up the Format Cells dialog box as shown below

Note: We can also use Ctrl + 1 to open the Format Cells dialog box.
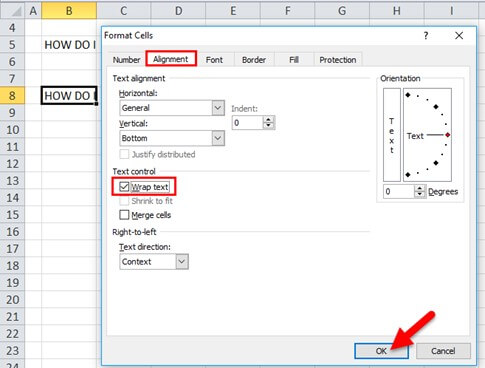
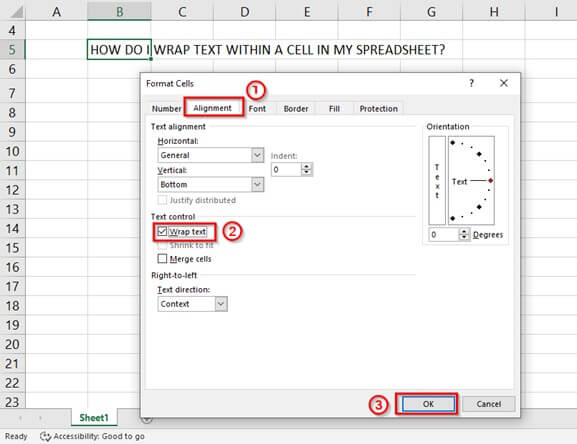
Step 3: In the Format Cells dialog box, select Alignment>Wrap Text checkbox and click OK.
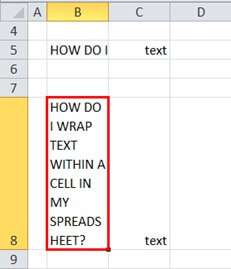
This wraps up or fits the B8 cell content within the limits of the cell as shown below
2] MANUAL WRAP TEXT
METHOD 3: Wrap Text in Excel by Adjusting Rows and Columns
Example #3
In this example, we want to wrap the text by Adjusting Row height and Column Width
Solution:
Step 1: Place the cross (+) at the edge of the desired column as shown in the below image
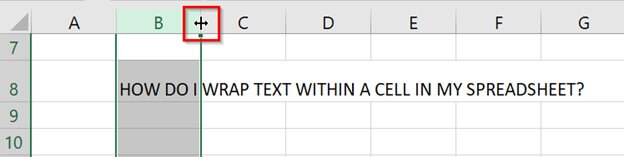
Step 2: Hold and move the cross towards the right and stop until the text fills in the cell B8
This will wrap the text in a single cell B8 but with increased column width as shown in the below image

If we increase the row height only the row header size will increase, it will not wrap the text,

To solve this problem,
Step 3: Click on the Wrap Text option in the Excel ribbon and the text in cell B8 is wrapped as shown in the below image
METHOD 4: Wrap Text in Excel by Adding Line Breaks
Example #4
Here, we want to Wrap the text in cell B8 by Adding Line Breaks
Solution:
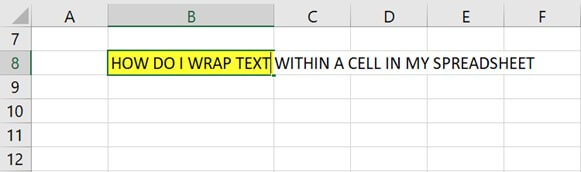
Step 1: Place the cursor at the position(highlighted in yellow) where the data exceeds the boundaries of cell B8
Now,
Step 2: Press Alt + Enter to add a line break
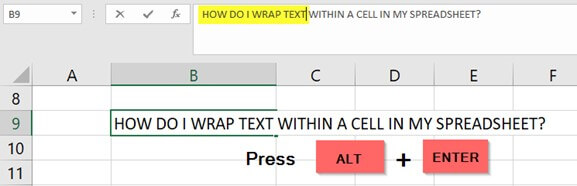
It will break the line into two to fit(wrap) the text into a single cell B8
Advantages of Wrap Text
- With the Wrap text functionality of Microsoft Excel, we can view all the data or information within a single cell.
- It makes reading easier and fits the content better in a cell suitable for printing the worksheet.
- If we wrap the text of the entire Excel worksheet, the column width becomes consistent throughout and gives a better viewing experience.
Things to Remember
- If we want to unwrap the text, we need to follow the same steps that we use for wrapping the text.
- The Wrap Text option in excel is not applicable to merged cells.
- If we fix the row height the wrapping will not be visible sometimes. We can make it visible by choosing the Autofit Row Height option in the Format section of the Home
Frequently Asked Questions (FAQs)
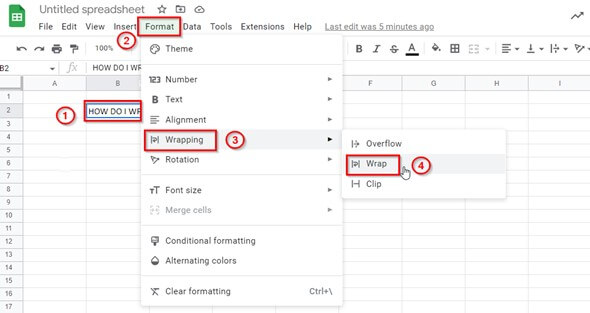
Q1) How do I enable text wrapping in sheets?
Answer: To wrap text in Google sheets,
- Select the cell of the data you want to wrap
- Click on Format > Wrapping > Wrap
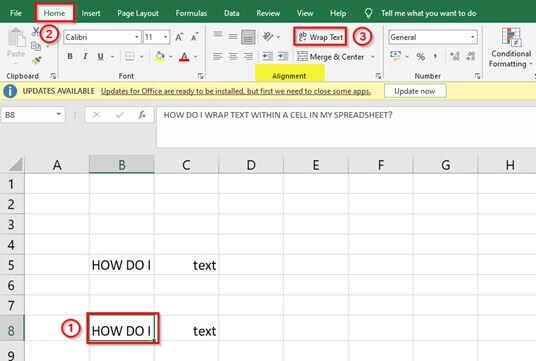
Q2) Where is wrap text in excel?
Answer: To locate Wrap Text,
- Select the cell of the data you want to wrap
- Click on Home > Wrap Text
Q3) Why can’t I wrap text in Excel?
Answer: The possible reason that sometimes the wrapped text is not visible is that we have manually set the row height to a certain value. To solve this problem, we should
- Select the cell of the data we want to wrap
- Click on Home > Format > Autofit Row Height
Q4) How do I set wrap text as default in Excel?
Answer: To set wrap text in Excel as default,
- Select the cell of the data you want to wrap
- Right-click on the cell to get a dropdown menu
- Click on Format Cells > Alignment > Wrap text > OK
Recommended Articles
The article is a guide to Wrap Text in Excel. EDUCBA recommends the below-given articles to get more Excel-related information.
