Updated June 6, 2023
Introduction to Arduino
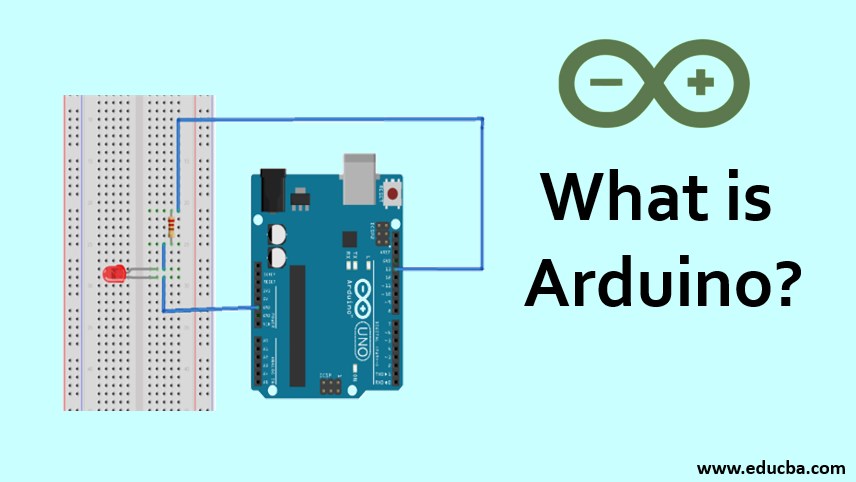
Arduino is an open-source software and hardware company that designs and manufactures single-board microcontrollers and kits to build digital devices. The boards developed by them are termed Arduino boards, capable of reading inputs like – dept info using radar, light on a sensor, press of a button, etc. can convert them into an output like activating the led light, motors, buzzers, etc.
Different variants of the Arduino board are available in the markets, e.g., Nano, Uno, Atmega, etc., and each one varies in shape and size. It also provides a Software IDE for their boards, which helps the developer to program the board in Language; this IDE also gives the liberty to the user to provide input instruction directly from the system.
Let’s see a few different types of the board provided by them themselves:
- Arduino USB: UNO, Duemilanove, Extreme, NG 240
- Bluetooth
- Serial
- Single-Sided Serial
- Mega
- Lilypad
- Nano
- Mini
- Mini USB Adapter
Arduino software uses Arduino Programming language, which is C based, to write the code. Since the programming language is C based, the difficulty of writing the program in assembly language is removed as the software covers the C-based program into assembly code internally and then uploads it to the board. Along with the code editor, the software also consists of a compiler, an uploader, and libraries for the peripheral devices.
How Arduino Works?
We will see the working by blinking a small LED.
Components Required:
Arduino UNO, LED, Jumper wires, Breadboard, and a 1k resistor.
Working:
Following are the steps involved in the blinking of the LEDs using Arduino
Step 1: Connect the components per the circuit diagram and then connect Arduino UNO to the system using the USB cable.
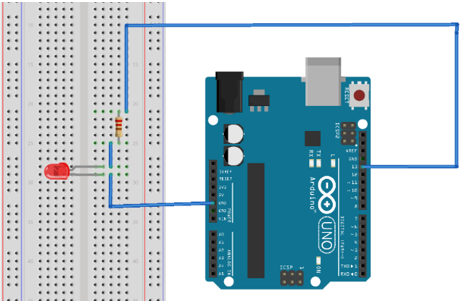
Source Link: https://projecthub.arduino.cc/
Be sure of the negative terminal of the LED; the shorter leg of the LED near the head indicates the negative terminal.
Step 2: Download Arduino IDE in your system from https://www.arduino.cc/en/software
Step 3: Setup Arduino IDE: Open IDE, go to Tools -> Boards, and select Arduino UNO. Then go to Tools -> Ports and select the port at which UNO is connected.
Step 4: Coding the logic: Implementing the LED code is simple. All the code of Arduino consists of majorly two functions:
Code:
void setput(){
}
Void loop(){
}
The Arduino calls a void setup when it starts, and the void loop continues to iterate in an infinite loop until the power is turned off.
The code to blink the LED is as follows:
Code:
void setup(){
//put your setup code here, to run only once:
pinMode(13, OUTPUT); // define pin 13 as the output
}
void loop(){
// put your main code here, to run in a loop:
digitalWrite(13, HIGH);
delay (1000); // delay for1s
digitalWrite(13, LOW);
delay (1000);
}
Step 5: Compiling and Uploading: After writing the code, you can either click the compile button and then upload it, or you can directly click the upload button, as it will compile the code, and if no error is there, it will upload it to the Arduino. In our case, if the code uploads successfully, then you should get a message like this:

If your connection is correct, you can see your LED blinking ON/OFF at an interval of 1 second.
Features and Applications of Arduino
The following features and applications are described:
Features:
- It is open source both in terms of hardware and software.
- It can perform serial communication with the computer using USB.
- It only needs 5V to power up.
- It can work with Digital and Analog signals, sensors, and Actuators.
- The recommended input voltage is 7-12V, while the operating voltage is 5V for most Arduino boards.
Applications:
Following are the few popular application:
- For Easy Prototyping.
- Controlling Motors.
- Robotics and Control System.
- Designing Basic Circuit Diagrams.
- Home and Industry Automation.
- Standalone Projects.
Advantages and Disadvantages
Below are the advantages and disadvantages mentioned:
Advantages:
- Inexpensive: Arduino boards are cheaper than other microcontroller platforms like Raspberry Pi or BeagleBone, making them more affordable for hobbyists and students. The least expensive can be handled by hand, while the pre-assembled model is less than 50$.
- Cross-platform: Most microcontrollers limit their compatibility to Windows, while Arduino code can run on Linux, Mac, and Windows.
- Common IDE for all the Arduino Boards: We can use Arduino IDE to program and upload the code for all the boards Arduino launched. There is no need to install any other software.
- Opensource: It is published under open-source hardware, so circuit designers can use it to implement their modules.
- Large Community Support: Arduino community Is very helpful in resolving queries and providing solutions and codes. There is a large number of projects at Arduino Home, which are available free of cost.
Disadvantages:
- Limited Memory and Processing Power: Arduino is not much powerful when compared to microprocessors like Raspberry pi. So, there can be scenarios where opting for a micro-processor like Raspberry pi is a better option over a microcontroller.
- Not optimized for specific use: Arduino fulfills a multipurpose role. It is more suitable for prototyping projects rather than being used as a particular PCB.
- Ease of Use: Yes, ease of use is also a disadvantage; using it for the electrical project will result in no understanding of the AVR microcontrollers.
- The Debugger is unavailable: The IDE doesn’t have a debugger, which sometimes makes debugging long codes difficult.
- Internet Connectivity: Connecting to the internet is not impossible, but it’s also not easy as it has shields and libraries.
Conclusion
Due to the limit on the size, we didn’t discuss the different types of Arduino boards, but even though In this article, we saw what it is, along with their advantages and disadvantages. We Understood how to write the first code in it. By now, you should be confident enough to write the program and use them in your module.
Recommended Articles
This is a guide to What is Arduino? Here we discuss how Arduino works, applications, features, advantages, and disadvantages. You can also go through our other related articles to learn more –

