Updated August 25, 2023
Introduction to Watercolor Brushes in Photoshop
The following article provides an outline for Watercolor Brushes in Photoshop. Watercolor Brushes in Photoshop is an interesting effect that creates wonderful effects when used with digital image editing software like Photoshop as it makes use of Filters, Brush tools, Layer styles, and Masking for producing a real hand-painted watercolor effect; besides, Photoshop also allows the users to create their own unique brush tools for creating amazing artworks as there is no limit to the amount of customization available; however, all you have to ensure is set the effects of Filter, Layer styles and Masking in the perfect balance.
Watercolor Effect in Photoshop
It is very easy to apply this effect. Let’s take an illustration of the Taj Mahal to create a Watercolor effect.
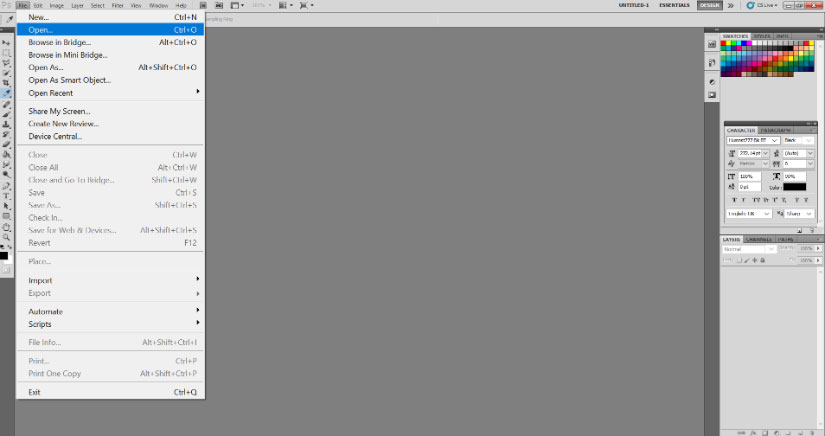
Step 1: Grab the Taj Mahal image online in which you want to apply the effect. Select File>Open. And select the image from that location that will be edited like this.
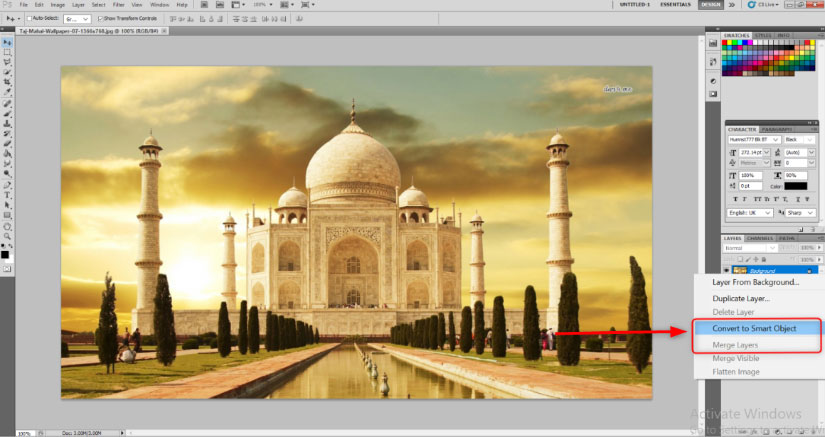
Step 2: Right-click on the background layer and select the Convert to Smart Object option. This will unlock the layer, and now the image is ready for any kind of Photoshop effects.
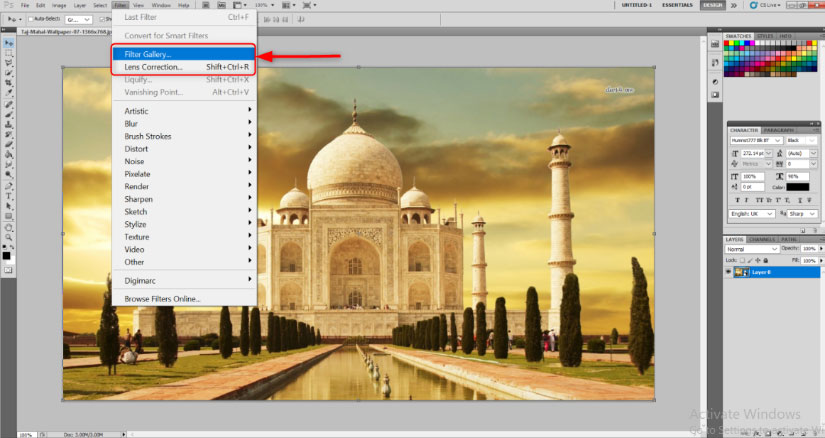
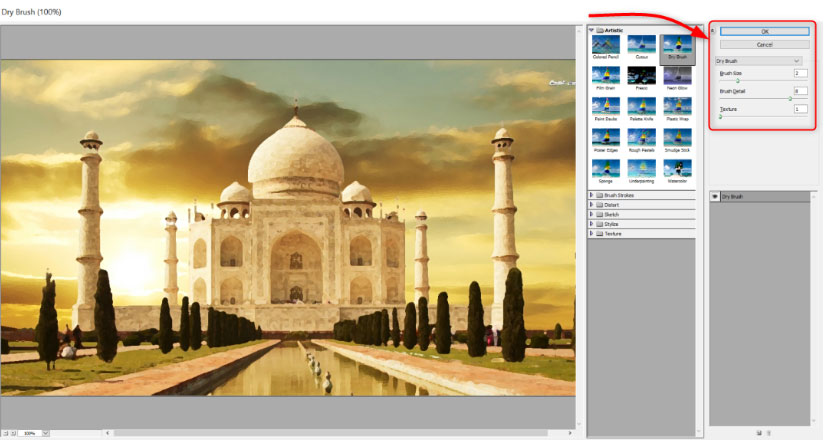
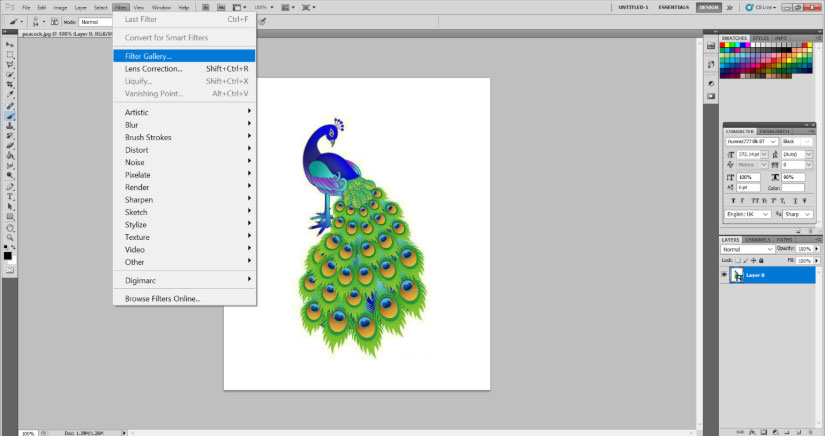
Step 3: Now, for the initial effect, go to the Filter menu and select Filter>Filter Gallery>Artistic.
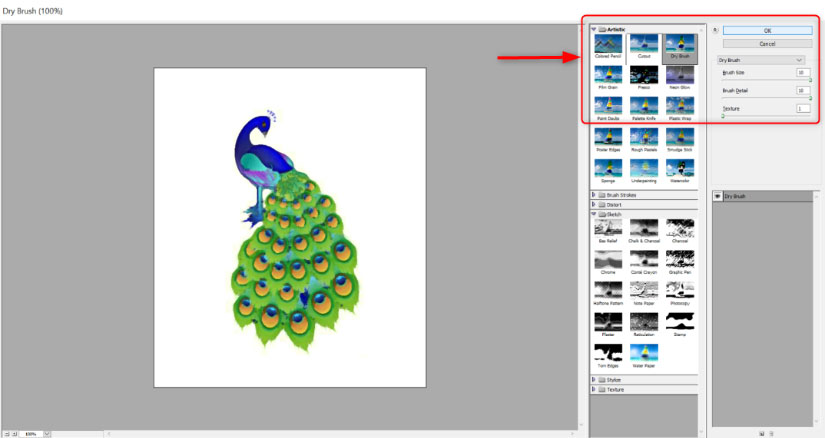
Step 4: This will open a large window with already ready-to-use effects that will instantly set the entire image’s tone for the entire image. Select the Dry Brush effect. Change the following values as mentioned, Brush size: 10, Brush detail: 10, and Texture: 1.
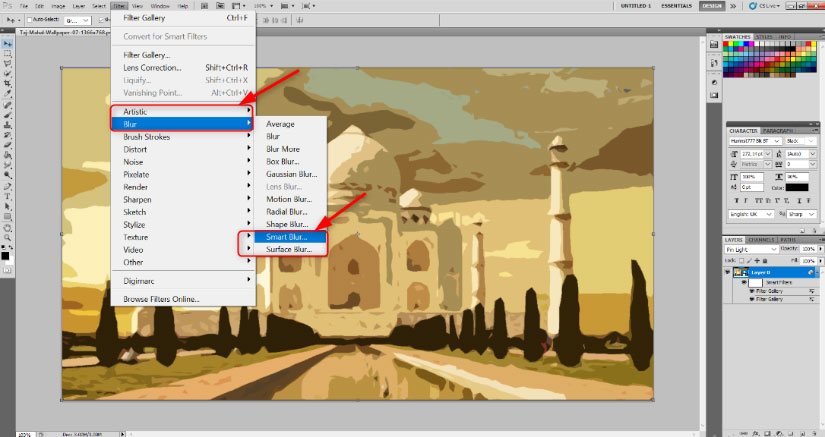
Step 5: Now, you will see that the initial layout has already changed to a rough watercolor-like effect. But Photoshop provides us with tools including brush and masking and lighting to exploit them to detail this effect even more. After that, go to Filter> Blur > Smart Blur. Set the following values. Radius: 5, Threshold: 100, and Quality: High. You will see that fine lines and sharp corners are blurred a bit, while the center still looks untouched.
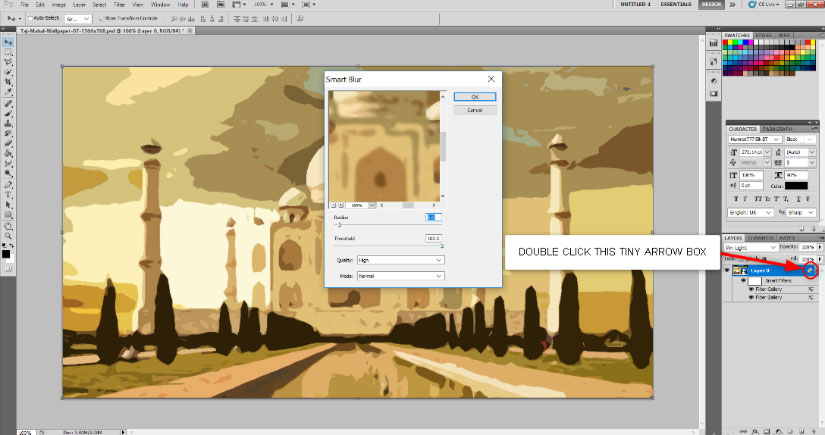
Step 6: This is a crucial step for us to understand. You will see a tiny arrow box next to Smart Blur Filter in the Layer panel. Double click on it. A dialog box called Blending options (Smart Blur) will open. Change the following values. Mode : Screen , Opacity : 50 %. This will soften the blur effect.
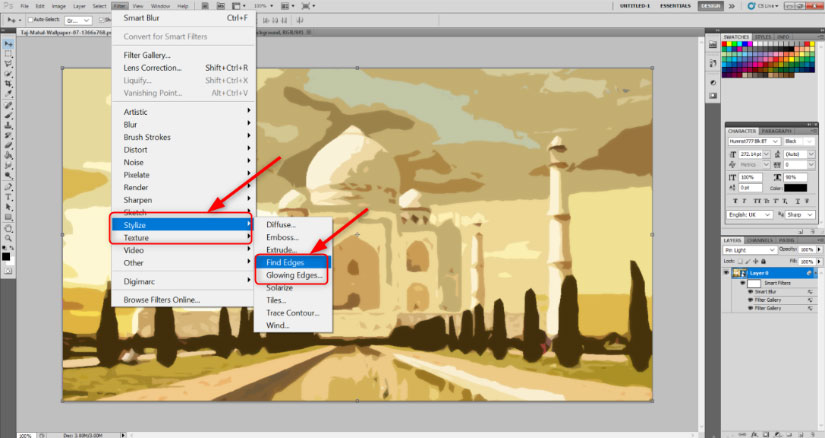
Step 7: Go to Filter > Stylize> Find Edges. Once the Filter is added in the Layer panel, Double click on the tiny box next to the Find Edges, and in the Blending Options dialog box, change the MODE to Multiply. You will see that a sketchy form of the image has appeared. This is a crucial step to understand. You will see a tiny arrow box next to Smart Blur Filter in the Layer panel. Double click it. A dialog box called Blending options (Smart Blur) will open. Change the following values. Mode : Screen , Opacity : 50 %. This will soften the blur effect.
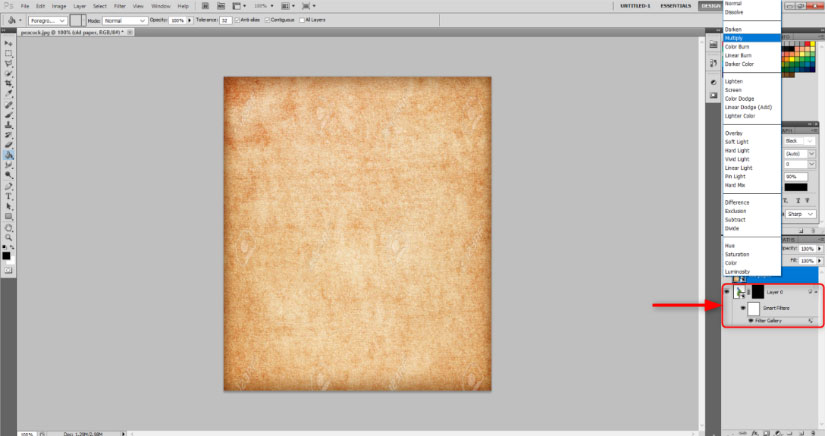
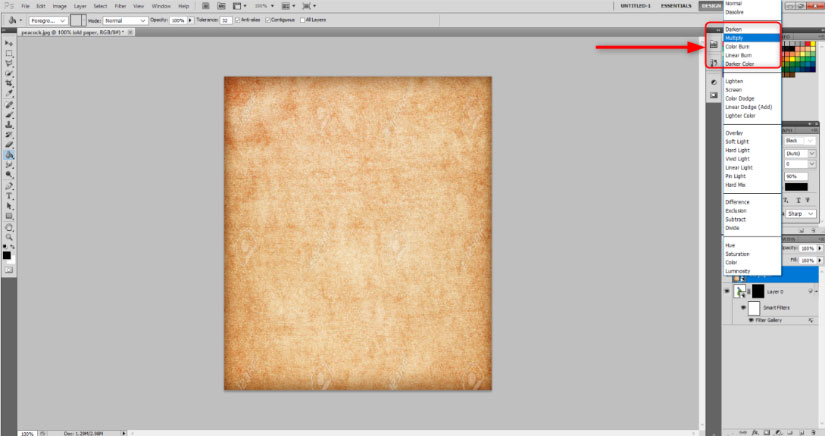
Step 8: Grab a free Ivory or Canvas Paper Texture background online. Place it in the image and resize it according to the Taj Mahal canvas size. Hit enter once adjusted and resized.
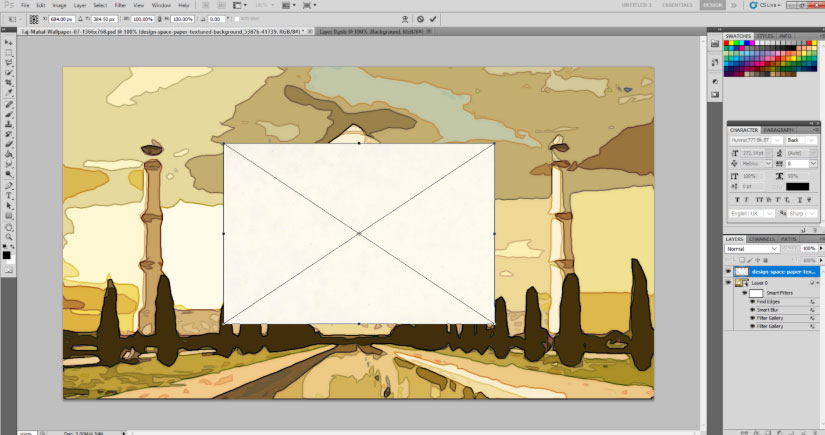
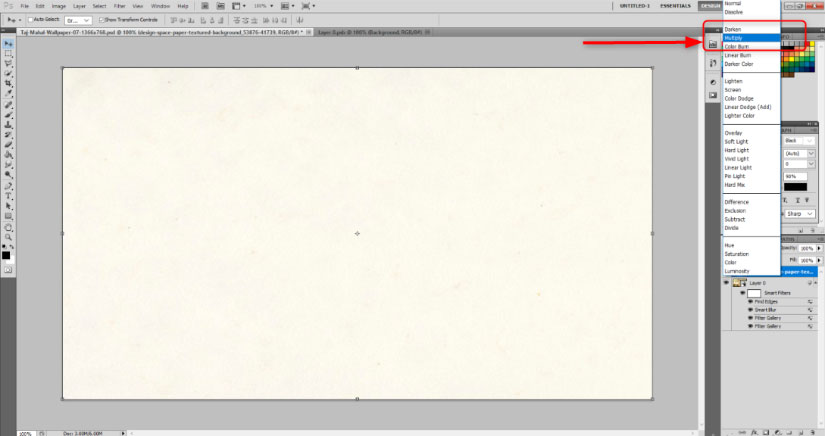
While clicking the paper texture layer, change the blending mode to multiply.
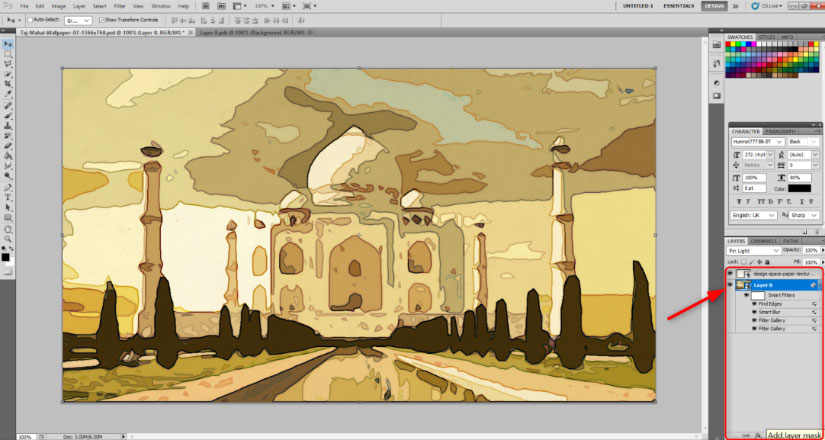
Step 9: Now, add a Layer Mask to the background layer. color the layer mask black using the paint bucket tool. It will appear as if the whole picture has disappeared.
Step 10: Select the brush tool. In the toolbar, there will be an option of the type of brush to be selected. You will see a tiny arrow beside it. Click that arrow and select Natural Brushes.
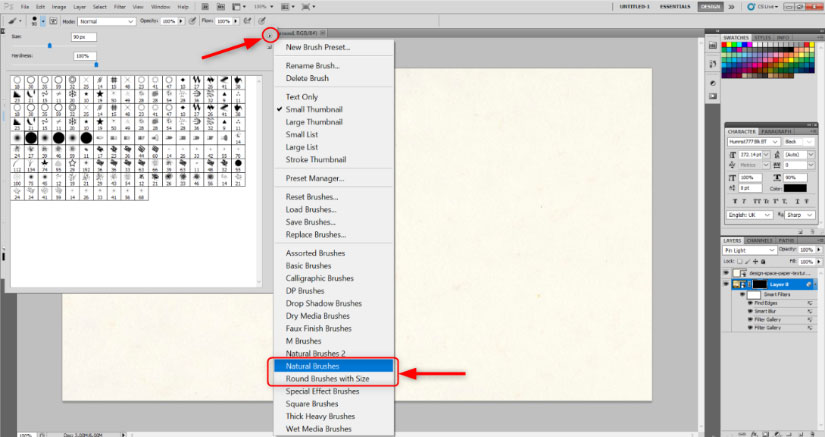
Click on Append in the next dialog box. This will add a range of brush patterns that appear like natural brush strokes.
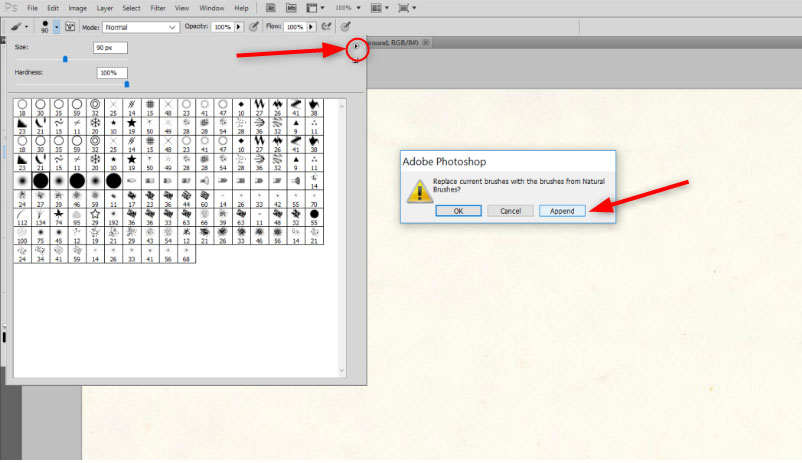
You can choose the design of your choice. Adjust the Brush size to approx 101. Opacity to around 17% and flow around 55%. These are the values that I have been comfortable with. You can taper according to your preferences.
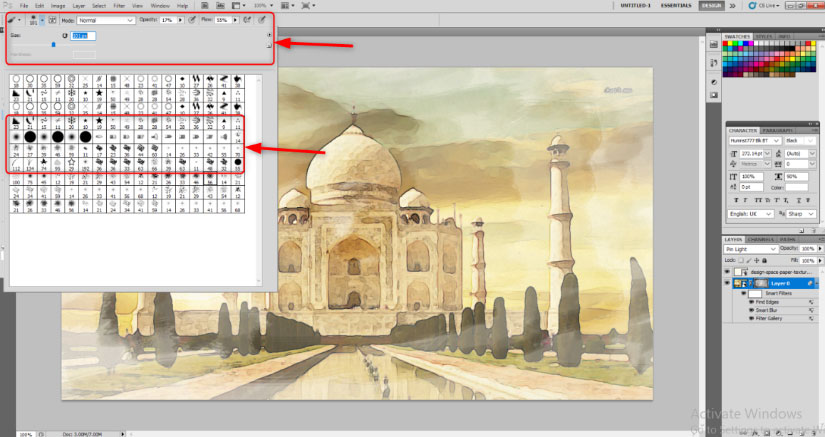
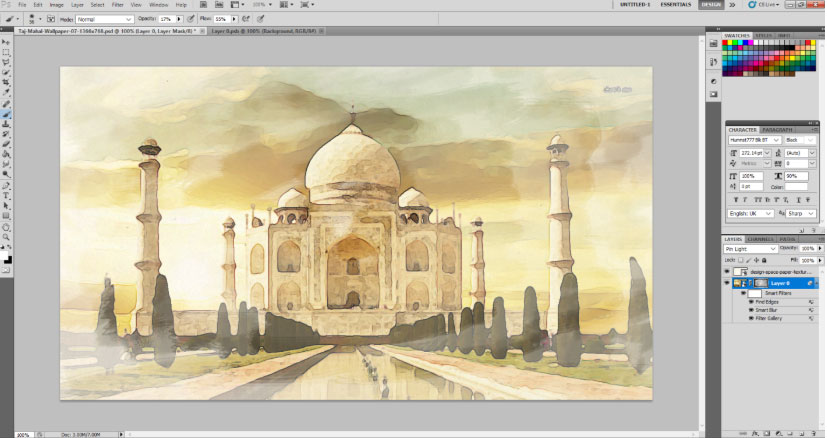
Step 11: Slowly start dragging the mouse and create brush impressions and strokes. You will see an image that already looks like watercolor is starting to emerge. Use the brush effect as long as you are satisfied with the look.
Watercolor Brush Effects in Photoshop
We are going to take similar steps for the following image. Just fewer steps to show that the watercolor effect is possible too quickly.
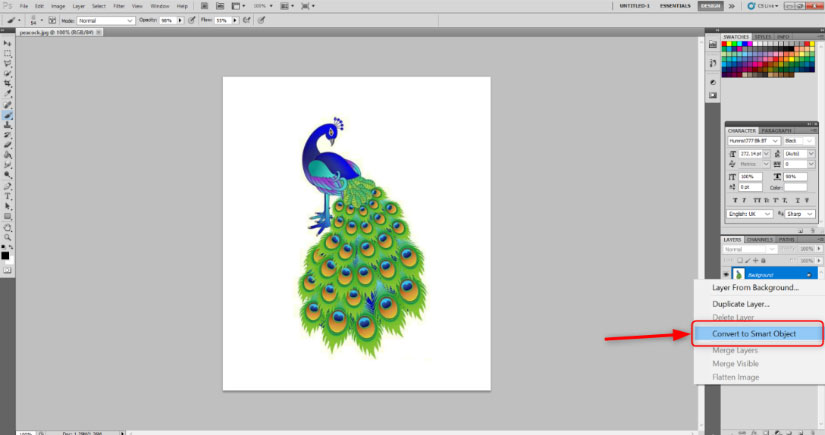
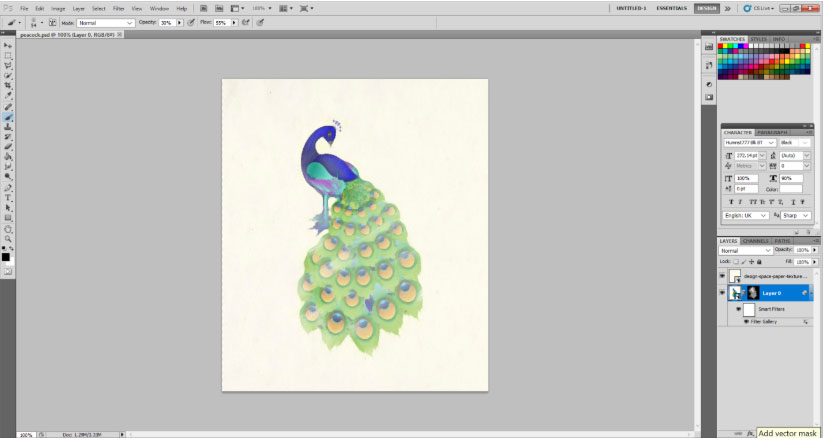
Step 1: Same as the above image, kindly try to find a free online peacock vector image that can have a watercolor effect. Open it in Photoshop and convert it into a Smart Object.
Step 2: Go to Filter > Filter Gallery > Artistic.
Choose the Dry brush option and keep the values Brush size: 10, Brush detail: 10 and Texture: 1.
Step 3: Create a Mask of the Background layer by selecting the tiny box like this below.
Step 4: Keep the Layer mask selected. Now using the Paint Bucket Tool, paint the mask in black.
Step 5: Select File> Place to place the Canvas or Ivory paper texture background in the image. Adjust the size of the peacock image and hit enter.
Step 6: Now, keep the paper texture layer selected and select multiply in the blending options above. This will immediately take the image back.
Step 7: Select the Brush Tool and select the Layer mask. Select the white color for the Brush Tool. In the brush design options in the Tool, Bar select a Natural brush style of your choice. Adjust the Brush Size, Opacity, and Flow according to your choice and start painting. You will see a peacock with a watercolor effect.
Conclusion
For many years this effect and the charm of watercolor has not died out. In fact, it is being now enhanced more with more and more introduction to various brush presets online that help the user to give a realistic effect to his image. All you have to do is set the Filter, Layer styles, and Masking effects in the right manner.
Recommended Articles
This is a guide to Watercolor Brushes in Photoshop. Here we discuss the introduction along with the watercolor effect and watercolor brush effect in photoshop. You may also look at the following articles to learn more –
