
Introduction to Lasso Tool in Photoshop
In this article, we will discuss an overview on Lasso Tool in Photoshop. As we all know, Photoshop is a professional tool for editing images for multiple reasons projects of the brochure, magazine making, personal photos editing, studio-level editings and many more. It has a collection of wonderful tool to do so. Today, we are going to look after the Lasso tool, which has a wide range of use in the graphic and photo editing profession-related jobs such as graphic designer, artist, texture-making, and others. This tool is used to select irregular shapes, patterns, and portions of an image to move, remove, increase, and many more based on its size on requirements.
Top 3 Lasso Tools in Photoshop
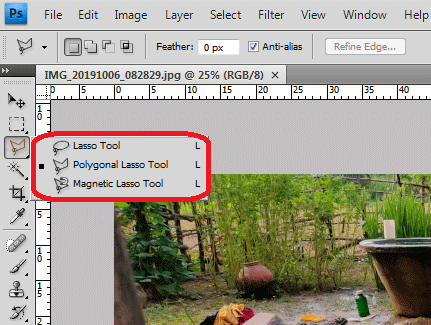
In the tools menu, we have a Lasso tool which is of 3 types; the hotkey is “L”.
1. Lasso Tool – Freehand lasso tool.
2. Polygonal Lasso Tool – Straight lasso tool.
3. Magnetic Lasso Tool – Magnetic lasso tool.
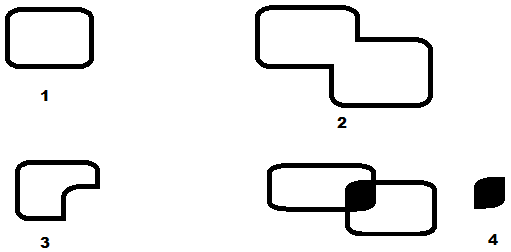
This entire 3 tool has 4 working options, as explained below.
- New select: The selection of pixels or portions from the image.
- Adding to selection: Adding a few more pixels or portions into selection.
- Subtract of selection: Removing some portion of pixels from the selection.
- Intersect of selection: Selecting the area where 2 loops are intersected.
Few keyboard shortcuts to use while the lasso tool is active.
- Ctrl + Spacebar to Zoom in.
- Alt+ Space Bar to zoom out.
- Shift to add an area.
- Alt to remove an area.
- Ctrl+C for a quick copy.
- Ctrl+V for a quick paste.
- Ctrl+D to select and deselect the selection area.
Steps to Use the Lasso Tool in Photoshop
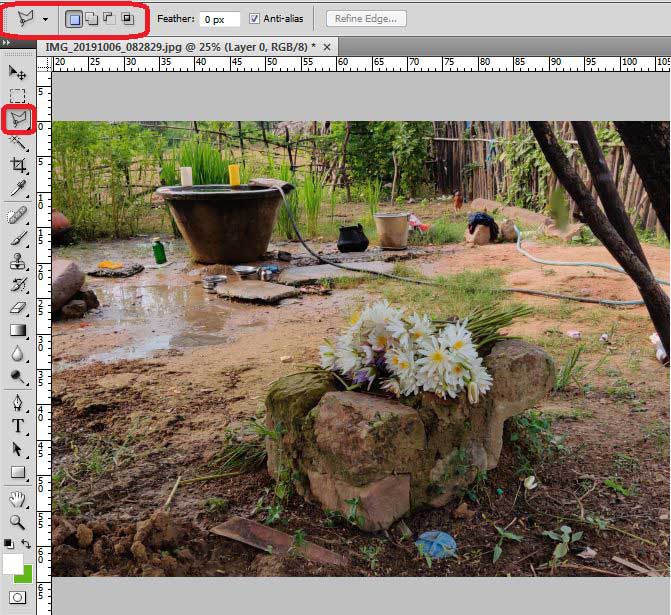
Step 1: The list of attributions that gets enabled along with the selection of the lasso tool is given below as we have already discussed with 4 option we shall see the remaining such as, Feather pixilation can be set to maintain or to cover the cut potions with the light feathers of a similar color.
Rarely used for projects. Anti-alas must always be turned on to maintain a smooth curvy approach to the edges of the letters and objects in the frame.
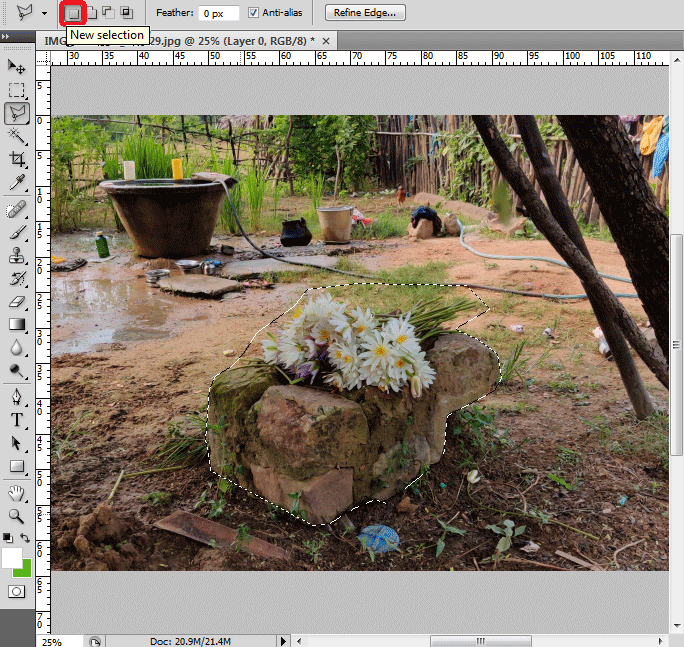
Step 2: Select the tool and start selecting the portion of the image which we want to capture using the mouse cursor from one point to another.
By pressing the backspace key, the previously selected point will be removed. With the ESC key, the complete selection is canceled. By pressing Ctrl+J, the newly selected area will be copied to a separate layer without damaging the original image at the bottom.
Step 3: To add a new option into the selected area, switch the mode and start adding the new additional portion of the image to the selection as shown below. We can even identify that the lasso tool appearing with a + symbol at the corner of the cursor as an indication to the users. Using this option, more can be added to the already selected loop.

Step 4: To remove or reduce the area of selection, we need to go to the 2nd mode as shown. By selecting this, we can identify that the lasso tool is going to have – symbol to the cursor corner and deselect the area from the selected portion to minimize the area and get only selected area for accuracy as shown below.
The selected area always is used further for changes and edits in Photoshop and explore the work capabilities in all aspects.

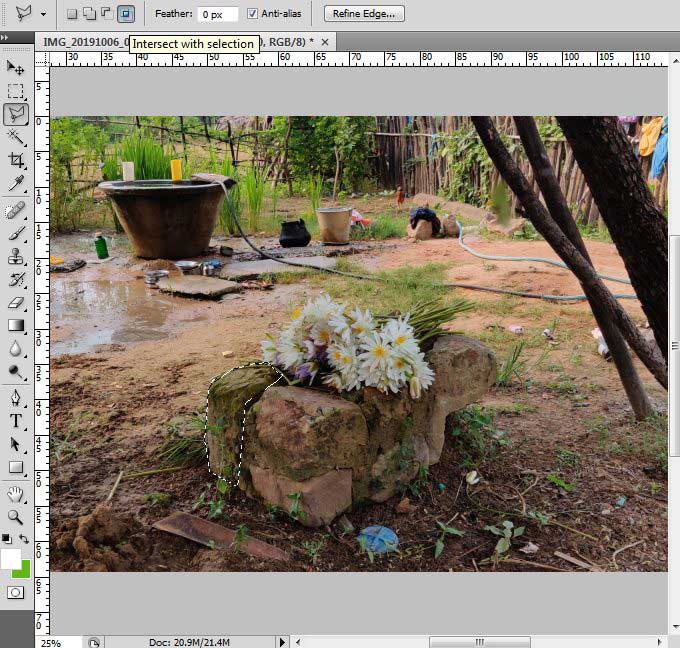
Step 5: The 4th option is the area that remains most common between two selected loops of the tool. That means the intersected portion of the image stays selected for editing by using.
We have to go with enough practice to make the intersection selection and working on it with the rest of the effects. The selected area is further treated for the rest of the editing process to enhance the look towards the technical aspects of image outcomes for clients.
Using this lasso tool, we can select the circular, elliptical, square, rectangular and irregular shape of structures for selection in our image for changes, edits, and graphics. Remove and delete the background or the subjects based on requirements.
Magnetic Lasso tool helps in quick removing of background as it identifies the object and background based on pixel rated color combination and as we start and move on our image, the lasso will be created itself using the color difference from object to background and object or the background can be easily changed or removed. And we can also perform all other Photoshop edits.
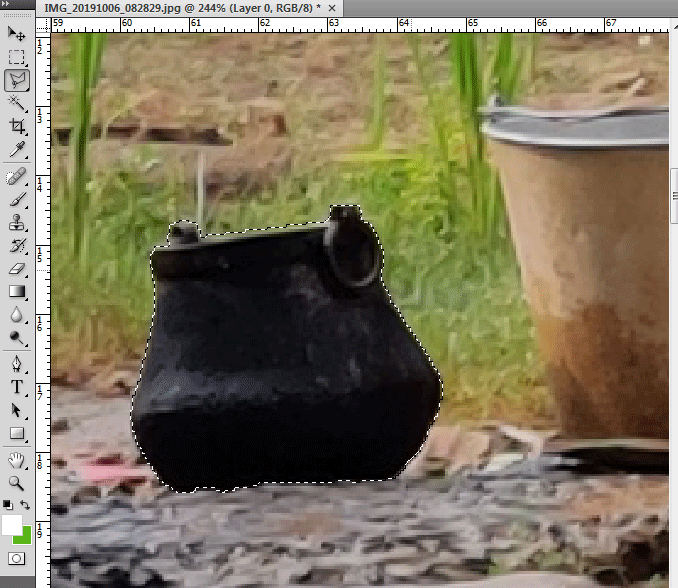
In the below example, we are using the lasso tool and are going to create a new selection of the vassal. After creating the vassal loop, make a new layer.
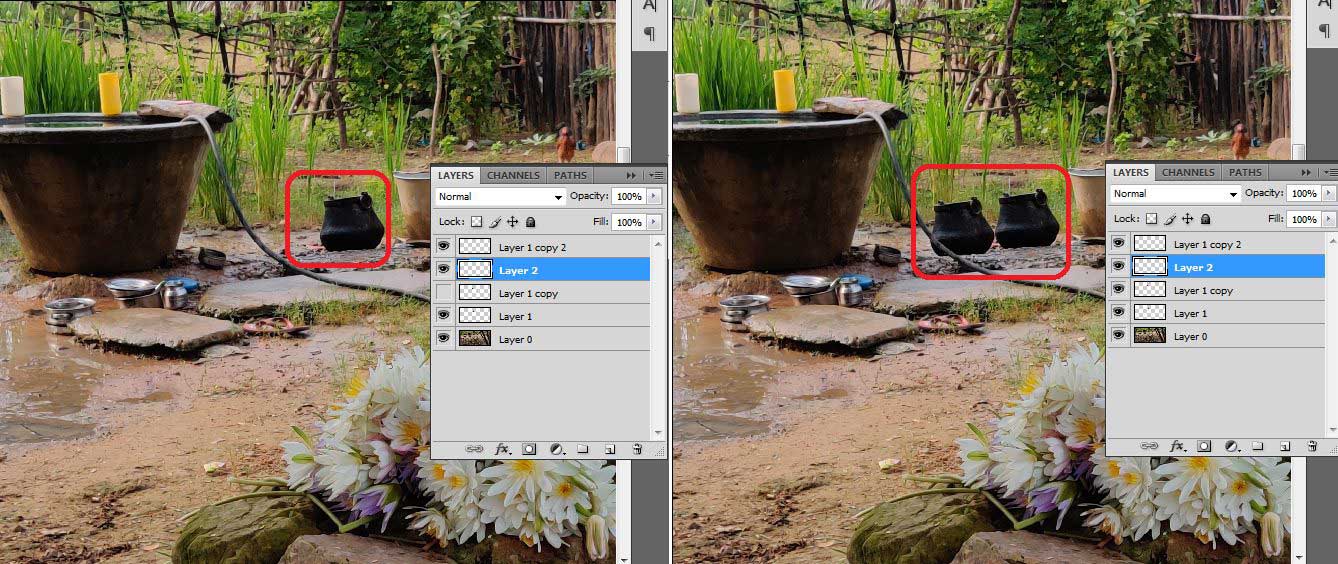
Increasing the existing objects of the image and removing the objects, and replacing them with other objects can be done. Along with this tool, we can also know a few regular common steps and practices of Photoshop, which put together with other attributions such as layers, mask, RGB level, making puzzles gifs and more.
In the below example, the vassal is replicated twice using the lasso tool and used as layers. Similarly, objects can be removed and replaced to enhance the image. The lasso tool is quick and easy to work on such types of edits with interest.
Conclusion
We have seen how to edit uniform and un-uniform shapes of the images as per our requirements with a smother finish and realistic approach to edit. We can even perform Photoshop edits such as masks, color composition, etc. Along with this Lasso selection and editing process, freshers must try all the attribution until they get hands-on experience on each of them. Based on project requirements, the tools and options must be changed and used for time-saving, affectivity of quality, and calculation efficiency while working.
Recommended Articles
This is a guide to Lasso Tool in Photoshop. Here we discuss the Introduction and Steps to use the lasso tool in photoshop along with the top 3 types. You may also look at the following articles to learn more –
