Excel VBA Debug Print
Debug Print is one of the most useful but underrated tools VBA has. Debug Print can be used in place of MsgBox. It helps in analyzing the process and output in the immediate window. Debug Print and MsgBox in VBA works on the same principles.
They both show the values like a message. But there are some major difference and benefits of using Debug Print over MsgBox. Debug Print, shows us the value stored in any variable or in itself in Debug Print like MsgBox. It also helps in debugging the error after executing the complete code. There is no need of clicking on the Ok button after we get the message, by which we can save a small amount of time and extra step to perform.
There is no proper syntax of Debug Print. We can add anything and whatever we want to see as output in the immediate window.
How to Use Debug Print in Excel VBA?
Below are the different examples to use Debug Print in excel by using VBA code.
Excel VBA Debug Print – Example #1
For applying Debug Print in Excel VBA, we need to follow the below steps.
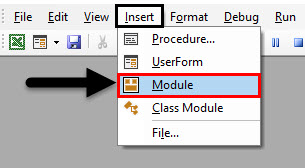
Step 1: Go to the VBA window, under the Insert menu tab select Module as shown below.
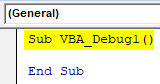
Step 2: In the newly opened Module, write the subcategory VBA Debug Print or you can choose any other name for that.
Code:
Sub VBA_Debug1()

End Sub
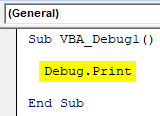
Step 3: Now directly use Debug Print as shown below. As we discussed, Debug Print doesn’t have any syntax. We can choose anything we want to print.
Code:
Sub VBA_Debug1()

  Debug.Print

End Sub
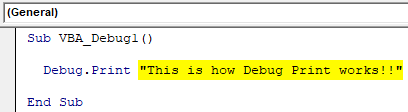
Step 4: Let’s print any random text which we want to see and quote that text in inverted commas to see the output.
Code:
Sub VBA_Debug1()

  Debug.Print "This is how Debug Print works!!"

End Sub
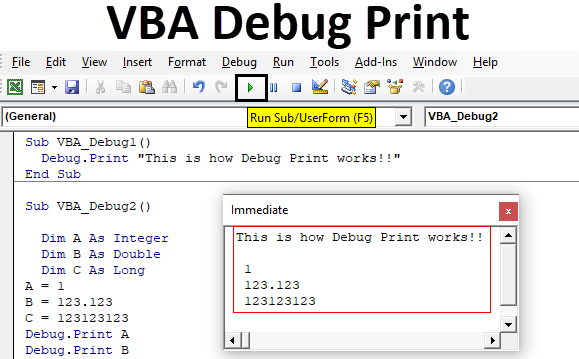
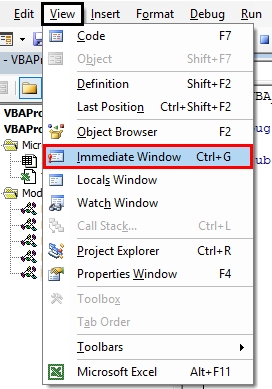
Step 5: As we know, the output of Debug Print will only be seen in Immediate Window. So, we will be opening the Immediate Window from the View menu bar as shown below.
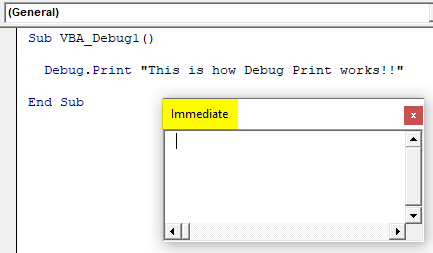
After that, we will be getting a blank Immediate Window as shown below. This is a place where we will be seeing all the output from Debug Print.
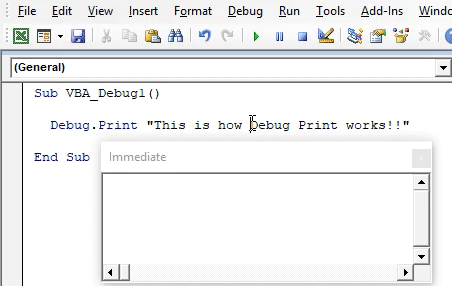
Step 6: Now compile the code and run it by clicking on the Play button located below the menu bar. We will see, the Debug print has omitted the output in Immediate window as shown below.
Excel VBA Debug Print – Example #2
In this example, we will see, how to print any value using Debug print in excel VBA. For this, follow the below steps:
Step 1: In a module, write the subcategory in any name as shown below.
Code:
Sub VBA_Debug2()

End Sub

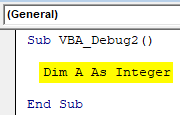
Step 2: We will need a variable as an Integer.
Code:
Sub VBA_Debug2()

  Dim A As Integer

End Sub
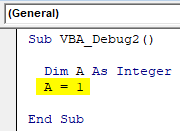
Step 3: Assign any value to that integer.
Code:
Sub VBA_Debug2()

  Dim A As Integer
  A = 1

End Sub
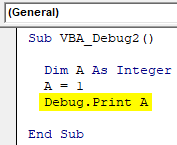
Step 4: Now we will use Debug print and assign the variable which we have just defined directly.
Code:
Sub VBA_Debug2()

  Dim A As Integer
  A = 1
  Debug.Print A

End Sub
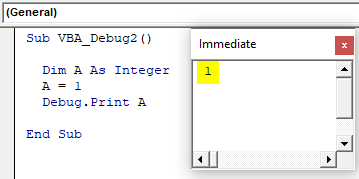
Step 5: Now we will run the code by pressing F5 key. We will see, the value stored in variable A is now printed in the Immediate window.
In a similar way, let’s define different types of variables in the same code and see, what changes happen.
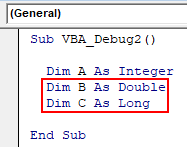
Step 6: Declare the 2 more variables as Double and Long where we will try to store decimal value and large values in 6 digits.
Code:
Sub VBA_Debug2()

  Dim A As Integer
  Dim B As Double
  Dim C As Long

End Sub
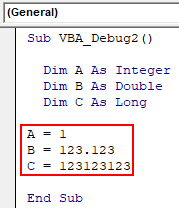
Step 7: Now assign some values to each defined variable as per their character of data types. Assign the whole number to variable A, decimal value to variable B and any 6 digits or larger number to variable C.
Code:
Sub VBA_Debug2()

  Dim A As Integer
  Dim B As Double
  Dim C As Long

A = 1
B = 123.123
C = 123123123

End Sub
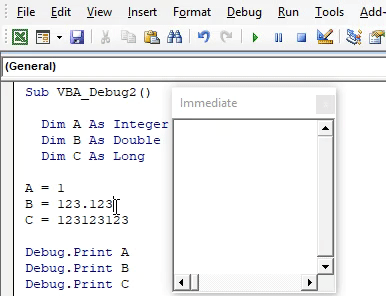
Step 8: Now give individual Debug Prints to each of the variables so that, we will be seeing the separate values but in the same immediate window.
Code:
Sub VBA_Debug2()

  Dim A As Integer
  Dim B As Double
  Dim C As Long

A = 1
B = 123.123
C = 123123123

Debug.Print A
Debug.Print B
Debug.Print C

End Sub

Step 9: Now run the complete code by pressing the F5 key or by clicking on the Play Button. We will see, in one shot all the values are stored in variables A, B, and C which can be seen in the immediate window.
Excel VBA Debug Print – Example #3
In this example, we will see how any mathematical expression would run if we use an immediate window to see the output. For this, follow the below steps to use Debug Print in Excel VBA.
Step 1: Write the subcategory of VBA Debug Print as shown below.
Code:
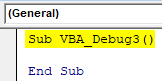
Sub VBA_Debug3()

End Sub
Step 2: Here, we will need to try to perform an addition of 2 variables. For this define 2 variables in which we will be submitting the input numbers and 3rd variable where we will store the output coming from addition of the first two variables. Let’s consider those variables as A, B, and C respectively.
Code:
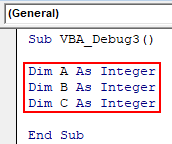
Sub VBA_Debug3()

Dim A As Integer
Dim B As Integer
Dim C As Integer

End Sub
Step 3: Now allot any numerical values to variable A and B. Here, we have considered those as 10 and 20 respectively.
Code:
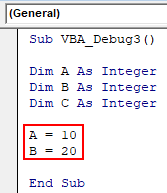
Sub VBA_Debug3()

Dim A As Integer
Dim B As Integer
Dim C As Integer

A = 10
B = 20

End Sub
Step 4: For the purpose of adding, we will perform a mathematical function where we will add first and second variable A and B and get the output in variable C.
Code:
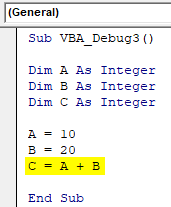
Sub VBA_Debug3()

Dim A As Integer
Dim B As Integer
Dim C As Integer

A = 10
B = 20
C = A + B

End Sub
Step 5: Now we will use Debug print to print the output of addition of variable A and B under variable C. So, only variable C will be assigned in Debug Print to see the output of addition.
Code:
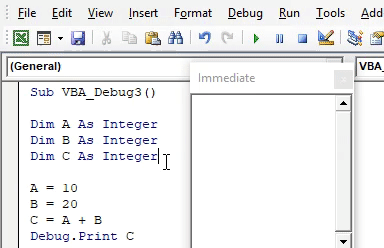
Sub VBA_Debug3()

Dim A As Integer
Dim B As Integer
Dim C As Integer

A = 10
B = 20
C = A + B
Debug.Print C

End Sub

Step 6: Now run the code by pressing F5 key or by clicking on Play Button. We will get the output of addition of values stored in variable A and B under C in the immediate window.
By this, we can perform any type of mathematical process and get the output in an immediate window instead of using MsgBox which is also easy but not as good as Debug Print.
Pros of Excel VBA Debug Print
- It is easy to apply.
- No need to change the window to see the output. That we easily can see in the immediate window.
- We can even delete the output data from an immediate window once the purpose is incomplete.
- Compiling the code is optional.
- If we get any error then we can easily rectify that just from seeing the output in the immediate window.
Things to Remember
- If there is an error in the code, then the immediate window will give us the output as 0.
- If the text is long, then we can adjust the size of the immediate window as per our need.
- We can also adjust the location of an immediate window.
Recommended Articles
This is a guide to VBA Debug Print. Here we discuss how to use Debug Print in Excel using VBA code along with practical examples and downloadable excel template. You can also go through our other suggested articles –
