Introduction to Track Matte in After Effects
Track Matte in After Effects is a layer that can control the opacity of the layer immediately below it. The track matte layer is invisible. A track matte creates holes or spaces through which the underlying layer is seen. But isn’t this what the masking tool does? Yes and No. Read on to understand.
Differences between a Mask and a Track Matte
- The key difference between a mask and a track matte is that a mask is applied directly onto a layer containing a video or an image, and it transforms when the layer transforms. This means that when the layer is moved or rotated, or scaled, the mask undergoes these changes too.
- In essence, a track matte is more like a stationary mask. A track matte is applied to the composition rather than to a layer. Things move in and out of a track matte while the track matte is itself fixed in place.
- Of course, a mask can be made stationary by using elaborate methods to transform the mask so that the changes done on a layer do not affect it. But it is very cumbersome. A track matte avoids those steps.
- But a track matte can be transformed too if one chooses to deliberately do so.
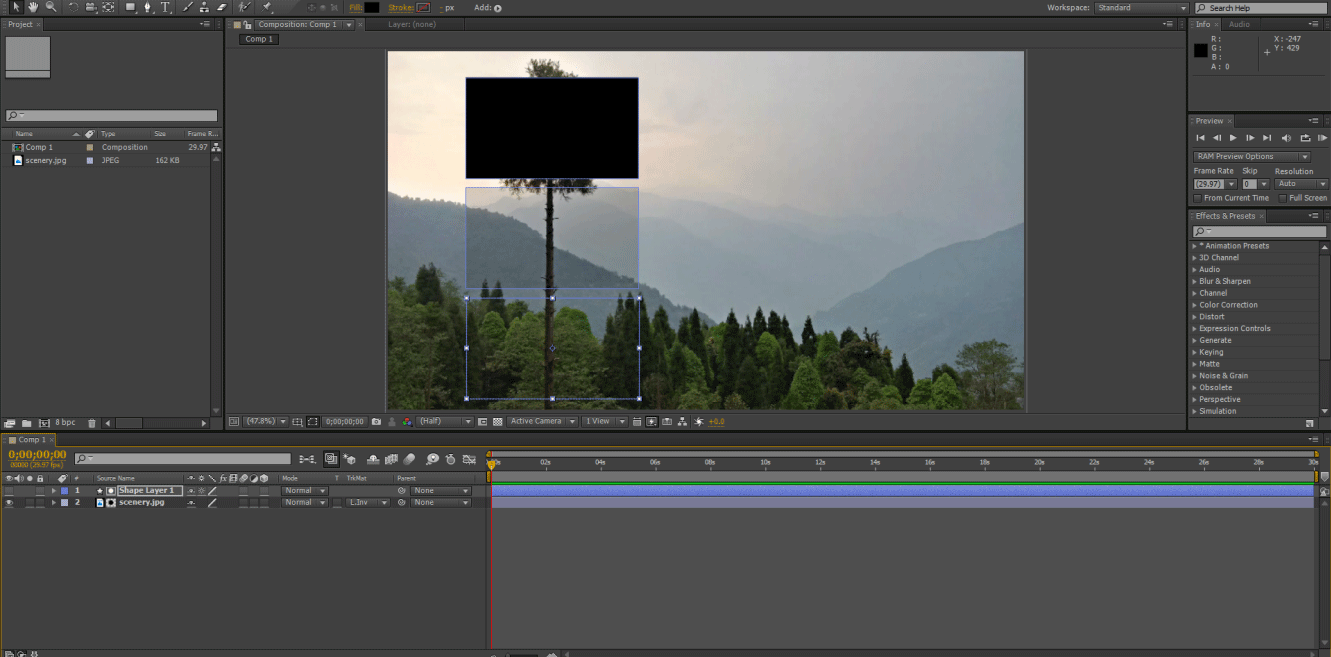
Where is the Track Matte Located?
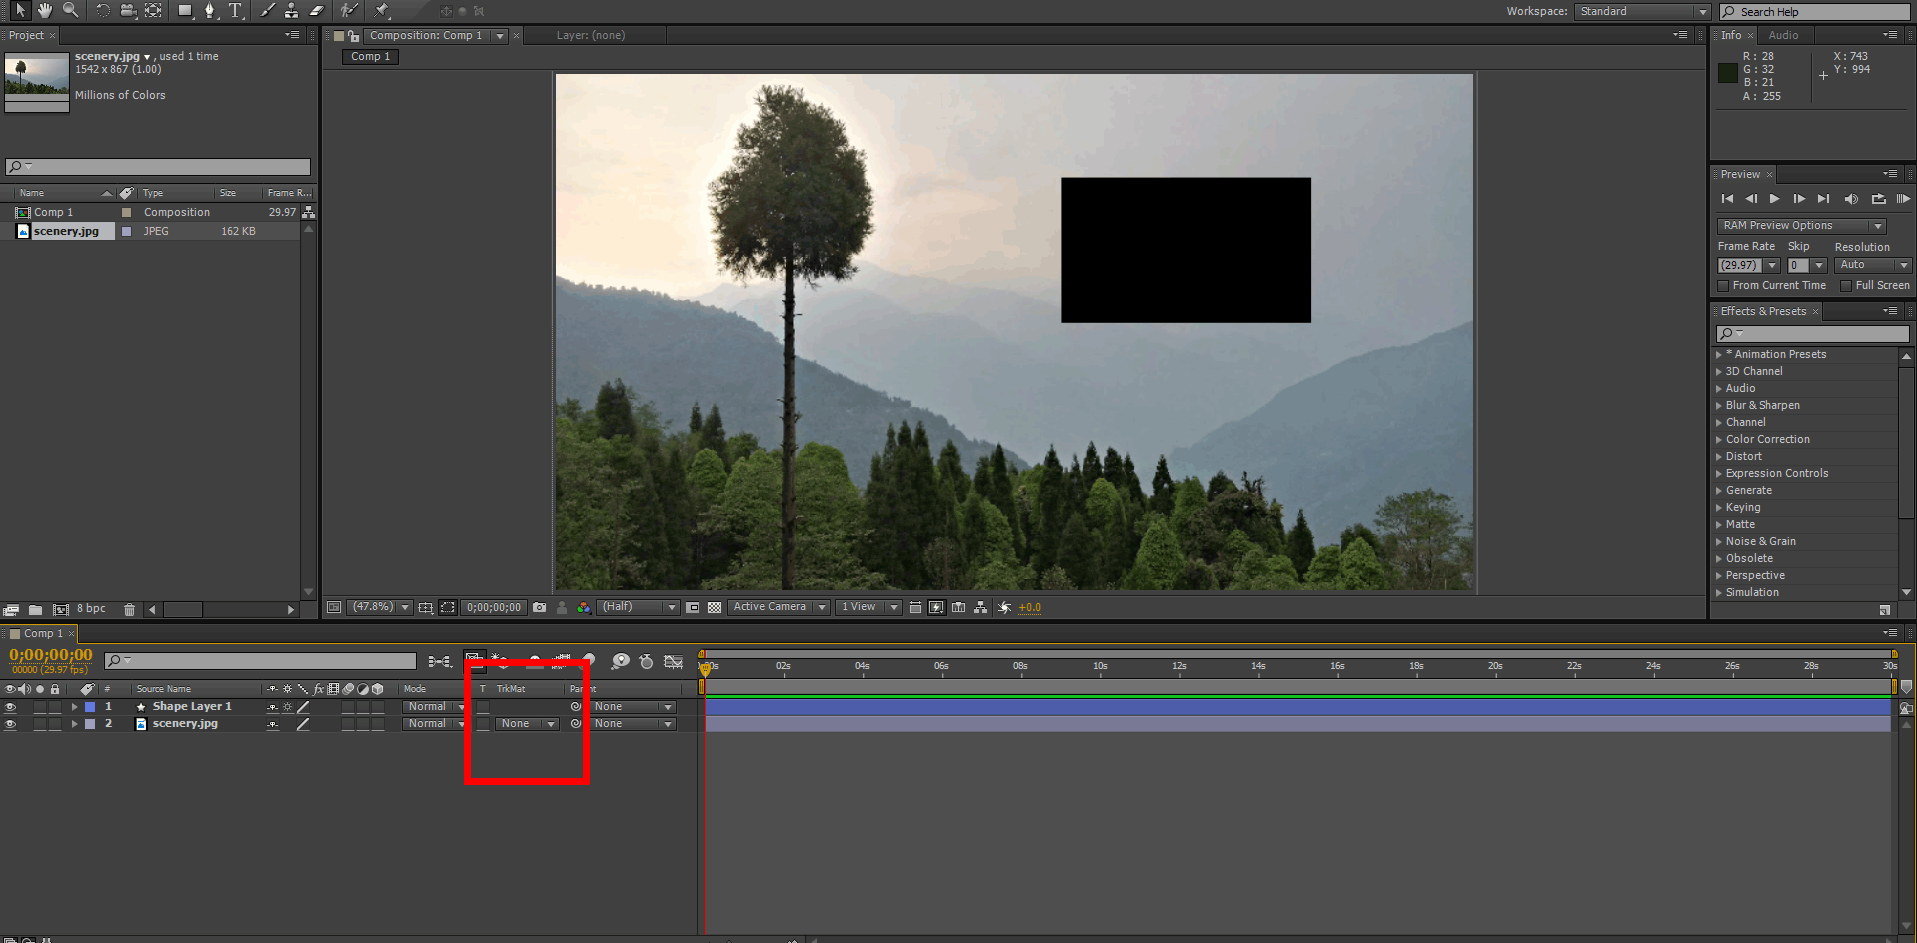
- Track Matte is located in the Timeline Window, as seen in the figure.
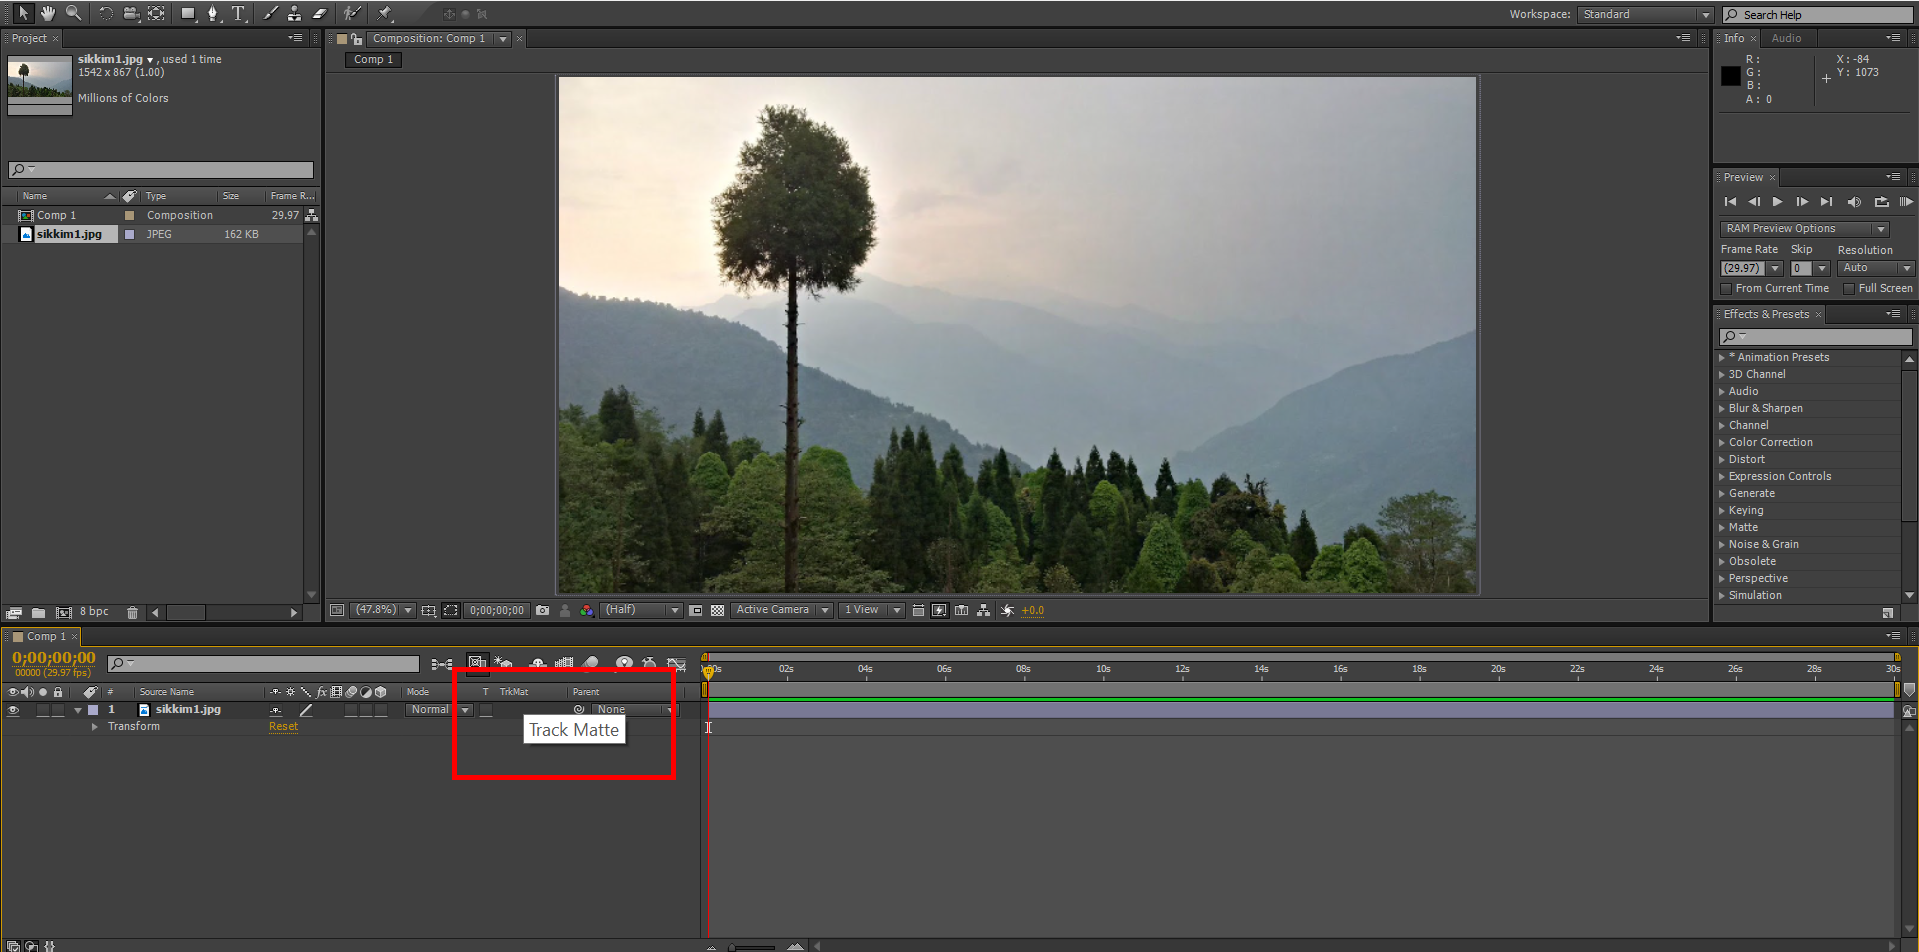
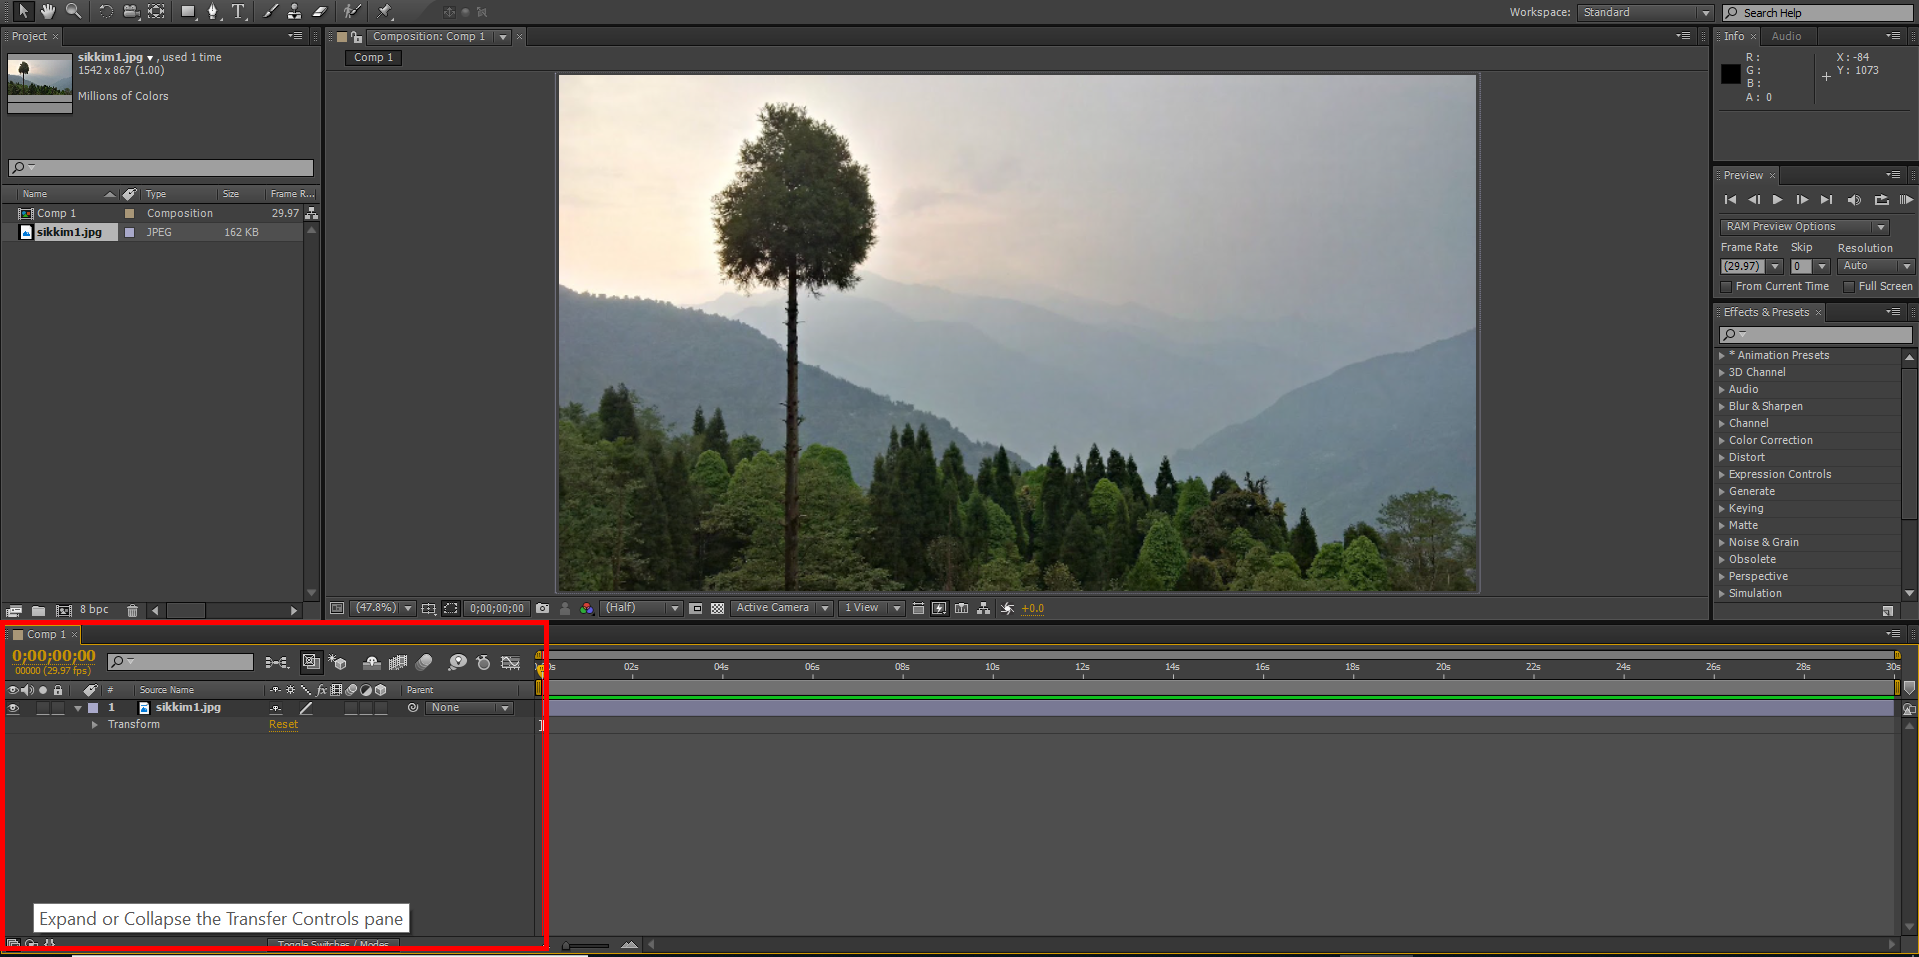
- If it is not available there, you may have to toggle the Transfer Controls Pane button at the bottom left of the timeline, as shown in the figure.
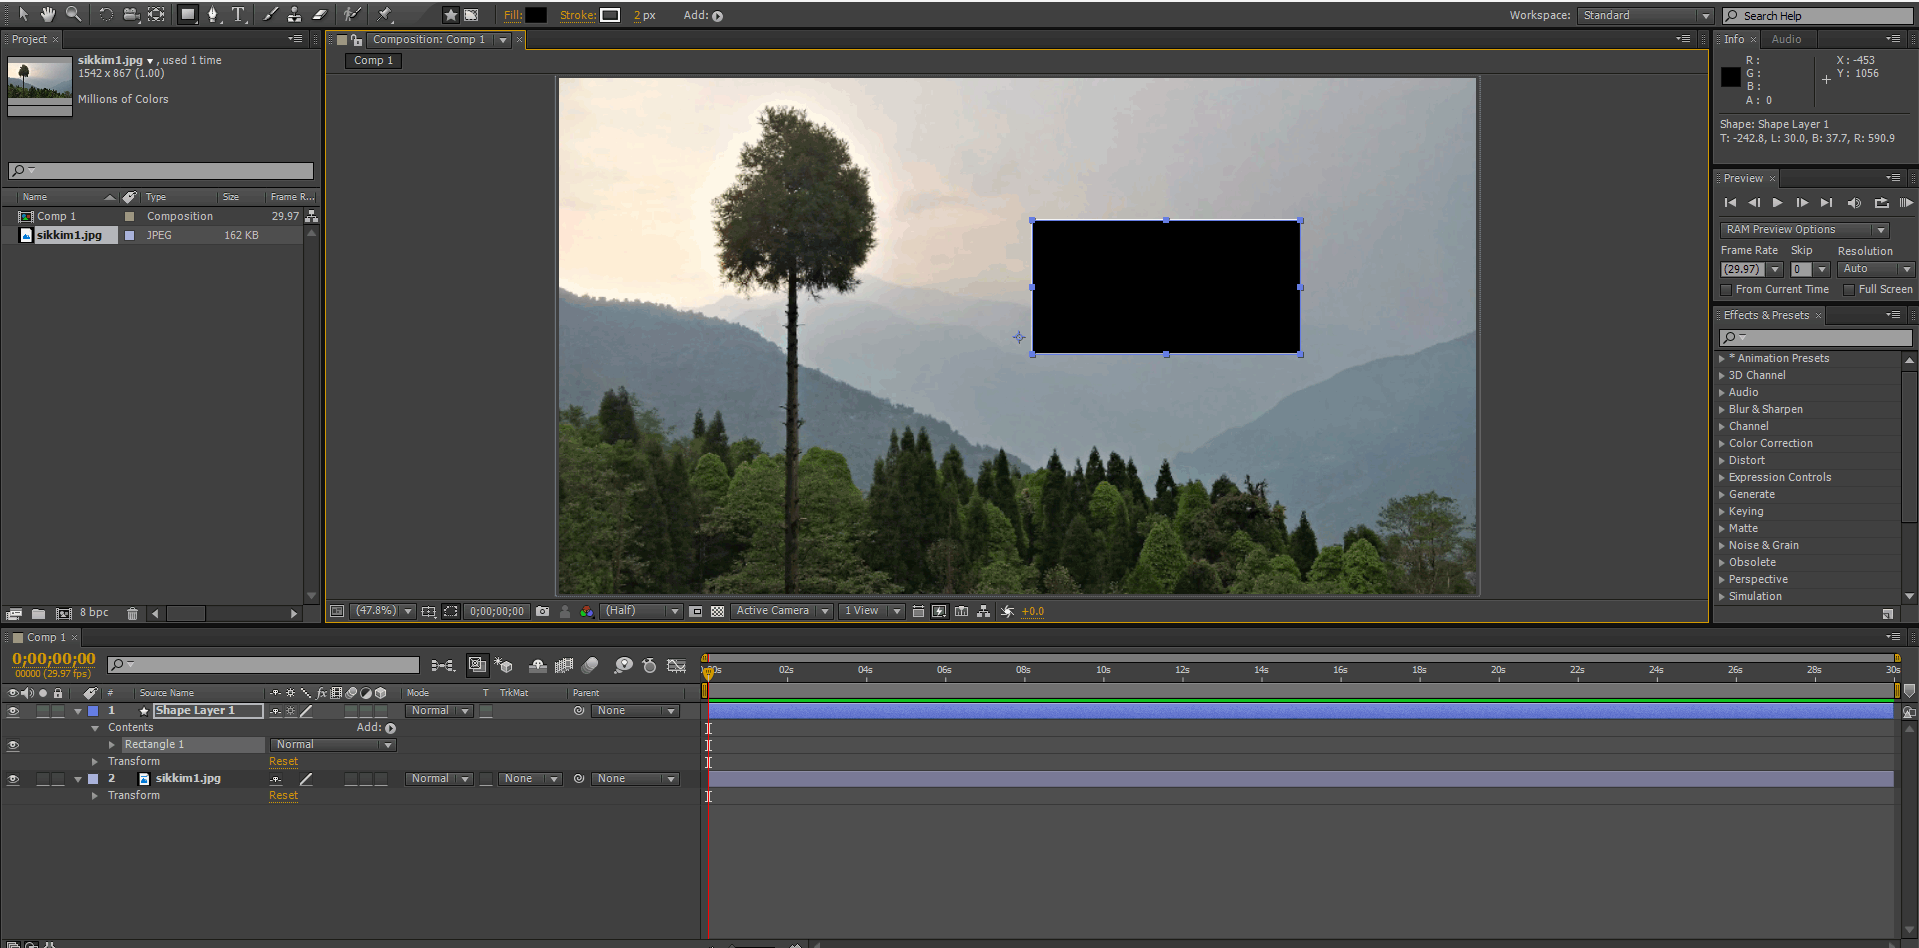
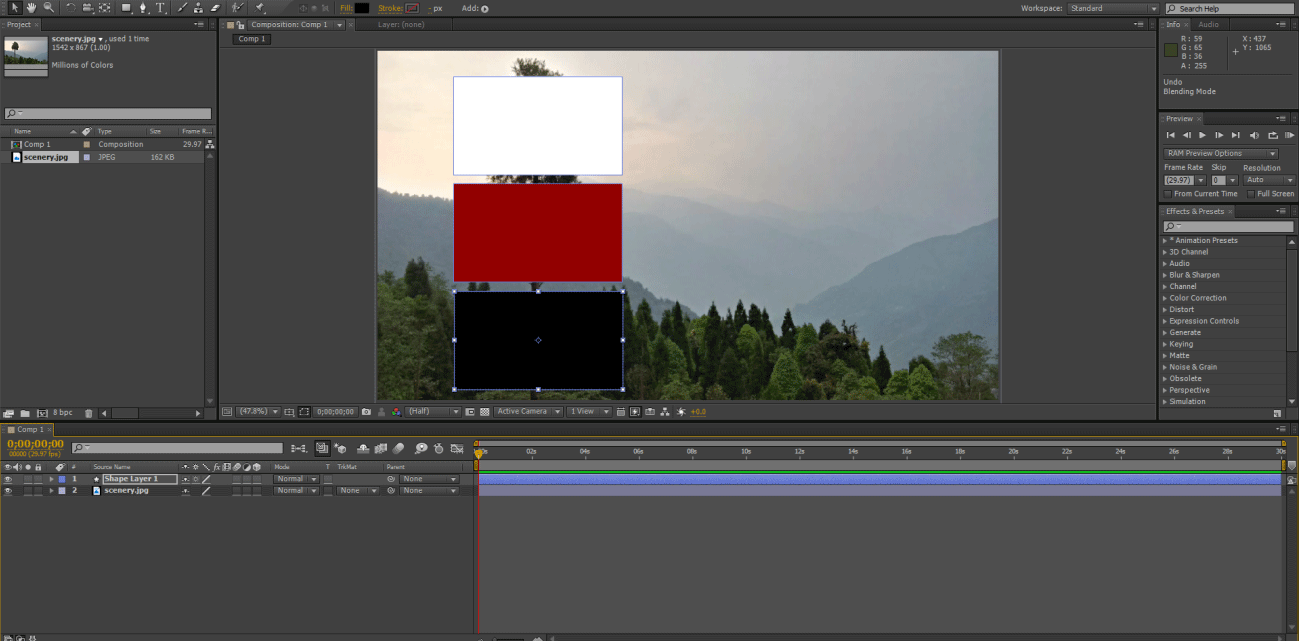
- A track matte is available only to a bottom layer, i.e. it is available only if there is a layer above this particular layer. Let me add 2 layers to my composition and explain what I meant.
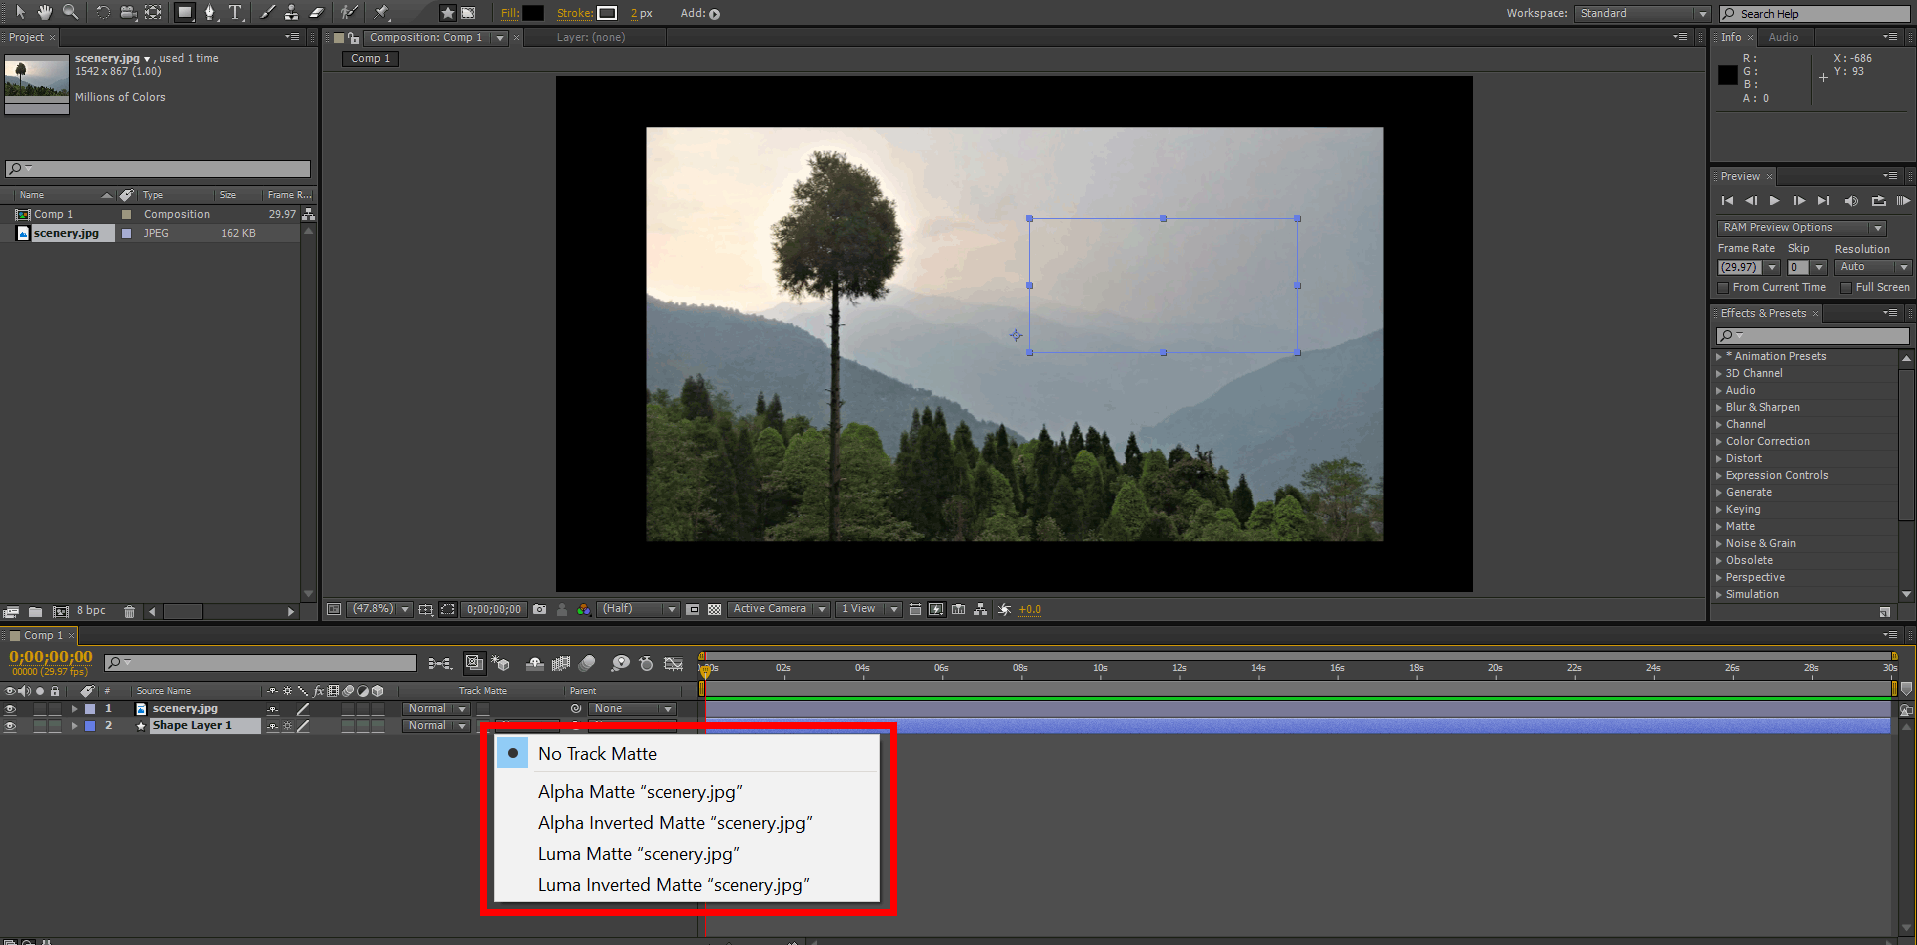
- Here the Track Matte (TrkMat) menu is revealed now.
- When you click on the little arrow at the right of “None”, a drop-down menu with four options is revealed. There are two options with Alpha and two with Luma.
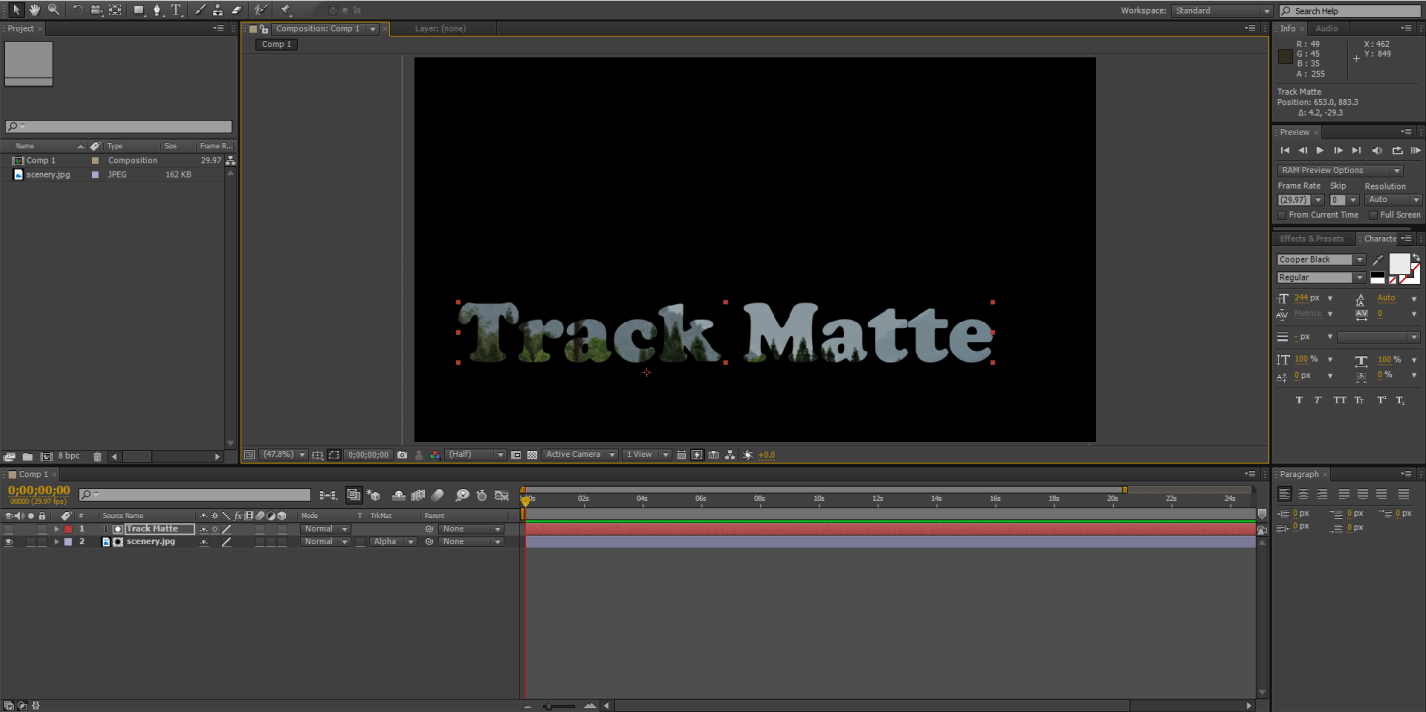
Uses of Alpha Matte
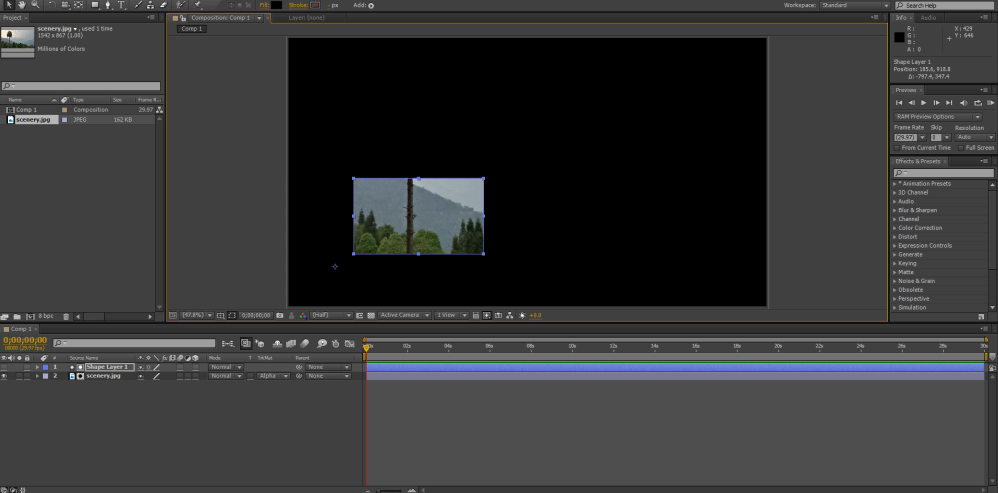
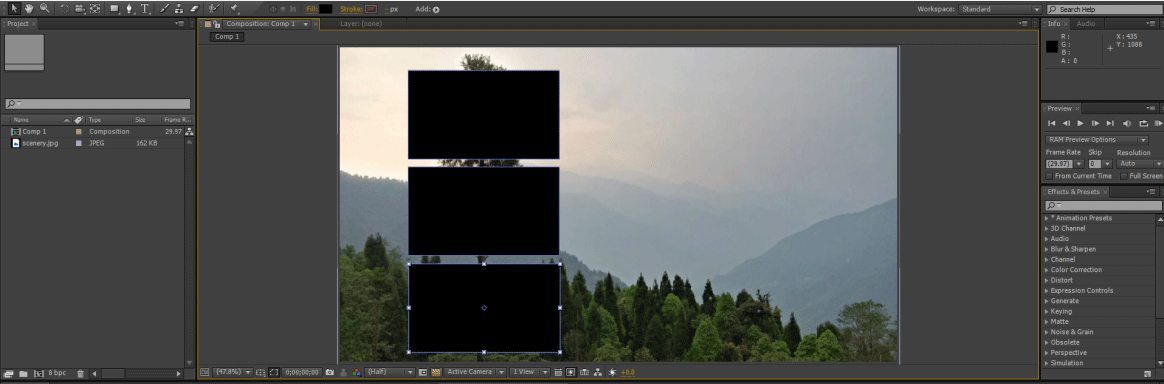
- Alpha indicates the presence of pixels or opacity, while the Luma (short for luminosity) indicates the brightness information. We know that the shape layer contains a black rectangle. If you click on the Alpha Matte for the scenery layer, notice what happens.
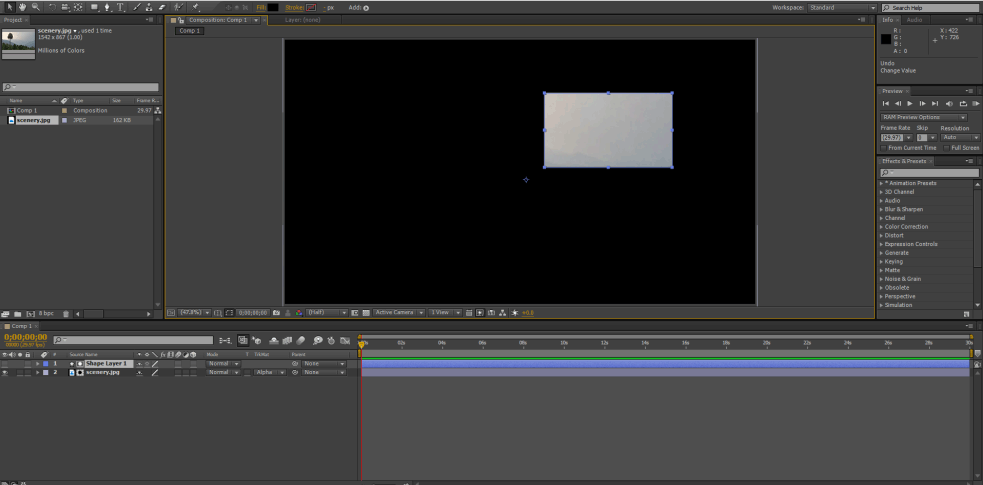
- Only the shape layer-portion of the scenery is revealed. You can move around the shape layer to reveal a different portion of the layer beneath it.
- The output does not change even when you change the color of the rectangle to white or red or anything else.
- You can see the image below.

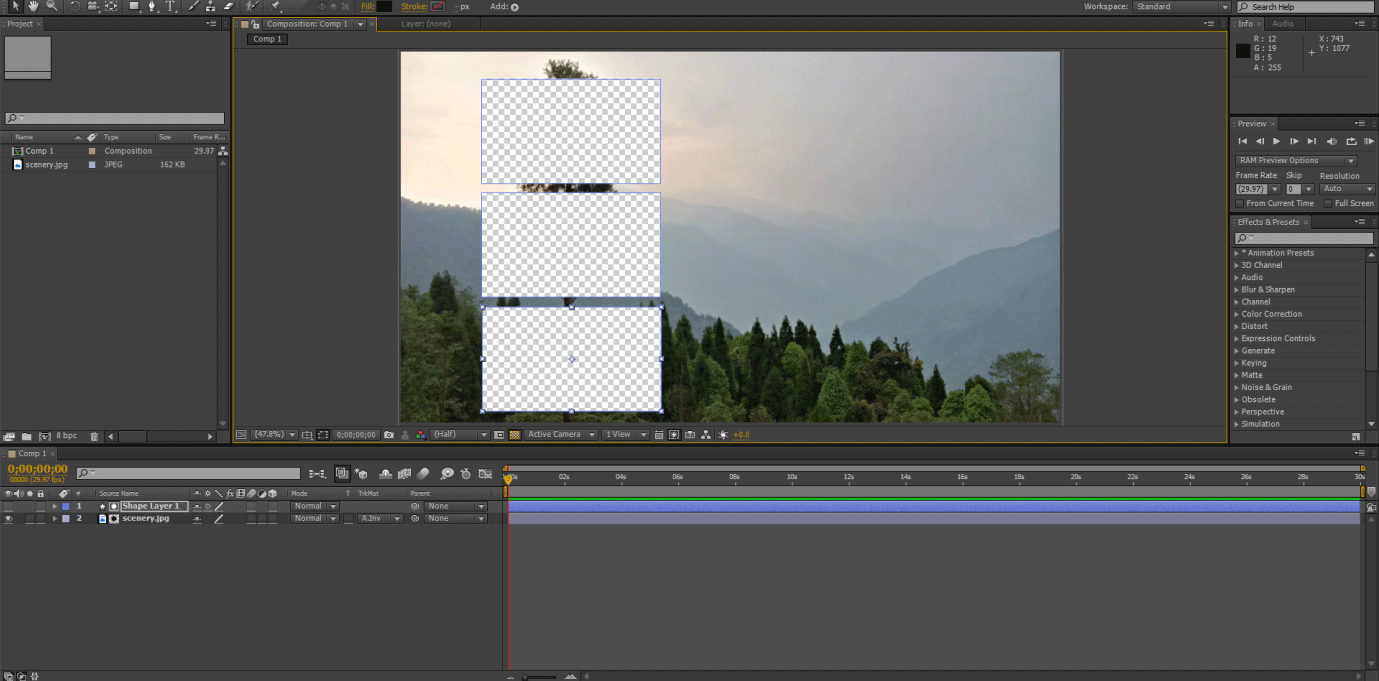
Alpha Inverted Matte
Select Alpha Inverted matte from the common panel.

If you choose to go with the Alpha Inverted matte instead of Alpha, the scenery is displayed in areas outside of the shape layer, as shown below.
Click on the Toggle Transparency Grid button.

The transparent background makes it clear that the black holes you were seeing before took the background color of the composition. This can be changed if necessary by going to the Composition Settings menu option (Composition Menu -> Composition Settings) (Shortcut is Ctrl+K).
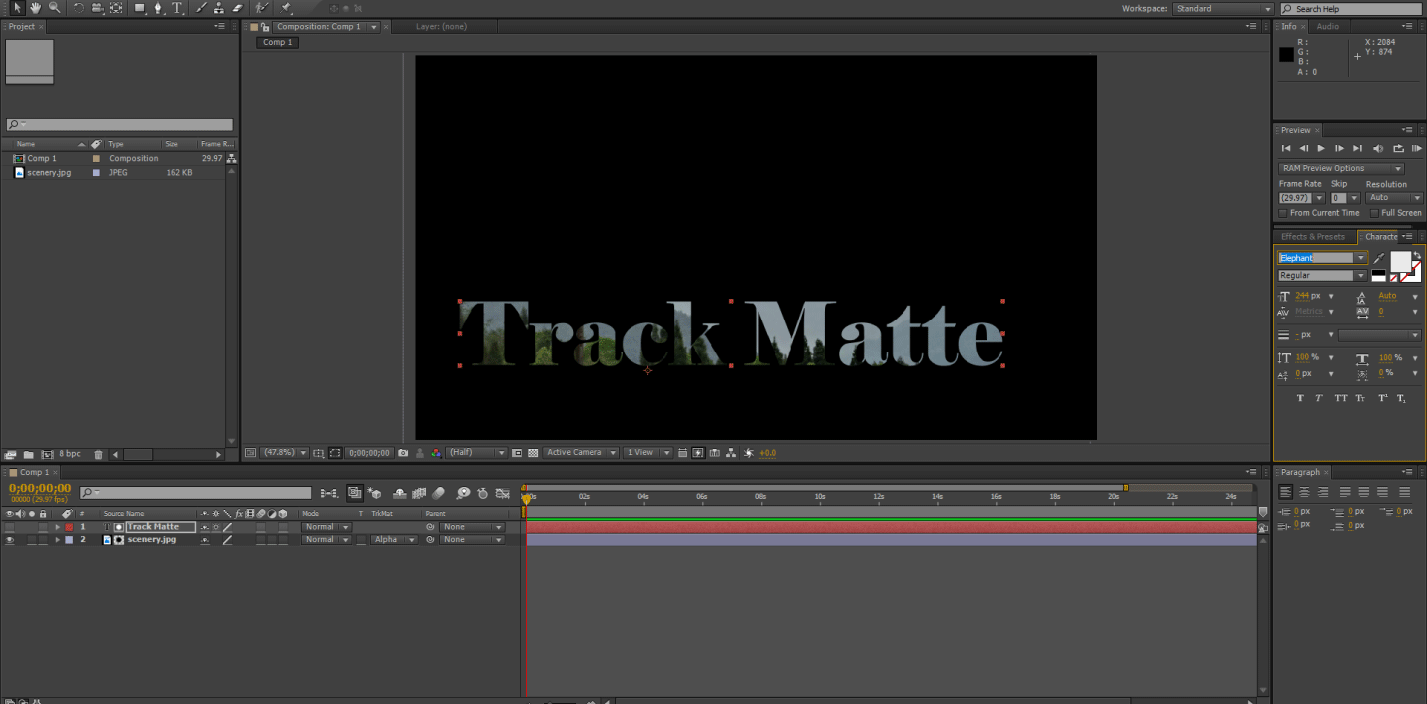
Luma Matte
- Now let us apply the Luma Matte on the scenery and see the output. The luminosity information from the shape layer has been used to display the scenery layer. As you can see, the opacity changes with the amount of light present in the shape layer.
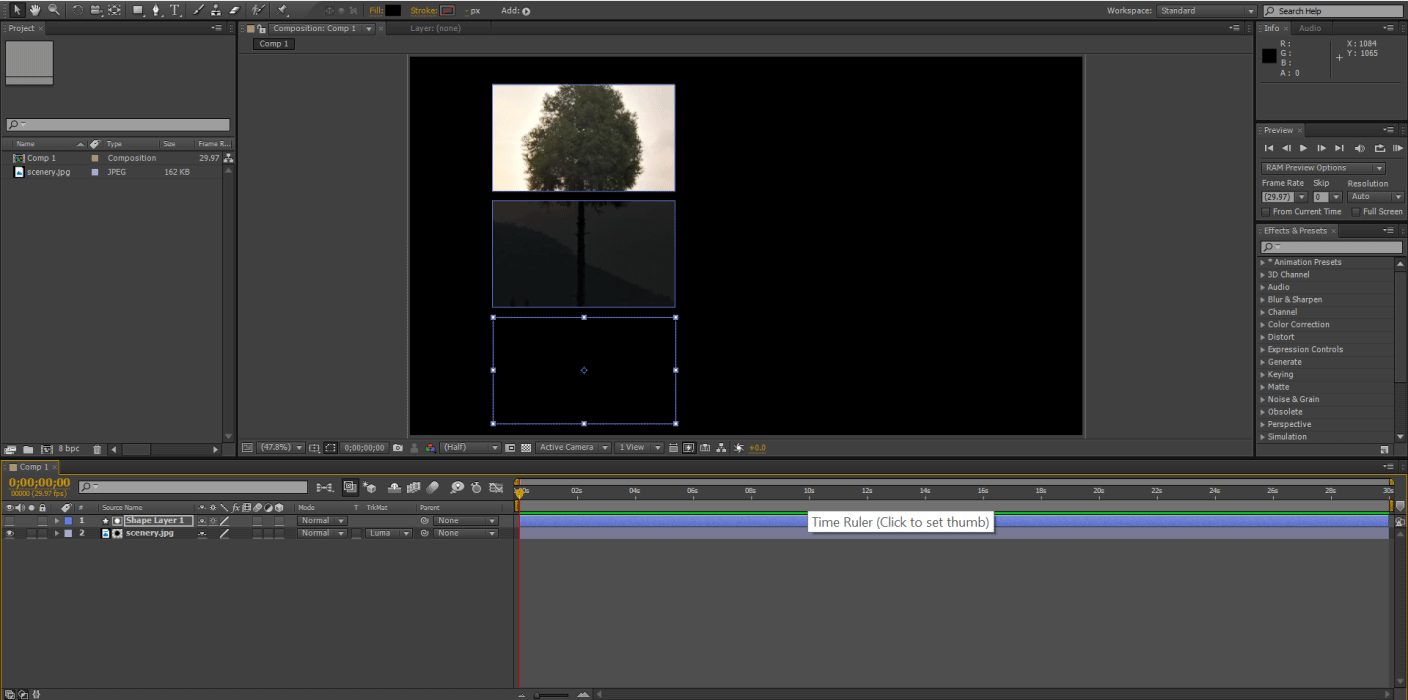
Hence white appears with 100% opacity, black with 0% opacity and red with opacity somewhere in between.
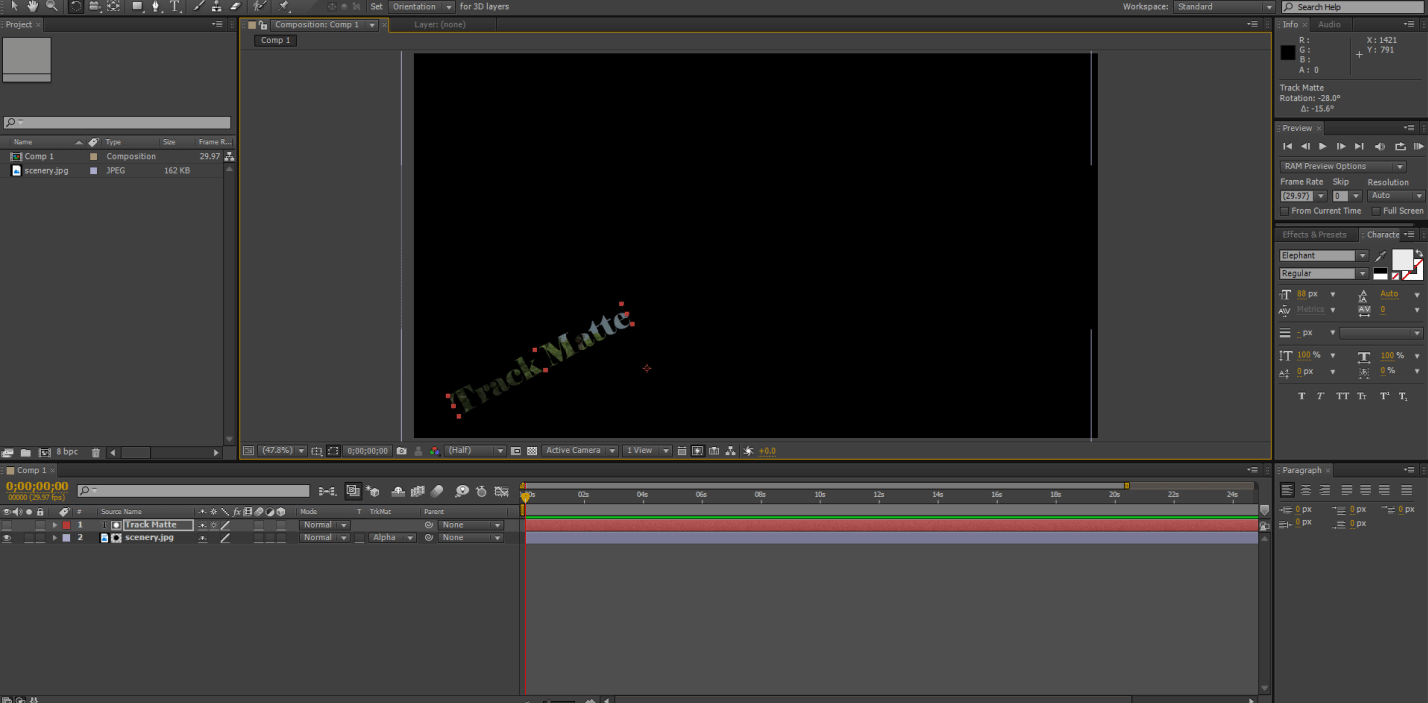
Luma Inverse Matte
- The Luma Inverse Matte gives the exact opposite result, as seen below.
Uses of Track Matte
- Let us look at some ways in which Track Matte can be used creatively. Suppose you have a text in which you want an image, a motion graphic or a video to play.
A track matte will work excellently for your image.
You can change the font of the image.

You can also change the size or its position to suit your needs.
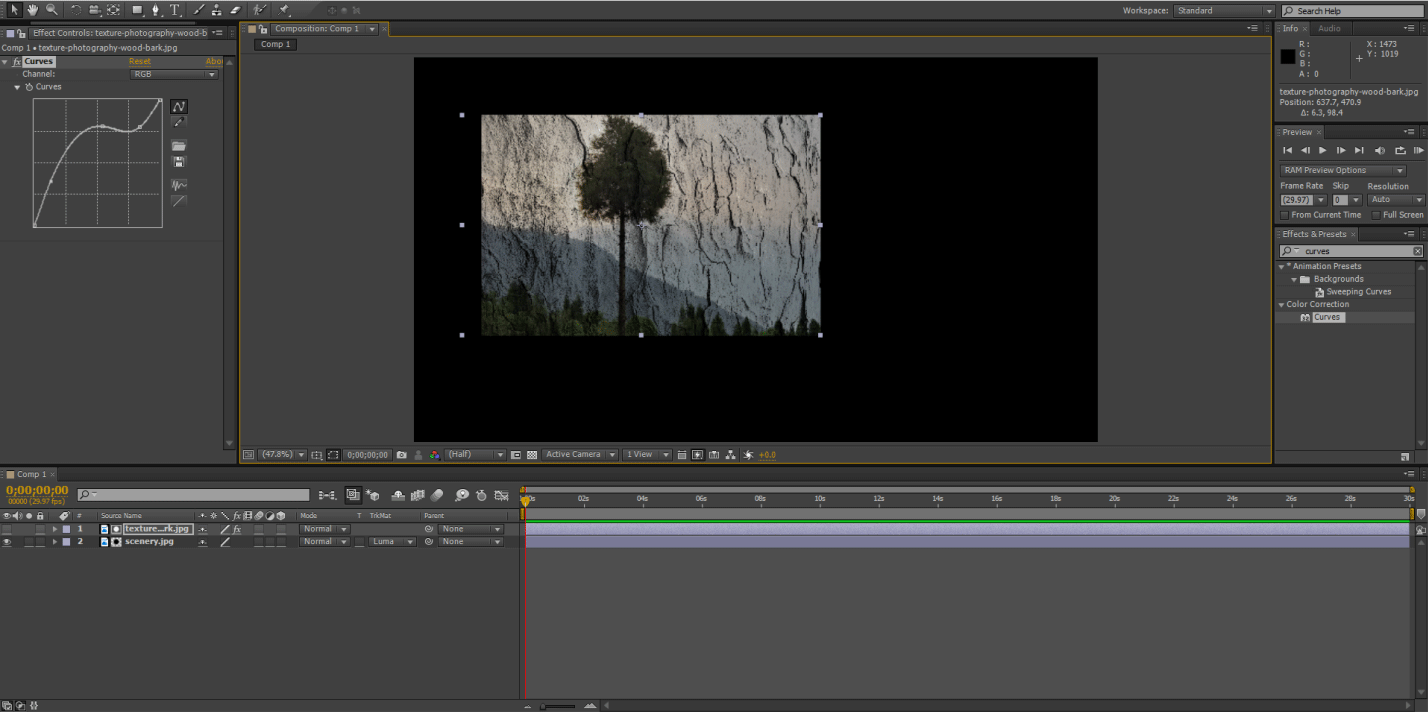
While using Luma Mattes, you can play around with contrasts to reveal or hide portions of a layer. This works especially well while using textures.
In conclusion, track matte is a useful feature in After Effects which will help designers to make interesting graphics.
Recommended Articles
This is a guide to Track Matte in After Effects. Here we discuss the differences between Mask and Track Matte along with its various features and the uses of Matte in After Effects. You can also through our other related articles to learn more –
