EDUCBA

EDUCBA

MENUMENU
  • Free Tutorials
  • Free Courses
  • Certification Courses
  • 280+ Courses All in One Bundle
  • Login

Snowfall in After Effects

Home » Design » Design Tutorials » After Effects Tutorial » Snowfall in After Effects

Snowfall in After Effects

Introduction to Snowfall in After Effects

Now a day’s people have started to create natural things like Rain, snow, etc. In graphics, graphics software development is a good advantage for the production houses because some of the impossible things will be created through the graphics, and some of the risky things will be done in graphics.

After-effects is one of the best applications for visual graphics; most of the production houses use this application to create graphics. Creating snow in after effects are easy; it is just the same as creating rain. With the help of particles, we can create snowfall in after effects, and also, we have default snow effect in after effects.

Start Your Free Design Course

3D animation, modelling, simulation, game development & others

Let’s try two methods to create snow.

Methods to Create Snowfall Effect

Below are the methods and the essential steps to create a snowfall effect in Adobe software.

Method #1 – Snow with Particles

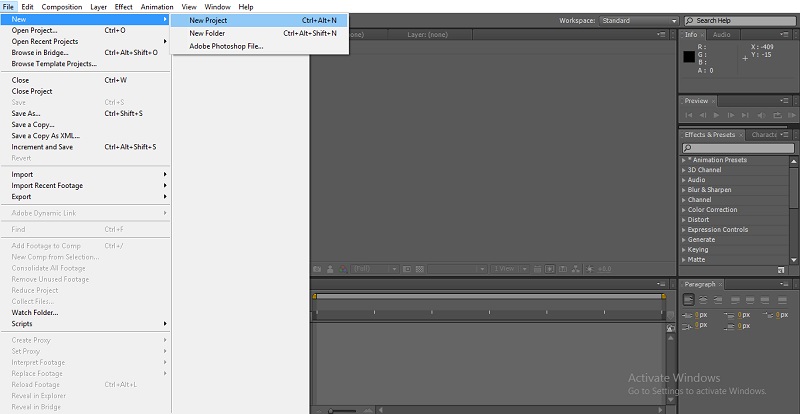
Step 1: We will create snow with the particles; open a new project.

new project

Step 2: Import a file.

Import a file

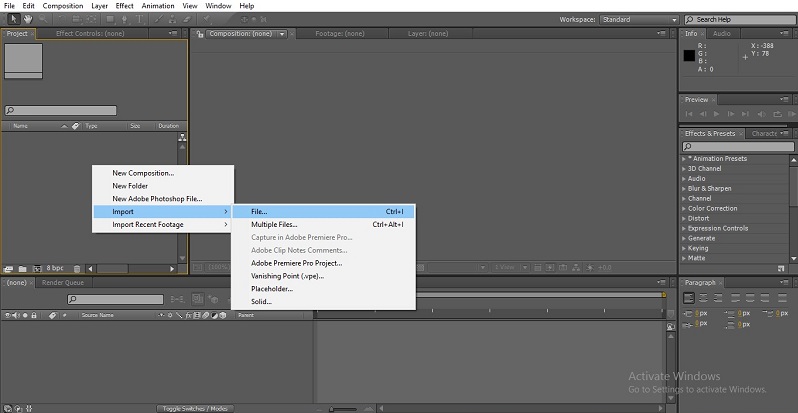
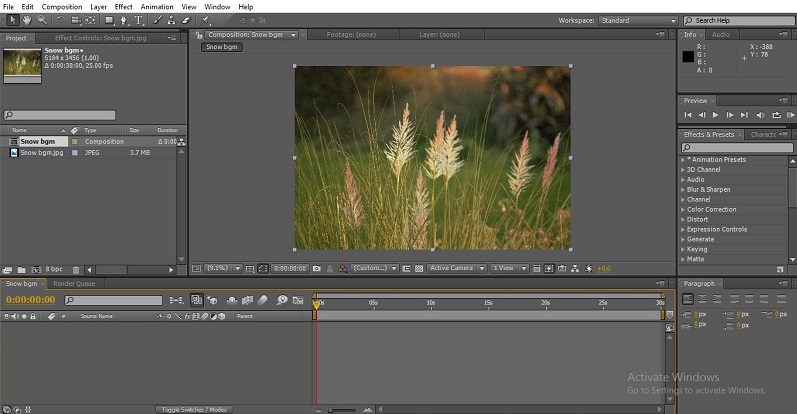
We can import an image or a video according to our requirements. Here I am importing an image file.

Snowfall in After Effects 1-3

Step 3: Import a solid layer.

Import a solid layer

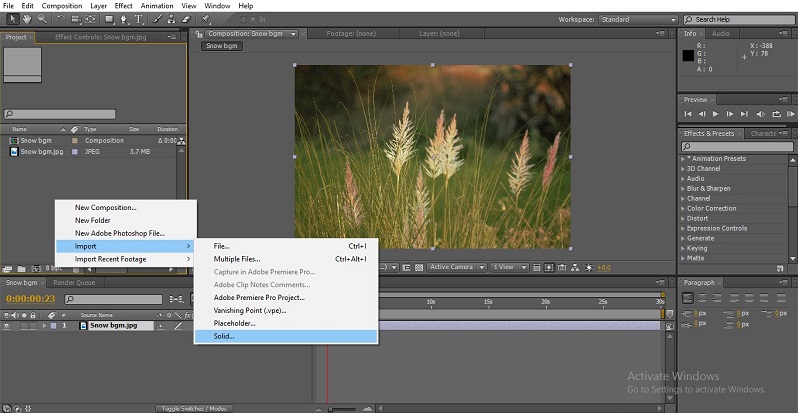
Make changes to the solid settings as shown in the window below, and click on the OK button.

Popular Course in this category
Sale
After Effects Training (1 Courses, 3+ Projects)1 Online Courses | 3 Hands-on Projects | 20+ Hours | Verifiable Certificate of Completion | Lifetime Access
4.5 (4,320 ratings)
Course Price

View Course

Related Courses
Adobe Premiere Pro Tutorial (3 Courses, 7+ Projects)All in One Design Bundle (280+ Courses, 100+ projects)

solid settings

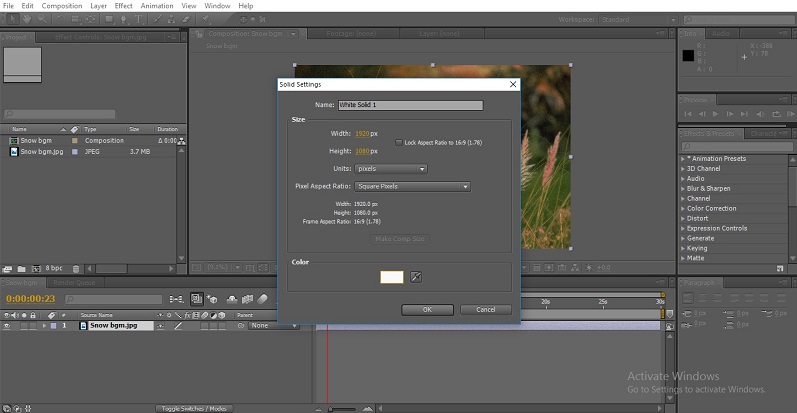
Select a white fill color.

Snowfall in After Effects 1-6

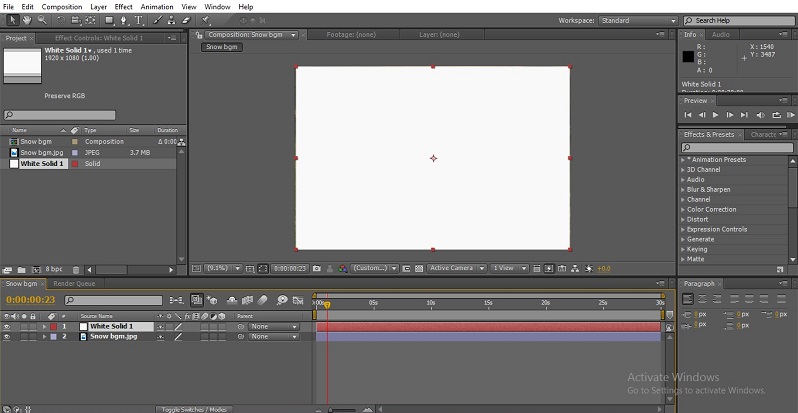
Step 4: We need to apply some particle effect to the layer, which means that we are going to change the solid layer to snow because we need to apply the CC particle world to the Solid layer. Go to effects and simulation, then select CC Particle world.

CC particle world

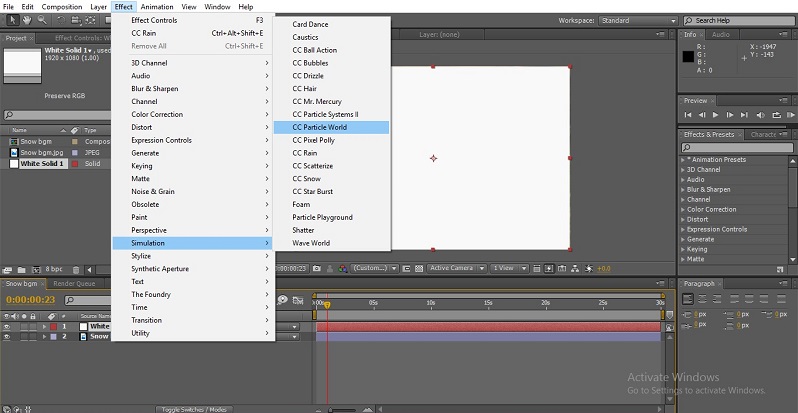
We also have a different option to get the effect. Go to the effects and presets window and search for the effect.

Snowfall in After Effects 1-8

Step 5: Once we apply the effect, the layer changes completely to the particles.

Snowfall in After Effects 1-8

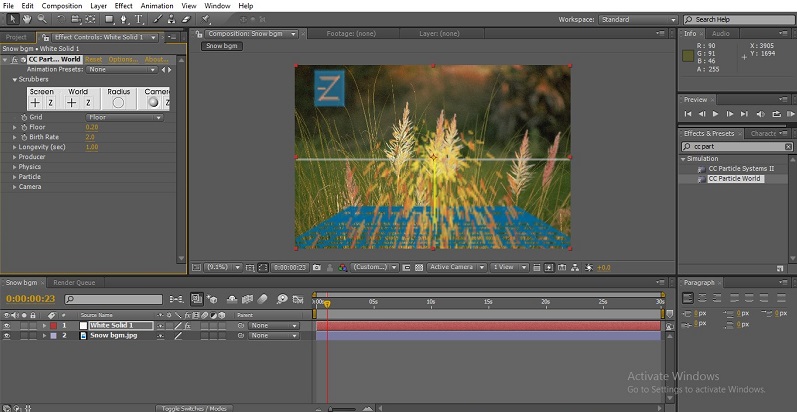
We can’t see anything on the screen; if we want to see the effect, just move the cursor then we can see the particles.

Snowfall in After Effects 1-9

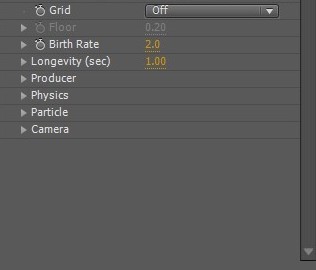
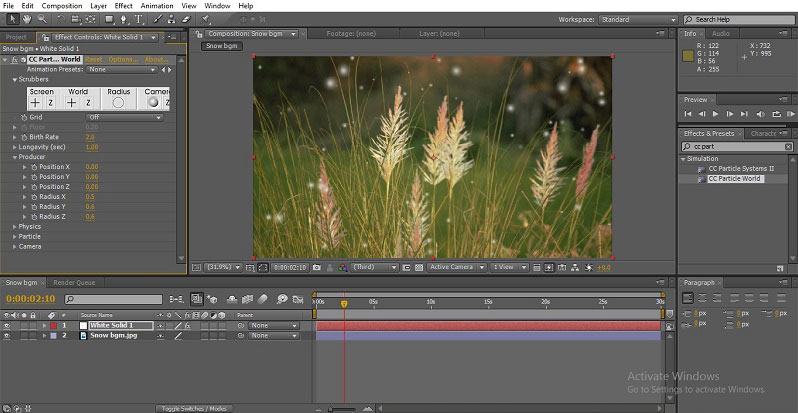
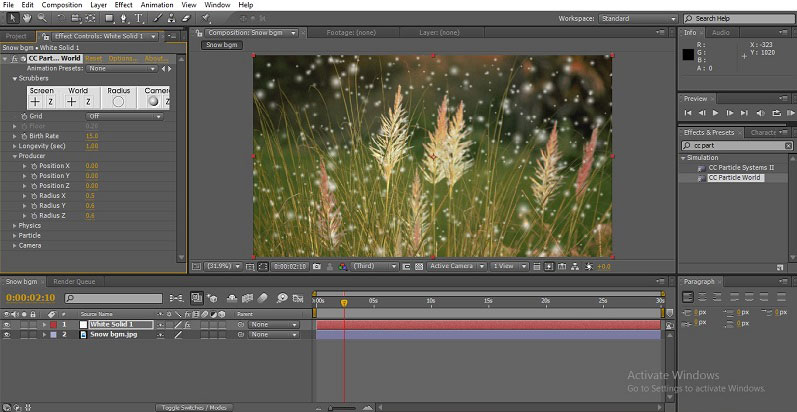
Step 6: Now, we are going to change the particles into the snow, go to the configure window and uncheck the grid.

Snowfall in After Effects 1-10

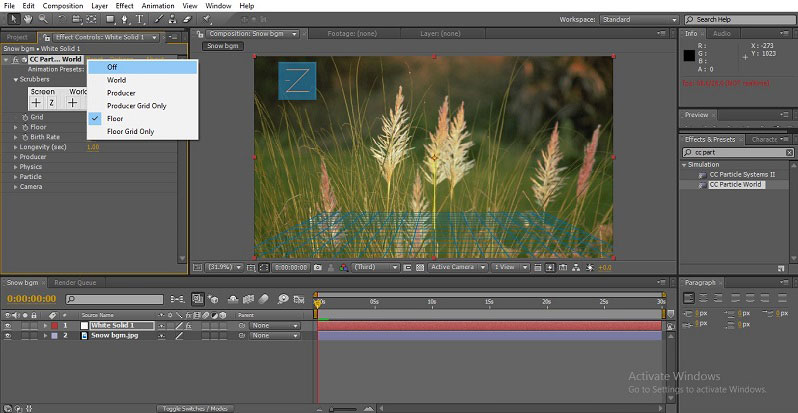
Once the grid lines are unchecked and the axis is disabled in the visual window, the output will also be shown.

Snowfall in After Effects 1-11

Step 7: In this configure window, we will mostly use producer, physics, and particles. If we expand this option well, we will have the perfect snow effect.

Snowfall in After Effects 1-12

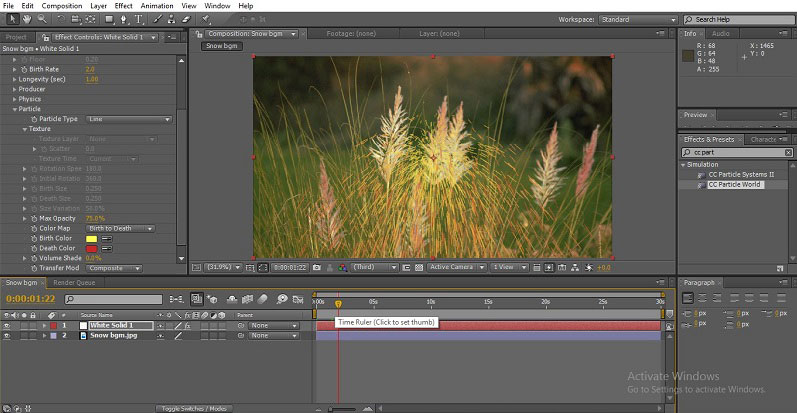
Step 8: Let’s start with particles; as we see the particle type in a line, that’s why it looks like a spark, so that we need to make the particles looks like snowfall.

Snowfall in After Effects 1-13

Step 9: Now we need to change the Particles type; how to change the type? How does snow look like? A small drop like a sphere. Change the particle type to a faded sphere.

 faded sphere

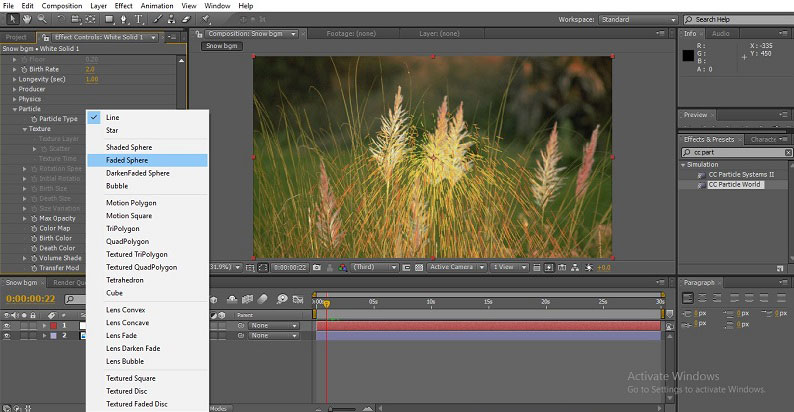
Once we change the particle type, we can find that the particles shape changes like a circle and blurred looks soft like snow.

Snowfall in After Effects 1-15

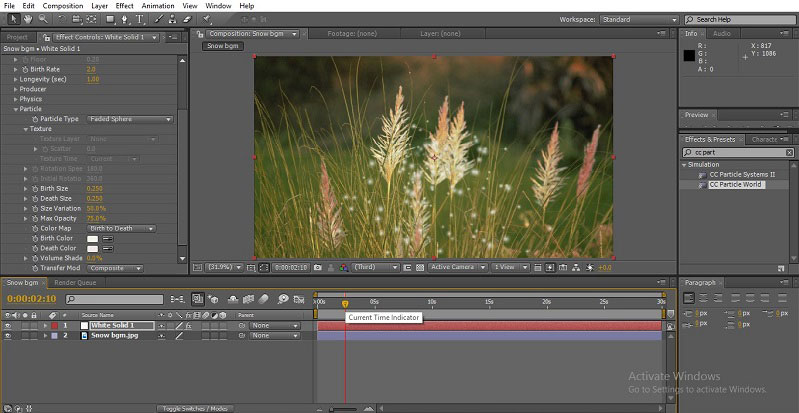
Step 10: Now we need to change the color of those particles so, we need to change the birth and death color.

Snowfall in After Effects 1-16

The performance will also appear in the window below.

Snowfall in After Effects 1-17

We give birth and death colors like white because birth color means it’s the beginning and the death color means that the snow has to be white at the beginning and end, so we give white.

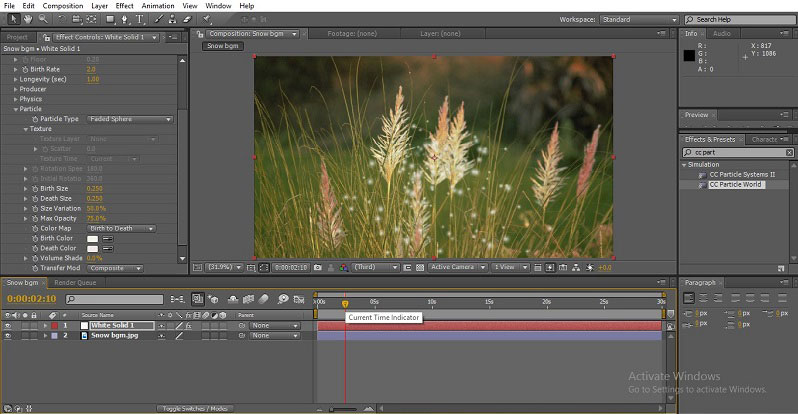
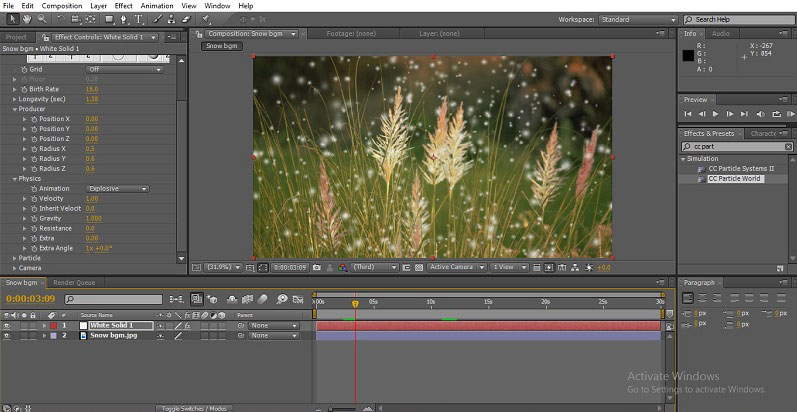
Step 11: Let’s expand the physics values. Physics is the most important option to change the gravity and velocity, etc.; by changing the gravity only, we can make the snowfall. Change the gravity to 0.300, velocity to 1.50

Snowfall in After Effects 1-18

Step 12: Now, let’s expand the producer option. In the producer option, we can find Radius X, Radius Y, and Radius Z. Just click on the radius and drag to the right till u get the perfect length and height. Do it for all three XYZ radiuses.

producer option

After expanding the radius values, the snow height and width changed. X Radius indicates width; if we increase X Radius, the particles expand horizontally. Y Radius Indicates Height; if we increase Y Radius, the particles expand vertically. By expanding the Z Radius, we can push the partials front and back.

Step 13: Here, the particles are sprinkling and low amount; to increase the number of particles, we need to increase the birth rate.

Snowfall in After Effects 1-20

After increasing the birth rate, we can see the amounts of particles are increase; now we can feel it like snow.

Step 14: With the simple methods, we created snow falling; now, if we render, we can feel that the snow is falling down.

Snowfall in After Effects 1-21

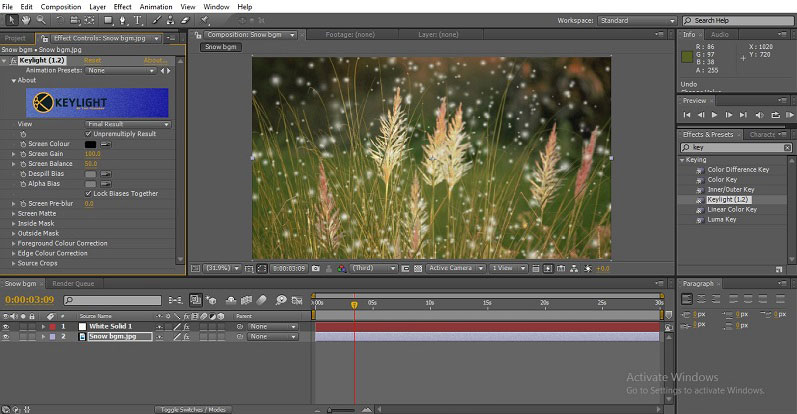
Step 15: We created snowfall, and around the snowfall, we need to create an atmosphere of snow effects. We have an option to do the work easily. Go to effects and presets and search for key light then we can find key light 1.2

key light

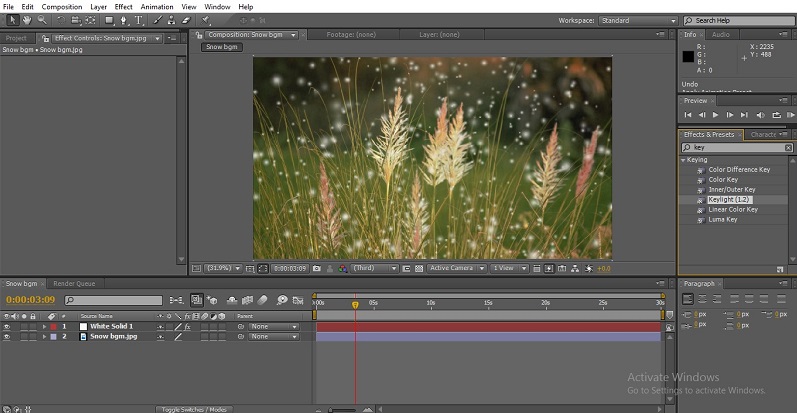
Step 16: Apply the effect to the background image or video, whatever we use.

Snowfall in After Effects 1-23

Step 17: We can get a configuration menu like this. Key light works like keying.

configuration menu

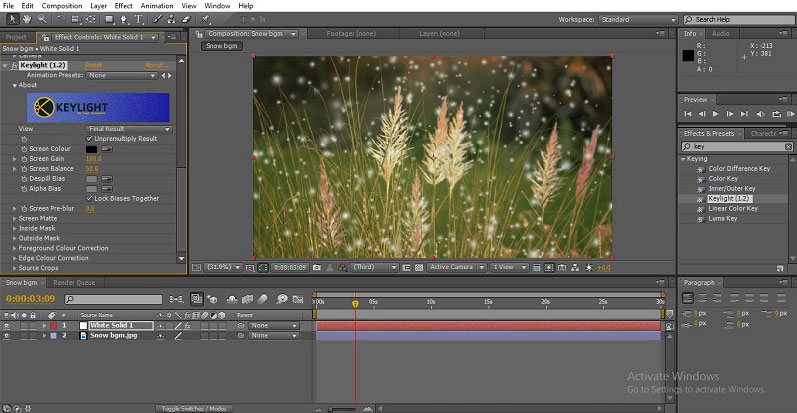
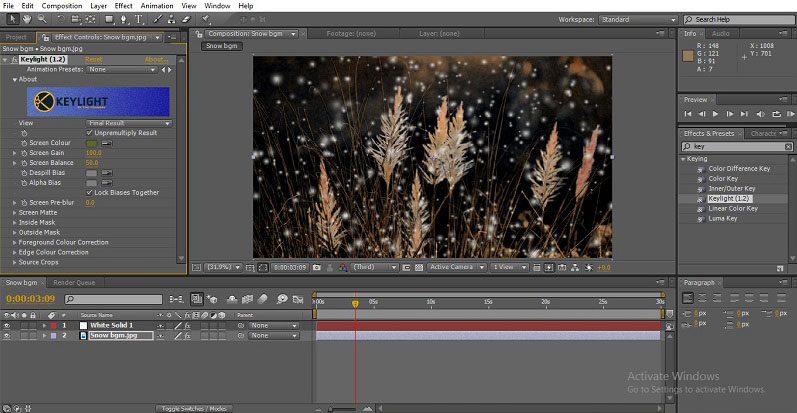
Step 18: Select the screen color and click on the image’s background colour or wherever we like to have a snow feel. I am clicking on the green color.

Snowfall in After Effects 1-25

Once we click on the color, then the color which we select will be disabled, now the snow looks natural, and we need to add some background to make this more effective.

Snowfall in After Effects 1-26

Step 19: Create a new solid layer with white color.

new solid layer

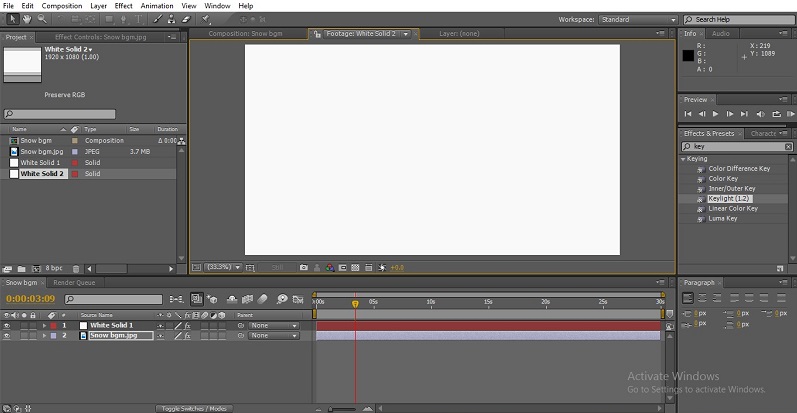
Step 20: Arrange the solid layer behind the background image.

Snowfall in After Effects 1-28

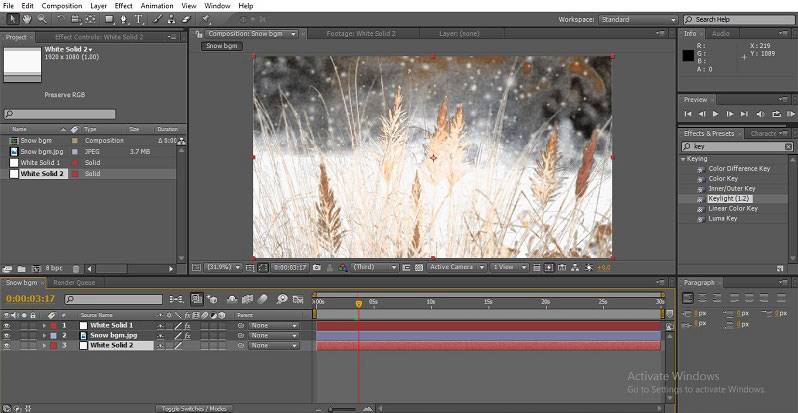
Once we apply this, we can feel that background filled with snow to make this more effectively adjust the color correcting of the solid layer.

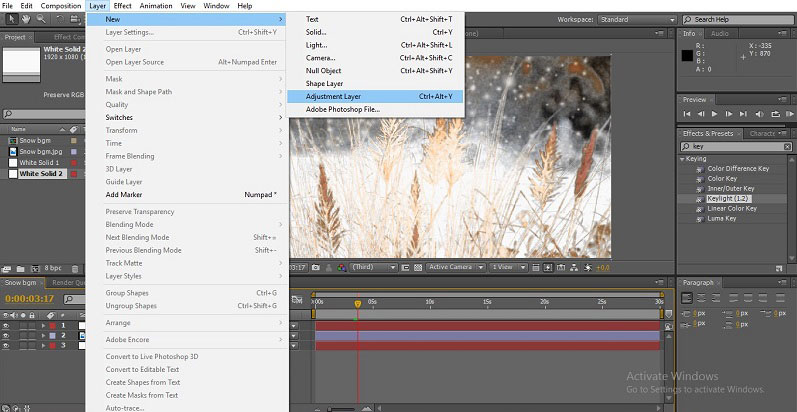
Step 21: If we like to adjust the color, we need to create an adjustment layer. Go to layers and select the adjustment layer.

adjustment layer

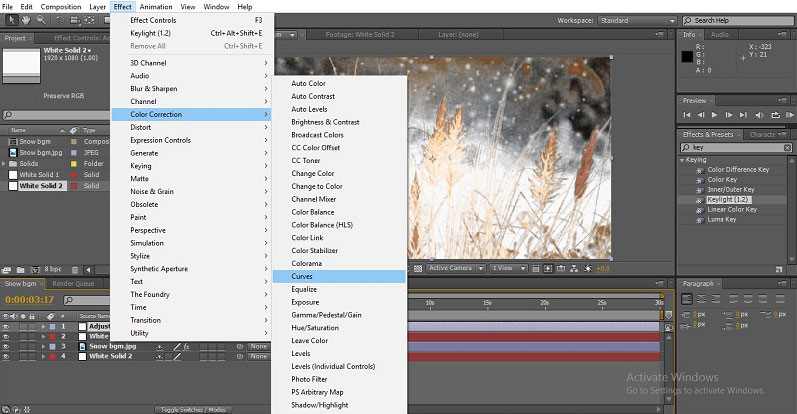
Step 22: Go to effects, expand color correction and select curves to adjust the colors of the background.

color correction

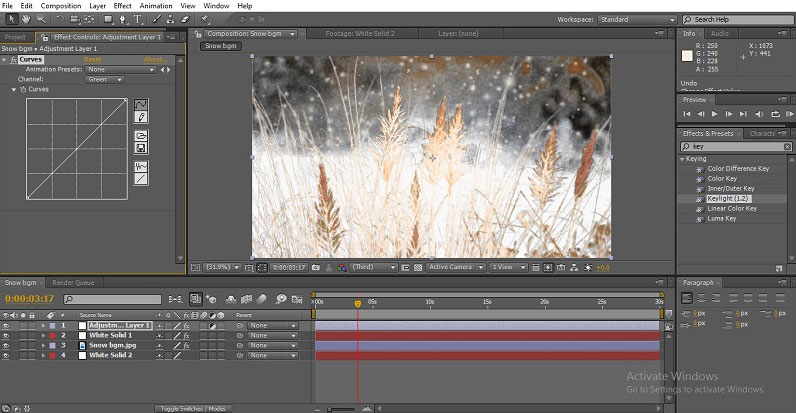
Step 23: By adjusting the curves, we can make good output after the project is rendered.

Snowfall in After Effects 1-31

Method #2 – Applying Black Solid Layer

We have another default and easy methods to create snow; let’s see.

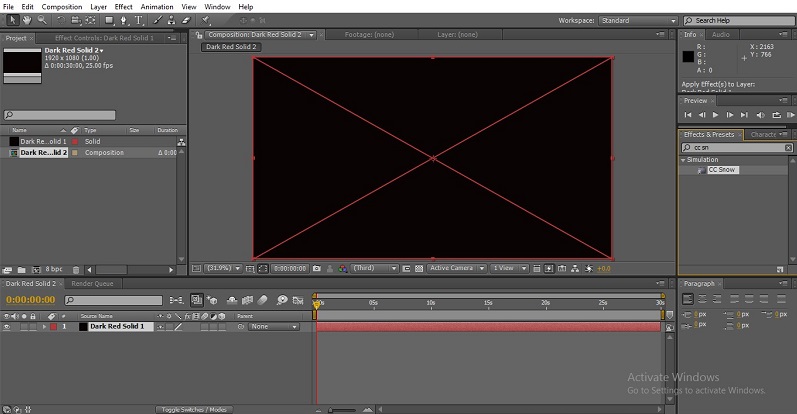
Step 1: Import a black solid layer to the new project. We only need to take a dark solid layer because snow will be white.

Snowfall in After Effects 1-32

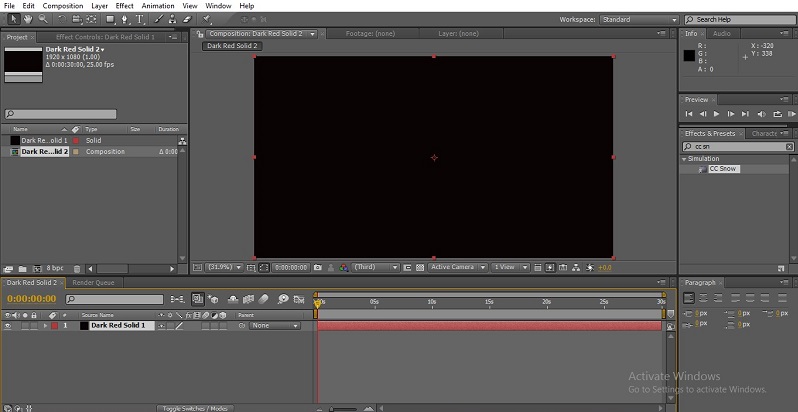
Step 2: Go to effects and presets we can found CC Snow, apply that effect to the solid layer.

Snowfall in After Effects 1-33

Once we apply, we can see the snow on the default screen.

Snowfall in After Effects 1-34

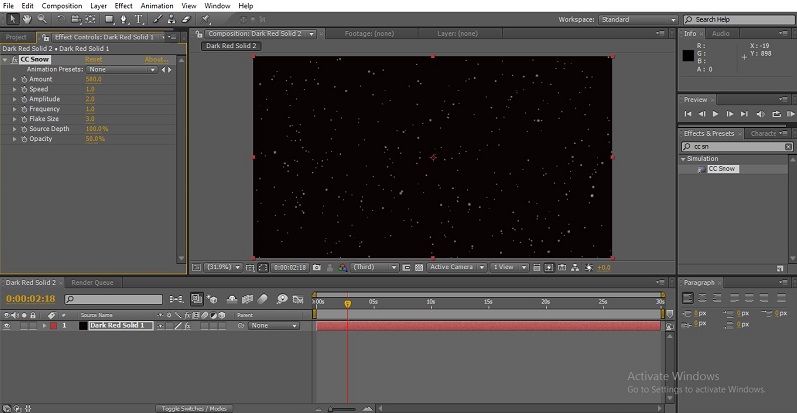
Step 3: Here, we can find snow; if we want to expand the size, speed, etc., we can find options in the configuration window. I can have the flake size of 10 to maintain the snow size a little bigger.

Snowfall in After Effects 1-35

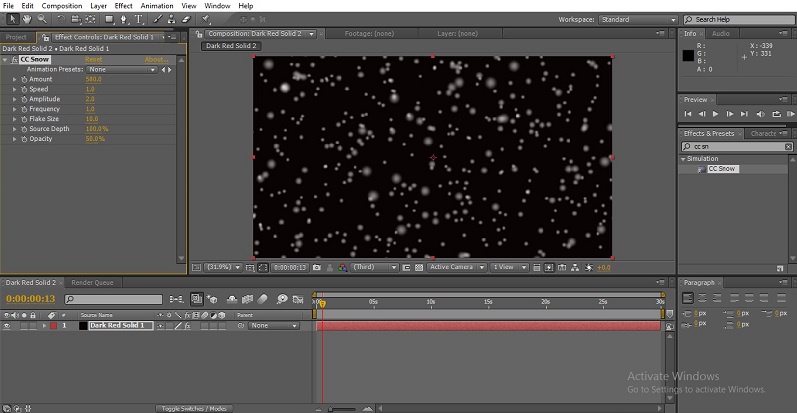
Now we can render the file.

Conclusion

In this process, we saw how to create the snow using the CC particles world; we import a solid layer and created snow with that. What did we learn? We learned how to create snow. How to use key light, how to use default snow effect and how to extend the values.

Recommended Articles

This is a guide to Snowfall in After Effects. Here we discuss the two methods to create snowfall in after effects, i.e. snow with particles and applying a black solid layer. You may also look at the following articles to learn more –

  1. Steps to Render in Maya Software
  2. Creating Text Animation in After Effects
  3. Top 13 Plugins in Photoshop
  4. How to Use Grid Tool in Illustrator?

After Effects Training (1 Courses, 3+ Projects)

1 Online Courses

3 Hands-on Projects

20+ Hours

Verifiable Certificate of Completion

Lifetime Access

Learn More

1 Shares
Share
Tweet
Share
Primary Sidebar
After Effects Tutorial
  • Effects
    • Crop in After Effects
    • Color Grading in After Effects
    • Text Effects in After Effects
    • After Effects Templates
    • After Effects Bounce Expression
    • After Effect Font
    • After Effects Duplicate Composition
    • After Effects Expressions List
    • After Effects Green Screen
    • After Effects Loop Composition
    • Drop Shadow in After Effects
    • Background in After Effects
    • Blur in After Effects
    • After Effects Freeze Frame
    • After Effects Move Anchor Point
    • After effects?Quicktime
    • Text in After Effects
    • Motion Blur in After Effects
    • Mask in After Effects
    • Color Correction in After Effects
    • Blending Modes in After Effects
    • Track Matte in After Effects
    • Transparent Background in After Effects
    • Slow Motion in After Effects
    • Animation in After Effects
    • Text Animation in After Effects
    • Logo Animation in After Effects
    • 2D After Effects Animation
    • 3D Effects in After Effects
    • 3D Text in After Effects
    • After Effects 3D Objects
    • Shape Layers in After Effects
    • Export in After Effects
    • Morphing in After Effects
    • Twitch in After Effects
    • Snowfall in After Effects
    • Rain in After Effects
    • Masking Layers in After Effects
    • Group Layers in After Effects
    • Glitch Effect in After Effects
    • Ripple Effect in After Effects
    • Composition in After Effects
    • After Effects Transitions
    • Typography in After Effects
    • Slider Control After Effects
    • Motion Graphics in After Effects
    • Wiggle in After Effects
    • After Effects Portable
    • Wiggle Expression in After Effects
    • Keylight in After Effects
    • Rotoscoping in After Effects
    • After Effects Render
    • After Effects Expressions
    • After Effects Presets
    • Duik After Effects
    • After Effects Split Clip
    • Trapcode in After Effects
    • Plexus After Effects
    • Logo Reveal After Effects
    • Mocha in After Effects
    • Twixtor in After Effects
    • Lens Flare in After Effects
    • After Effects Particles
    • After Effects Timeline
    • After Effects Tracking
    • Camera Tracking in After Effects
    • After Effects Repeater
    • After Effects Cartoon
    • After Effects Loop Expression
    • After Effects?Optical Flares
    • Glow in After Effects
    • After Effects GIF
    • After Effects Motion Tracking
    • After Effect Kinetic Typography
    • Cut Clips in After Effects
    • Lower third after effect
  • Basic
    • What is After Effects
    • After Effects Versions
    • After Effects Software
    • After Effects Shortcuts
    • Adobe After Effects Plugins
    • How to Use After Effects
  • After Effects Tools
    • After Effects Tools
    • After Effect Hologram
    • Pen Tool in After Effects
    • Puppet Tool in After Effects
    • KeyFrames in After Effects
    • Adding Keyframes in After Effects

Related Courses

After Effects Training Course

Adobe Premiere Pro Training Course

Design Training Course

Footer
About Us
  • Blog
  • Who is EDUCBA?
  • Sign Up
  • Live Classes
  • Corporate Training
  • Certificate from Top Institutions
  • Contact Us
  • Verifiable Certificate
  • Reviews
  • Terms and Conditions
  • Privacy Policy
  •  
Apps
  • iPhone & iPad
  • Android
Resources
  • Free Courses
  • Photoshop Tutorial
  • 3ds Max Tutorial
  • All Tutorials
Certification Courses
  • All Courses
  • Design Course - All in One Bundle
  • Photoshop Course
  • Maya Course
  • Unreal Engine Course
  • Unity Course
  • DaVinci Resolve Course
  • Pro Tools Course

© 2022 - EDUCBA. ALL RIGHTS RESERVED. THE CERTIFICATION NAMES ARE THE TRADEMARKS OF THEIR RESPECTIVE OWNERS.

EDUCBA
Free Design Course

3D animation, modelling, simulation, game development & others

*Please provide your correct email id. Login details for this Free course will be emailed to you

By signing up, you agree to our Terms of Use and Privacy Policy.

EDUCBA
Free Design Course

3D animation, modelling, simulation, game development & others

*Please provide your correct email id. Login details for this Free course will be emailed to you

By signing up, you agree to our Terms of Use and Privacy Policy.

Let’s Get Started

By signing up, you agree to our Terms of Use and Privacy Policy.

Loading . . .
Quiz
Question:

Answer:

Quiz Result
Total QuestionsCorrect AnswersWrong AnswersPercentage

Explore 1000+ varieties of Mock tests View more

EDUCBA Login

Forgot Password?

By signing up, you agree to our Terms of Use and Privacy Policy.

This website or its third-party tools use cookies, which are necessary to its functioning and required to achieve the purposes illustrated in the cookie policy. By closing this banner, scrolling this page, clicking a link or continuing to browse otherwise, you agree to our Privacy Policy

EDUCBA

*Please provide your correct email id. Login details for this Free course will be emailed to you

By signing up, you agree to our Terms of Use and Privacy Policy.

4th of July Offer - After Effects Training (1 Courses, 3+ Projects) Learn More