Updated May 15, 2023
Introduction to Smudge Tool
Smudge Tool is used in Photoshop to create the messy smeared effect using ink, or with our fingers, for making effects that bring a liquefied flow, to help remove unwanted elements or scratches on old photos; smudge tool works by blending similarly to how we mix colors while painting on a canvas creating a lot of variation into the design work which is very useful for movie professional such as graphic artist, photographers, digital matte painters while working on various touch-ups and restoration of stills for creating the desired illusions and effects in the film.
How to use the Smudge Tool?
Firstly, to know and understand when and how we have to start using the smudge tool, we first use a small brush or a brush with its basic settings for smudging tiny areas, which can be its edges. While using these brushes, we have to make sure that we use them carefully because larger brushes can produce many different effects to the image.
Steps with Screenshots
Before we start with the steps as to how we can use the smudge tool, we should understand as to how we can also start our work using the shortcuts, which could help us deliver our work faster in a short timeframe.
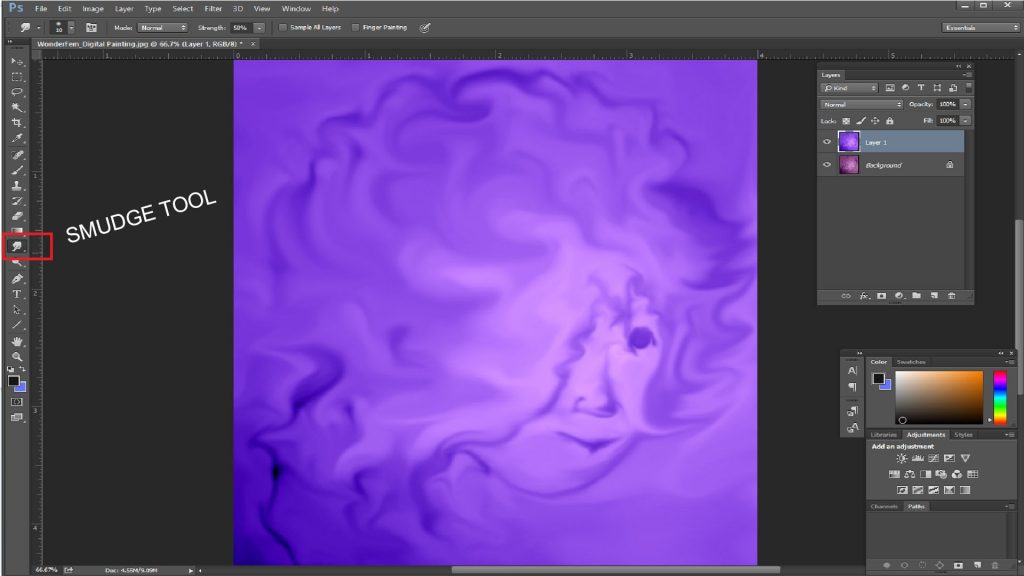
First, we have to start by pressing the shortcut key (V) key on the keyboard, which activates the Move tool. This tool helps us with navigating through our Photoshop options while we are going through various options.
The Move tool can also be found in the side Toolbar, i.e. at the top left-hand corner in the side Toolbar.
Thereafter we start our steps as to how we have to start using the Smudge Tool using these steps below:
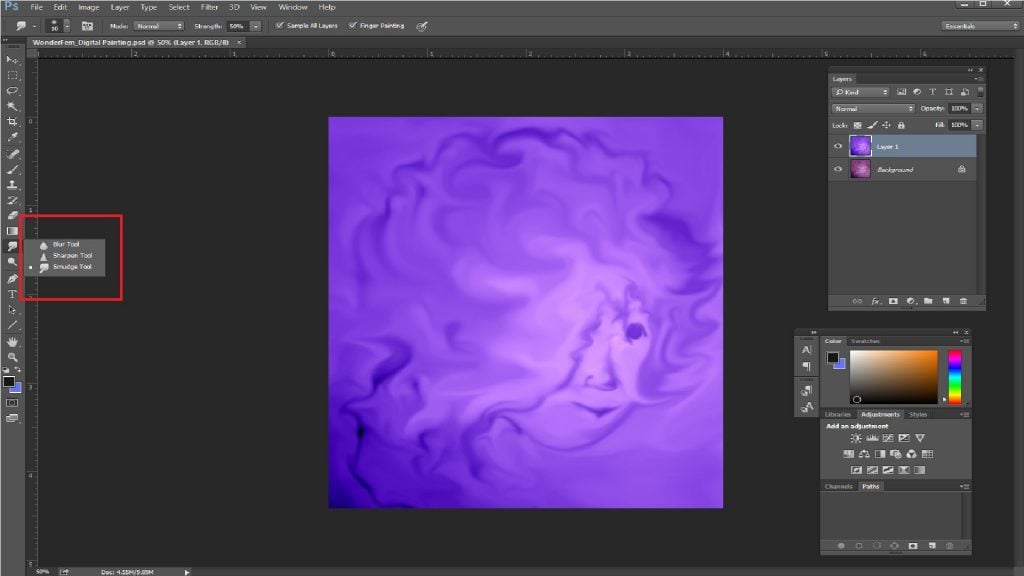
1. For us to start using the Smudge Tool in Photoshop, first we go to the option by selecting the “Smudge Tool” from the toolbox and Tool Options Bar. We might first think why and where is the smudge tool or whether it’s hidden somewhere. Well, the thing is that this tool is a combination or also a set of tools that are set within the Toolbox which is then broken into three parts, i.e. the “Blur tool”, “Sharpen tool”, and the “Smudge tool”.
2. Next step, after we have understood the brushes and their settings, we go further.
Looking at the brushes, at the top left-hand corner side, we can choose from these options to set the brush stroke and also select or change the brushes through the brush options, as desired in the Tool Options Bar. The blending mode, brush, size, and strength from the drop-downs and sliders available can be customized through the options.
We can also set our brushes and coursing through the brush presets by changing their angle, roundness, and spacing to get some variations for our painting.
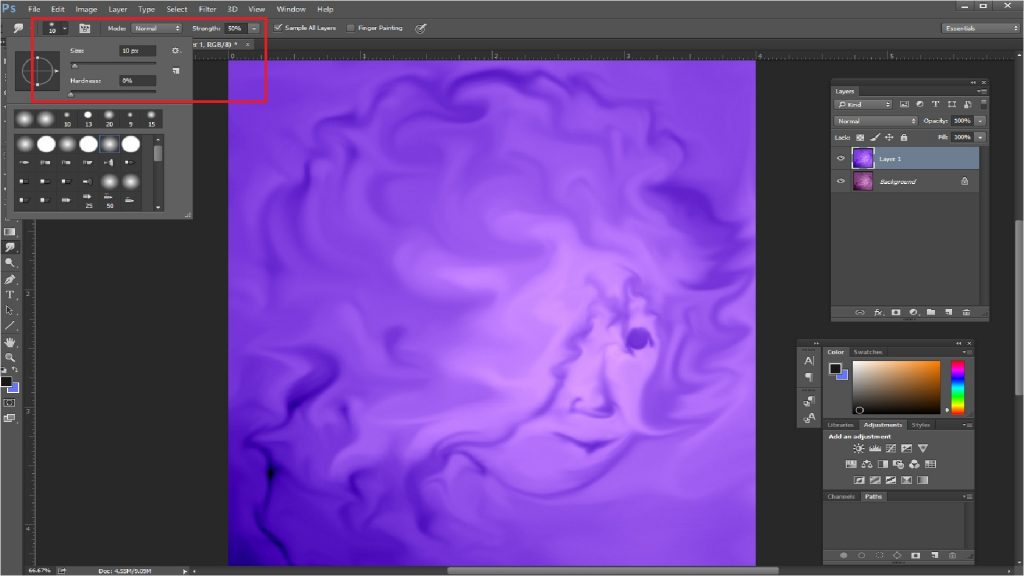
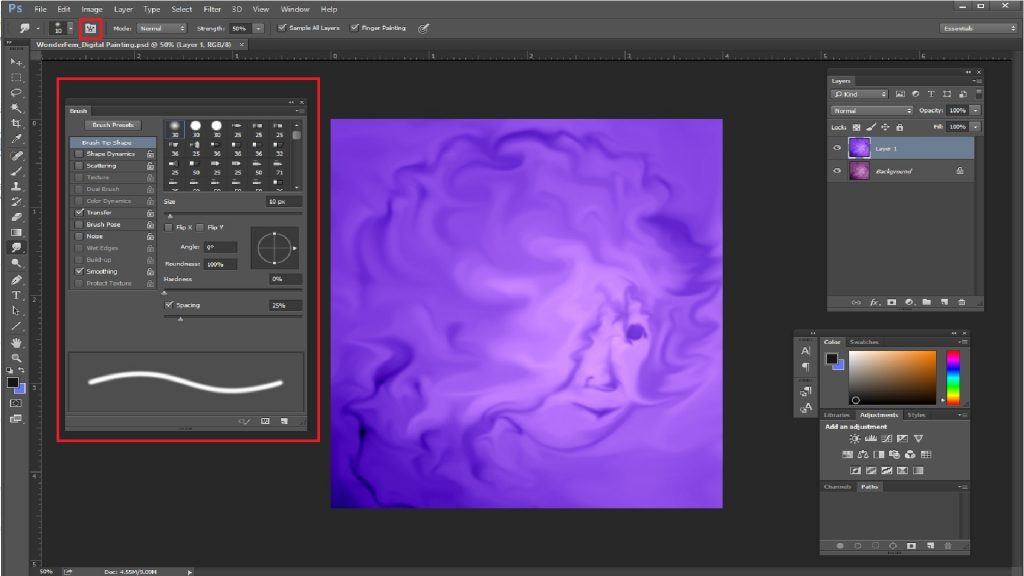
The Option such as the “Sample All Layers” checkbox on the top can also be selected to select the combined color value from all layers. Doing so if it’s not selected, it only smudges the color from the visible layer, which is currently selected.
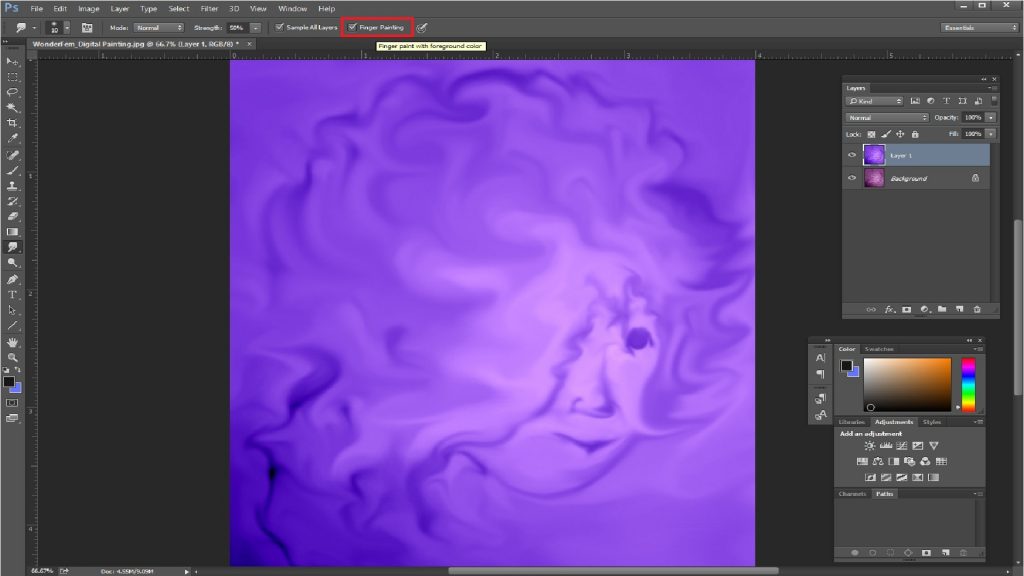
3. As we look towards progressing further, we can also use this option, i.e. Finger Painting option, to start painting while using the foreground color. The best part is that we can get the best results while painting when we use this option. We can also toggle through the option temporarily, i.e. through the Smudge tool and the Finger Paint setting by holding down the Alt key while we drag.
Conclusion
Coming to our conclusion after we have learned to remember and know so much about the Smudge tool, we surely know that it is still a useful tool for all the graphic artists, photographers, digital matte painters and also it is actually used often when we do different kinds of touch-ups and restoration works for various films when it comes to creating illusions and effects.
Recommended Articles
This has been a guide to the Smudge tool in photoshop. Here we discuss how to use the Smudge tool in photoshop and its Steps with Screenshots for better understanding. You can also go through our other suggested articles to learn more –
