Introduction to Magic Wand Tool in Photoshop
Magic wand tool is a very useful feature found in Adobe Photoshop that, like magic, selects the part of an image autonomously based on the tone and color and furthermore, it can also fine-tune the image edges, adjusting certain parameters like tolerance, once done correctly, the magic wand tool can precisely select the pixels in your image that otherwise would have been extremely difficult and time-consuming to extract using manual effort as magic wand tool can identify and accurately select complex and large pixels based on tone and color within seconds so that you can use the part and replace it with any other image.
How to Use the Magic Wand Tool?
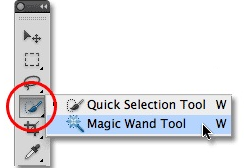
Let us start with the selection of the magic wand tool. For that, we should identify the location of the icon. For versions CS2 or earlier, you can select the icon from the tool pallets. But from version CS3, they have introduced a quick selection tool in the tools panel, which includes the magic wand tool.
Check the image attached below, which shows you the tool panel, and the magic wand tool is attached behind the quick selection tool. When you put the cursor in the icon for a few seconds, a flyout menu appears, which shows the wand tool.
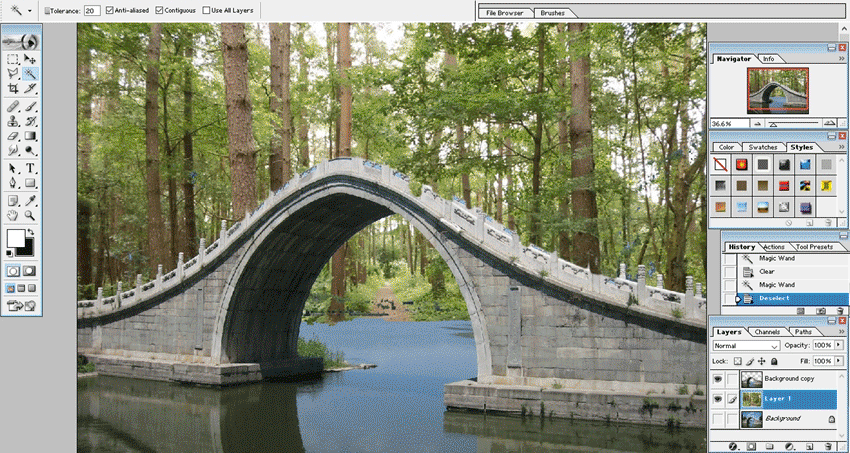
To explain the working of the magic wand tool, I have selected an image of a bridge with the sky in the background. To start the trial,
Open the image in your Photoshop software, as shown in the image below.
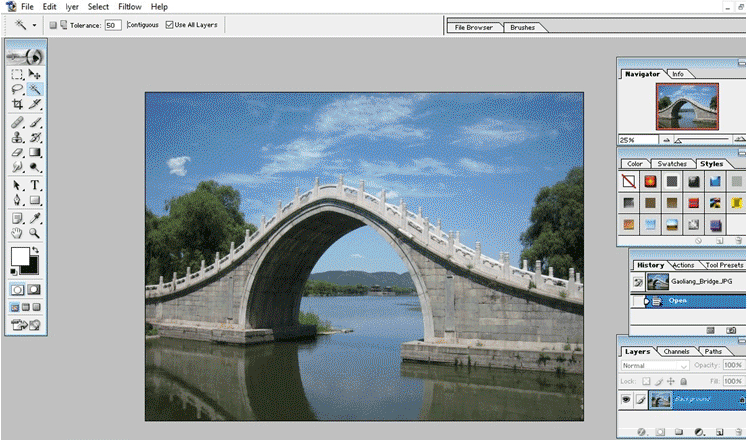
As I told you before, the magic wand tool selects the object based on the color gradient and the tone. We can see a bridge with an orange color and a blue sky in the image we opened. When we select the wand tool and click on an area in the image, the wand tool will look at the tone and color of the area we selected and select the pixels that contain the same color and brightness value.
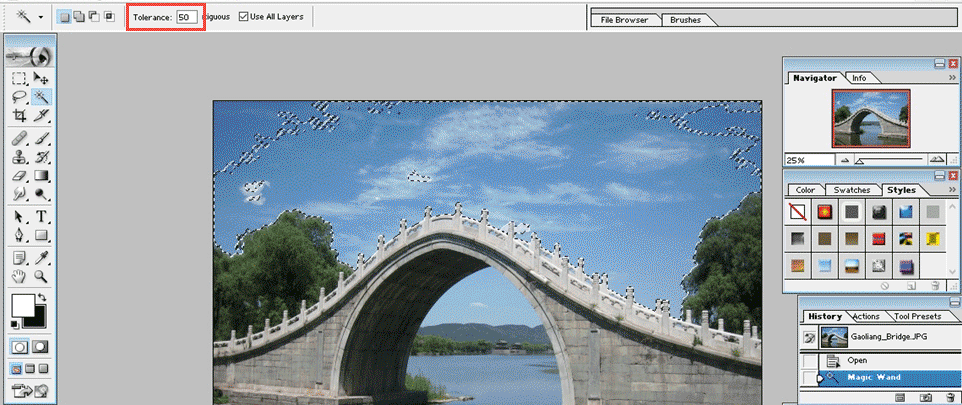
For example, if I want to change the background of the image, I need to select all the areas except the bridge. For that, click anywhere on the sky area using the magic wand tool. You can see the entire background with the same color, and the tone will be selected. But in the image given below, you can see that only a part of the sky was selected.
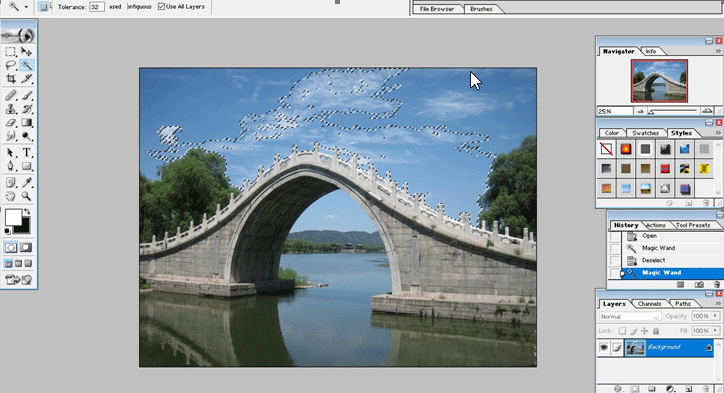
It is because of the default tolerance value given in the software. The tolerance value defines how different is the tone and color in a selected area to the area which is not selected. Here we can see a color difference in the sky from dark blue to light blue. This difference results in the tool to select the sky partially.
To resolve this issue, we need to change the value of tolerance. Check the below-attached image of the panel, which shows the location of the tolerance icon.

By default tolerance value is given as 32 in Photoshop. It means that the software will select any pixels that have the same tone and color as the area we selected, plus any pixels that are up to 32 shades brighter or 32 shades darker. By increasing the value of tolerance, we will get a better result. I have kept the tolerance at 50, which is shown in the image below.
Even in my second trial, I was not able to select the entire background. For that, I could try again with a higher tolerance value. But there is another easier option to select the remaining area. The magic wand tool consists of an option called ‘add to existing options, ’ which means I can add more selections based on my first selection. For that, hold down your shift key and click on the area you want to select, then a plus sign will appear with the tool cursor. This means you are ready to add selections; in our case, when the plus sign is visible, click on the background area that was not included in the initial selection. Thus we can select the entire background of the image.
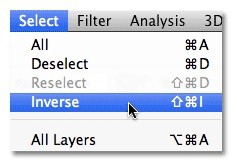
For selecting the sky to replace, one more option is available. Instead of selecting the sky, we can select the remaining areas, and using the reverse feature, we can select the sky. It means that when we choose the inverse option, it will select everything that was not selected and remove the selection of the initially selected area. For that, go up to the select menu at the top of the screen and choose the inverse option as shown below.
In our case, reversing is a time-taking process to go with the first method itself.
Select a new image to replace with the original image. Open the new image and put it as the second layer.
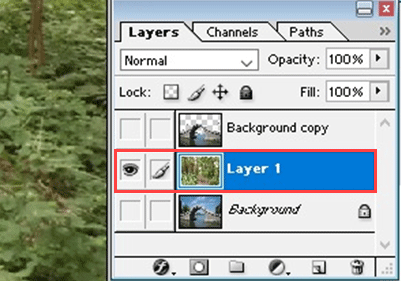
To replace the background, we have to copy the selected area to a new layer. For that, press ‘Ctrl+J’ to copy the selected area to the layers in the layer panel and save it as layer1. After this, open the new image, which we want to set as the new background. Then select the entire image by pressing ‘Ctrl+A’ and then copy it to the clipboard by pressing ‘Ctrl+C.’
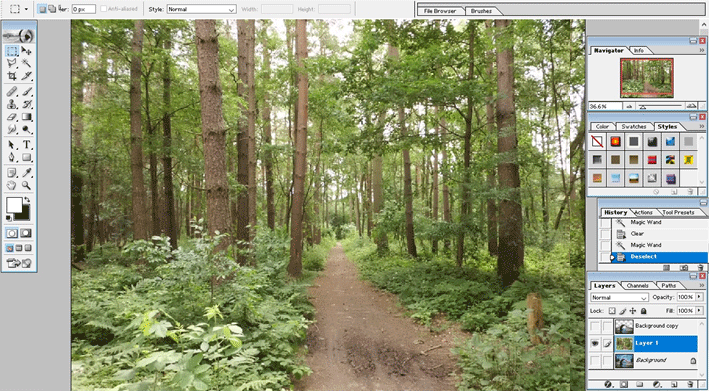
After this, we will go back to our original image and click on the background layer in the layers panel so that when we paste the new background into the document, it will save in between the existing 2 layers. Finally, press Ctrl+V to paste the new background into the document. See the image given below with a new background.
Conclusion
As we have seen in this tutorial magic wand tool is a very useful selection tool that allows users to select pixels that would be near impossible to select manually. It is also the easiest and quickest way to select large and complex shapes. As we already discussed, this tool makes selections based on the color and tone of the pixels and due to this, the resultant selection will be more accurate and sharp.
With this tutorial, you will learn the basic and common functions of the magic wand tool, and by continuous practicing, you will be able to use all the features of this tool, and you can create very accurate and précised selections with less effort.
Recommended Articles
This has been a guide to Magic Wand Tool in Photoshop. Here we discuss how to use Magic Wand Tool in Photoshop and its Steps with Screenshots for better understanding. You can also go through our other suggested articles to learn more –
