Updated July 3, 2023
Scrollbar in Excel
While working on a computer, you must have come across a scrollbar (a long, narrow bar) on the side or bottom of a window. This helpful tool allows you to move your viewing area in different directions – up and down or left and right. In Microsoft Excel, you can insert a scrollbar to view a large dataset without taking up too much space on your screen.
For instance, if you have 100 rows of data, you can use the scrollbar only to view ten rows at a time. The scrollbar feature in Excel also lets you provide the number of rows that you want to view at a time, so if you only want to see five rows of data instead of 10, you can adjust the scrollbar accordingly. Thus, a scrollbar is a handy feature for viewing extensive client data, viewing a long list of enrolled students in an institution, or displaying the results of various national and international competitive exams.
Hence, based on the direction of movement, there are two types of scrollbars:
1. Horizontal Scroll Bar (Moves left and right)
2. Vertical Scroll Bar (moves up and down)
How to Insert Scrollbar in Excel?
To create the SCROLLBAR in Excel, follow these steps:
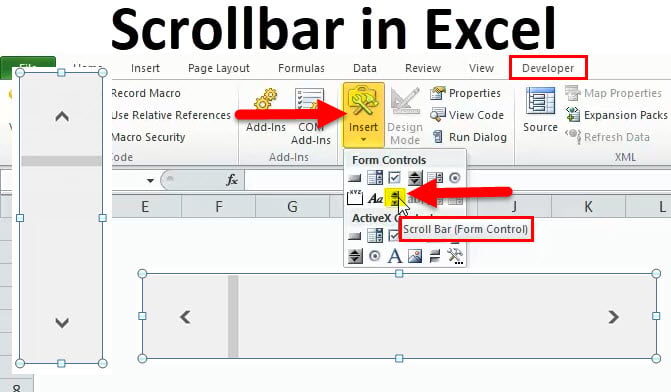
First, you need to enable the Developer tab visible on the ribbon so you can get to the VBA and the ActiveX control commands. To get the Developer tab, follow these steps:
Step 1: Go to file and click on the Excel option.
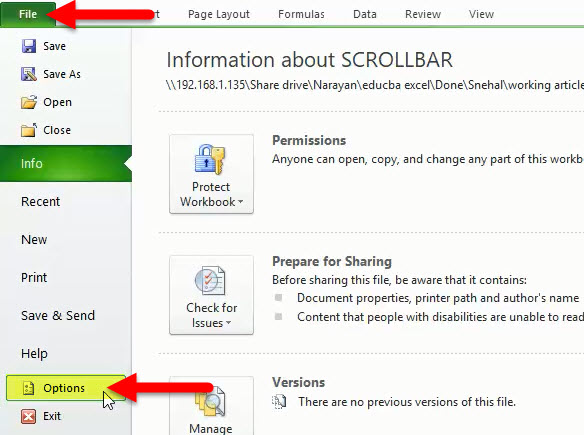
An Excel Options dialog box appears
Step 2: Click Customize Ribbon
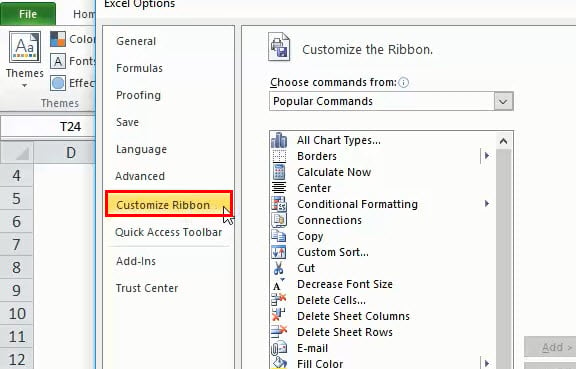
Step 3: Select the Developer Check box.

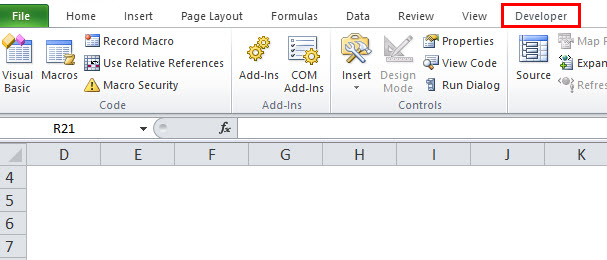
Excel will add the Developer as a new tab, as shown in the image below.
Step 4: Under the Controls group, click Insert, then select the SCROLLBAR control.
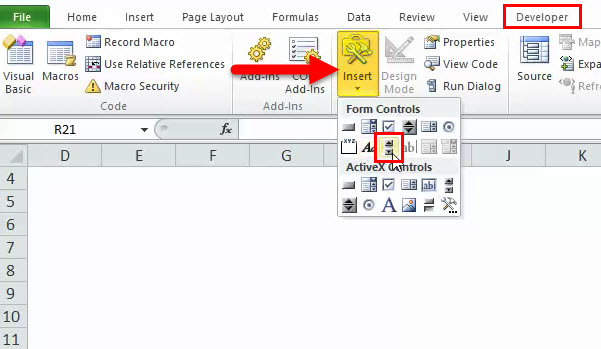
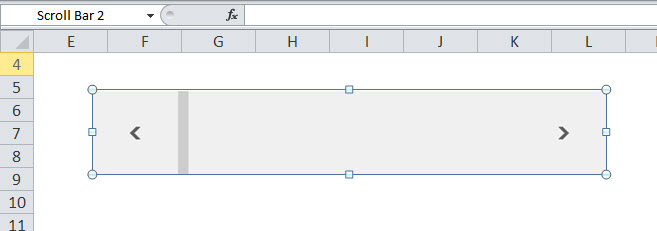
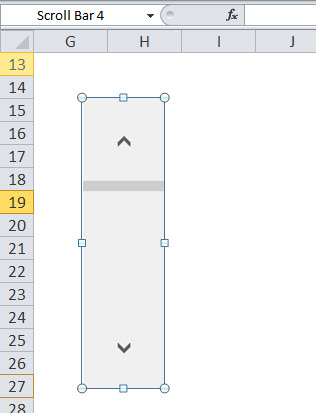
Step 5: Draw a rectangle in the Excel worksheet to insert a ScrollBar.
If you stretch the rectangle horizontally, Excel will insert a Horizontal Scroll Bar.
If you stretch the rectangle vertically, Excel will insert a vertical scrollbar.
Optimizing Parameters of Scrollbar in Excel
In this section, we will understand a few properties of ScrollBar. Once you have inserted the scrollbar, you can customize its properties. It will also allow you to adjust the minimum and maximum values or link them to a specific cell in your worksheet.
To set up a scrollbar, follow these steps:
Right-click on the scroll bar and select the “FORMAT CONTROL” option.
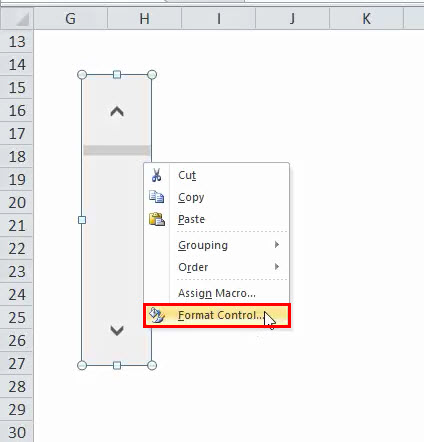
It will open a Format Object dialogue box as shown below:
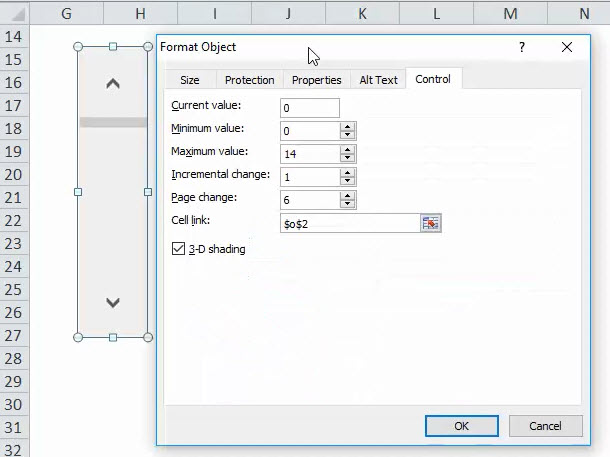
In the Format Object dialogue box, you can find several options to customize the scrollbar:
1. Current Value: The scrollbar always has a numeric value associated with it. The current Value field defines the present value of the scrollbar and the current position of the scrollbar.
2. Minimum Value: This defines the minimum position value of the scrollbar
3. Maximum Value: This defines the maximum value possible for the scrollbar. The current value will always lie between the Minimum and Maximum Value.
4. Incremental Change: This also defines the number of values we want to change in one click movement of the scrollbar. If you set it to 1 and click the down arrow of the scrollbar, its current value will increase by 1.
5. Page Change: In this box, we must provide the amount that the value decreases or increases and the degree to which the scroll bar moves if we click between the scroll box and any end arrow of a scrollbar. For instance, in a scroll bar having a minimum value of 0 and maximum value of 10, if a user puts the integer 2 in the Page change property, the scrollbar value will decrease or increase by 2 (here, 20% of the value range of the scroll bar) when you click the area between the scroll bar and any of the scroll arrows.
6. Cell Link: It contains a cell name, which will hold the current value of a scrollbar. You will use this value in other formulas to respond to the positioning of the scrollbar. Because of the value in this cell, you will automatically get updated whenever you move the scrollbar.
How to Use Scrollbar?
In the above section, we have seen how to insert the scroll bar and set up its parameters; now, we will create a simple, scrollable area from a more extensive data set.
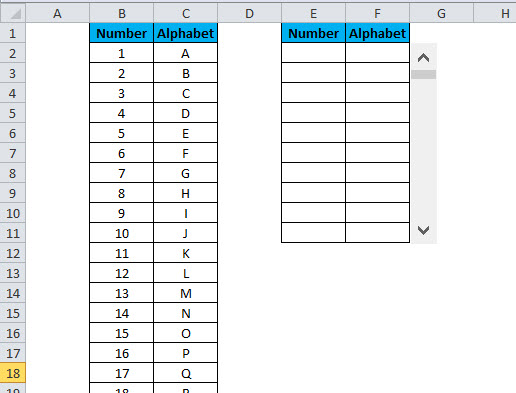
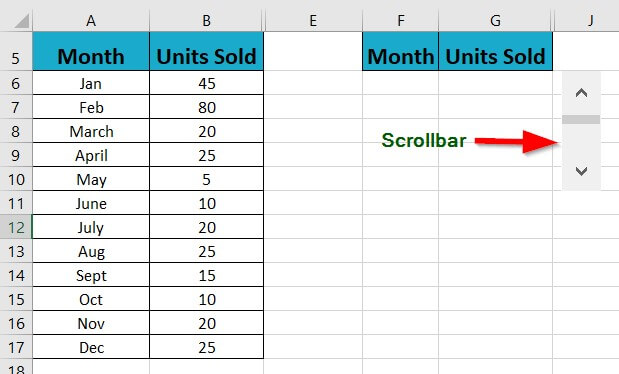
Let’s take an example of a simple data set of all 26 alphabets:
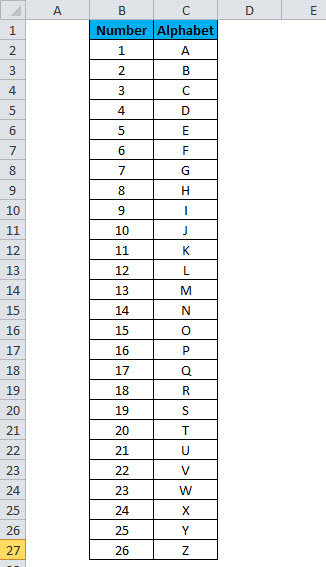
Creating the above data set in an Excel sheet will consume 27 rows (1 for the heading and 26 for each alphabet).
But with the help of the scroll bar now, we will adjust the above data set into fewer rows. To do so, follow these steps:
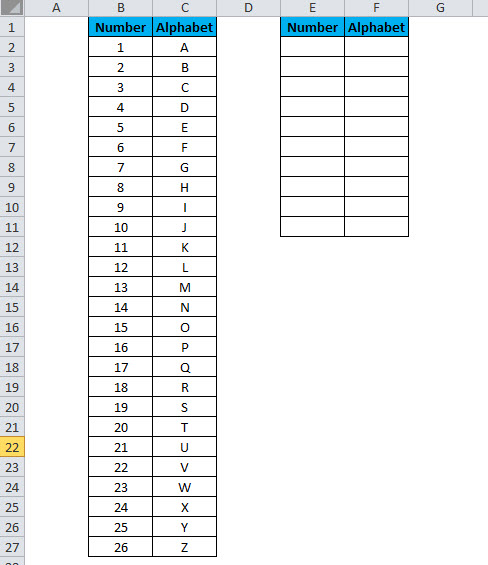
1: Create a space where you would like to display the data set with a scrollbar
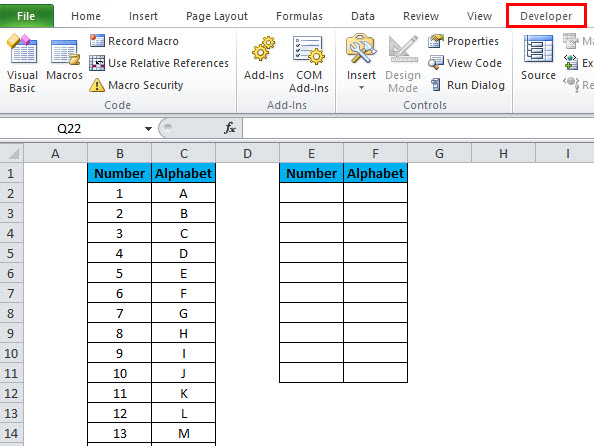
2: Click the Excel Ribbon and select the Developer tab.
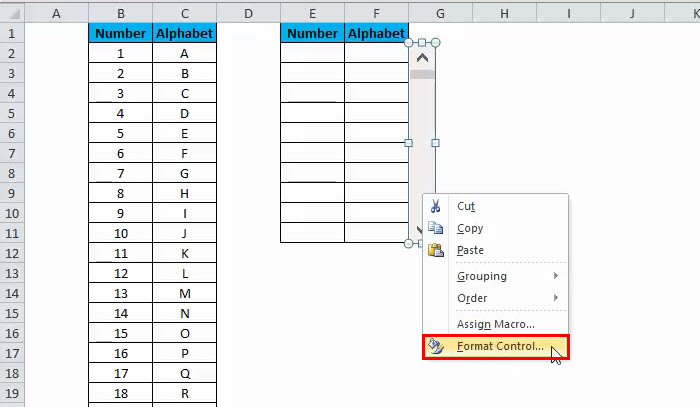
3: Click on Insert, then click the SCROLLBAR control to insert the new list box in the Excel worksheet near the newly formatted space where you would like to display the scrollable data, as shown below.
4: Now right-click the scrollbar and select the Format Control option.
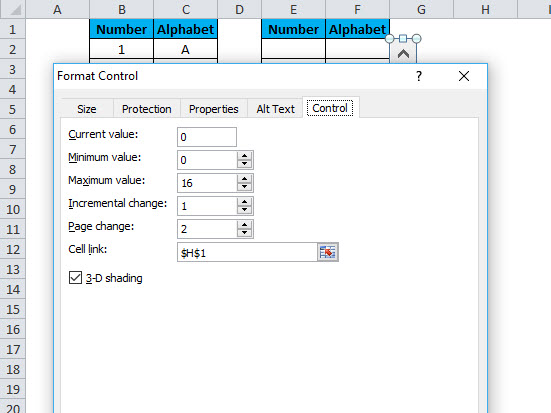
Fill following data for scrollbar parameters:
- Current Value: 0
- Minimum: 0
- Maximum: 16
- Incremental Change: 1
- Page Change: 2
- Cell link: Any empty cell (we are taking H1)
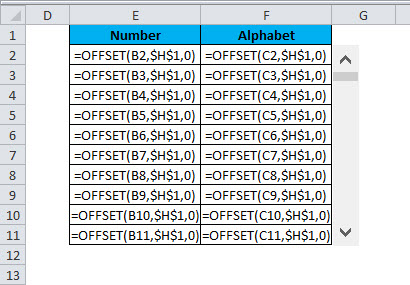
Step 5: Now in E2 cell type in the following formula:
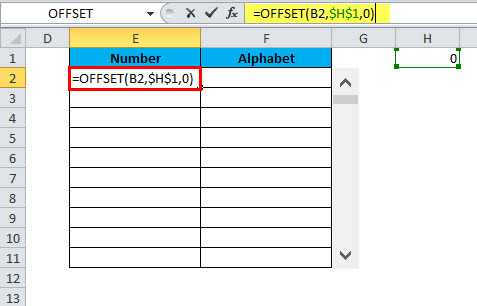
You can use the Excel OFFSET function to get a reference that offsets the specified number of rows and columns from the starting point.
Here is why we use the OFFSET Function:
Our data set is in cells C2:C27, and we want to create a scroll bar allowing us to view only the first 10 rows of data. The OFFSET function will help us make a reference to the range C2:C11 (first 10 rows) and then a link that refers to the link property of the scroll bar.
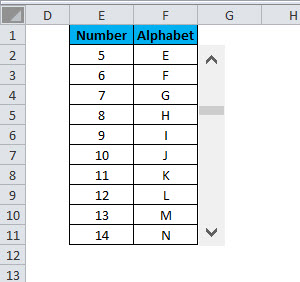
Step 6: Now Copy the above formula into all cells of the desired area.
It fills the table will scrollable data, as shown in the image below.
Using Scrollbar with Dynamic Chart
Microsoft Excel also allows users to create a dynamic chart that depends upon the position of a scrollbar. Let’s see an example of how to make one:
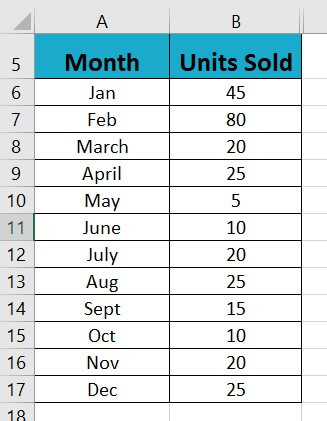
1: Create a data table showing a list of product units sold each month of the year.
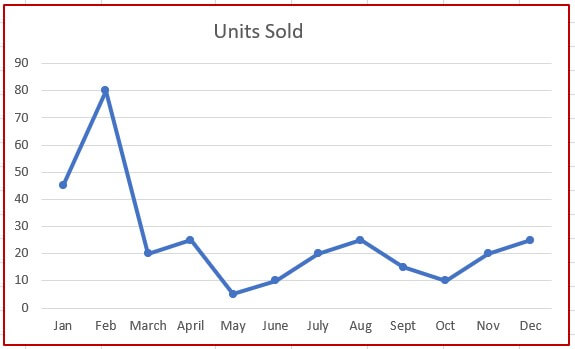
2: Create a line chart based on the monthly sold quantity data range.
3: Insert a scroll bar to the data range using the Develop tab and specify the maximum value, page change, and cell link values in the Format Control window.
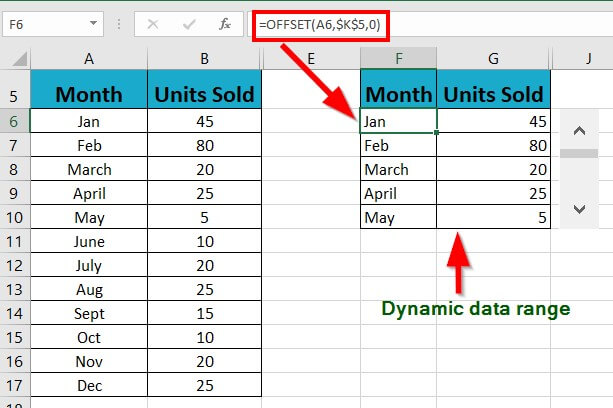
4: Link the scrollbar to the data cell and create a dynamic data range using the formula =OFFSET(A6,$K$5,0).
To visualize the data on the Chart per the dynamic range, update the chart data source. Select the line Chart and click the Chart Tools ribbon to do this.
5: Choose “Select Data” and click on “Edit” in the “Select Data Source” dialog box.
6: In the Edit Series dialog box, provide the “Series values” and click OK.
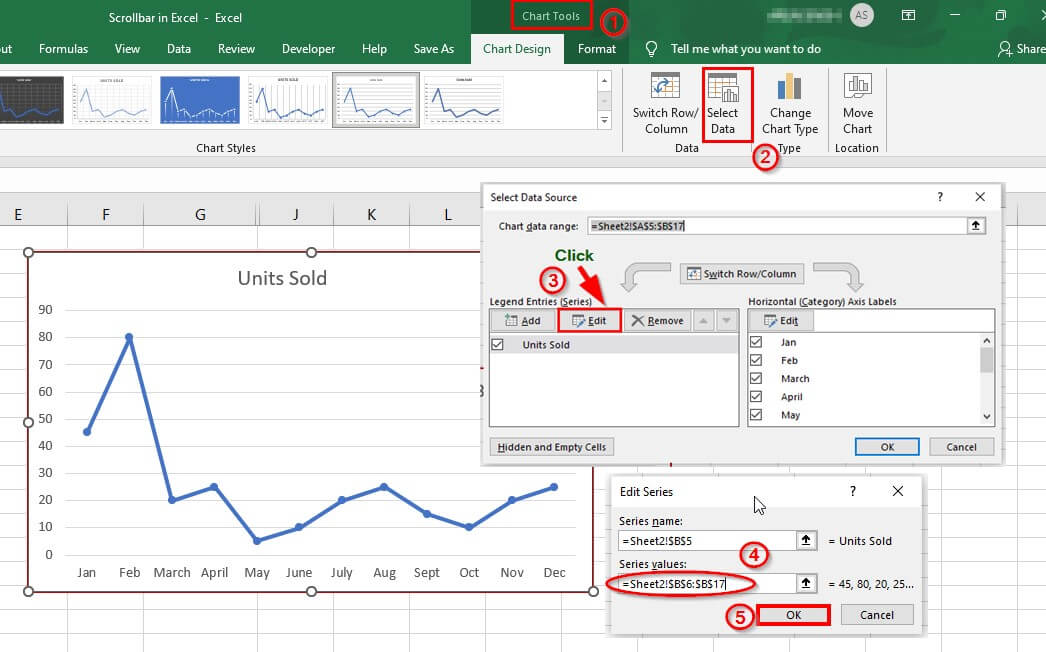
7: Move the scroll bar to see how the chart updates based on the change in data.
Frequently Asked Questions (FAQs)
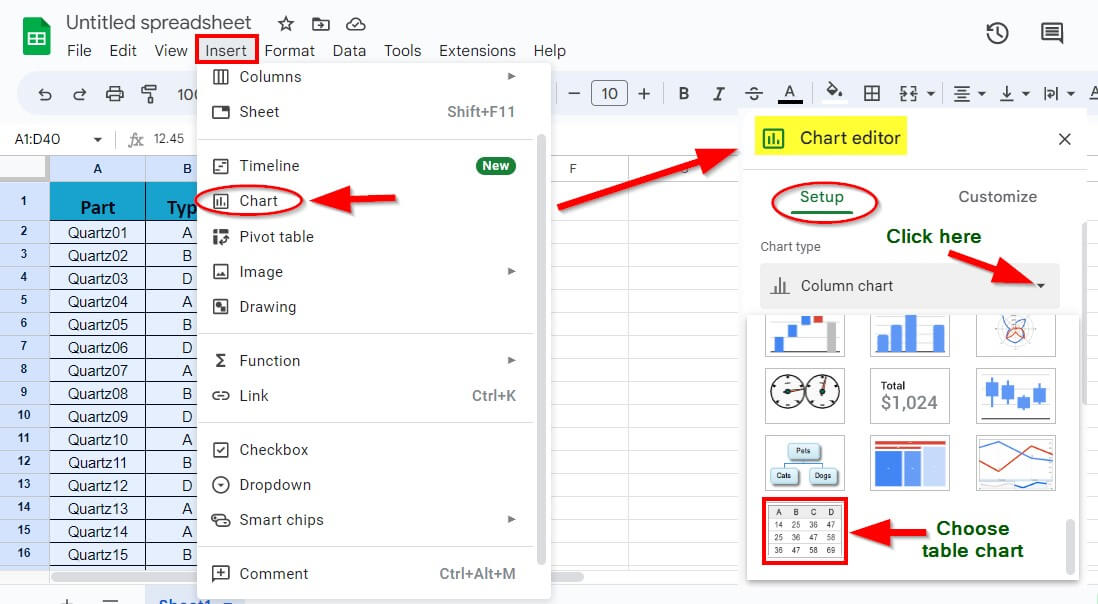
Q1. How do I add a scroll bar to sheets?
Answer: To add a scroll bar to Google Sheets, follow these steps:
Step 1: Select the data range, including headings
Step 2: Go to Insert and click Chart
It will open a Chart Editor
Step 3: Click on the Chart type drop-down and choose Table chart
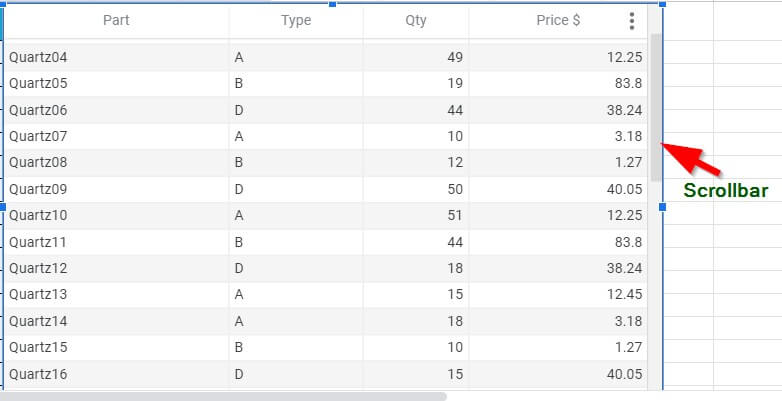
It will create a table with a scroll bar.
The resulting table with a scroll bar is shown below.
Q2. What are the types of scroll bars in MS Excel?
Answer: By default, Excel allows a vertical and horizontal scroll bar to move through the data in a workbook so that you can scroll through the data quickly. The vertical scroll bar will enable users to move or view the data in a vertical, i.e., up-down direction; a horizontal scroll bar enables users to move or view the data in a horizontal, i.e., right-left direction.
Recommended Articles
It has been a guide to Scrollbar in Excel. We discuss here the basic concepts like inserting a scrollbar in Excel, using the scrollbar, setting up a scrollbar, examples, and a downloadable template of Excel. Lastly, we suggest you go through our other articles –
