Updated August 19, 2023
What is Formula Bar in Excel?
Formula Bar in Excel is a section where we can see values and formulas stored in it. The Formula generally is already seen below the menu bar. But if it is not there, we can activate this from the View menu option under the Show section. It can also activate from the Excel Option’s Advanced tab. Apart from showing the values and formula of any cell, Formula Bar also tells at which cell we have kept the cursor and the Insert Function option denoted by fx.
The content of the current cell or where the selection is pointed will be visible in the formula bar. Visibility includes:
- Current cell selection.
- The formula is applied in the active cell.
- The range of cells selected in the Excel.

How to Use Formula Bar in Excel?
The formula bar can edit any cell’s content and expand to show multiple lines for the same formula. Let’s understand the function with a few examples.
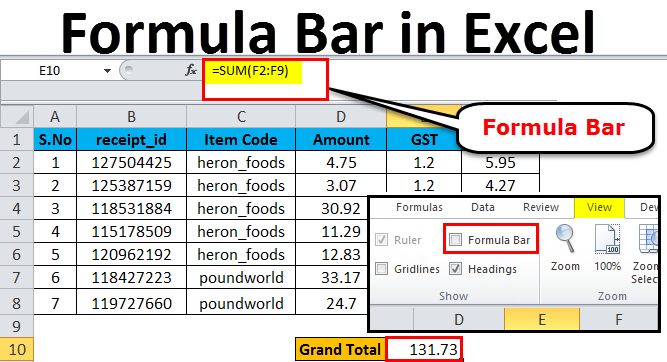
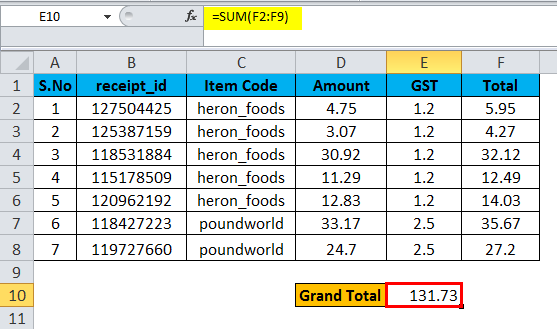
Formula Bar in Excel – Example #1
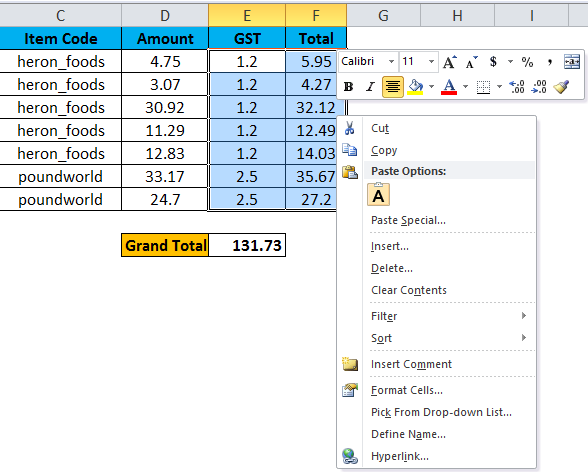
The formula for the total column is the sum of the amount and GST. The formula “=D2+E2” is applied to the entire column. The formula applied within the formula bar is visible, and the corresponding cells are filled with the value after applying the formula.

After applying the formula in the total column, the values sum the Grand total. Now the formula bar shows the current formula applied in cell E10. “=SUM (F2: F9)” represents the range of cells in the formula.
Formula Bar in Excel – Example #2
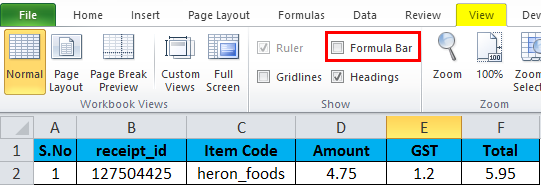
It is possible to hide the formula bar from the options available in the menu bar as needed. You can customize the tools you want to display from the view menu in the available interface.
Go through the below steps to show or hide the formula bar within the Excel sheet.
- Click on the View menu.
- Tick or untick the rectangle box to enable or disable the formula bar.
- According to your selection, the visibility will be set.
How to Use Formula Bar Icons?
You can see some icons associated with the formula bar. It includes the icon next to the formula bar used for the following.
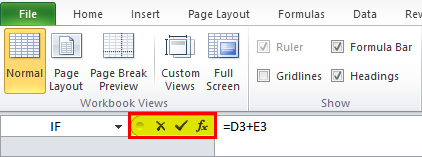
- × – This icon is to cancel edits and partial entry of the formula in the current cell.
- √ – Helps to edit the data in the current cell without moving the active highlighted cell to another.
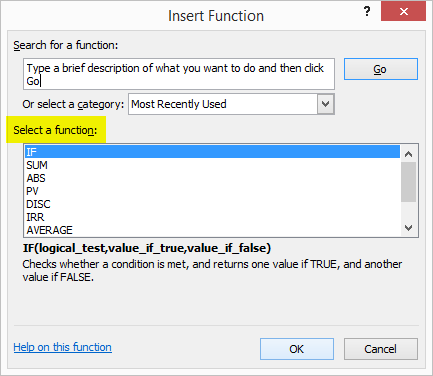
- ƒx – This is a shortcut to insert the different functions used in the calculations.
The below dialogue box will drop down the different functions available.
The same can activate by using the shortcuts as
- Esc key – Remove the edits and a partial entry.
- Enter key – Edit the data in the current cell without moving the active highlighted cell to another.
- Shift + F3 – To get the dialog box to insert the functions.
How to Expand the Visibility of Formula Bar?
A formula will display by selecting the formula bar rather than the values. While you are opening an Excel sheet, the cells will show the values. But if you select a specific column, the formula applied to the cell will show in the formula bar.
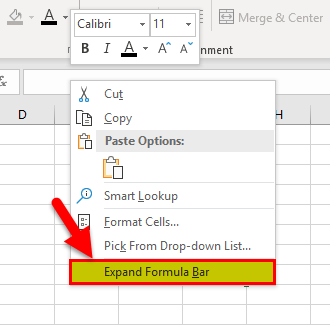
If the formula bar is expanded, the “Collapse Formula Bar” option will be visible on the right click.
When you use complex formulas and many entries, the expansion of the formula bar is allowed. Expanding the formula bar wraps the data into more than one line. This helps you edit the formula easily, unlike within the corresponding cell.
- By clicking the arrow at the end of the formula bar
- By expanding the mouse pointer selection with the two-headed arrow
- By right-clicking the formula bar, select the option from the drop menu
The alternate option is to use the keyboard shortcut Ctrl + Shift + U. If the same keys are pressed repeatedly, the default size will restore.
To wrap the complex formulas or data into multiple lines, point your selection where you want to break your data or formula, and press Alt + Enter. The data or formula will move to the next line in the formula bar.
How to Protect the Formula from Unwanted Editing?
You can protect the formulas that you have applied in different cells. There are chances to delete the formulas when multiple persons handle the same Excel sheet. Using some simple steps, you can protect your formulas from editing by unauthorized users.
The first step is to hide the cells or range of cells where the formula is being applied.
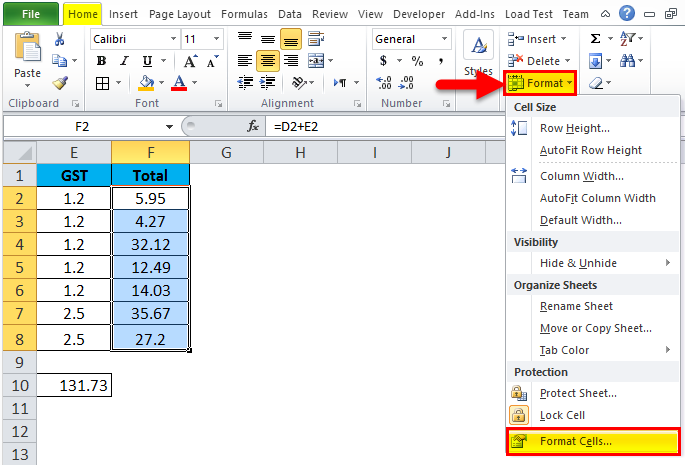
- Select the range of cells where you have already applied some formulas and want to hide. From the menu bar, click home and go to the format option to get a drop-down.
- Select the “Format Cells” option from the dropbox.
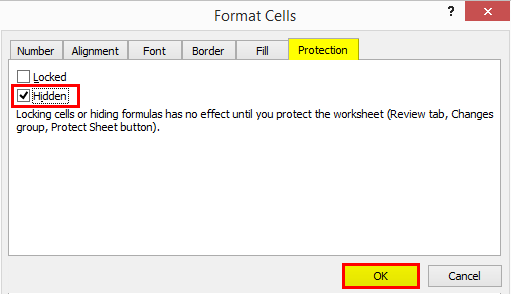
A dialog box will appear to select the “Protection” tab. Select the hidden checkbox by enabling the tick mark Press “OK” to apply your selection and close the dialog box.
The next stage is to enable the worksheet protection
- Click on the drop-down from the same format option in the home menu.
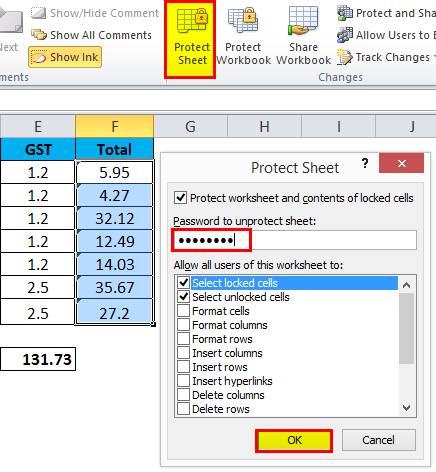
- Go to the “Protect Sheet” option from the drop-down list
- You will get a dialogue box that helps you to give protection to the selected cells
- By checking the “Protect worksheet and contents of the locked cell”, the protection will be enabled
- To protect the cells with the password, you have the option to give a password
- You can use the given password to unprotect the same selected cells.
After setting the protection, if you try to make any changes, you will get a warning message to use the password to make any changes.

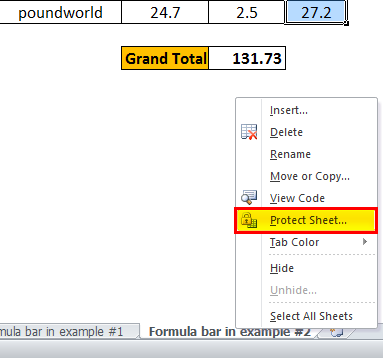
The same options are also available when you select the range of cells and right-click
While selecting the format cells, you will get the same dialog box to hide the formulas. To protect the sheet, you can right-click on the sheet name and will get the same dialog box to protect the sheet.
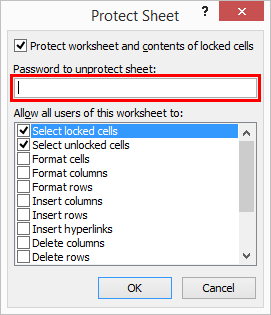
You will get a dialog box to set the password if you want to make the sheet password protected.
Using the shortcut key F2 makes it possible to edit the active cell. This is a default setting if you need to make any changes to this.
Go to the File menu in the “Option” menu will get Advanced editing options to disable the “Allow editing directly in the cell“.
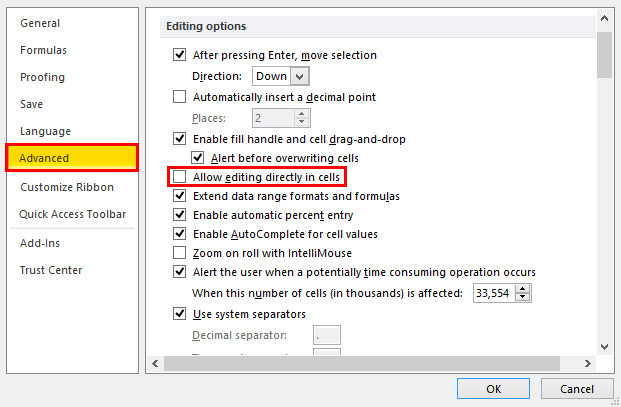
This will prevent unwanted editing of the inserted formula by mistake.
Things to Remember About Formula Bar in Excel
- Since the formula bar always points to the active cell while applying the formula, you should ensure the active cell is correct.
- Better to use a formula bar for editing an applied formula. This will help you to manage the long formulas or data easily.
- Apart from the menu bar, use the shortcuts and right-click the selection to make your work easy.
- If you share the Excel document with multiple users, ensure the formulas are protected from editing. This will help to prevent data loss.
Recommended Articles
This is a guide to Formula Bar in Excel. Here we discuss how to use Formula Bar in Excel, practical examples, and a downloadable Excel template. You can also go through our other suggested articles –
