Updated June 1, 2023
Introduction to Red Eye Tool in Photoshop
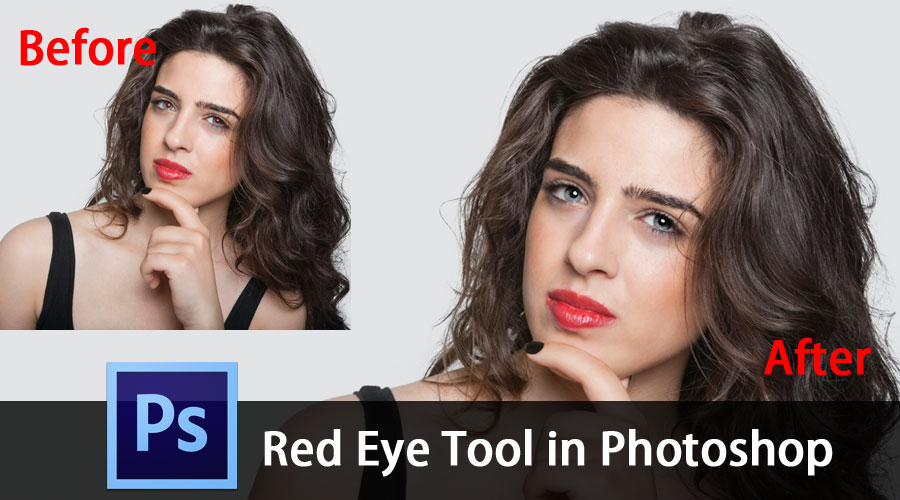
Adobe Photoshop is a raster graphics editor software developed by Adobe Inc. Photoshop is considered the leader in image editing software. This software allows users to crop, resize, manipulate, correct color, and animate digital images. Photoshop provides users with many tools and features to edit their images, enabling them to make them attractive and effective. You may have heard about the red-eye in photographs. It is the common appearance of red pupils in color photographs of the eyes of humans or animals. The flash causes this to happen when taking a photo. The light of the flash reflects from the retina, and the camera captures this, which results in the red color in the eyes.
Photoshop allows us to remove this red-eye using its features. A red-eye tool is a user-friendly tool that removes the red-eye effects that appear in photographs. Today we will discuss the red-eye tool, and through this article, you will learn how to use the red-eye tool. The work is explained with examples for your better understanding. In this topic, we will learn about the Red Eye Tool in Photoshop.
How to Use Red Eye Tool?
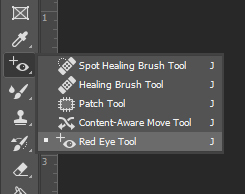
Let us start with the selection of the red-eye tool. Identifying the location of the tool is the first step. For that, locate the toolbar on the left side of the workspace, and within the toolbar, find the spot healing tools menu with a band-aid-shaped symbol. After selecting the spot healing tool, you can see more selections appear. Select the red-eye tool at the bottom of the list.
Check the image attached below, which shows you the toolbar and spot healing tools menu. You can see the Red-eye tool at the bottom of the list.
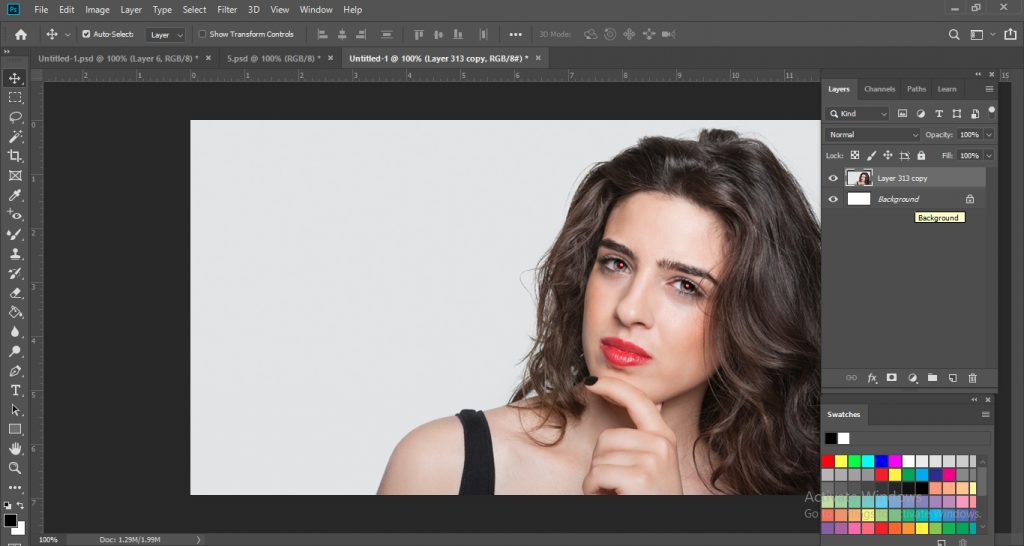
To explain the working of the red-eye tool, I have selected an image of a kid with a red eye. To start the trial, open the image in your Photoshop software, as shown in the image below.
Before going for further steps, you should set the values for pupil size and darken amount. Those are listed at the top of the workspace. Put both the values like 50% since it is the default value, and most of the red-eye can be removed with these values. See the below-attached image, which shows you the pupil size and darkening amount options.

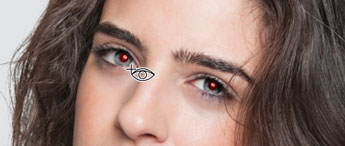
There are two ways to remove red-eye using Photoshop. The first method is to click the red pupil after selecting the red-eye tool, and Photoshop will automatically select the red area and remove the red color. This is the easiest and most common method used. See the below-attached image below; you can see the red-eye tool is placed in the red-colored pupil.
BEFORE
The image below shows the final image in which Photoshop automatically detects red and changes the color to natural black.
AFTER

Another method to remove the red-eye is manually selecting the affected area and allowing Photoshop to detect the red color. When you perform this action, you achieve more control over the color and provide Photoshop with precise location information. After selecting the red-eye tool, this method goes to the affected area and clicks and drags around the eyes to make the selection. This will allow the software to identify the location and remove the red color.
See the below-attached images, which show the selection of the affected area and removing the red-eye using the second method,
BEFORE

AFTER

To fully remove the red-eye in a complicated image, you may need to use either the methods or apply any of the methods for several times. Just keep applying them until the red color gets eliminated. Thus you can obliterate the red-eye.
Conclusion
Red-eye can quickly ruin a great image. We all experienced the bad effect of red-eye in some way or other. But through this article, we found an excellent remedy for that. Photoshop has everything in it to make a photo looks better. We can quickly repair the photo, remove the red color, and make the eye look natural through the red-eye tool.
This feature is very easy to use. Even beginners can also do this editing feature without any complications. This will help you to make your personal photos looks better. Photoshop is available on both computers and mobile phones. You can even use the red-eye tool on your handset.
Recommended Article
This has been a guide to Red Eye Tool in Photoshop. Here we have discussed the steps to Use Red Eye Tool in Photoshop and how to remove Red Eye. You may also look at the following article to learn more –
