
Introduction to Paint Bucket Tool in Photoshop
The Paint Bucket tool isn’t something which has been created just now or in about a few years ago. On the contrary, this tool has been most commonly used since the time its users ever created Photoshop. This tool is most frequently used for rendering, publishing, and photo editing by the artists or photographers who use this tool daily, especially when used with a marquee tool.
To make a note of its uses, this tool helps fill the selected area in the image with a color that is the foreground color, and it comes in handy when used to create a background or a layout design. The best part is that this can allow us to fill up all of the areas connected to the rest of the area selected for the color to be filled in.
Where is the Paint Bucket Tool present in Photoshop?
To know and learn as to where the paint bucket tool is located, we will see it in this image, and examples are given below:

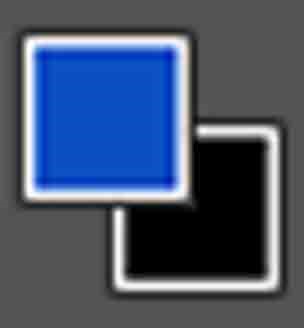
The Paint bucket tool can be found in the side Toolbar, i.e. at the middle left-hand side of the Toolbar, which is the same location where the Gradient tool is located.

How to Use the Paint Bucket Tool in Photoshop?
To know how we go about using the Paint bucket tool, we start by following a few steps. While doing so, we should also start our work by using the shortcut keys to speed our work a bit, which can help us improve our speed. The shortcut key (V) on the keyboard activates the Move tool to help us with the navigation part through our Photoshop software options while we are going through various options.
The Move tool can also be found in the side Toolbar, i.e. at the top left-hand corner in the side Toolbar.
Steps to Use Paint Bucket Tool
Step 1: Go to the option to select the “Paint bucket tool” by left-clicking and holding down on the icon and then selecting the Paint bucket tool.
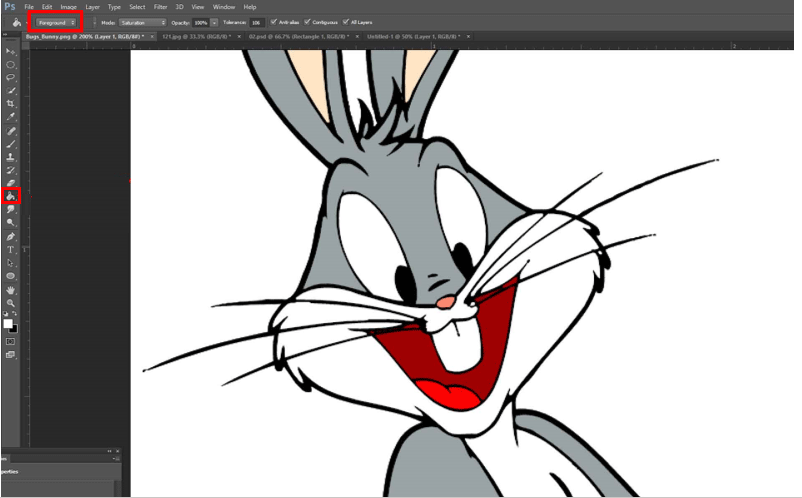
Using this tool, we then set the foreground color as Blue, and while simultaneously using the Paint Bucket Tool, we apply the color on to the transparent space of the background, which is to change or modify something in the image.

We can also use the shortcut key (G) on the keyboard. This shortcut key activates the Paint Bucket Tool as well the set tools, i.e. the “Gradient Tool” and the “3D Material drop Tool”.
Step 2: Selecting a color for the Foreground.
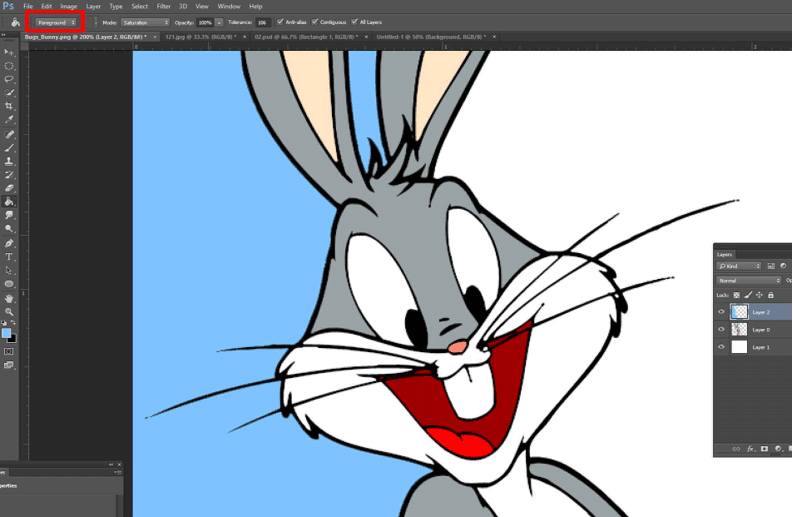
In order to start adding or selecting colors, we need to click on the “Foreground Color” swatch, which we see in the image. Using the Tool Options Bar, we select the options Fill type to be applied by this tool which we see on the top left-hand corner in the images. By default, the fill is selected to be used for the “Foreground color”, and after we apply the Blue color using the Paint Bucket Tool, we see the output in the image below.
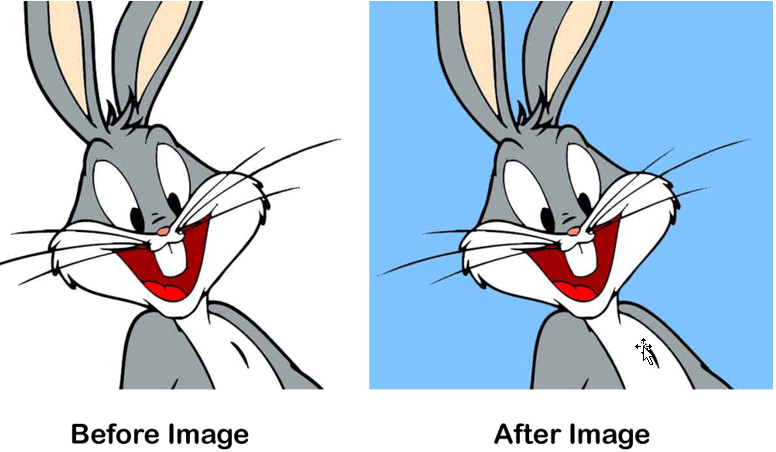
Output Comparison
In case we wish to use some pattern instead of colors, we can then go to the select “Pattern fill” option. This tool is located in the same place, i.e. we see it on the top left-hand corner.
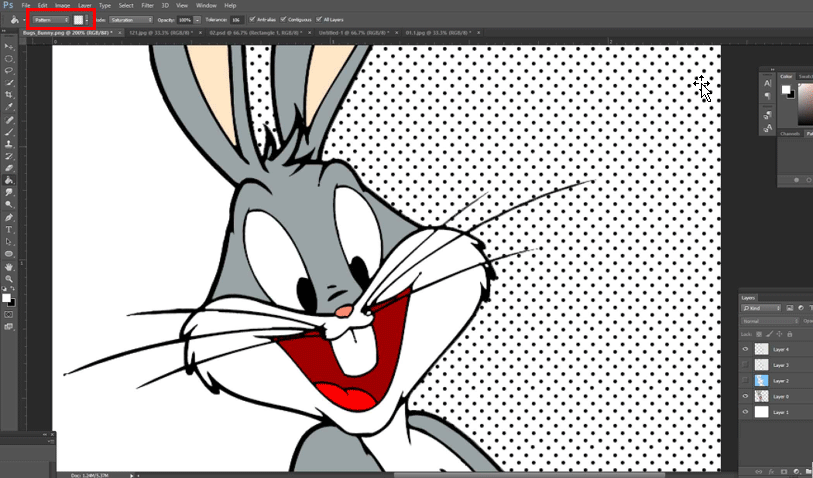
To start using the patterns, we go to the drop-down, and we can select which pattern to apply on to our selections or image backgrounds as we see in this image which we use to paint the desired area.
Output Comparison
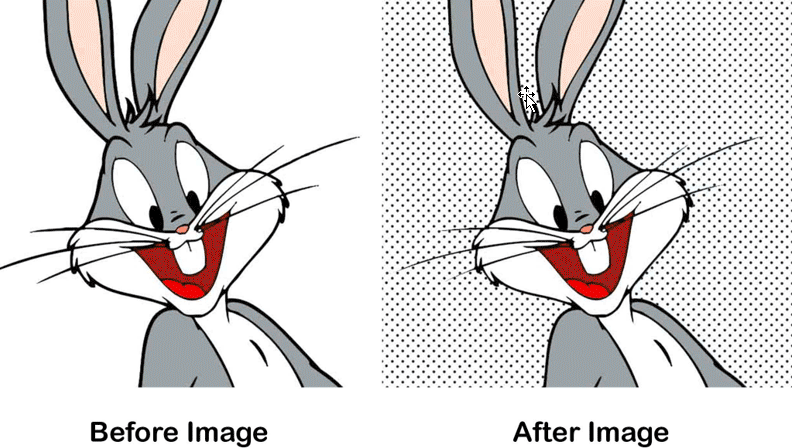
In this manner, we then know how to apply the colors or patterns using the Paint Bucket Tool, which we see the outputs in the above images.
Paint Bucket Tool in Photoshop
Step 1: After we get to know how to use the fill color type or pattern type, we now can play with the other options with the image below.
The “Opacity” option is something we use to set its transparency percentage, i.e. from 1 to 100% using the slider. This way, what we get is that our color which we choose will bring it to be opaque.
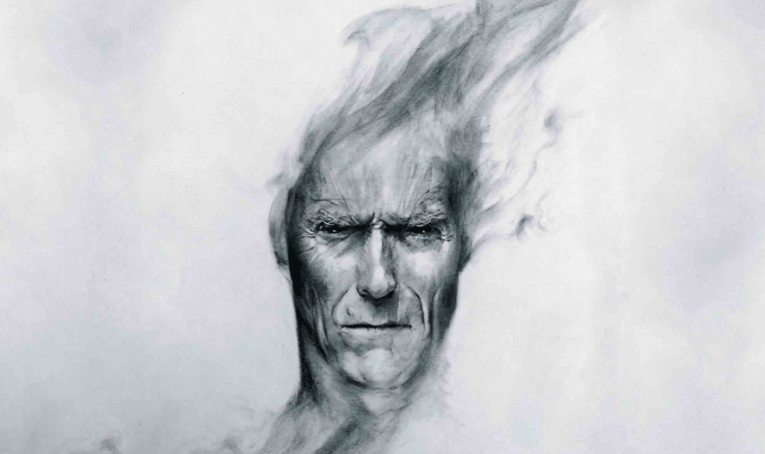
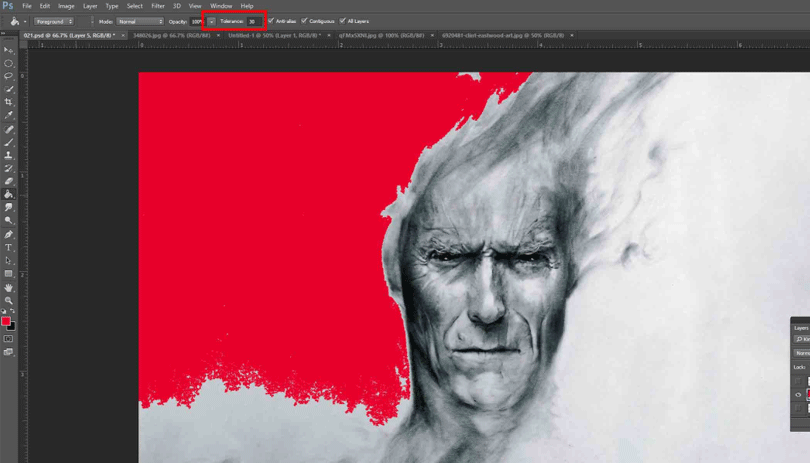
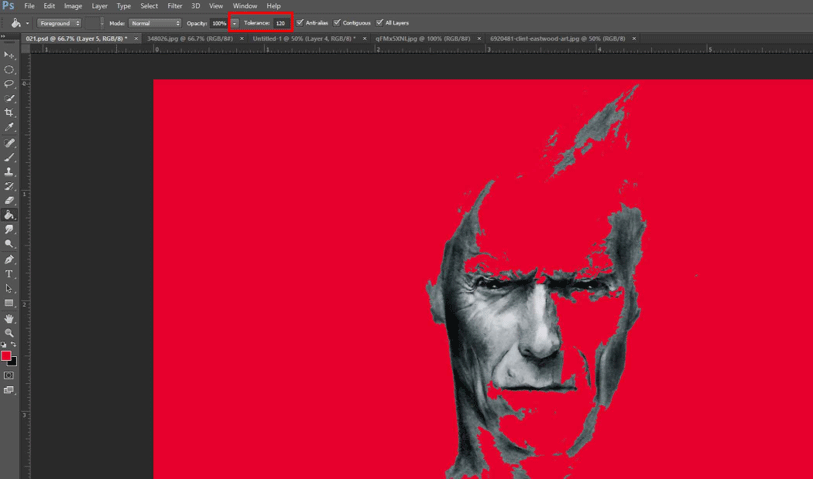
Step 2: The “Tolerance” option is something from which the lowest tolerance value only paints the color on the image that has the same color in that area. The values in the slider which we have by default to choose from, i.e. starting with 0 to 255.
The below image shows the output, and we see the Tolerance value is at 30.
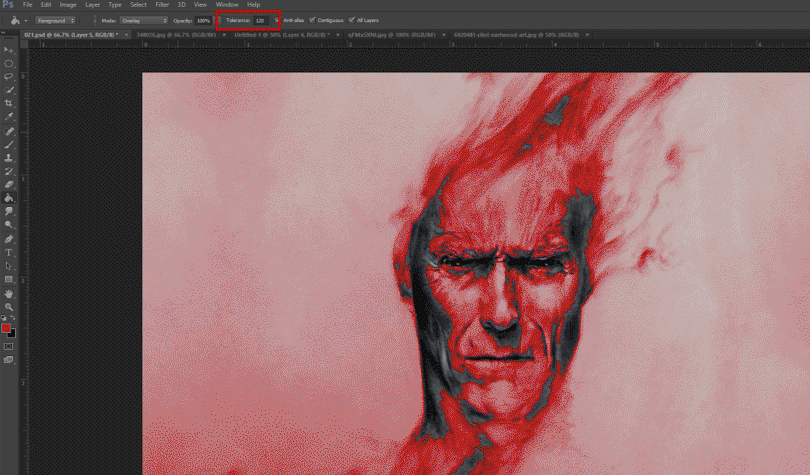
Step 3: As we go to the Tolerance value at 120, we see how much more does it cover as much as it takes a wide range of pixels in the image below.
Step 4: The “Blending Mode” option is something that we can use to apply while testing around with different Blending modes that could suit our needs. Thus, this helps us to achieve how we can use colors using the Paint Bucket Tool to create a perfect blended background.
Furthermore, when we have the option “All Layers” selected, it affects the fill color selected in all layers, and if it’s not selected, then the pixels are filled in the currently selected layer. When we use the option “Anti-aliasing”, we can have better smooth curves.
Different Ways of Using the Paint Bucket Tool
There are ways to how we go about using the Paint bucket tool, such as:
- This tool can be used to paint diagrams or image redraws that require adequate information added to a design or publishing website.
- This tool is helpful for kids to help them learn how to fill colors or patterns to make them understand and learn them quickly.
Conclusion
Coming to our conclusion, we all have to agree that this tool which is combined with features and the ability to create something using blending options, tolerance, and opacity control, can give us a whole lot of support to use for our daily work, i.e.in our publishing, gaming apps, website designing, Book Covers, etc. Thus, we know this tool is quite useful and helpful to bring us control for our primary goal.
Recommended Articles
This has been a guide to the Paint Bucket Tool in Photoshop. Here we discuss the concept and how to use the Paint Bucket Tool in Photoshop. You can also go through our other suggested articles to learn more –
