Updated March 13, 2023

Definition of Nginx X-Forwarded-For
Nginx x-forwarded-for header is the header of the de-facto standard used for identifying the client connecting originating IP address to web server through the proxy of HTTP or we can also connect through by using a load balancer. When traffic is intercepting between server and client, the server will access the logs containing the load balancer’s IP address and proxy. For seeing the original IP address, we are using x-forwarded-for.
Overview of Nginx X-Forwarded-For
The x-forwarded-for is the abbreviation of the XFF. The XFF is a simple and very powerful solution to a common problem. Nginx is deployed on the cluster behind the load balancer of 7 layers. At the time of implementing the proxy layer, 7 is offering the whole host options such as an access control list. There are multiple cases where the requests are routed through the intermediate server before reaching the application server. The intermediate server includes the reverse proxy, load balancer, and CDN. Multiple CDN services are available like KeyCDN, MaxCDN, AWS cloudfront, cloudfare and google CDN.
How to use nginx x-forwarded-for?
The reverse proxy is the component of the server which was listened to the requests from the internet and forwards the traffic to the actual service. The below steps show how to use the XFF as follows.
- In the first step for using XFF, we are installing the nginx server. We can install the server of nginx by using the apt-get command in the ubuntu system. If suppose we are using another Linux flavor then we can also use rpm or yum command to install the nginx server.
apt-get install nginx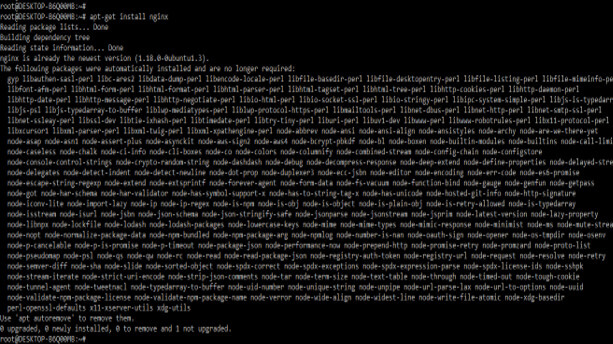
2. The nginx server is not started by default after installing the same on the ubuntu system we need to start it manually we can start the nginx server by using the “service nginx start” command. After starting the nginx server, we can check the status of the nginx server by using the “service nginx status” command. In the below example, we can see the version of the nginx server and also we can see the module which we are included into the nginx server.
service nginx start

service nginx status

nginx –V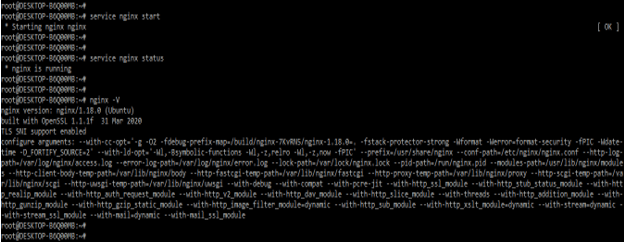
3. After starting the nginx server now, we are opening the configuration files for the setup of nginx uwsgi as follows.
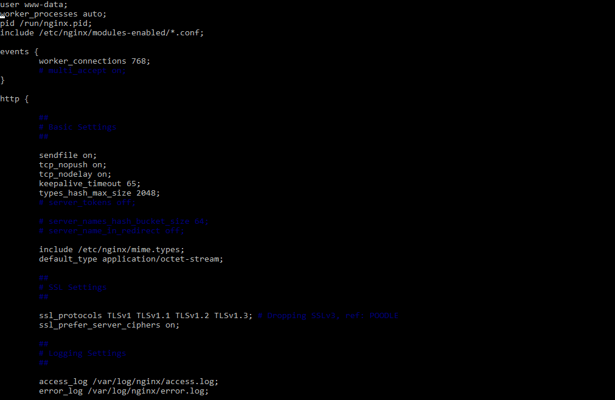
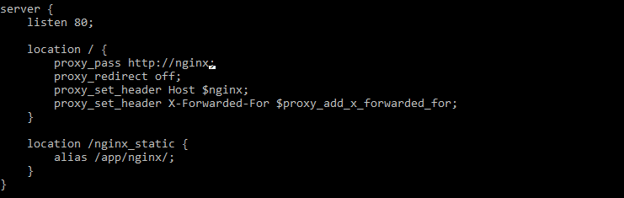
4. After opening the configuration file in this step, we define the server and location directive of XFF. In the below example, we are defining the proxy set header as follows.
Code –
server {

listen 80;

location / {

proxy_pass http://nginx;

proxy_redirect off;

proxy_set_header Host $nginx;

proxy_set_header X-Forwarded-For $proxy_add_x_forwarded_for;

}

location /nginx_static {

alias /app/nginx/;

}

}
5. After defining the server and location directive of XFF now, we are checking the syntax of the config file and taking a restart of the nginx server. We are checking the syntax of the configuration file by using the nginx –t command.
nginx –t

service nginx restart
Nginx x-forwarded-for IP Address
X-forwarded-for is the special header of the http field, which was used to identify the client IP address, regardless of connecting through the proxy, load balancer, or another such service. Normally we have a load balancer to intercept the traffic of our website, and then it will forward to the backend server. Then backend server will intercept all the traffic and receive the same, which was coming from the load balancer.
If suppose we are using an nginx, then we will need to modify it in order to make an XFF ip address field. For our nginx server to use the real IP address instead of the proxy address, we will need to enable the module of ngx http realip module. This module is referred to as the realip module. This module is responsible for telling our web server which information we are using for incoming requests when we are determining the address of the client IP.
For starting with the realip module we need to complete the nginx as it will not be built by default. For all the module which was not included in nginx, we need to recompile our web server to include the same. We can enable the realip module into the nginx module in the parameter of configuration. While installing the realip module, we need to make sure that we need to include configuration parameters which was used in our setup. The below example shows the nginx XFF ip address.
In the below example, we are adding the real ip addresses while using the XFF, we are also using the realip header as follows.
real_ip_header X-Forwarded-For;

set_real_ip_from 192.168.92.128;![]()
After defining the XFF ip address, we need to check the syntax of the configuration file and need to reload the configuration file as follows.
nginx –t

service nginx reload
Nginx x-forwarded-for header
Using nginx, we can define two ways of service modified to use the XFF header. The method which was used depends on whether the nginx binary is compiled with the module of nginx. We can use the included module by using the “nginx -V” command.
Proxy forwards for the XFF heard will contain the application’s server IP. The application logs for receiving the header realip as the source IP at the time of using the proxy mode. This behavior is justified by using the argument that the proxy server received from the client traffic, which was direct.
We need to log the IP address, not the IP address for the load balancer. The client IP in the logs is helpful for tracking the origin of the traffic. In the below example, we are using the XFF header as follows.
location / {

proxy_pass http://nginx_header;

proxy_redirect off;

proxy_set_header Host $nginx_header;

proxy_set_header X-Forwarded-For $proxy_add_x_forwarded_for;

}
After defining the XFF header, we need to check the syntax of the configuration file and need to reload the configuration file as follows.
nginx –t

service nginx reload
Conclusion
Nginx is deployed on the cluster behind the load balancer of 7 layers. At the time of implementing the proxy layer, 7 is offering whole host options such as an access control list. The x-forwarded-for is an abbreviation of the XFF. The XFF is a simple and very powerful solution of a common problems.
Recommended Articles
This is a guide to Nginx X-Forwarded-For. Here we discuss the Definition, overviews, How to use nginx x-forwarded-for, and examples with code implementation. You may also have a look at the following articles to learn more –
