Updated May 12, 2023
Introduction to Nginx worker_connections
Nginx worker_connections is nothing but the number of connections that simultaneously manage the worker process. The default value of the nginx worker connection is 512, but most of the system contains sufficient resources which accommodate the higher value. The value of worker connection is determined by using the traffic’s nature and the server’s size. We can also use the method of testing for worker_connections.

What is Nginx worker_connections?
Nginx is a high-performance web server that boosts 40% of the website, which was the busiest. Nginx will execute the worker process, which is multiple, where each process will handle the connection, which is a large number of connections at one time. The default settings of nginx are working well; however, obtaining optimal performance will necessitate tuning. The nginx worker process specifies the total worker process spawned simultaneously. The number of nginx worker processes is set by one by default. The Nginx worker process is beneficial and essential in the nginx server.
How to Use nginx worker_connections?
It will work perfectly when executing one worker process with one CPU core; the nginx team is recommended to configure the nginx server using this way. We can increase the value of the worker process in multiple cases, such as the worker process will require a lot of disk input and output operations.
The below steps show how to use the nginx worker_connections as follows. First, to use the nginx worker_connections, we need to install the nginx server in our system.
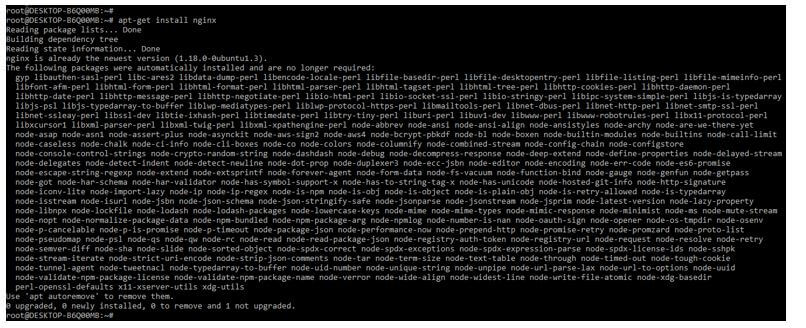
1. In this step, we install the nginx server on the ubuntu system. We are installing the nginx server by using the apt-get command.
Code:
apt-get install nginxOutput:
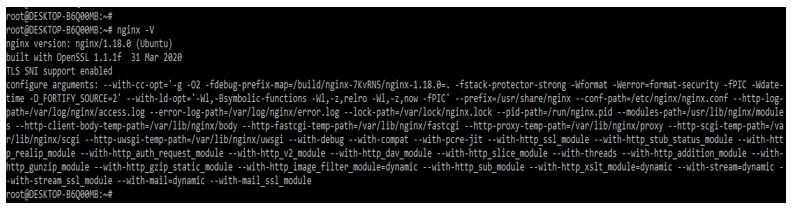
2. After installing the nginx server, we check the nginx installed version by using the following command. We can check the nginx version and the running status of the nginx server.
Code:
nginx –VOutput:
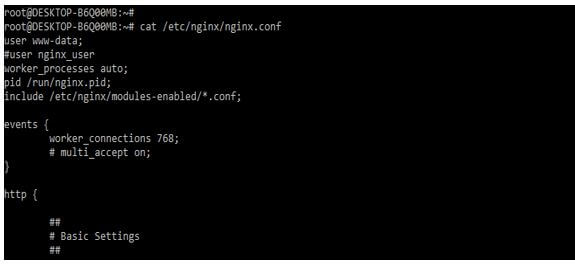
3. After installing the nginx on the ubuntu system, we are now opening the nginx configuration file to check the configuration of nginx.
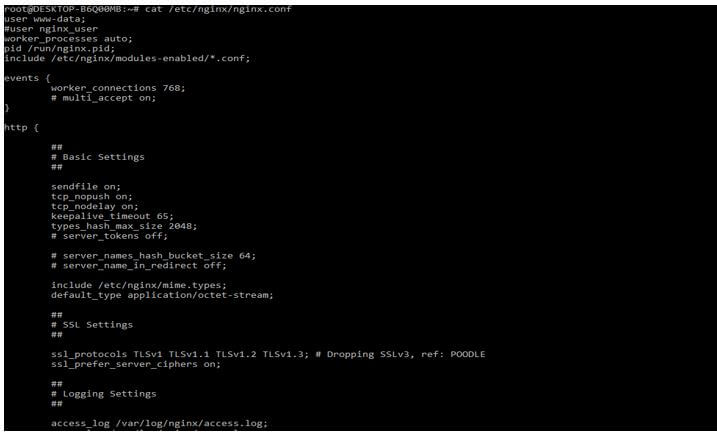
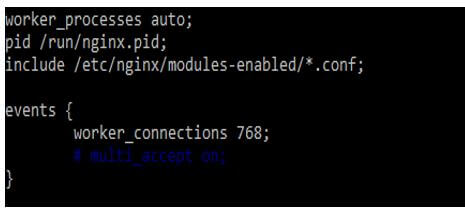
4. Basically, the directive of worker connections indicates the number of persons servicing once by the process of the worker. The default value of the nginx worker connection is 768. However, we can also maximize the worker connections potential by using ulimit. In the below example, we can see the ulimit of the ubuntu system is 1024. Below is the command to show the ulimit of the ubuntu system as follows.
Code:
ulimit –nOutput:

5. From the above output, we can see that the core limit will exist as 1024 per system. The figure below shows that the worker connection value is set as 768, which was by default. We can change this value per the ulimit we set at the OS level.
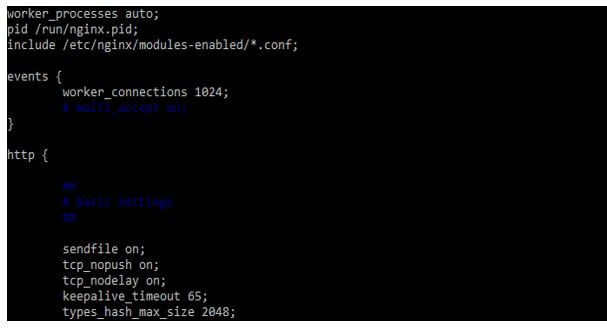
6. As per the above configuration file, the default output of worker connections is showing as 768; we can change this limit in our configuration file from 768 to 1024. In the below example, we are adding the worker connections into the block of events. Using this, we can fix the error of not having enough worker connections.
Code:
events {
 worker_connections 1024;
}
Output:
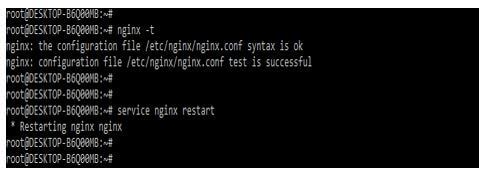
7. After adding the worker connections limit into the nginx configuration file, we are rebooting the nginx server to take the effect of the parameter we have changed into the configuration file. We are reloading the configuration file by restarting the nginx server as follows. Before restarting the server, we execute the nginx –t command to check the nginx configuration file does not contain any error.
Code:
nginx –t
service nginx restart
Output:

Nginx worker_connections Processes
The directive of the worker process is the backbone of the nginx server. When connecting our virtual server to the corrected IP and port, this directive is accountable for informing which workers are spawned. As per the standard settings, we can execute the one-worker process in a single core. However, setting any value will leave a lot of idle processes on our nginx server system.
We can check the number of cores on our nginx server by setting the value of worker connections processes. If suppose we are utilizing the 512 MB, then we have only one core for use. So it is better to confirm the number of cores from the system first and then the worker process value. In the below example, we are checking the CPU core of our system. The below example shows that our system contains 4 CPU cores as follows.

The default value of worker processes on to the nginx server auto means it will take from the number of processors. The below example shows to check the default value of the nginx server as follows.
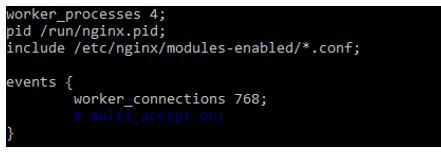
As we have seen, the worker processes in our server are by default auto, not per CPU core; we are setting the value of worker processes as four as follows. The below example shows to set the value of worker_processes as 4.
Code:
worker_processes 4;Output:
After adding the worker processes as four into the nginx configuration file, we reboot the nginx server to take the effect of the parameter we have changed into the configuration file. First, we check the syntax of configuration files.
Code:
nginx –t
service nginx restart
Output:
Conclusion
The number of nginx worker processes is set by one by default. The Nginx worker process is beneficial and essential in the nginx server. Nginx will execute the worker process, which is multiple, where each process will handle the connection, which is a large number of connections at one time.
Recommended Articles
This is a guide to Nginx worker_connections. Here we discuss the introduction, how to use nginx worker_connections? and processes. You may also have a look at the following articles to learn more –
