Introduction to Mirror Effect in Photoshop
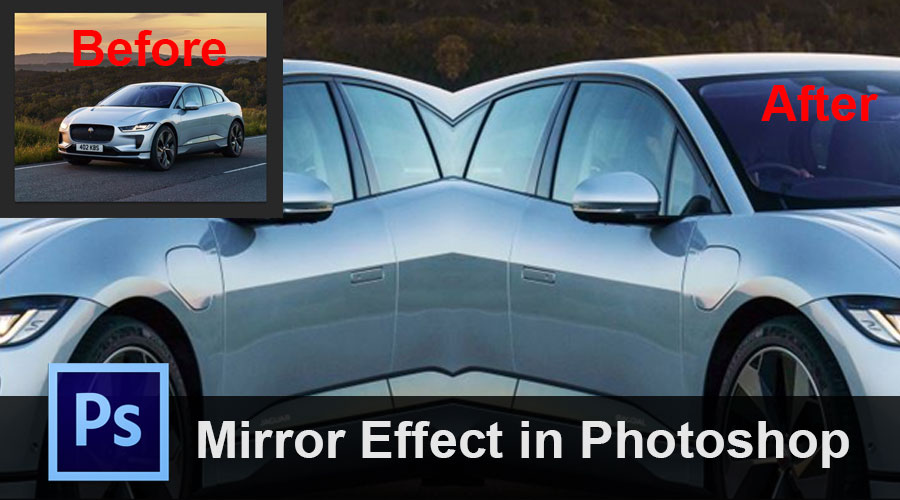
A mirror image reflects an object that seems nearly identical but reverses perpendicular to the mirror’s surface. In this Photoshop tutorial, we’re learning how to produce a mirror image impact with a picture, converting the right half of the picture into a mirror reflection of the left half. You have likely seen this impact everywhere, particularly in movie posters or album pages and, as it is very simple to produce with many of Photoshop’s traditional and common picture impacts.
How to Create a Mirror Effect in Photoshop?
Here we have shown the step-by-step process on how to create a Mirror Effect in photoshop.
Step 1: Create A New Blank Document
Let’s begin stuff with fresh empty paper instead of operating straight on the picture itself. Instead of attempting to operate in the dimension of the photograph itself, we can generate our impact at any magnitude that we need. Go up to the panel File at the bottom of the display to select New, or just click on the Ctrl+N (Win) / Command+N (Mac) keyboard shortcut. The New Document dialog box of Photoshop carries in either manner. Enter the sizes for the impact that you need. I will type for this tutorial in a normal6-inch width and 4-inch height range, but you can naturally specify whatever sizes you need. I will register 240 pixels per inch for the resolution, which should offer me competent display outcomes if I choose to display the picture subsequently. The most popular size for screen outcomes for specialist applications is 300 pixels/inch, but you will frequently discover that you can get back with less without significant performance deterioration. Usually, I use my pictures for 240 pixels/inch:
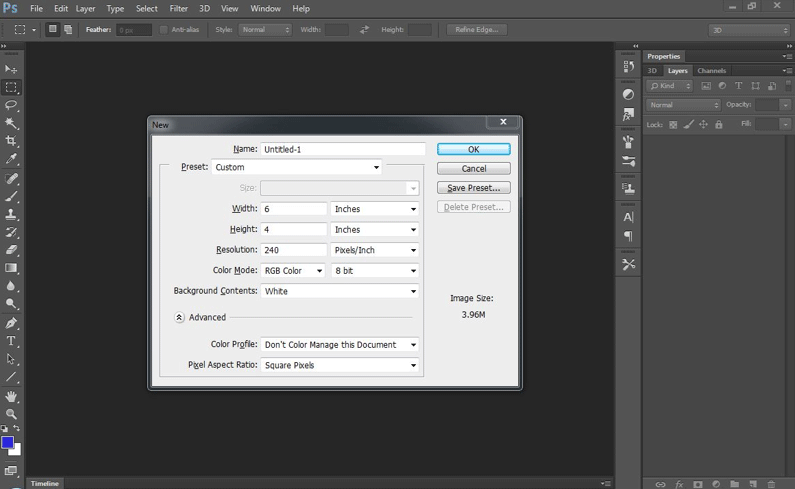
When you have finished exiting the dialog box, click OK. Your display will display a fresh empty paper.
Step 2: Select And Copy The Photo
Switch to the paper folder, which includes the picture with which you are collaborating. We have to transfer the picture into our fresh empty paper. There are a few methods to do that, but we’re going to use the traditional’ copy and paste’ technique. We must pick the picture as a whole first. Go to the bottom of your display Select panel, select All, or click the Ctrl + A (Gain) / Command+ A (Mac) computer shortcut. In the paper panel, you find a choice contour (also recognized as Marching Ants) around the whole picture:

Step 3: Into the new document, paste the photo
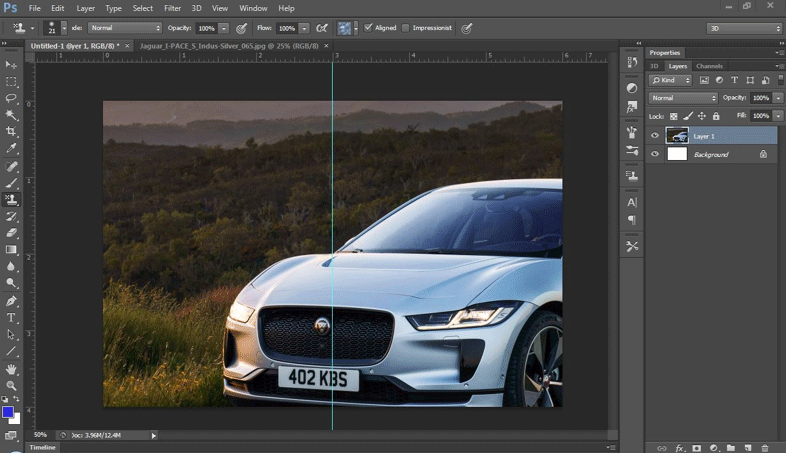
Return to your fresh empty paper. We will insert the picture into it. Go to the Edit menu and select Paste for that purpose. This moment Or click the Ctrl+V (Win) / Command+V button shortcut.
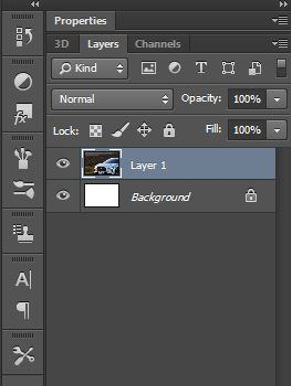
Looking at the fresh paper in the Layers palette, we can see that our picture is positioned above the background level, on its own surface. Photoshop labeled the coating “Layer 1” automatically:
At this time, you can close the original picture document window because we don’t have to open it anymore.
Step 4: The photo inside the document, if necessary resize and reposition
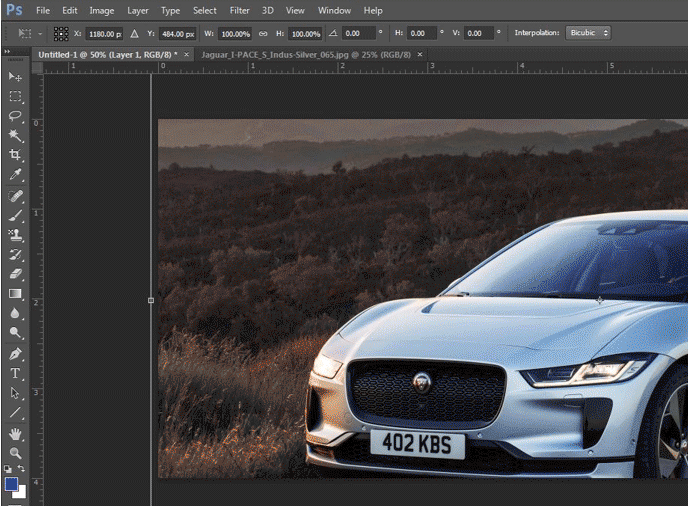
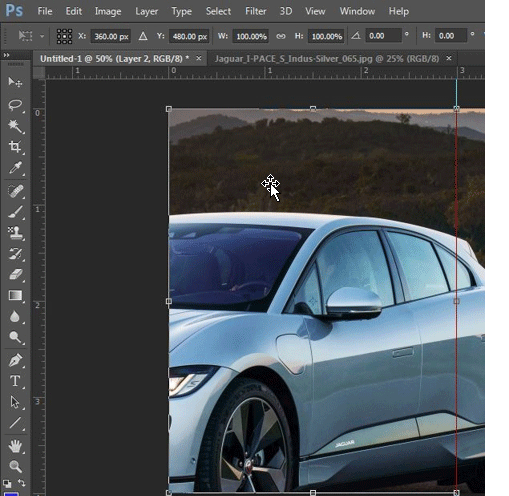
Probably you’ll discover the picture does not match into the fresh paper completely. In my case, the picture is too large, and part of it extends beyond the visible area of the document. We must resize it, and we can use the Free Transform button from Photoshop to do this. Go to the Edit panel and select Free Transform or click Strl+T (Win) /Command+T button shortcut.
Anyway, the Free Transform cabinet takes up the picture and treats them. Unfortunately, I can’t see all Free Transform keys, given that portion of my picture stretches beyond the noticeable region of the document. To solve this, I just go up to the edge of the display View panel and select Sit on display. With a button shortcut Ctrl+0 (Win)/Command+0, I could also pick the same choice.
The Fit on Screen control zooms the picture so far as it can now be seen inside of the file cabinet, including the Free Transform buttons. To resize the picture, keep down your Shift button, press and push the door buttons to the inside of the noticeable region until you have the picture you need. Download the Shift button while dragging restricts the image’s color proportion to not be inadvertently distorted. For me, I’ll press on the button in the correct bottom and pull the grip inside until you see the top of the photograph:
You can move the picture as necessary by pressing on it and pulling the picture around anywhere in the Free Transform cabinet. Just don’t press the tiny destination icon in the middle of the Free Transform button; else, you will press the destination icon, not the picture. When finished, click the Enter (Win)/Return (Mac) button in the Free Transform button to acknowledge the modifications and leave.
To zoom in the picture away to complete the full-text screen again, just like now, select Fit on Screen again from the View panel. Also, you can choose Real Pixels from the View panel, which will filter the picture to 100%. Ctrl+Alt+0 (Win)/Command+Option+0 (Mac) is the screen shortcut for Actual Pixels.
Step 5: Down the Middle of the Document, add a Vertical Guide
We must transfer everything that we want “reflection” to a part of the paper first to generate our mirror image impact. In my situation, I need to have the man remaining in my picture. I’ll insert a manual down the center of the picture to assist me to figure out precisely how far remaining I need to push him. Go to the upper display View panel and select the New Guide:
This creates the new dialog box for Photoshop. To orient the manual up and down the picture, choose Vertical rather than the bottom. Enter 50% of the Position choice so that the precise middle of the paper goes down:
To close the dialog, click OK, and Photoshop will insert a fresh manual right down the file middle:
Step 6: Drag the Main subject to one side of the paper
Think about the manual we have just inserted as the “reverse stage.” In other phrases, on the other hand of the manual, everything we put on one hand appears to be reflected. Naturally, we first have to transfer everything we want to reflect on to one part of the paper before reflecting on anything. Choose the Move device from the bottom of the instrument palette or click column V for the shortcut:
Then press anywhere on the picture with the Move instrument chosen and push it left or correct until all of the mirrors you wish on one part of the manual are displayed. Keep the Shift key down, which forces a picture to only shift left and correct so that you can not shift it up or down inadvertently. In my situation, in my picture, I will drag the man to the corner of the paper to the stage that the top of his ear reaches his chest. For my impact, this will be the reverse side’:

Step 7: Drag a selection to the side you want to look at.
To use a shortcut on the keyboard, pick the rectangular tool at the bottom of the Werkzeug palette, or click M to pick:
Drag a range around the whole part of the paper you would like to mirror with the Rectangular Marquee Tool chosen. I will carry a range around the remaining part of the paper in my situation. As soon as you have the Snap and the Snap to display choices in the View menu at the bottom of the display, your cursor will grip into the Guide as soon as your approach is near enough. When finished, the whole part of the paper you are supposed to mirror should be shown in a choice format:
Step 8: Copy The Selection To A New Layer
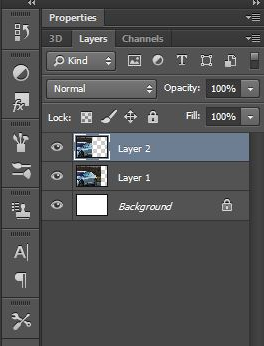
If the page is now being displayed, go up to the bottom of the display layer panel, select New, and select Layer with the Copy function. Or tap the Ctrl+J (Win) / Command+J (Mac) button shortcut:
This produces a duplicate and puts it straight over the preceding coating on a fresh coating. Nothing appears in this document window to have happened, but if we look into the Layers palette, we can now see we’ve got a new layer named “Layer 2,” and if we look at the layer preview thumbnail on the left of the name of the layer, it can be seen that the layer contains a copy of the selected document side:
Step 9: Flip The Document Horizontally on the left or right side.
All we have to do is to turn halfway the paper that is on “Layer 2” horizontally to produce our reflected picture impact. However, before we do, we have to say Photoshop that we want to use the vertical core (where the manual is) of the paper as the “cut stage.” To do this, click Ctrl+T (Win) and Command+T (Mac) to resume the Free Transform function of Photoshop. Appear around which part of a paper you transferred to “layer 2” you’re going to see the Free Transform cabinet. It’s the remaining hand in my situation. See the sign I instructed you not to press previously in the middle of the cabinet Free Transform.
This destination sign shows the Free Transform control rotation point. It is standard in the middle, but we can transfer it anywhere we want, in the Free Transformations cabinet. The fresh rotation point, wherever we pass it. Suppose Photoshop wants to turn the picture along with the manual; just press on the destination sign and bring it to the side-handle right in the center of the paper. The destination sign snaps to it once you get closer enough to the grip:
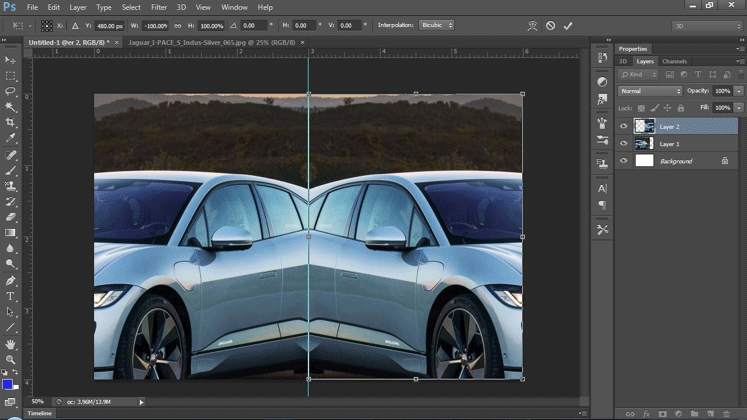
Still activated with Free Transform, go to the Edit menu at the bottom of the display, select Transform, and Flip Horizontal.
Photoshop shifts “Layer 2” images for us using our freshly repositioned destination sign for the spin stage, and a perfect reflected duplicate of the bottom quarter is now being made to the correct part of the paper:
To acknowledge conversion and departure from the Free Transform button, press Enter (Win)/Return (Mac). Our manual is no longer necessary to go to the View page to select Clear Guides:
Select View > to remove the guide by select Clear Guides
We are accomplished! We are accomplished! Our finished “mirror picture” impact is here, after just some easy measures:

Conclusion – Mirror Effect in Photoshop
Mirror Effect is used as a metacognition instrument and as a wisdom vector in education. The mirror effect is possible by observing, hearing to his remarks, or by viewing a clip straight from another individual. The effect is the reflection of substances like a mirror or water as an optical effect. It is also a geometry notion and can be employed as a 3-D structural conceptualization method.
Recommended Articles
This has been a guide to the Mirror Effect in Photoshop. Here we discuss the Concept and step-by-step explanation of the Mirror Effect in Photoshop. You can also go through our other suggested articles to learn more –
