Updated June 2, 2023
Introduction to Custom Shape Tool in Photoshop
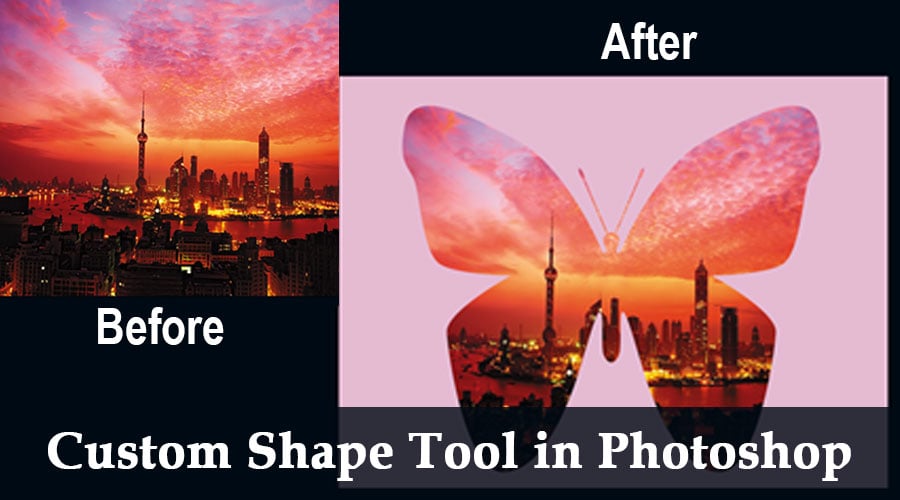
Custom Shape Tool in Photoshop is pre-created vector artwork elements already installed in Photoshop software. These custom shapes are convenient to use; they significantly save time. Photoshop custom shape tool is beneficial while making any specific form of shapes/complex design. If you do not have a suitable brush, use predefined custom shapes present. These Custom shapes differ from brushes. You can smoothly scale the size of shapes from smaller to bigger and vice versa without compromising their resolution. This gives you more opportunity to explore the complexity of the designs.
What is Photoshop?
Photoshop is widely used by many professional photographers, editors, and designers for various tasks like retouching or editing and manipulating. Besides these, Photoshop also does color correction, photo restoration, clipping path, and damage expert of old photographs; this task looks minor in changes but significantly impacts editing/designing.
These features provided by Photoshop are lifesavers, as it takes significantly less time to do and works super efficiently for those editing loads of photographs in a day. Tools provided by Photoshop software are convenient and befitted for various graphic design programs. That is why Photoshop has become very popular and is being used as a prevalent editing program by everyone on a professional and personal level who would like to pursue this as a profession or hobby.
How to Use Custom Shape in Photoshop?
Let’s take a look at the custom shapes available in Photoshop:
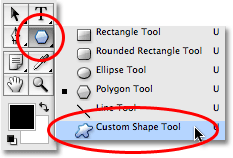
First, let’s see how to select a custom shape tool. In the toolbox, a rectangular shape is available; if you drag the cursor, you can find various shape tools that are looped beneath it.
Drag down over the rectangle shape; you can select whichever tool you want. In the control bar, you would see different settings of shapes. If you click on the little arrow pointing downwards, you can see the full pallet of shapes. You can make custom-built shapes for your personal use/project.
In the control bar, a few settings need to be considered; Photoshop allows us to draw three different kinds of shapes. 1) vector shape 2) Path outline of shape 3) Pixel-based shape, where Photoshop will fill color to it.
In most cases, vector artwork will prefer the select shape layers option from the control bar.

A Custom Selection of Shapes From ToolBox
Custom Shapes in Photoshop for Creative Application
Step-by-step guide on how to start using Custom shapes in Photoshop for creative application.
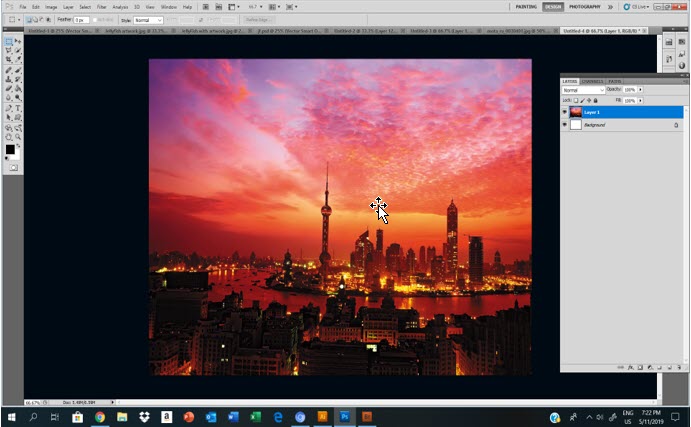
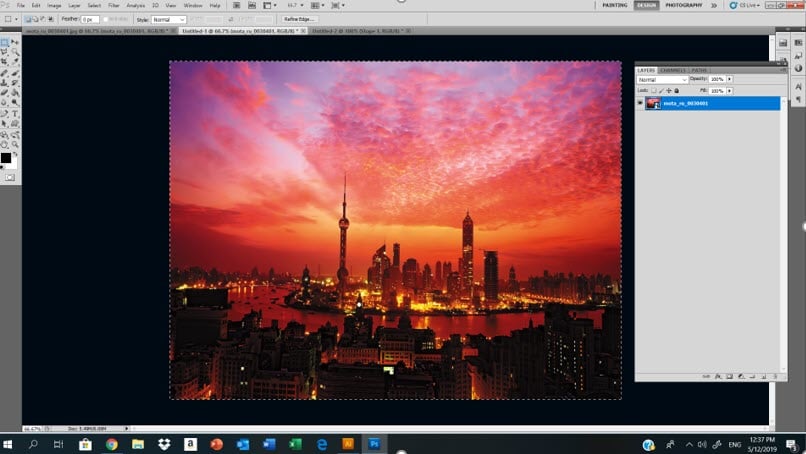
Step 1 – The image shown above is the actual/previous image.
Step 2 – Create another document for the web.
Step 3 – Select the custom shape you want for your creative artwork.
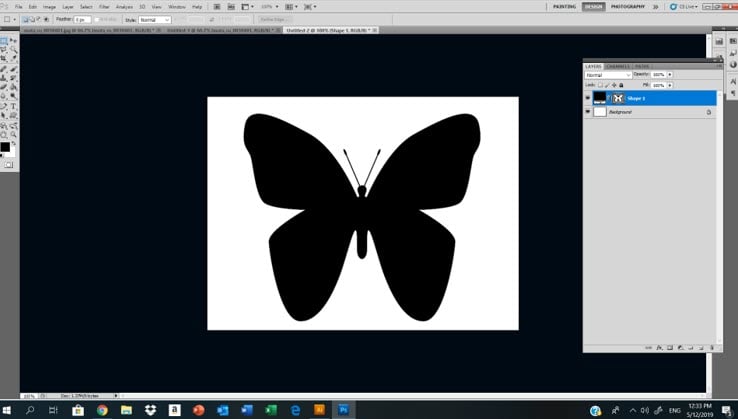
Step 4 – Click on selecting the custom shape in which you would like to proceed.
Here I selected a butterfly custom shape with a fill black color with no stroke.
Step 5 – Drag an image you would like to place in the custom shape of your choice.
Now we are going to place this image in our butterfly custom shape.
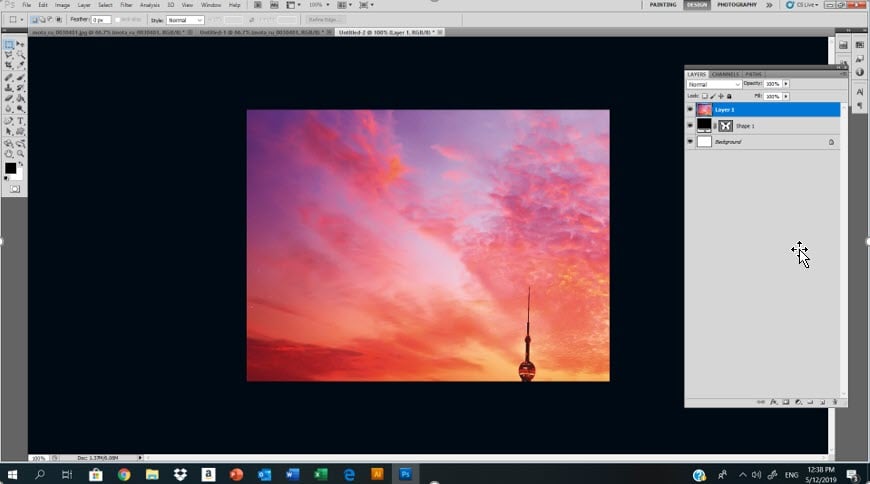
In the Layer panel, we can see three layers; the topmost is our image, which we will use; after that is our custom shape, and the bottom layer is the background layer.
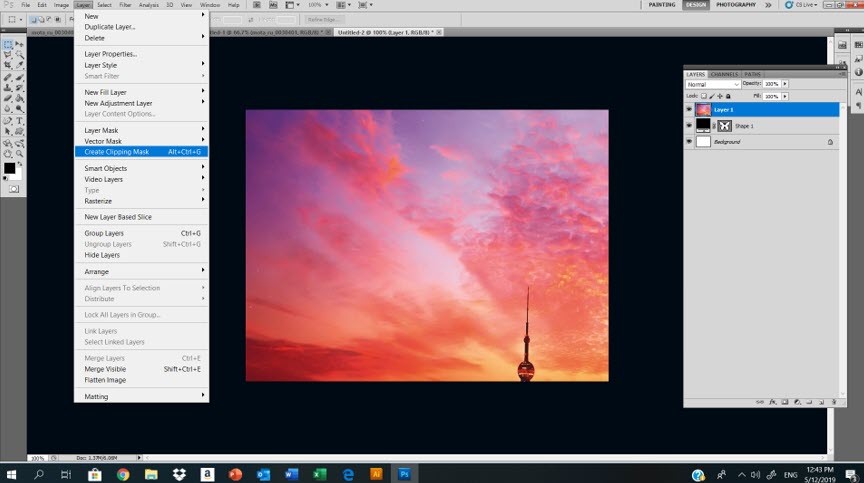
In this step, we will make a clipping mask to our topmost layer, the city landscape Image. Forget this Layer-Clipping Mask; Once we hit the clipping mask command, we will get a result something like the one shown below:
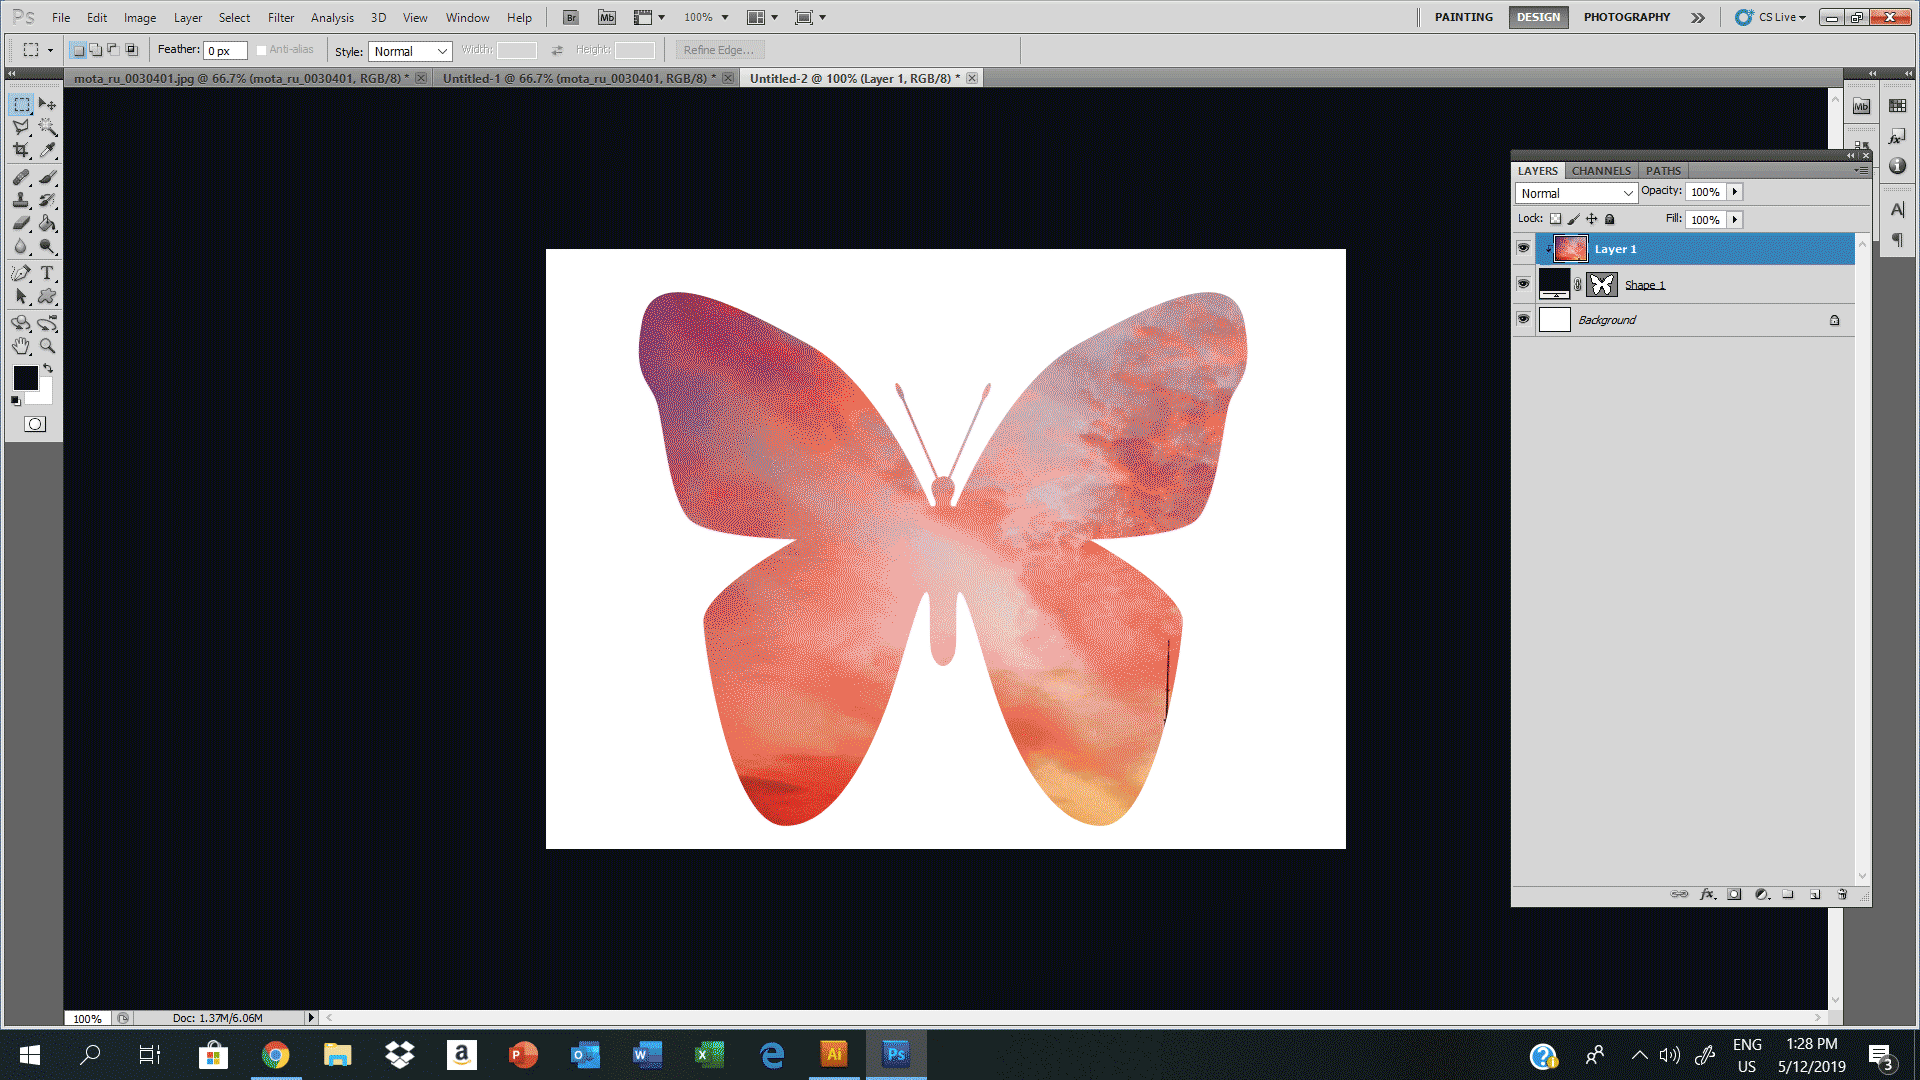
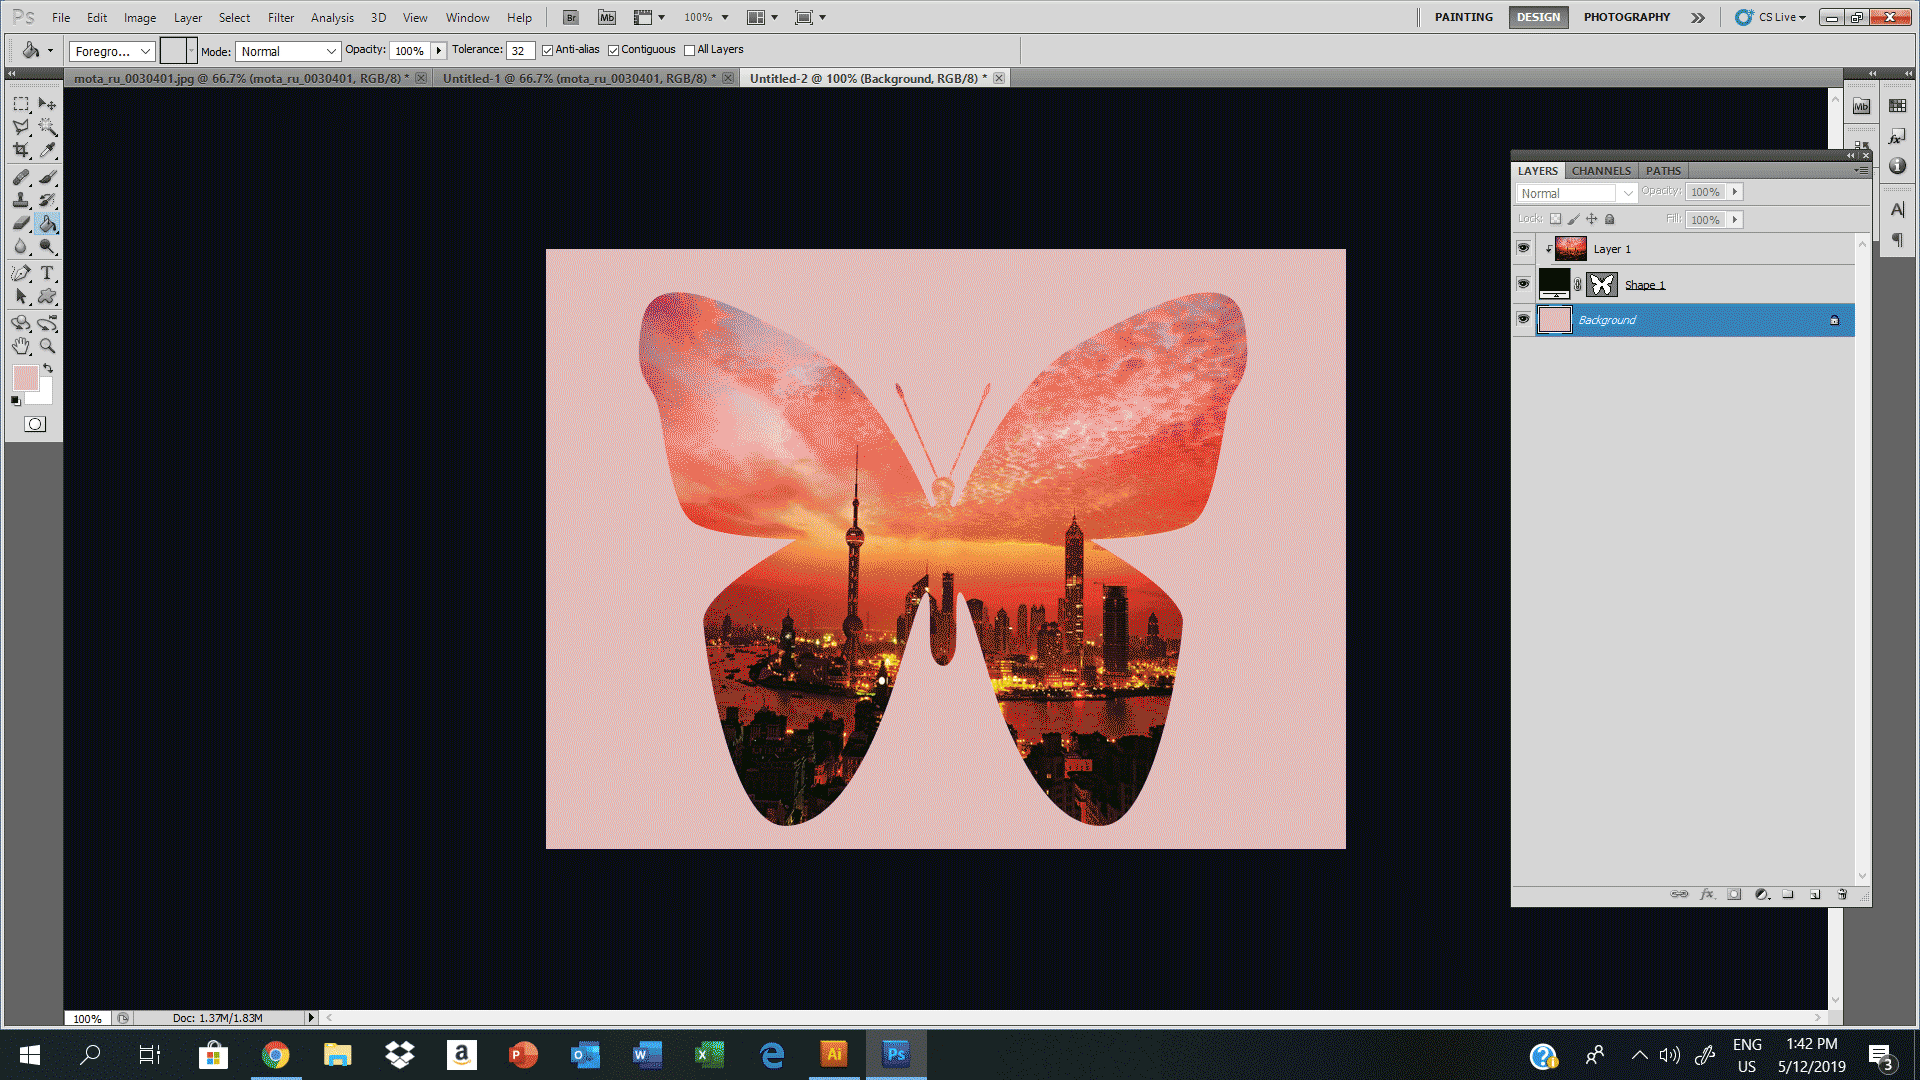
But now our landscape image cannot see properly through the custom shape. To fix this, Edit- FreeTansform-adjust the image by hitting the handles; you can adjust the view of your image; once you are happy with the clipped mask, Hit Enter.
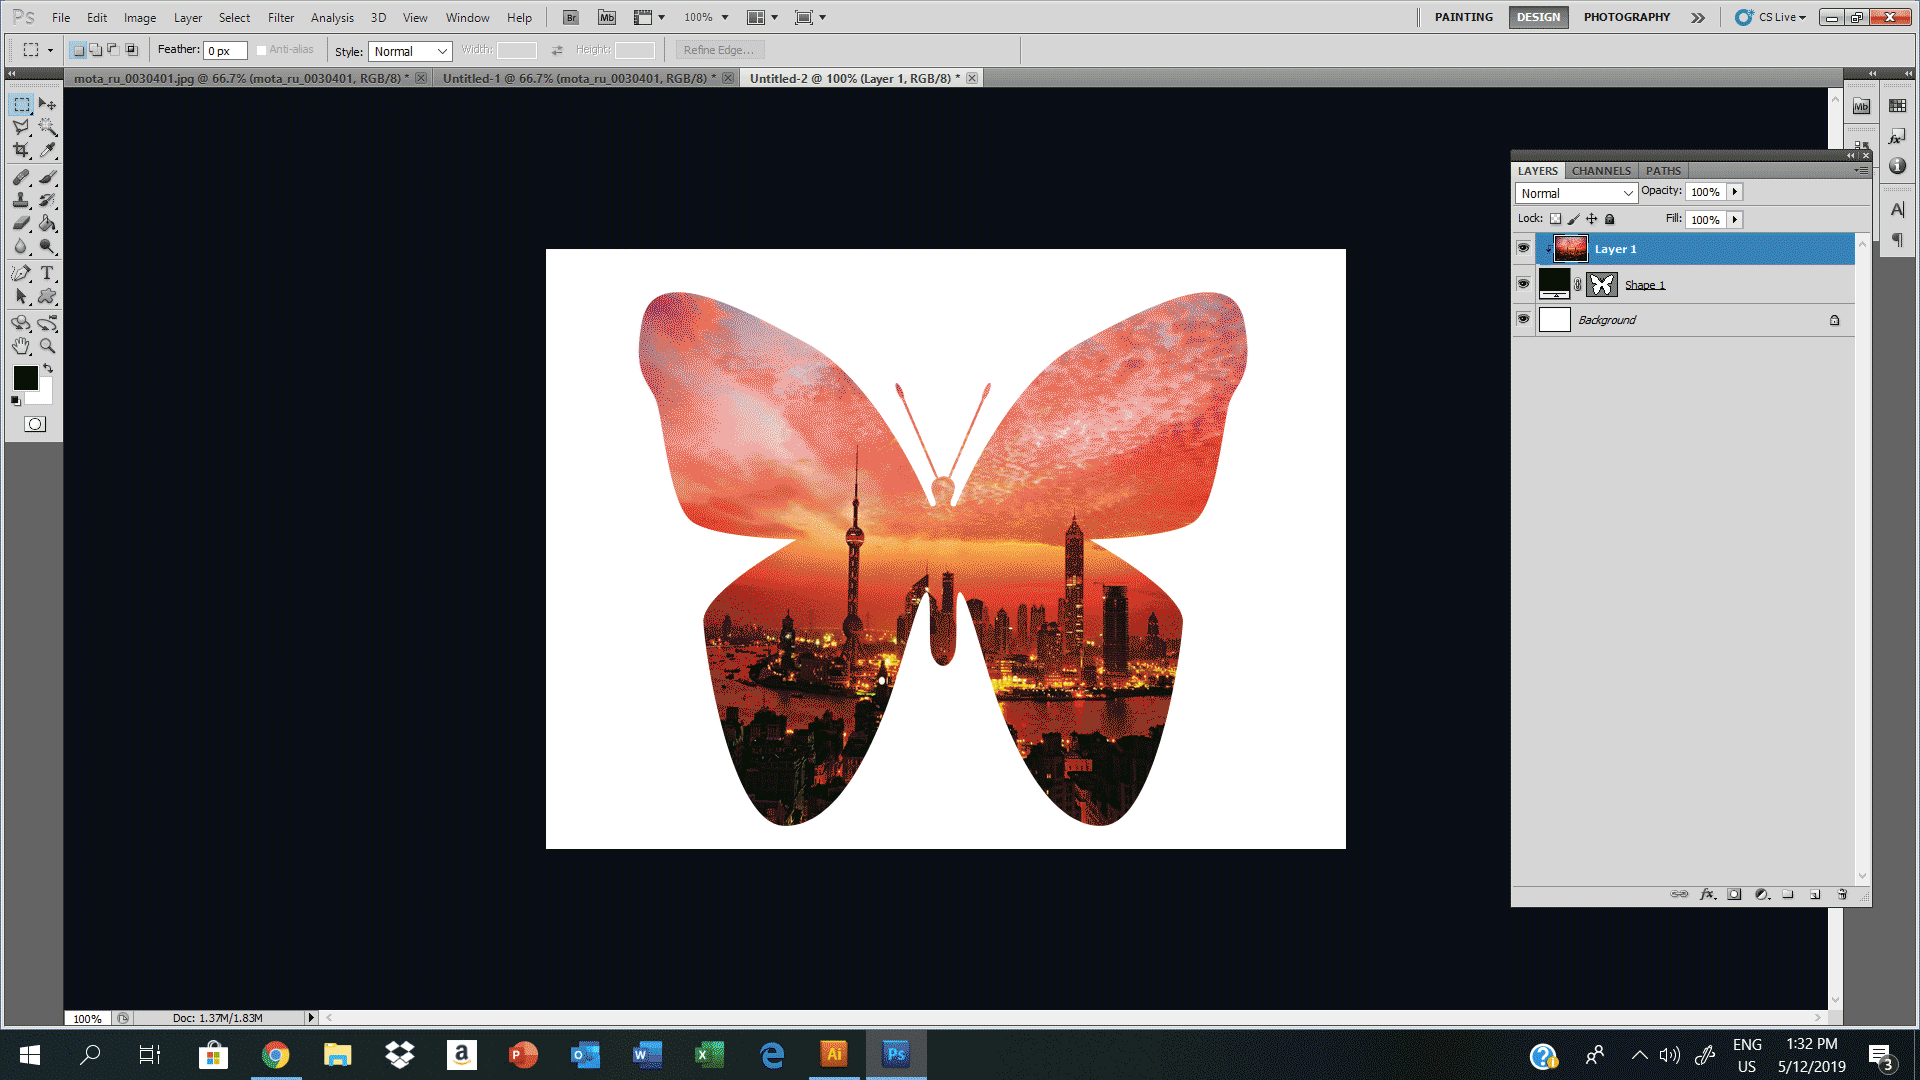
This is our end result after using the clipping mask to a custom shape.
In this last step, we changed the background color of our base layer. Double-clicking unlocks the background layer and fills color into the layer with your preference. If you wish, you can also select the color from the image using the Eyedropper tool.
I used the Eyedropper tool by clicking on the image and selecting a purple color.
Conclusion
Photoshop has become one of the popular software in the graphics industry. Its applications in the designing world are outstanding; that is the reason it is loaded with powerful features for designing or editing any images or photographs. I hope you understood the custom shape tool well and got detailed knowledge from the above information. It is easy to use. You can do a lot of new experiments by using this tool for different creative graphic artwork.
Recommended Articles
This has been a guide to Custom Shape Tool in Photoshop. Here we discuss how to use Custom Shape Tool in Photoshop and the steps to custom an image. You can also go through our other suggested articles to learn more –
