Updated July 1, 2023

Definition of JavaFX Timer
JavaFX is known for its flexibility and easiness. There are several classes available in it, and Timer is a class that helps in scheduling the tasks that have to be executed later. Creating a new object of Timer spawns a new thread that can execute the program after the time mentioned. Let us see more about this topic in the following sections.
Syntax:
Following is the syntax of the JavaFX timer.
Timer timerobj = new Timer();How to Create a Timer in JavaFX?
Similar to the Timer class, the TimerTask class has a role in the execution of the timer. It is an abstract class that extends the interface Runnable. However, it does not implement the method run. Moreover, a subclass of the class TimerTask can be created to override the method run when the timer fires within the overridden method run.
Examples
Now, let us see some sample examples of the JavaFX timer.
Example #1: Demonstrate the working of a timer with the help of a button
Code:
//import all the relevant classes
import java.util.Timer;
import java.util.TimerTask;
import javafx.application.Application;
import javafx.application.Platform;
import javafx.geometry.Insets;
import javafx.scene.Scene;
import javafx.scene.control.Alert;
import javafx.scene.control.Button;
import javafx.scene.control.Spinner;
import javafx.scene.layout.HBox;
import javafx.stage.Stage;
//main class
public class TimerProgramSample extends Application
{
//set the delay as 0
int del = 0;
public void start(Stage st) {
UIinitialisation(st);
}
private void UIinitialisation(Stage st) {
//create object for horizantal box
HBox hb = new HBox(12);
//set the padding
hb.setPadding(new Insets(12));
//create object for timer class
Timer tm = new java.util.Timer();
//create object for spinner class
Spinner sp = new Spinner(1, 62, 5);
//set the prefernce width
sp.setPrefWidth(85);
//create button
Button b = new Button("Yayyy. . . Timer works. . .");
//set the action event on clicking the button
b.setOnAction(event -> {
del = (int) sp.getValue();
//schedule the timer
tm.schedule(new subtimer(), del*1000);
});
//get the children of horizontal box
hb.getChildren().addAll(b, sp);
//on close event
st.setOnCloseRequest(event -> {
tm.cancel();
});
//create a scene
Scene sc = new Scene(hb);
//set the title
st.setTitle("Timer Working");
//set the scene
st.setScene(sc);
//display the result
st.show();
}
//subclass that extends the TimerTask
private class subtimer extends TimerTask {
//run method
@Override
public void run() {
//method
Platform.runLater(() -> {
//create object for Alert class
Alert al = new Alert(Alert.AlertType.INFORMATION);
//set the title
al.setTitle("Dialog box");
//set the header text
al.setHeaderText("Oh oh.. Time elapsed");
//create a string
String c;
//check the condition of delay
if (del == 1) {
// display one second is elapsed
c = "1 sec elapsed";
} else
{
c = String.format("%d sec elapsed",
del);
}
al.setContentText(c);
al.showAndWait();
});
}
}
//main method
public static void main(String[] args) {
//launch the app
launch(args);
}
}
Output:
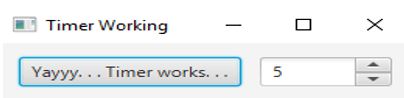
In this program, all the necessary classes have to be imported. Then, set the delay as 0. In that method, create an object for the horizontal box. Then set the padding of the horizontal box. After that, set the preferred width and create the button. That is, the functionality that has to trigger on clicking the button has to be mentioned. After getting out of the subclass, a scene object can be created, followed by setting the title and scene and displaying the result.
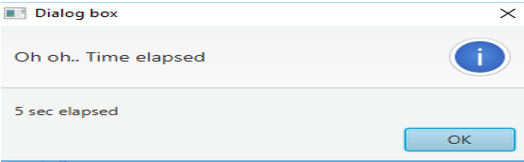
A dialog box will appear on executing the code, as shown above. As I have selected 5 seconds and clicked the button, a dialog box, as shown below, appears after every five seconds.
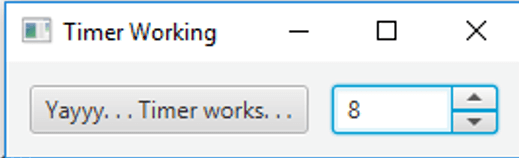
Once we change the value to another, it will be displayed below. That is, timer functions for the new value given
Example #2: Demonstrate the working of the Timer
Code:
//import all the relevant classes
import java.util.Timer;
import java.util.TimerTask;
//main class
public class TimerProgramSample {
//main method
public static void main(String[] args) {
//notify that timer starts
System.out.println("Here, it starts....");
//create object for timer
Timer tm = new Timer();
//schedule the timer
tm.schedule(new TimerTask(){
//override run method
@Override
public void run() {
//print a message notifying about timer
System.out.println("Timer begins. . . .");
}
}, 5000);
//tIMER that repeats each 20second
Timer tr = new Timer() ;
//schedule the repeating timer
tr.scheduleAtFixedRate(new TimerTask(){
//override run methid
@Override
public void run(){
System.out.println("Timer working. . . .");
}
}, 0, 2000);
}
}
Output:
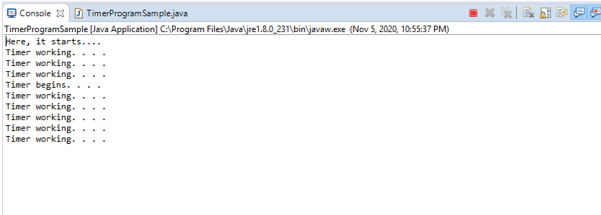
In this program also, all the necessary classes have to be imported. Then, create an object for the timer and schedule it. Override the run method and print a message notifying you about the timer. Like the first one, the run method must schedule and override it.
Conclusion
In JavaFX, Timer is a class that helps in scheduling the tasks that have to be executed later. Timer in JavaFx is denoted by the java.util.Timer class. In this article, different details on JavaFX timers, such as working and examples, are discussed in detail.
Recommended Articles
This is a guide to JavaFX Timer. Here we discuss the definition and How to Create a Timer in JavaFX? along with examples. You may also have a look at the following articles to learn more –

