Introduction to InDesign data merge
InDesign Data Merge is a very good feature of this software which helps us to create multiple variations of our text data that have unique data set for each entry. You can understand it as mail merge of Microsoft word because it performs the same type of work for our creative Layout. With the Data Merge feature, we can easily create a number of copies of a design layout with each different entry. Here in this software, we have a whole panel of Data Merge with several parameters, which we will manipulate according to our requirements. There are few more things about which you have to know for working with Data Merge. So let us get started.
How to work with Data Merge in InDesign?
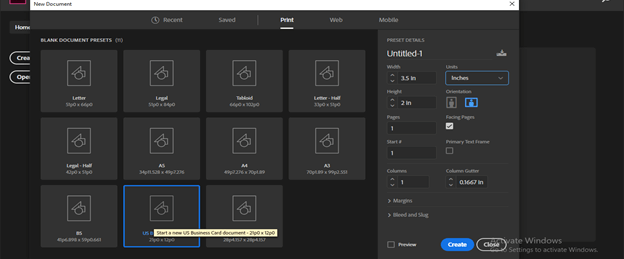
For start our learning, i will create a new document page by clicking on Create New button of this welcome screen of InDesign.

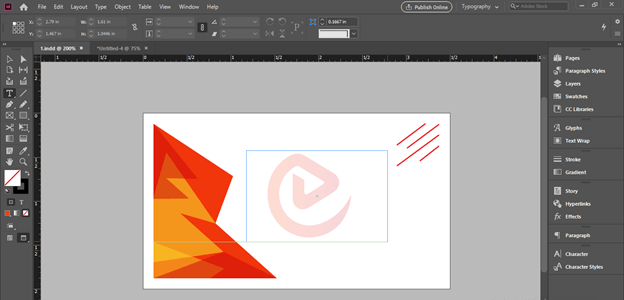
I will create multiply copies of the Business card using the Data Merge feature of this software, so i will take a Business card template and click on the create button.
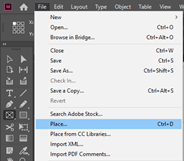
Now i will place an illustrator file here, which i have designed for Business Card. So for that, i will go to the File menu and click on the Place option, or press the Ctrl + D button on the keyboard.
I choose my desired file from here. You can place any of the file formats of this list in InDesign.
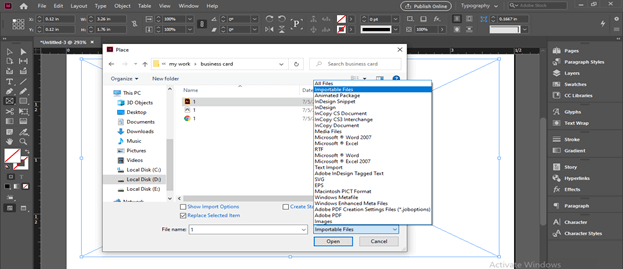
This is a design with the EDUCBA logo at the center which i will use as a business card design.

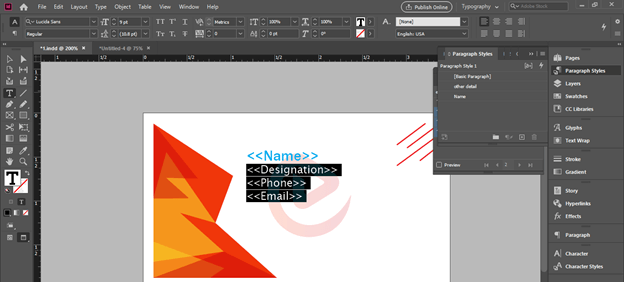
Now i will take the Type tool from the tool panel and draw a text box.
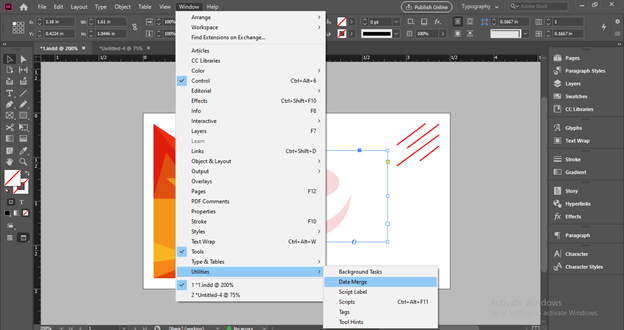
Now we will open the Data Merge panel and for that, go to the Window menu of the menu bar, go to the Utilities option of the drop-down list, and then choose the Data Merge option.
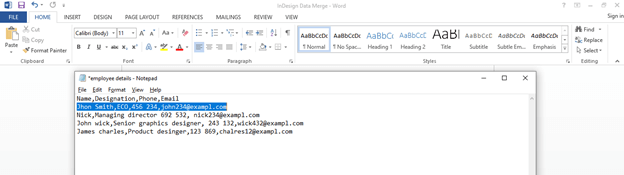
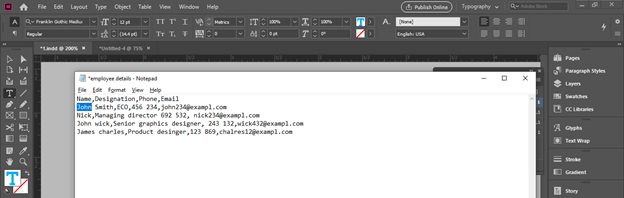
Before start using this panel, i will show you the Data which i will use here as the entry of the business card. I have my data in Notepad. You can use Excel sheets, Google Sheet, Text editor data also as per your choice.
One thing you should keep in mind is that each data which you want to enter separately on the business card should be written with a comma, and first-line should be the title of entry that is in Business card there will be Name of Employee then its Designation then the Phone number and so on. So i have these things in my first line.

Then enter the details of employees with commas according to the title, and i have four entries here.
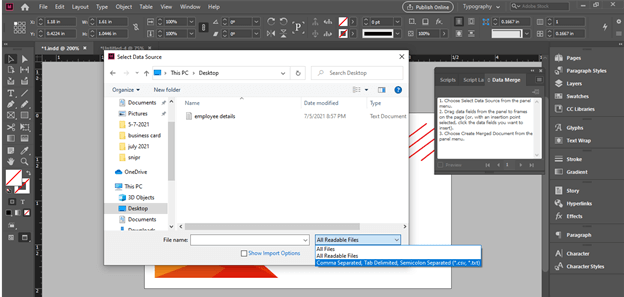
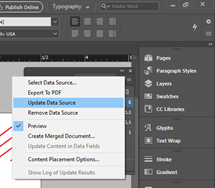
Now come to InDesign and click on the top right tab of the Data Merge panel, then click on the Select Data Source option of scroll down list.
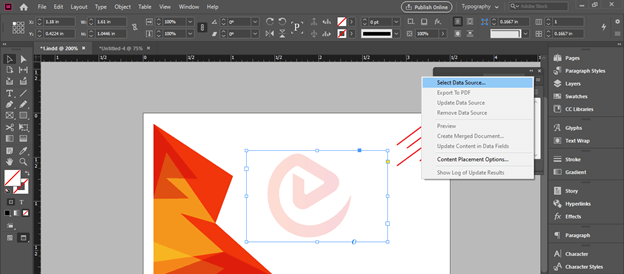
Choose a file of your data from its saved location in the opened dialog box. You can choose .txt or .csv file format for this purpose. I have a .txt data file here.
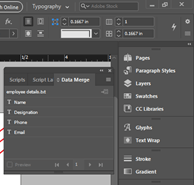
Now Data Merge will automatically understand the first line of a data text file as main entries and show it in its panel like this. These Entries will be source entries, or you can say them as Master Entries.
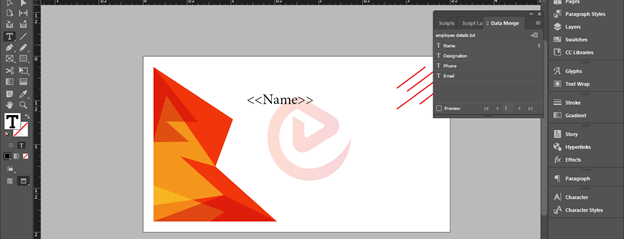
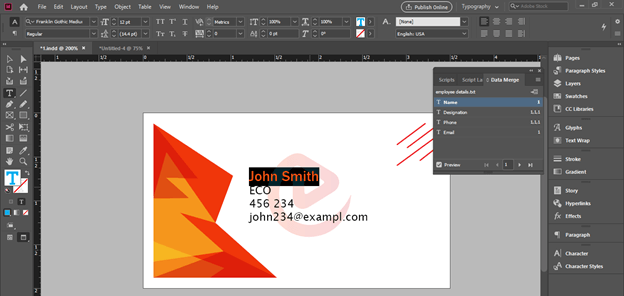
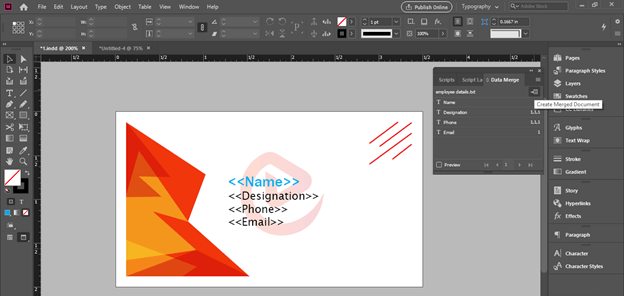
Now come to the text box which we have drawn before and make click on here, then do to Data Merge panel and click on Name layer so that it will enter in the text box as source text of entries.
I will press enter button and then click on the Designation layer because i want this in the next line.
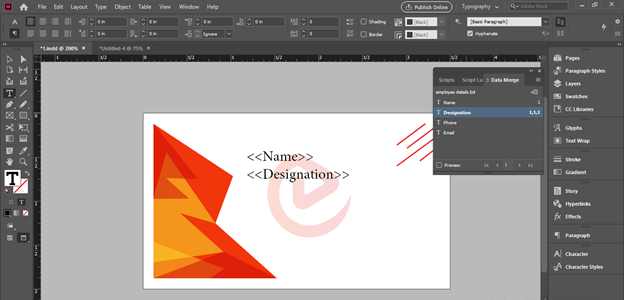
I will do the same for the remaining entries.
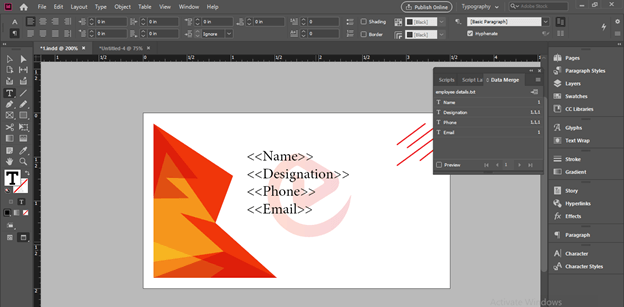
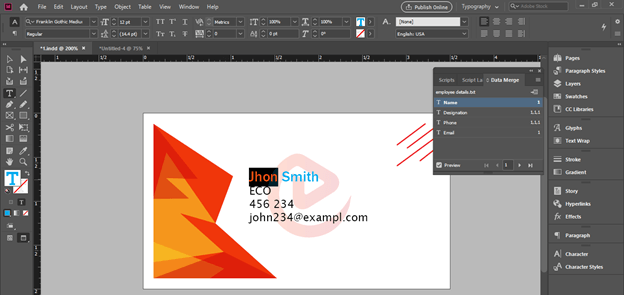
You can see the Preview by click on the check box of the Preview button of the Data Merge panel. Here at the right edge of the text box, you can see a red plus sign that means our text does not perfectly fit in this text box.
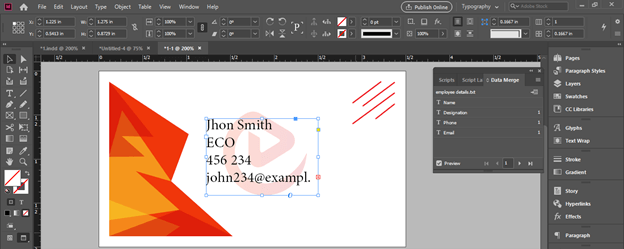
So we can change the size of the text box for fitting it properly; it will not affect the entries.
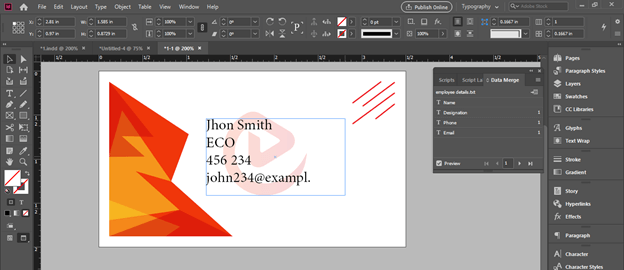
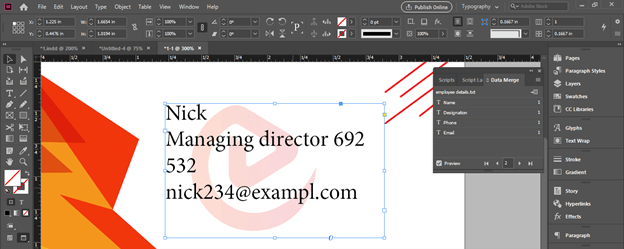
You can see the next entry by clicking on the next button of the Data Merge panel.
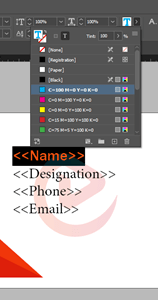
Now i will change the font style and color of this Name entry.
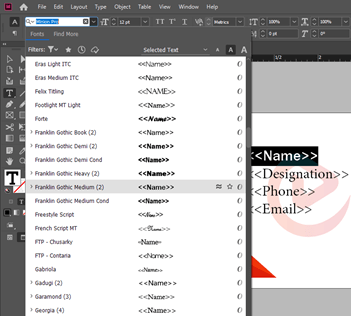
And in the Paragraph Style painting in other text entries also.
Now you can again see the preview. What if you have made any mistake in data like the spelling of John is wrong here. So you need not to go through all steps again.
Just make corrections in your data sheet and save the change.
And gain click on the top right button of the Data Merge panel then click on Update Data Source.
And your made correction will update here automatically. In the same way, you can increase the number of entries. Just add other employee data and update it from the Data Merge panel.
Now disable preview mode and click on Create Merge Document button of the Data Merge panel.
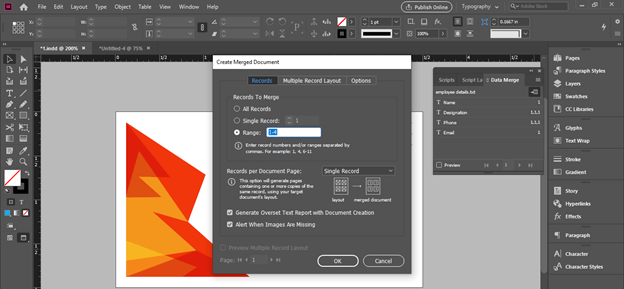
And a dialog box for this option will be open. Here in this box, you can choose how many entries of data you want to create. So, for example, you can create a merge document only for a single entry from this option.
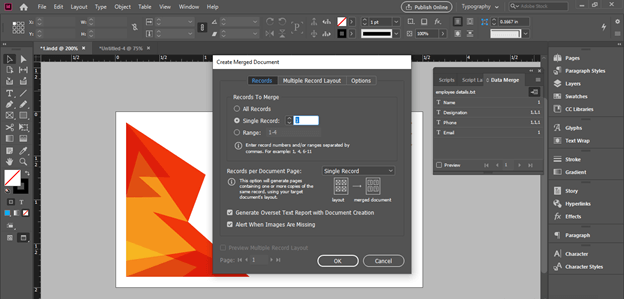
Or decide a range of them from the Range option.
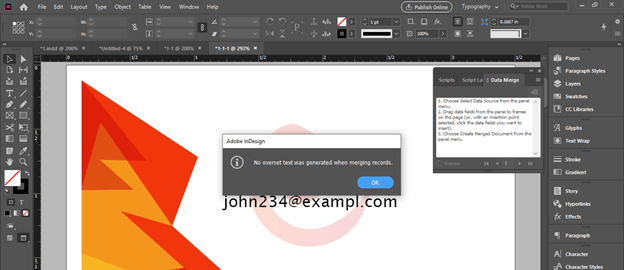
I will go with all and click on the Ok button of this dialog box, and when i will click on the Ok button, if there is no Overset text, then it will show a message for this that means i can create a merged document without any issue. If you want to know about an overset text, you can go with my ‘Overset text’ article of InDesign.
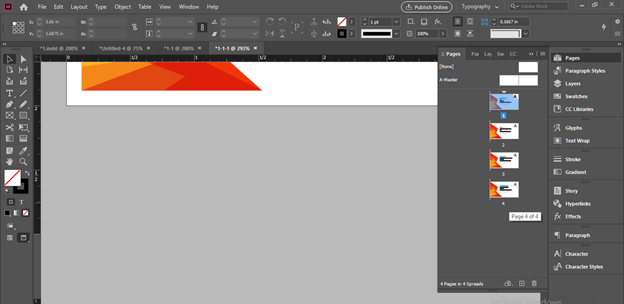
Once i will click on the Ok button, then it will create all entries business cards on each separate page. So now we can save it as .pdf and directly take it for printing.
Conclusion
I hope you find Data Merge as a very good and effective feature of this software, and it saves your lots of time during making these types of a number of entries for different layout design. You can use .psd file design also in InDesign, and Data Merge features will also work with .psd designs.
Recommended Articles
This is a guide to InDesign data merge. Here we discuss How to work with Data Merge in InDesign step by step in detail. You may also have a look at the following articles to learn more –
