What is Go To Special in Excel?
Go To Special is a special feature in Excel that lets you quickly select any specific type of cell or element in a worksheet, such as constants, formulas, blanks, or objects.
Let’s say you are working on a financial model in Excel, and you want to check all the cells that contain formulas to ensure the accuracy of your calculations. By using Go To Special, you can select all the cells that have formulas at once. This allows you to double-check your formulas and make any necessary corrections.
Where is Go To Special in Excel?
You can access the Go To Special feature in Excel in 2 ways:
Option 1: Using Excel Shortcut
- Press Ctrl+G or F5 to open the “Go To” dialog box.
- Then, press Alt+S to access the “Special” feature.
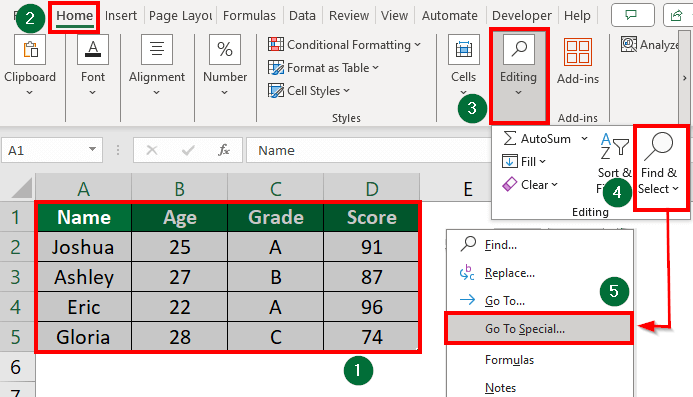
Option 2: From Ribbon
- Go to the Home.
- Go to the Editing.
- Click on the Find & Select dropdown arrow.
- From the dropdown menu, choose Go To Special.
How to Use Go To Special in Excel?
After opening the Go To Special dialog box, you can customize your selection with various options.
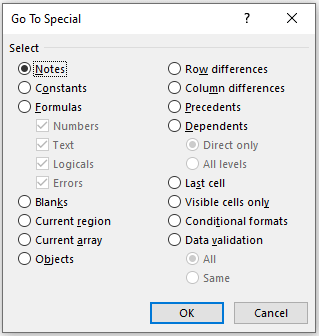
- Notes
- Constants
- Formulas
- Blanks
- Current Region
- Current Array
- Objects
- Row Differences
- Column Differences
- Precedents
- Dependents
- Last Cell
- Visible Cells Only
- Conditional Formats
- Data Validation
Let us view how and when we can use each type of selection in the Go To Special feature.
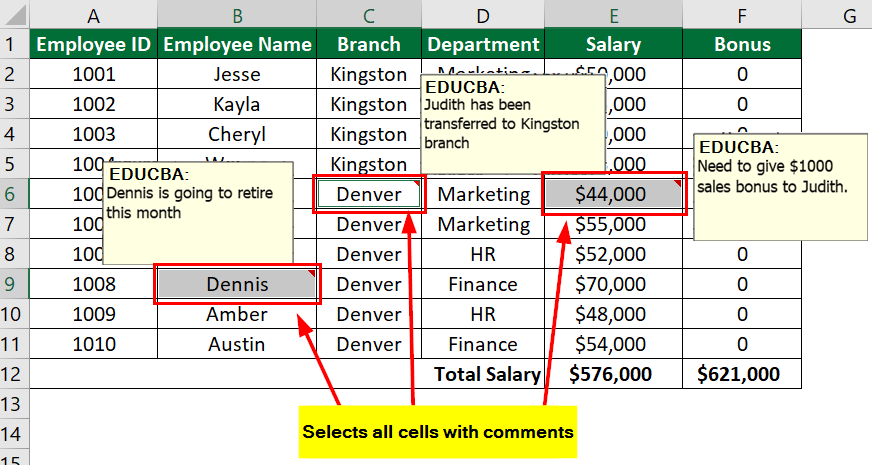
1. Notes
This option helps to select all the cells that contain comments or notes.
How to access it?
- Manual: Select the desired cell range, then go to the Home tab > Editing group > Find & Select > Go To Special > Notes > OK.
- Shortcut: Ctrl+G > Alt+S > N.
When to use it?: When you want to review or edit cell comments.
Example:
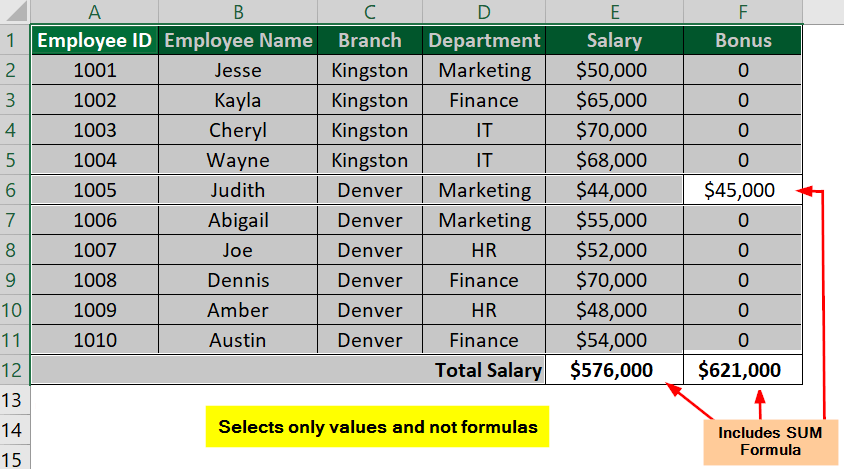
2. Constants
This option selects cells that contain constant values, such as numbers, text, or dates, only excluding cells with formulas.
How to access it?
- Manual: Select the desired cell range, then go to the Home tab > Editing group > Find & Select > Go To Special > Constants > OK.
- Shortcut: Ctrl+G > Alt+S > O > OK.
When to use it?: To work with cells that have fixed data, ignoring the calculated results.
Example:
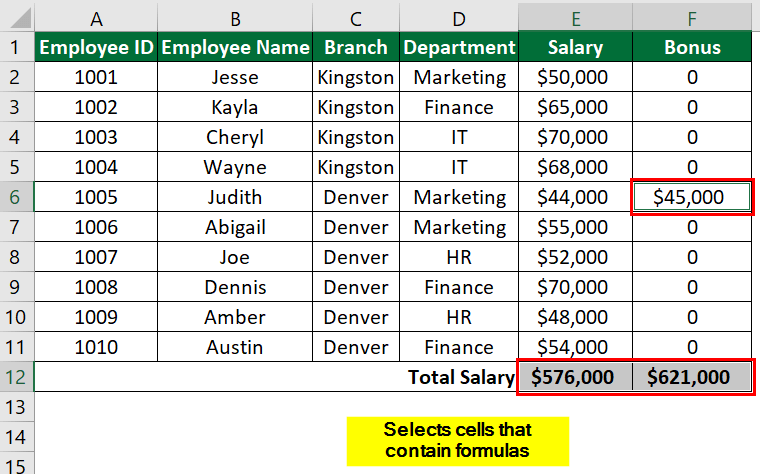
3. Formulas
This option selects cells that contain formulas.
How to access it?
- Manual: Select the desired cell range, then go to the Home tab > Editing group > Find & Select > Go To Special > Formulas > OK.
- Shortcut: Ctrl+G > Alt+S > F > OK.
When to use it?: To select cells with calculations or modify existing formulas.
You can find 4 checkbox options to select:
- Numbers: Selects all cells containing numeric constant values, including whole and decimal numbers. It’s useful for isolating cells with numerical data.
- Texts: Selects all cells that contain text constant values. This includes any cells with letters, words, or characters.
- Logicals: Selects all cells that contain logical constant values like TRUE or FALSE.
- Errors: Selects all cells that contain error constant values, such as “#VALUE!,” “#REF!,” “#DIV/0!,” etc. This helps you quickly identify and address errors in your worksheet.
Example:
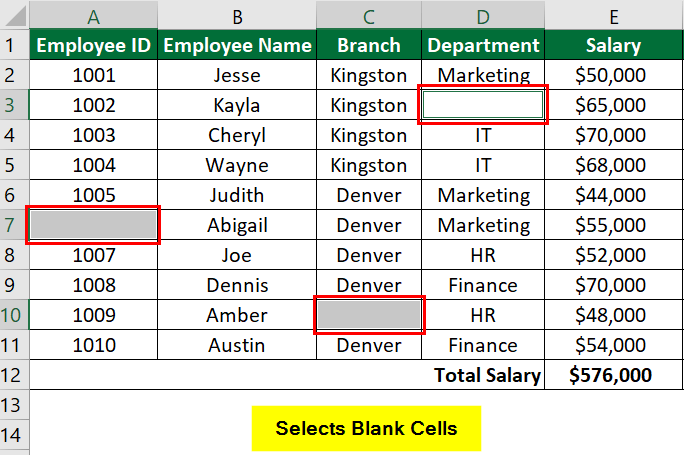
4. Blanks
This option selects empty cells in the specified range.
How to access it?
- Manual: Select the desired cell range, then go to the Home tab > Editing group > Find & Select > Go To Special > Blanks > OK.
- Shortcut: Ctrl+G > Alt+S > K > OK.
When to use it?: To fill in or manipulate empty cells.
Example:
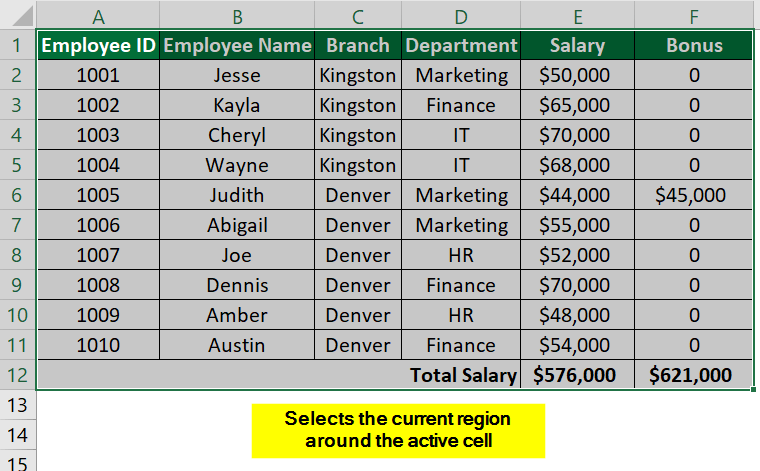
5. Current Region
This option selects the region around the active cell, which is the contiguous block of data. It’s especially handy for large datasets.
How to access it?
- Manual: Select the desired cell range, then go to the Home tab > Editing group > Find & Select > Go To Special >Current Region > OK.
- Shortcut: Ctrl+G > Alt+S > R > OK.
When to use it?: To perform operations on a specific data block.
Example:
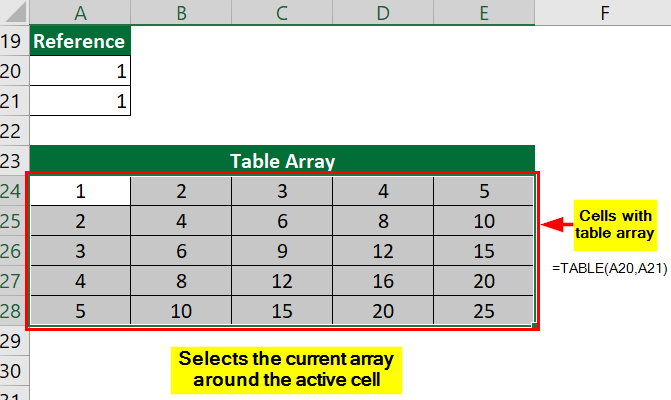
6. Current Array
Selects the array around the active cell.
How to access it?
- Manual: Select the desired cell range, then go to the Home tab > Editing group > Find & Select > Go To Special > Current Array > OK.
- Shortcut: Ctrl+G > Alt+S >A > OK.
When to use it?: To manage arrays within your worksheet.
Example:
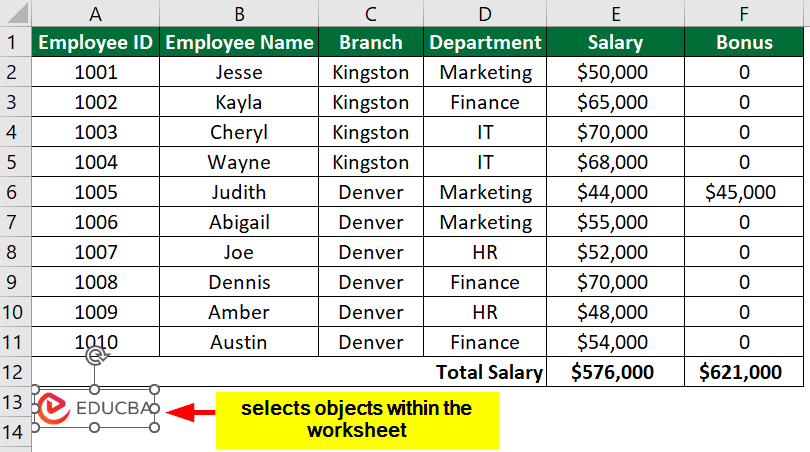
7. Objects
This option selects objects or shapes within the worksheet, such as pictures, charts, or shapes.
How to access it?
- Manual: Select the desired cell range, then go to the Home tab > Editing group > Find & Select > Go To Special > Objects > OK.
- Shortcut: Ctrl+G > Alt+S >B > OK.
When to use it?: To work with or manipulate graphical elements.
Example:
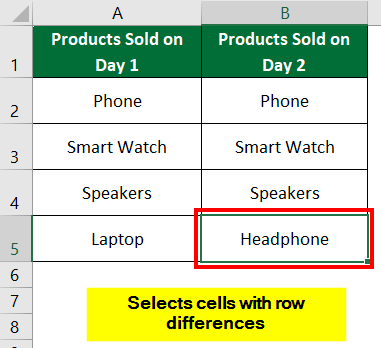
8. Row Differences
This option selects the cells in the selected row that have a different value than the first cell. It uses the value in the first cell as a reference and checks if any value in the row does not match the reference value.
How to access it?
- Manual: Select the desired cell range, then go to the Home tab > Editing group > Find & Select > Go To Special > Row Difference > OK.
- Shortcut: Ctrl+G > Alt+S >W > OK
When to use it?: To find differing values in a row.
Example:
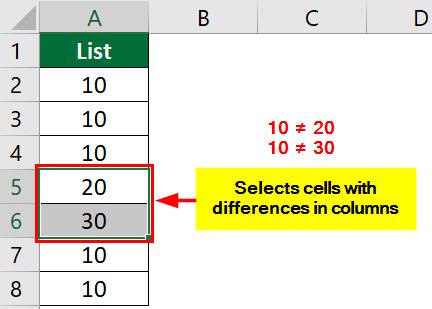
9. Column Differences
It is similar to “Row Differences,” but it selects cells with differences in columns. It uses the value in the first cell in the column as a reference and checks if any value in the column does not match the reference value.
How to access it?
- Manual: Select the desired cell range, then go to the Home tab > Editing group > Find & Select > Go To Special > Column Differences > OK.
- Shortcut: Ctrl+G > Alt+S >M > OK.
When to use it?: To find differing values in the column.
Example:
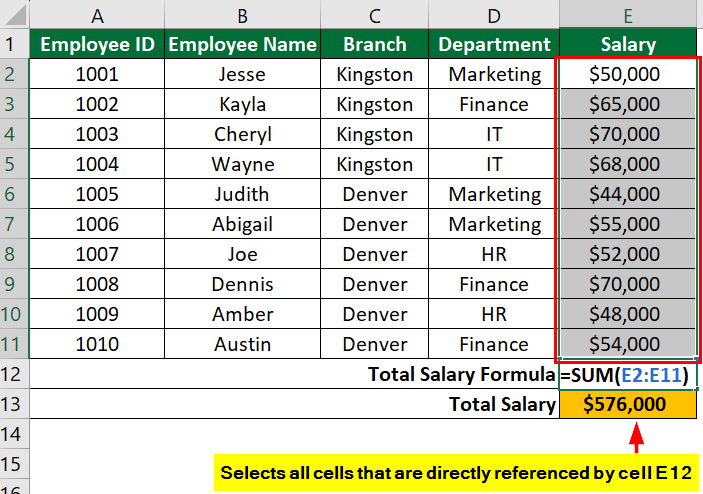
10. Precedents
It selects all the cells that are related to the active cell’s formula. For example, if your active cell formula (=A1+B1) uses A1 and B1, the precedents option will select those two cells.
How to access it?
- Manual: Select the desired cell range, then go to the Home tab > Editing group > Find & Select > Go To Special > Precedents > OK.
- Shortcut: Ctrl+G > Alt+S >P > OK.
When to use it?: To trace cell dependencies in complex formulas.
Example:
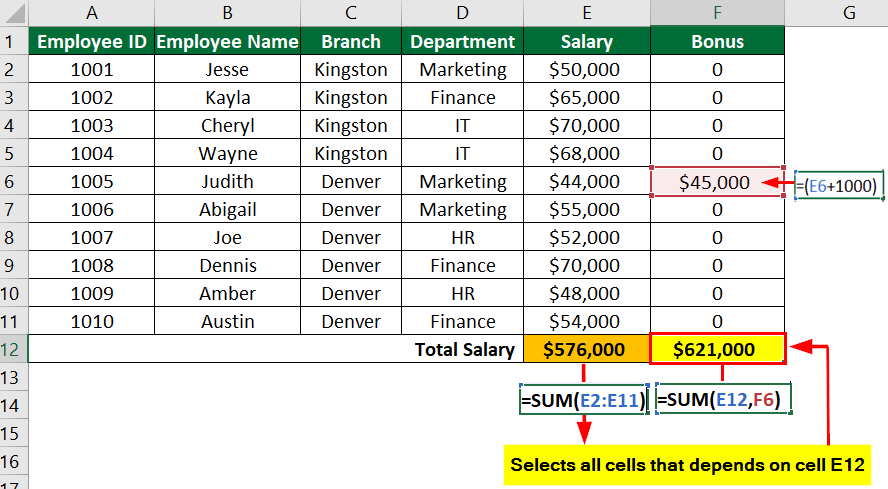
11. Dependents
Selects all cells that depend on the value in the active cell (reference cell you selected). For instance, if you use cell A1 in formulas in cells B1 and C1, clicking on A1 and selecting “Go To Special” will show you that B1 and C1 are dependent on A1.
How to access it?
- Manual: Select the desired cell range, then go to the Home tab > Editing group > Find & Select > Go To Special >Dependents > OK.
- Shortcut: Ctrl+G > Alt+S >P > OK.
When to use it?: To identify which cells rely on a specific cell’s value or formula.
You will see 2 selection options:
- Direct Only: Selects only the cells that directly depend on the value or formula in the active cell.
- All Levels: Selects all cells that depend on the value or formula in the active cell, either directly or indirectly.
Example:
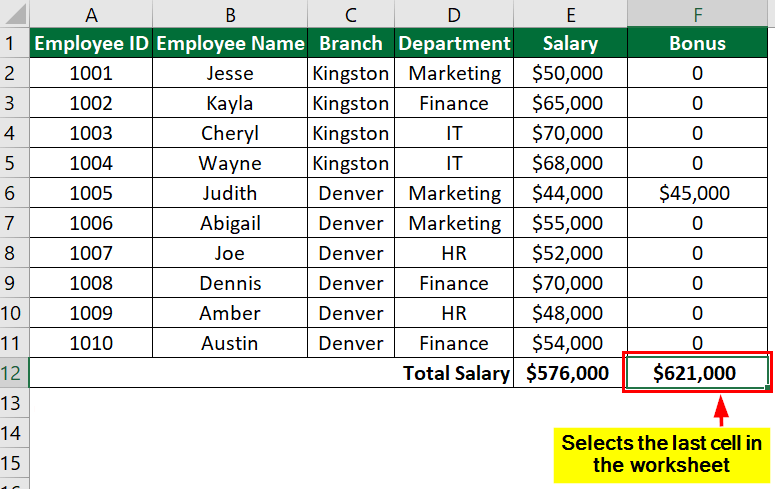
12. Last Cell
Selects the last cell in the worksheet that contains data or formatting.
How to access it?
- Manual: Select the desired cell range, then go to the Home tab > Editing group > Find & Select > Go To Special > Last Cell > OK.
- Shortcut: Ctrl+G > Alt+S >S > OK.
When to use it?: Can be helpful to quickly navigate to the end of a large worksheet instead of manual scrolling.
Example:
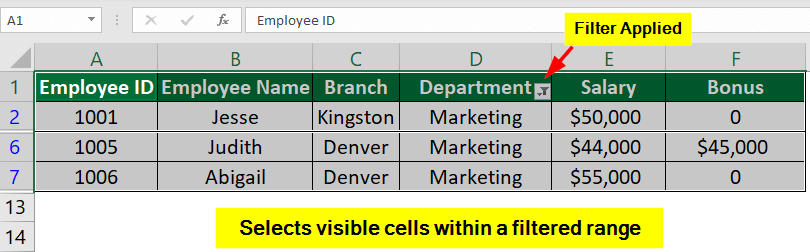
13. Visible Cells Only
When you hide rows/columns in Excel and try copying/pasting only the visible cells, you cannot do that by copying the cells directly. It is because Excel copies the hidden cells, too. So, to select only the cells that are visible (unhidden), you can use this option.
How to access it?
- Manual: Select the desired cell range, then go to the Home tab > Editing group > Find & Select > Go To Special > Visible Cells Only> OK.
- Shortcut: Ctrl+G > Alt+S >Y > OK
When to use it?: When you have applied filters and want to work with visible data.
Example:
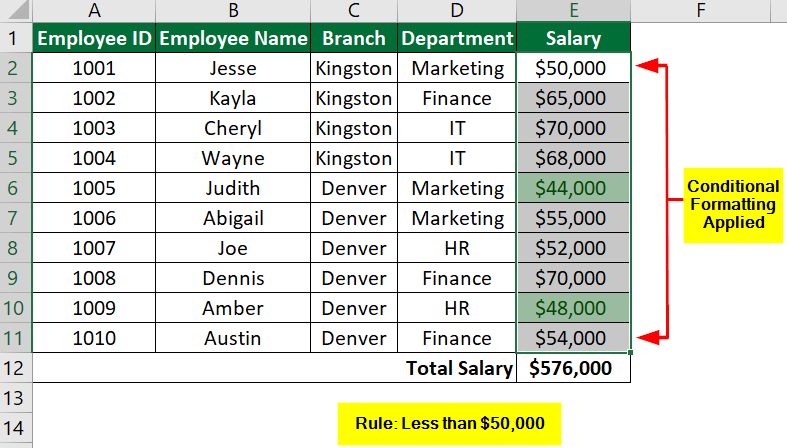
14. Conditional Formats
It selects cells that have conditional formatting applied to them.
How to access it?
- Manual: Select the desired cell range, then go to the Home tab > Editing group > Find & Select > Go To Special > Conditional Formats > OK.
- Shortcut: Ctrl+G > Alt+S >T > OK
When to use it?: To make changes to cells with specific formatting conditions.
Example:
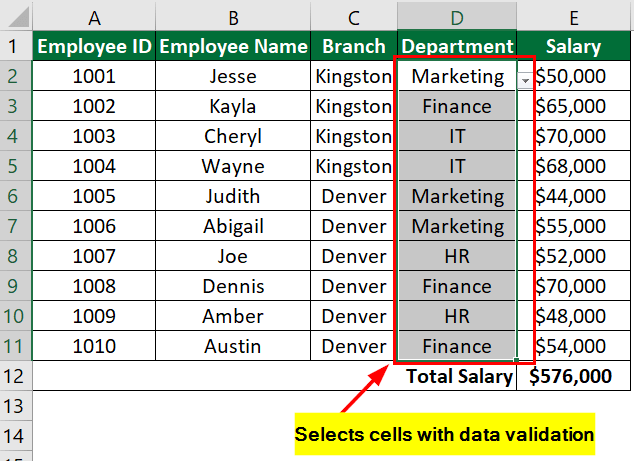
15. Data Validation
It selects cells that have data validation rules applied.
How to access it?
- Manual: Select the desired cell range, then go to the Home tab > Editing group > Find & Select > Go To Special > Data Validation > OK.
- Shortcut: Ctrl+G > Alt+S > V > OK
When to use it?: To manage cells with data validation constraints.
When you choose the “Data Validation” option, you will see two select options:
- All: This option selects all cells in the specified range containing any conditional formatting type.
- Same: This option selects all cells in the specified range with similar conditional formatting rules as the current cell.
Example:
How to Open Go To Special in Google Sheets?
The Go To Special feature is not available in Google Sheets. However, if you want to move to a specific cell, you can use the “Go To Range” option.
Follow these Steps:
1. Go to Help in the Google sheet ribbon.
2. In the “Search the Menus” option, type “Go To Range”.
3. In the search box that opens, enter the cell number, e.g., B1.
4. Press Enter.
Final Thoughts
Excel’s Go To Special feature simplifies cell selection based on specific criteria, enhancing tasks like formatting and data management efficiency. Though versatile, it may not address all scenarios, sometimes requiring additional Excel functions or VBA. Ultimately, it streamlines Excel workflows by targeting data and elements precisely, saving time and effort.
