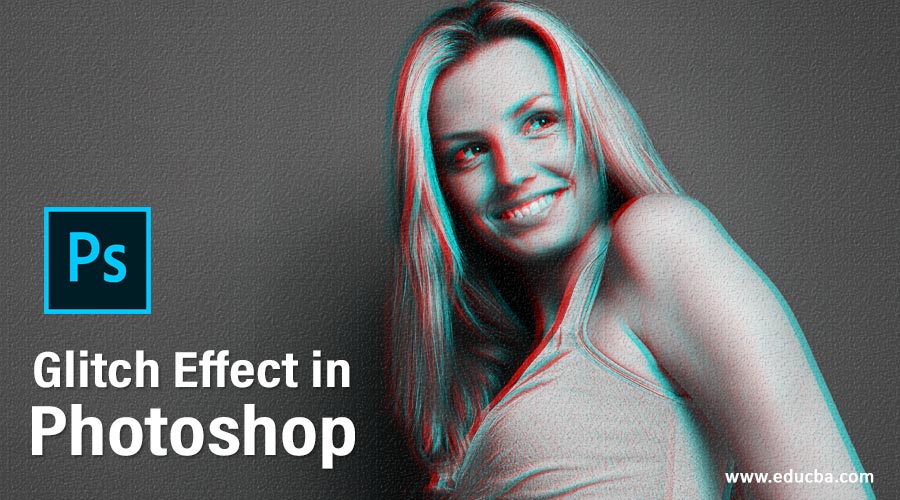
Introduction to Glitch Effect in Photoshop
Photoshop is a raster image editing software that was developed by adobe systems as its image editing software for editing professionals. We have different types of techniques for making different types of effects in this software. Glitch is one of the effects of making an old television type effect on our image by using some techniques and parameters of this software. So in this article, we will understand all those techniques and parameters through which we can make a glitch effect on our image one by one with a very effective example.
How to make the Glitch Effect in Photoshop?
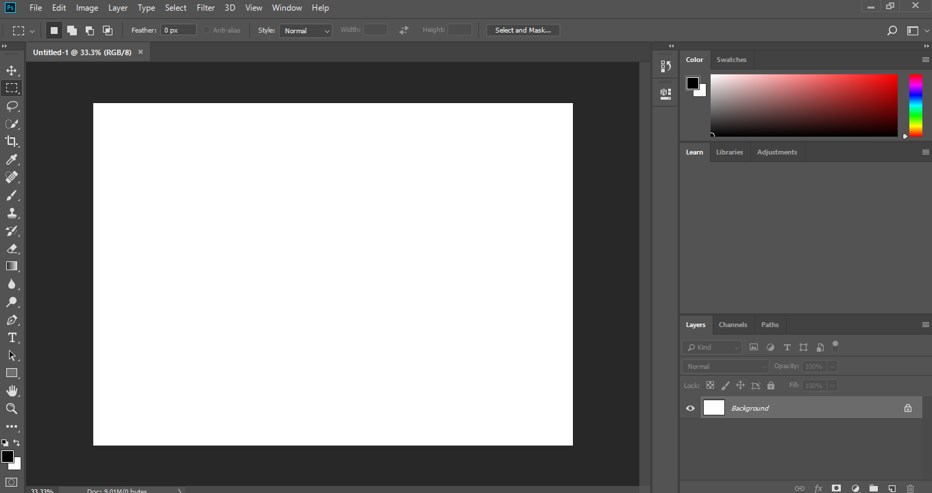
We can make a glitch effect on our image by following some simple steps of different techniques of this software, but before starting, let us look at the working screen of this software to better understand this topic throughout this article.
Step 1: At the top of the working screen there is a Menu bar which has the number of menus for handling different type of work in this software such as file menu, edit menu, Image menu and some other, below this we have property bar of our active tool for making the change in the parameters of that active tool, below this property bar we have a toolbar at the left side of the working screen of this software which had the number of tool for making our work easy in this software, at the center of the working screen we have display window in which we can see our current working, at the right side of the display window we have some sections such as color panel, Layer panel, and some others.
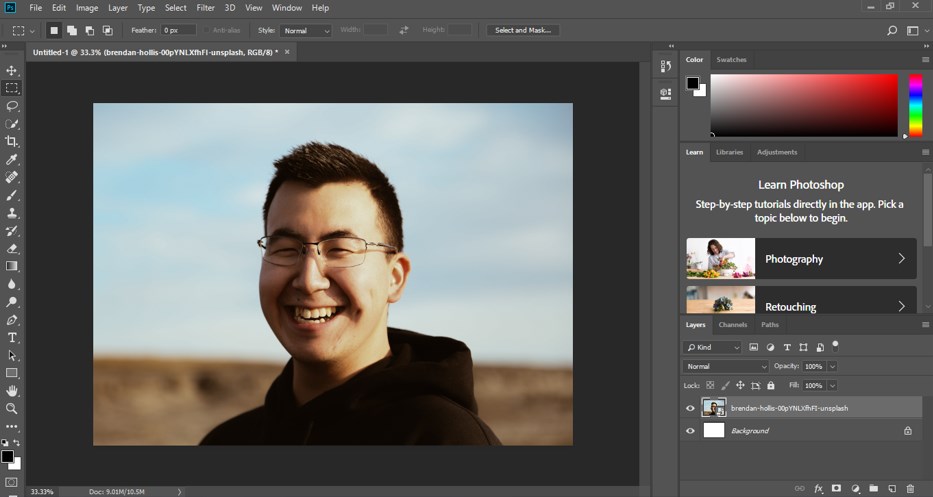
Step 2: Now, let us have an image for our learning. For placing an image in this software, just go to the folder where you have saved it, then pick it from there and drop it in the display window of this software. You can download it from the internet or take your own image for this work.
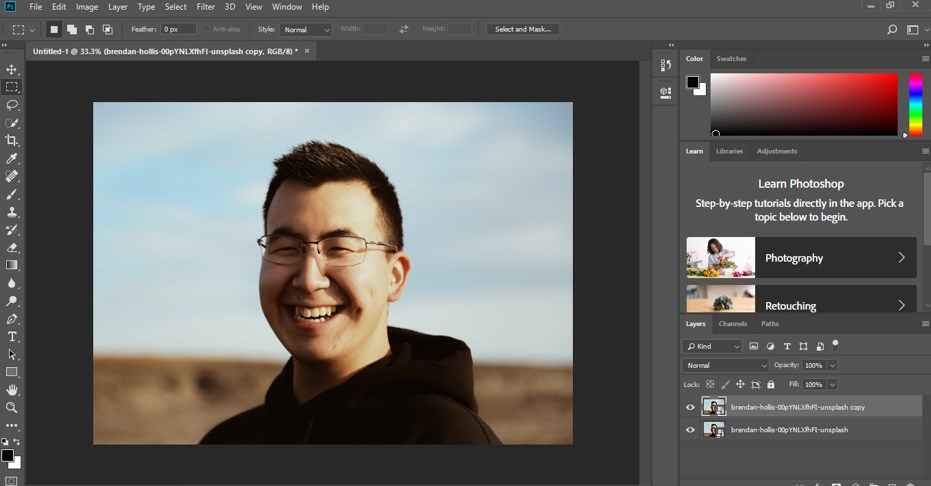
Step 3: Now, let us make a copy of this image. For making a copy select this layer and press the Ctrl + J button from the keyboard.
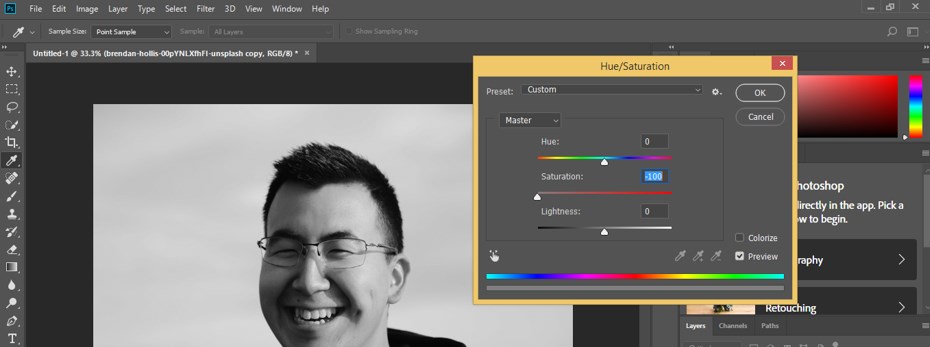
Step 4: Now select the copy layer by click on it and press the Ctrl + U button from the keyboard to open the Hue/saturation color dialog box.
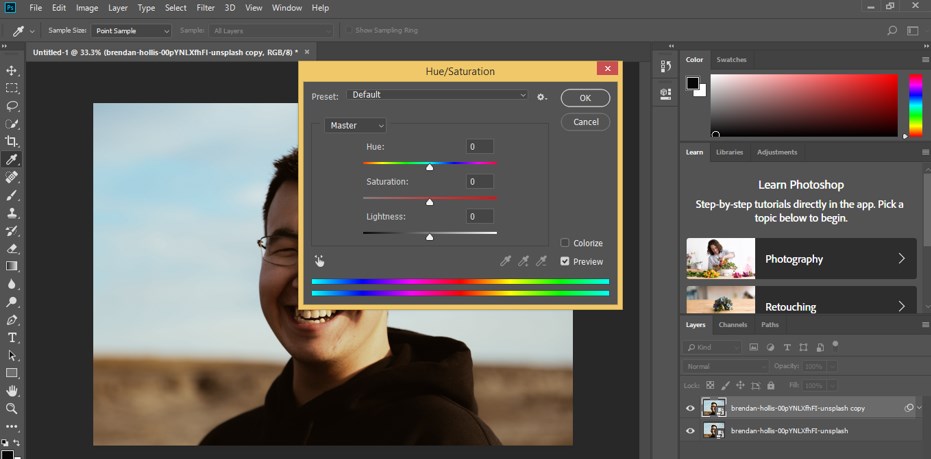
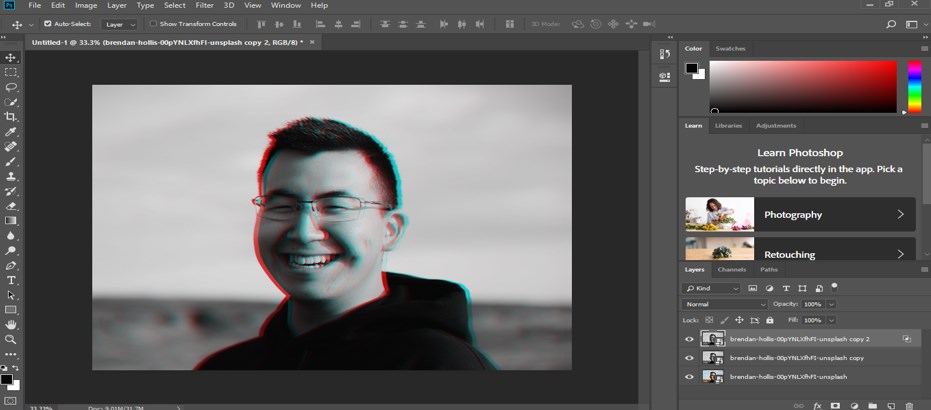
Step 5: Now, make the value of the Saturation scale in negative value by dragging the slider of saturation scale, then press the Ok button of this dialog box with the mouse button, and your image will become black and white.
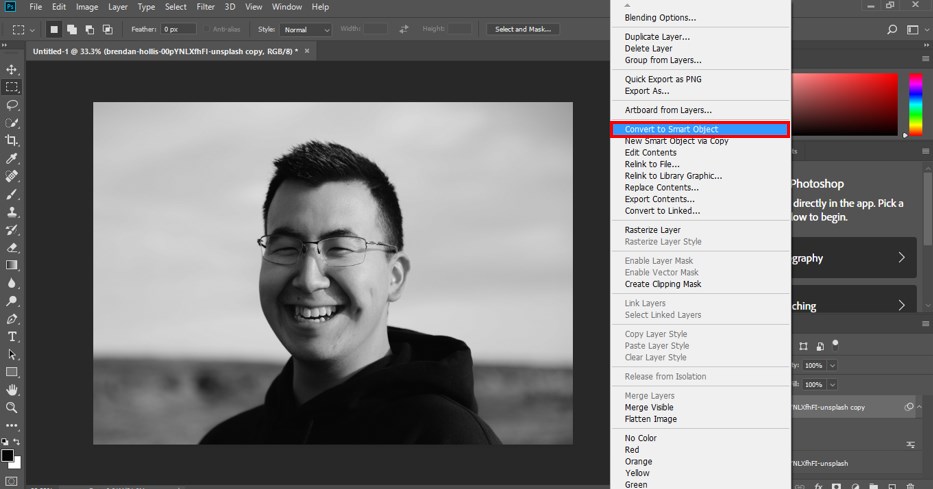
Step 6: Now go to the layer panel and make right-click on the copy layer of this image with a mouse button. A drop-down list will be open to choosing the ‘convert to smart object’ option from the list by click on it.
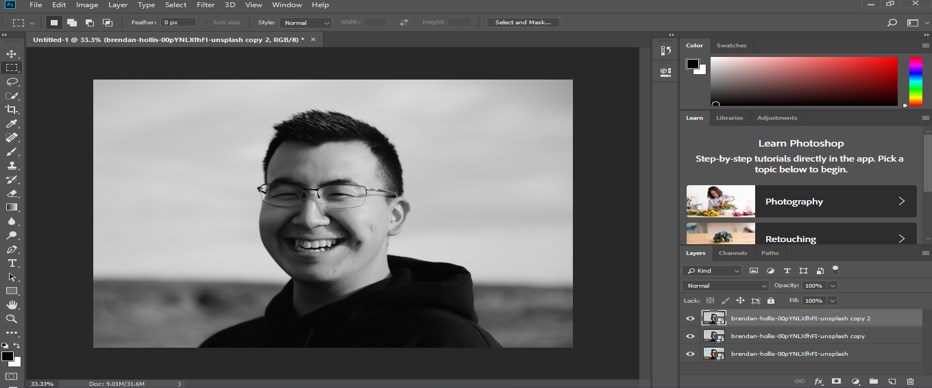
Step 7: Now, again, make a copy of this black and white layer by pressing Ctrl + J button from the keyboard.
Step 8: Now go to the bottom of this layered panel and click on the effect button. A drop-down list will be open; choose the Blending mode option from the list by click on it.
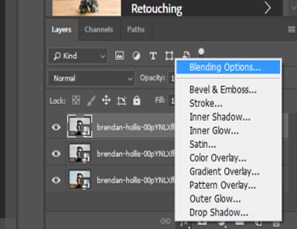
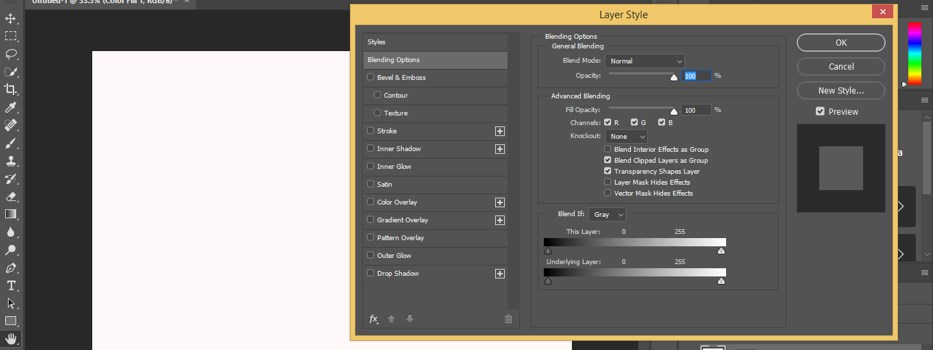
Step 9: Now, a dialog box of Layer Style will be open. Make R-value of the channel of Advance blending option uncheck by click on it with the mouse button and press the Ok button of this dialog box.

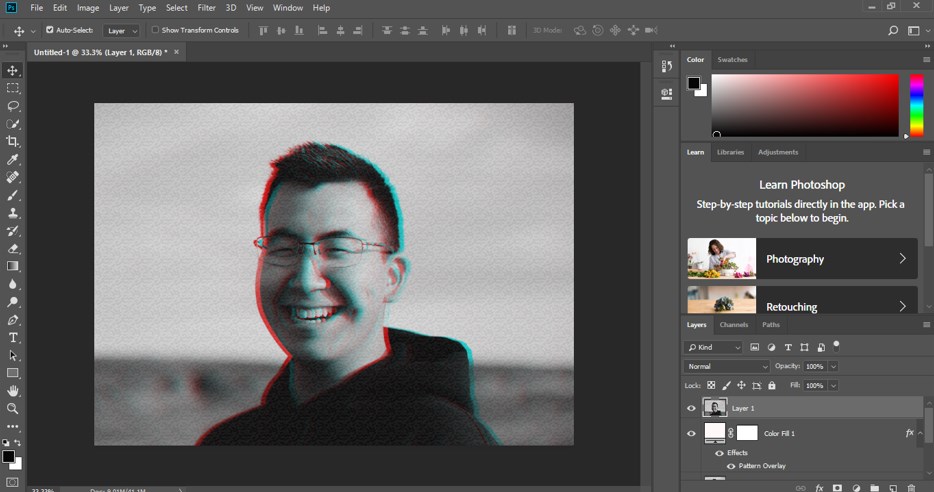
Step 10: Now select move tool from the tool panel of this software and press the right arrow key of your keyboard or press the left arrow key of your keyboard much time and you will see the effect of glitch on your image with every press of the arrow key. Make sure your smart layer copy is selected for this work.
Step 11: Now again, go to the bottom of the layer panel and click on the effects button. A drop-down list will be open. Choose a solid option from here by click on it.
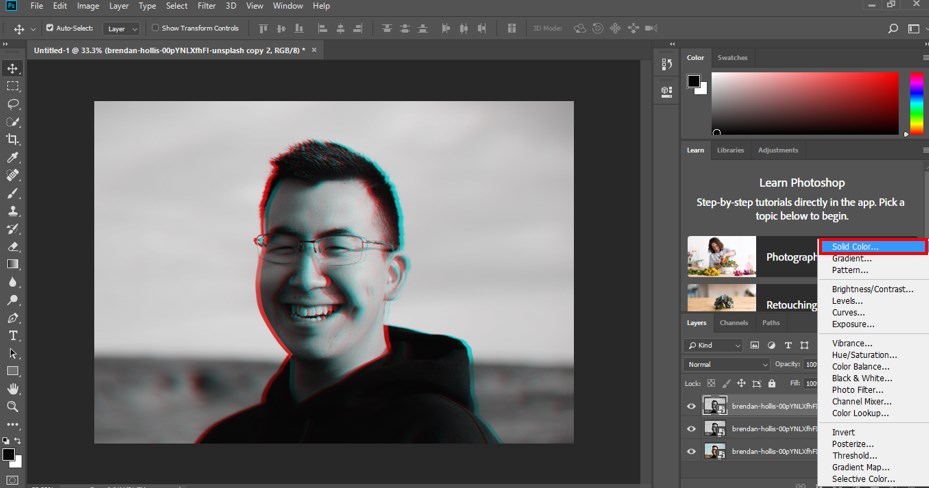
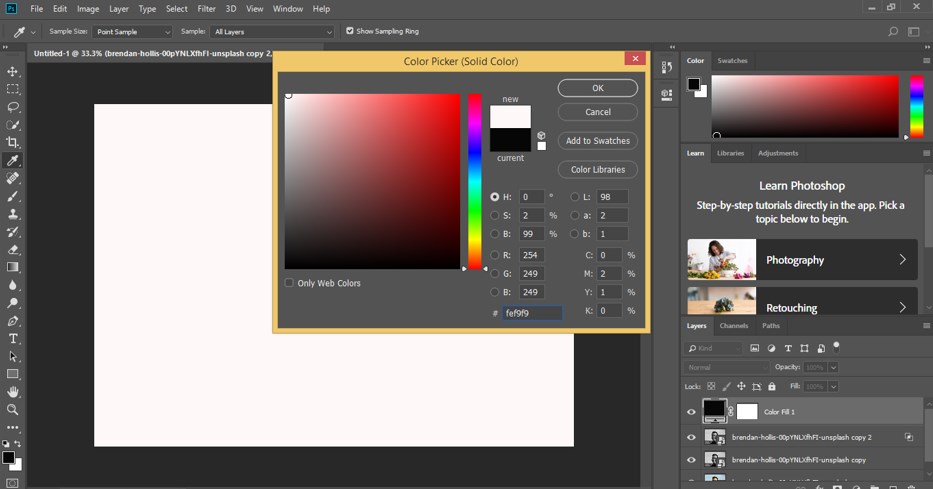
Step 12: Now, choose the color of this solid layer from this color picker box as white color.
Step 13: Now make double click on this layer with the help of the mouse left button. Once you make a click, a Layer style box will be open like this.
Step 14: Now click on the Pattern Overlay option of this style list and make a tick mark on this style option by clicking on the checkbox.
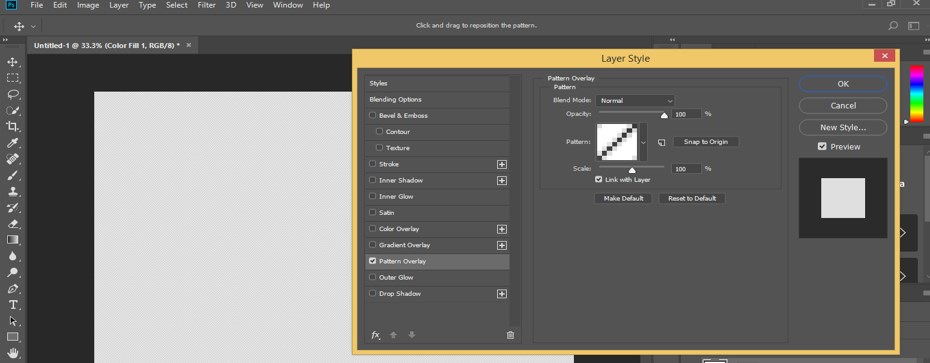
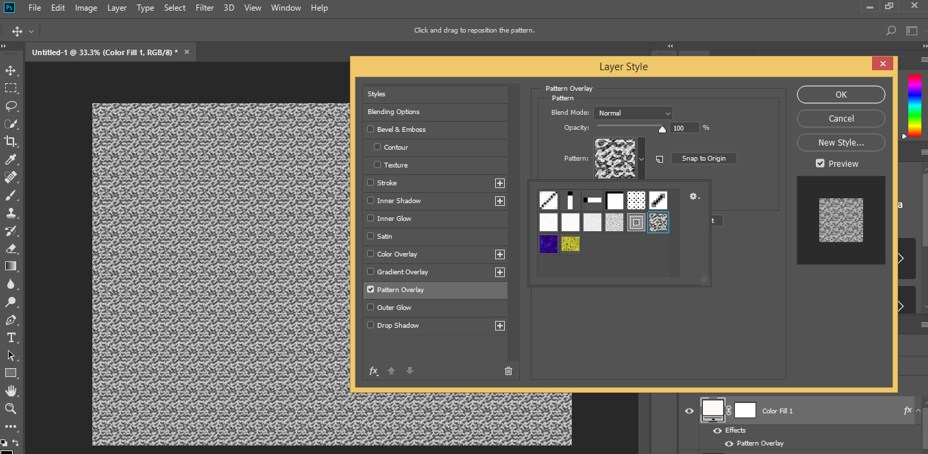
Step 15: Now go to the pattern option of this box and click on the drop-down arrow button of the pattern option. A list of different patterns will be open. Click on the pattern, which will give you a glitch effect; real look for old television print, then press the Ok button of this dialog box with the mouse left button to apply this pattern on the solid layer.
Step 16: Now, to go opacity option of this layer, then set the value of opacity as 10 percent. You will find this type of effect now.

Step 17: Now press Ctrl + shift + alt + e button from the keyboard for taking a snapshot of this image in the layer panel.
Step 18: Now got to the tool panel of this software on the left side of the working screen; then, take a rectangle tool from the list of tools by click on it. Now make the selection on the image like this with this rectangle tool, then again go to the tool panel of this software and take the move tool by click on it.
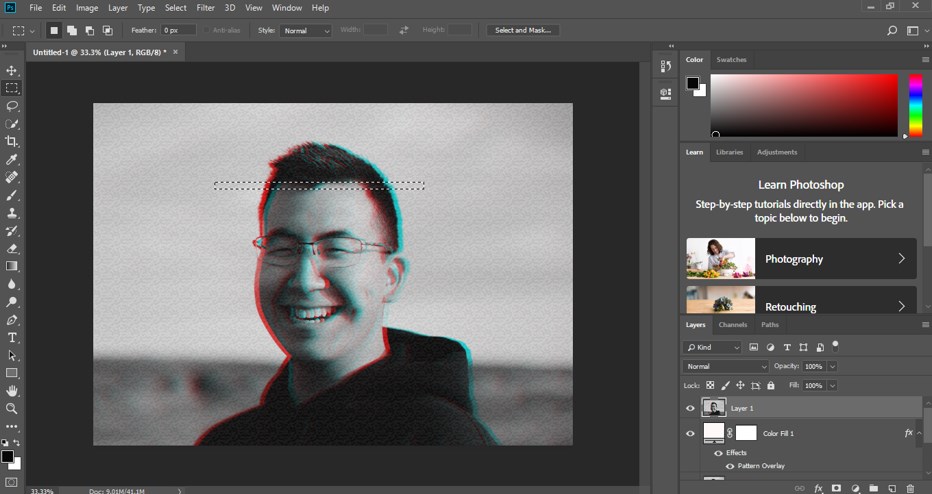
Step 19: Now press the right arrow button of the keyboard repeatedly for displacing the selected area of the image a little bit on the right side; you can displace it on the left side by pressing the left arrow button of the keyboard.

Step 20: Make more displaced areas in your image at different places by following the same steps as we did in previous for getting a real glitch effect on your image.
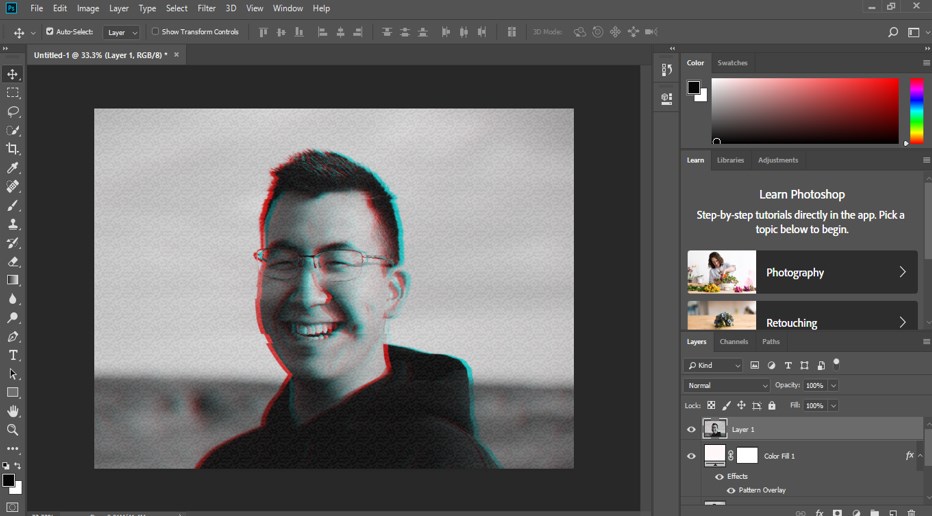
In this way, you can make a glitch effect on your image in Photoshop by taking different tools and features of this software to make this type of old television effect.
Conclusion
Now, after this article, you can understand what the glitch effect is in Photoshop software and how you can make a good television effect by using this effect. You can make a good command of different types of effects of this software by practicing on them again and again.
Recommended Articles
This is a guide to Glitch Effect in Photoshop. Here we discuss an introduction, how to use glitch effects in a step by step manner in photoshop. You can also go through our other related articles to learn more –
