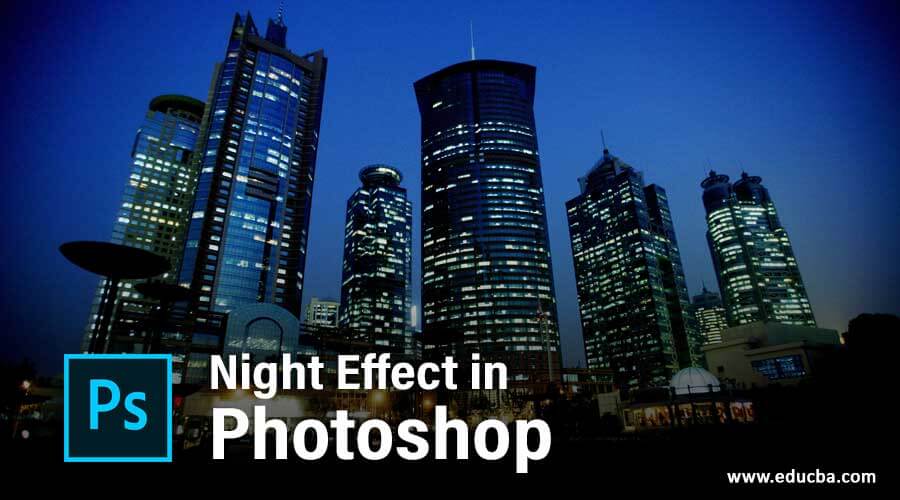
Introduction to Night Effect in Photoshop
Night effect is a fake effect that we can create on our image in Photoshop software for getting night mode on our image by using different types of features, tools, and parameters of this software. For creating a night effect in Photoshop, you just have to manage some parameters such as Hus/saturation, color balance, and some others and have to create some mask and a new layer for it. So let us discuss all these parameters and steps through which we can create a night effect for having night mode on our image. We will understand this topic through an example.
Applying Night Effect in Photoshop
We should have followed some steps to create this type of effect in Photoshop and have to make some changes in different parameters for getting it. So let us learn this topic in a very exciting manner. But before starting, let us get an introduction about the user screen of this software so that you can understand different term which we will use throughout this article.
Step 1: At the top of the user screen, we have a Menu bar with some important menu; below this, we have a property bar of active tool or image, below this at the left side, we have a tool panel which has a different type of tool, at the center we have display window, at the right side, there are some tabs such as color tab, layer panel, and some others. You can change the place of all sections as per your choice.
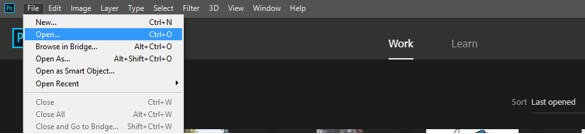
Step 2: Now, let us have an image that we will convert into night mode. For having images in this software, go to the File menu of the menu bar and click on it. Once you click, a drop-down list will be open. Choose the Open option from the list.
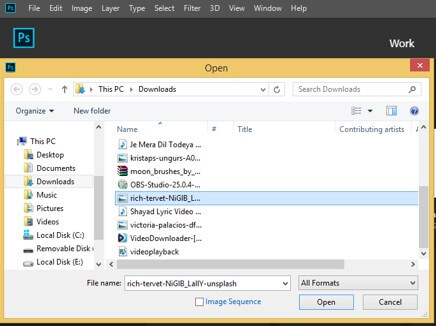
Step 3: Now, a dialog box will be open. Go to your desired folder and choose your desired image. Once you chose to click on the Open button of this box for placing your selected image in this software.
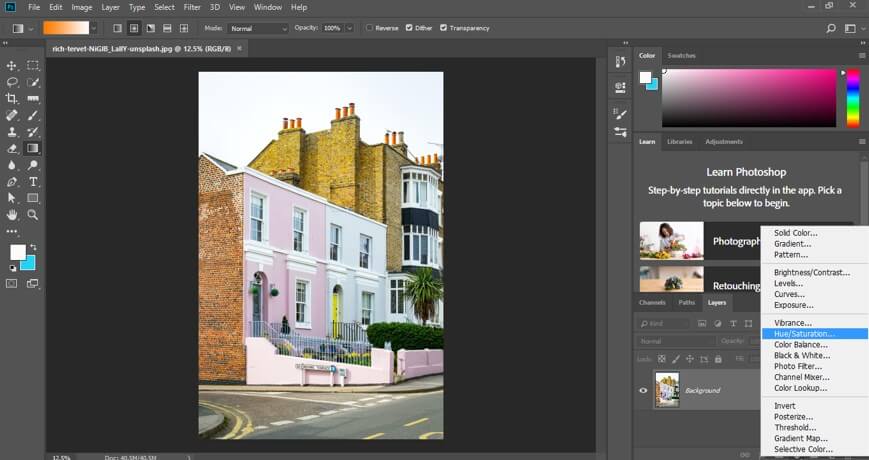
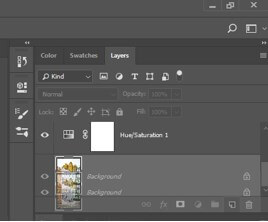
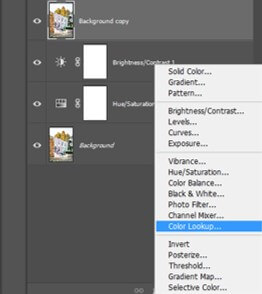
Step 4: Your image will place like this. Now go to the bottom of the layer panel and click on the Adjustment layer button. A pop-up list will be open. Choose the Hue/Saturation option from the list.
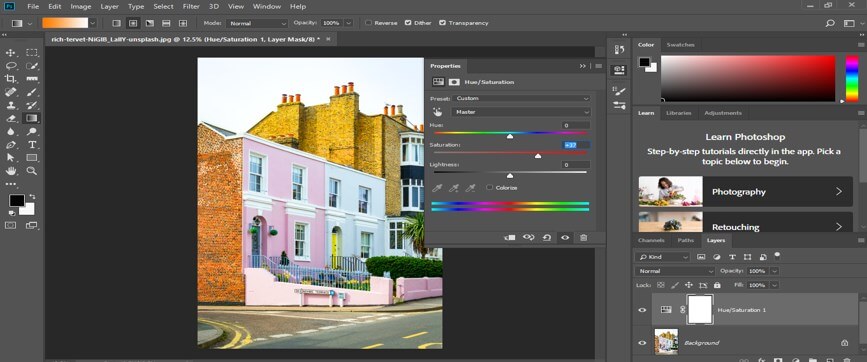
Step 5: Now, decrease the value of Saturation from the saturation slider scale of the Hue/Saturation box.
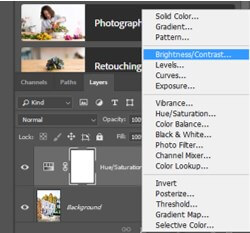
Step 6: Now again, go and click on the Adjustment layer button, then choose the Brightness/Contrast option from the list.
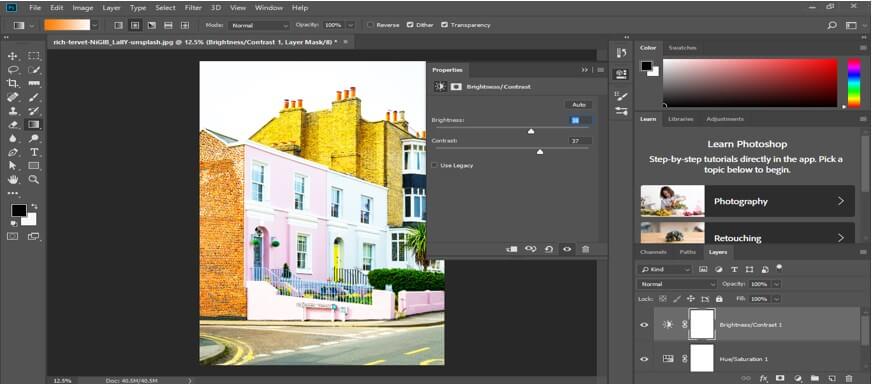
Step 7: Now increase the value of brightness and contrast up to 40 % from the box of Brightness/ Contrast for increased brightness and contrast on this image.
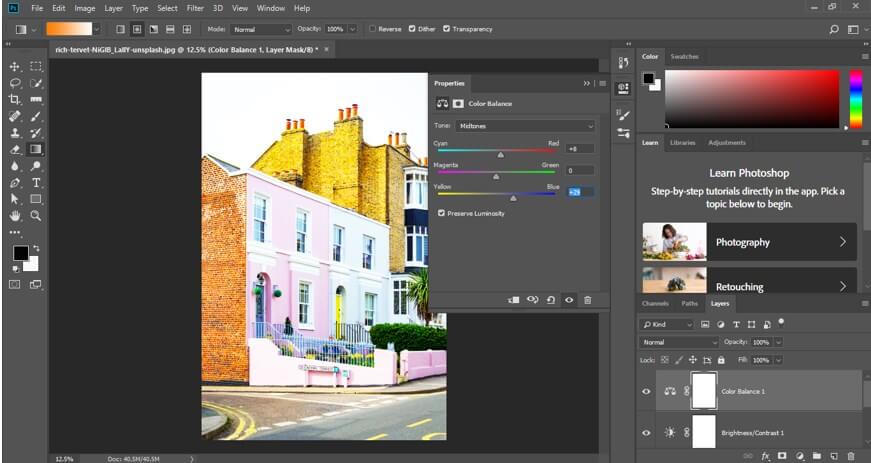
Step 8: Now again, go to the Adjustment layer button and choose the list’s Colour balance option.
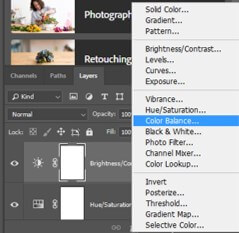
Step 9: Now adjust the Yellow tone value up to 30% and Cyan tone value up to 10%.
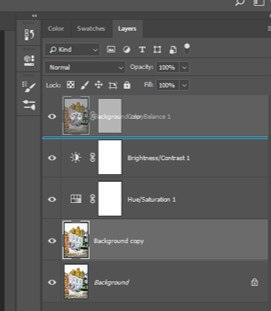
Step 10: Now drag the background layer to the Create new button for making a copy of this layer.
Step 11: Place this copy layer at the top of all layers by dragging it with the help of the mouse button.
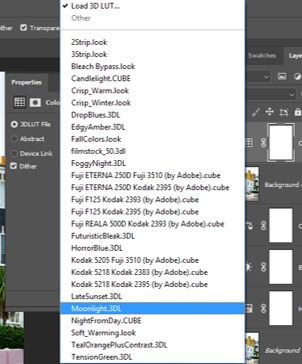
Step 12: Now select this copy layer and click on the Adjustment layer button. Choose the Color Lookup option from the list.
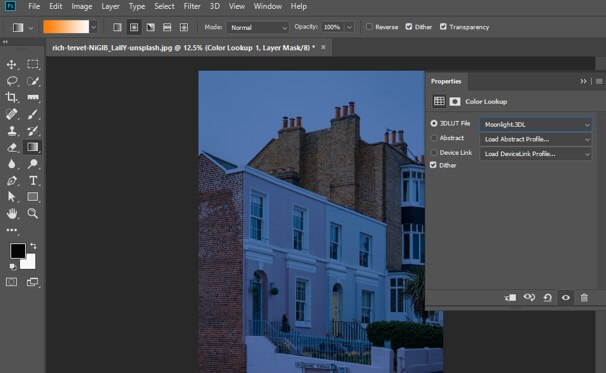
Step 13: A Color Lookup box will be open. Click on the drop-down arrow of the first option of this box and choose the Moonlight option from the list, or you can choose the NightFromDay option for night mode from the list.
Step 14: I will choose the Moonlight option, and your image will convert like this.
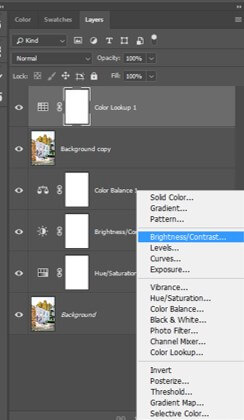
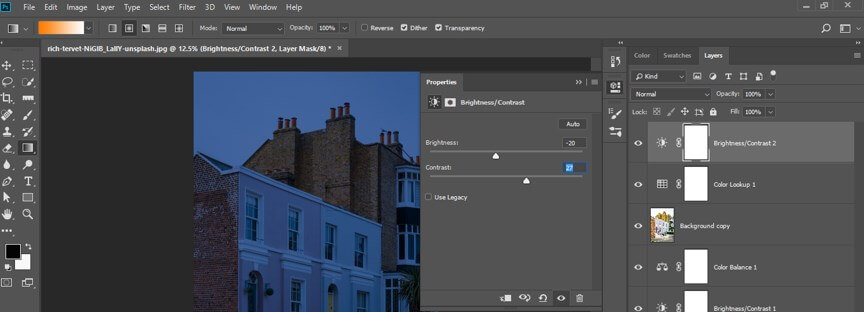
Step 15: Now again, go to the Adjustment layer button and choose the Brightness/Contrast option from the list for increasing darkness on your image.
Step 16: Now, decrease the value of brightness on the brightness options and increase the contrast value in the contrast option of this box.
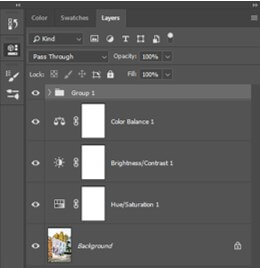
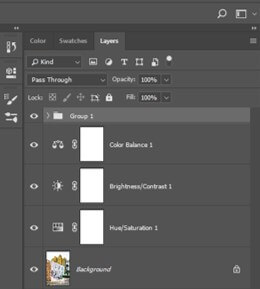
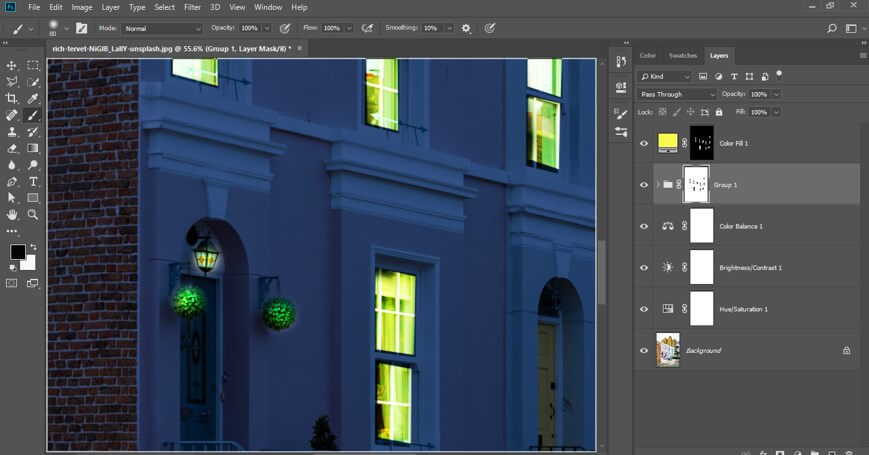
Step 17: Now select these layers by holding the shift button of the keyboard.

Step 18: And press Ctrl + G button for grouping them into one layer.
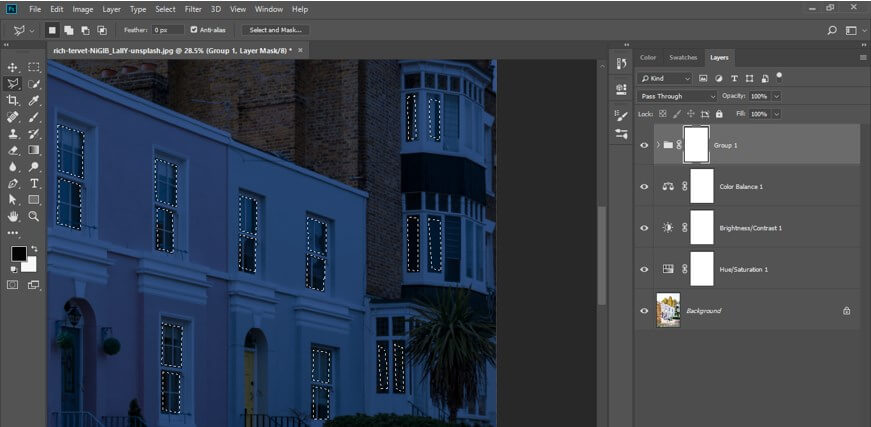
Step 19: Now click on Add Mask button, which is at the button of the layer panel of this software for adding a mask in the group layer.
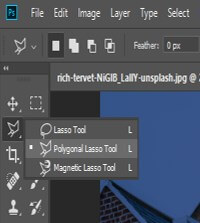
Step 20: Now go to the tool panel of this software and take the Polygonal Lasso tool.
Step 21: And make a selection around the windows of this image like this. Make a selection by holding the shift button of the keyboard.
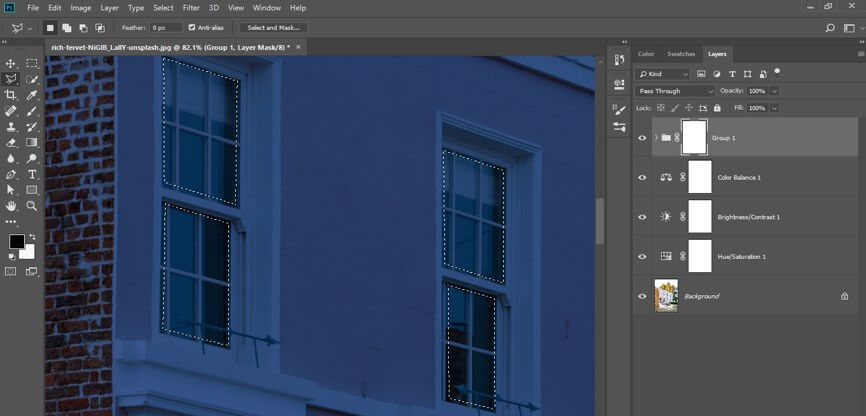
Step 22: You can make many selections as per your choice like this.
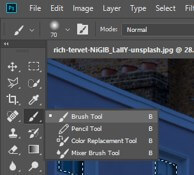
Step 23: Now, take the brush tool from the tool panel.
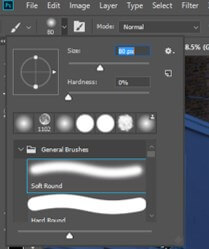
Step 24: Adjust the size of the brush from the Size option of the property bar of the brush tool.
Step 25: Make sure you have selected black color as the foreground color in the color box. Now drag brush on window area, and it will highlight windows like this.

Step 26: Now go to the Adjustment layer button and click on the Solid layer option of the list.
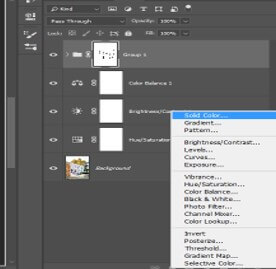
Step 27: Choose yellow color as a solid color and then press the Ok button of this box.

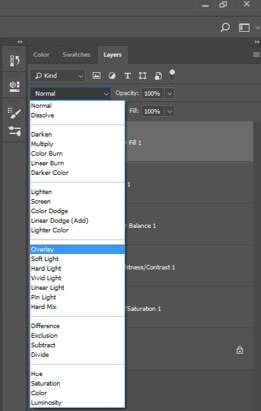
Step 28: Now, choose the Overlay option in the mode option of this solid layer.
Step 29: Now, you will get this type of effect on the window.

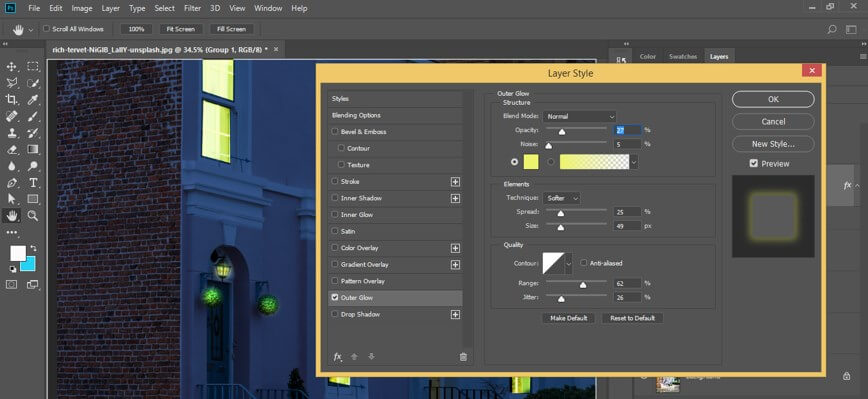
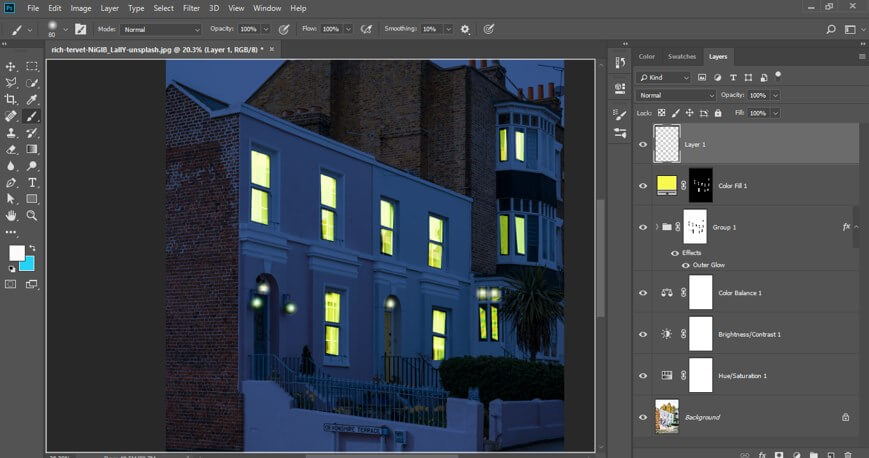
Step 30: Now select Group 1 layer and make click on the lamp light with the brush tool, and you will get a light effect on it like this.
Step 31: Now make double click on this layer, and a layer style box will be open. Choose the Outer glow option from the box. Make some adjustments here in the parameter for outer glow according to how heavy light effect you want on the windows of your image.
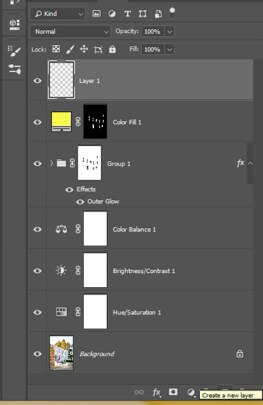
Step 32: Now go to the bottom of the layer panel and click on Create new layer button for creating a new layer like this.
Step 33: Now again, take a brush tool, and this time makes sure you have white color as the foreground color in the color box. Now make a click on the lamp lights of the image for adding more glows like this.

Step 34: This is your final night effect. You can add the moon and stars in the sky area of the image to add more detail in your image.
In this way, you can create a Night effect in this software.
Conclusion
Now, after this article, you can understand what Moon brush is and how it is helpful for your project work. You can do many different types of creation with these types of the brush of Photoshop software; just practices on them and apply your own idea by using them in your image editing work.
Recommended Articles
This is a guide to Night Effect in Photoshop. Here we discuss the introduction and various steps to apply Night Effect in Photoshop. You can also go through our other related articles to learn more –
