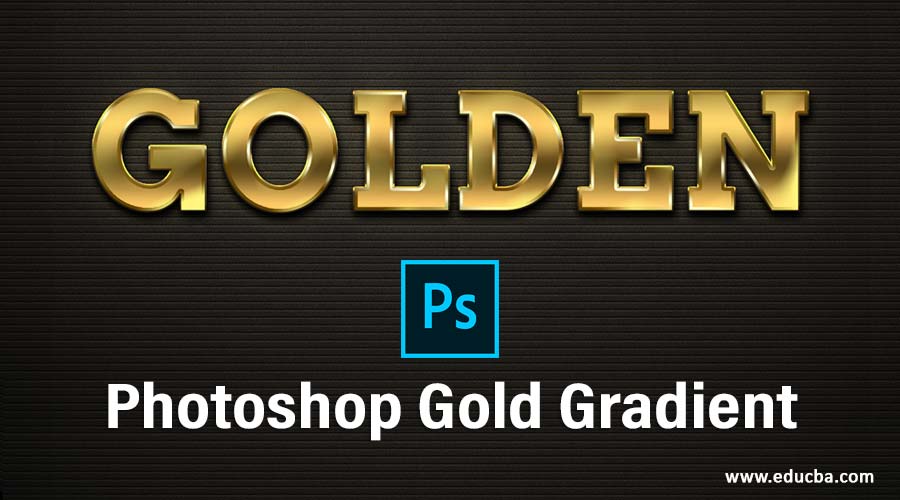
Introduction to Photoshop Gold Gradient
Gold Gradient is a combination of different color ranges through which you can create a gold effect on your image or on any text in this software. You can create a Gold gradient in this software by using gradient features and some color combination of this software and some settings parameters of different types of features. In this article, we will analyze different gradient and color combinations for creating a gold gradient for our text so that we can give a golden color look to our text. So let us discuss the main features of the creation of this gradient.
How to Create Gold Gradient in Photoshop?
We can create a gold gradient in this software by setting some color parameters and using the tools panel tools. So before starting our learning, we should have a look at the working screen of Photoshop software to understand the different terms that we use throughout this article.
Step 1: At the top of the Photoshop software screen, we have a Menu bar which has a different type of menus; below this menu bar we have Property bar of active tool or active image, below this, we have three sections, at left side we have tool panel, at the center we have display windows, at the right side, we have different tabs such as Color tab, Layer panel, and some other important tabs are there. You can rearrange these sections as per your choice.
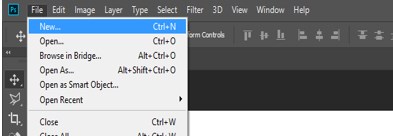
Step 2: Now, let us take a new document for our learning. For ‘new document’, click on the menu bar’s File menu and click on the New option of the drop-down list.
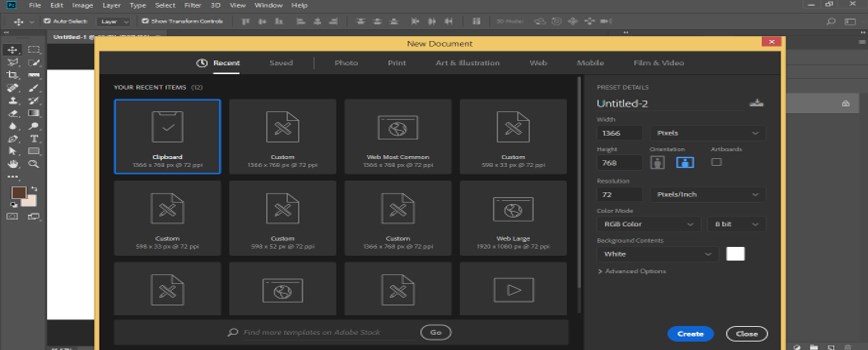
Step 3: A New Document dialog box will be open. Choose your document size according to your requirement, then press the Create button of this box.
Step 4: Now go to the tool panel of this software and take the Text tool from the list by click on it.
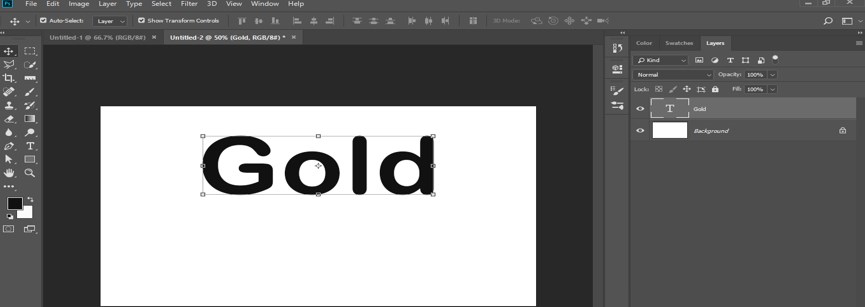
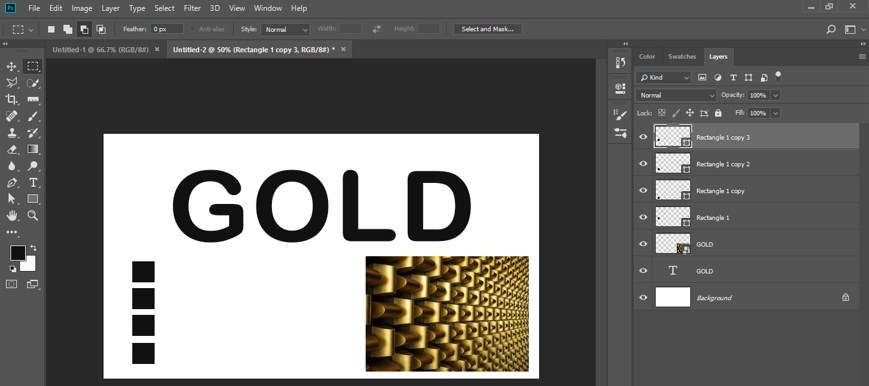
Step 5: Now, type a text like this. Take black color in the foreground color box and whiter color in the background color box.
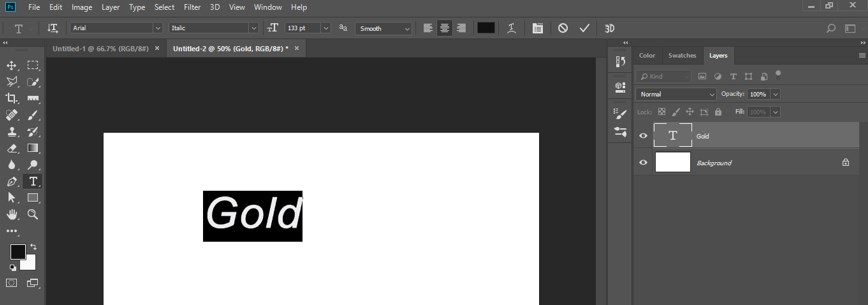
Step 6: Set this text at the center of the document.
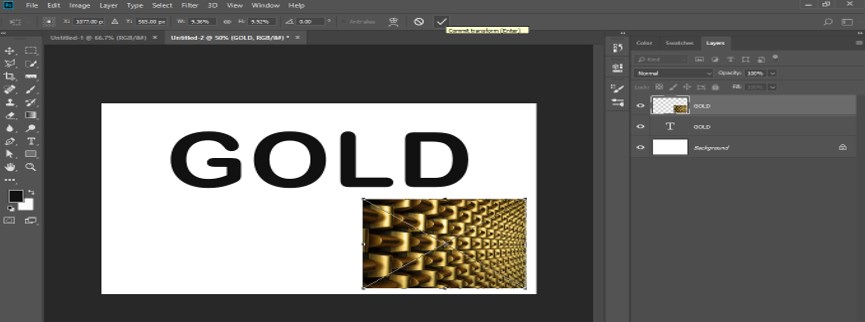
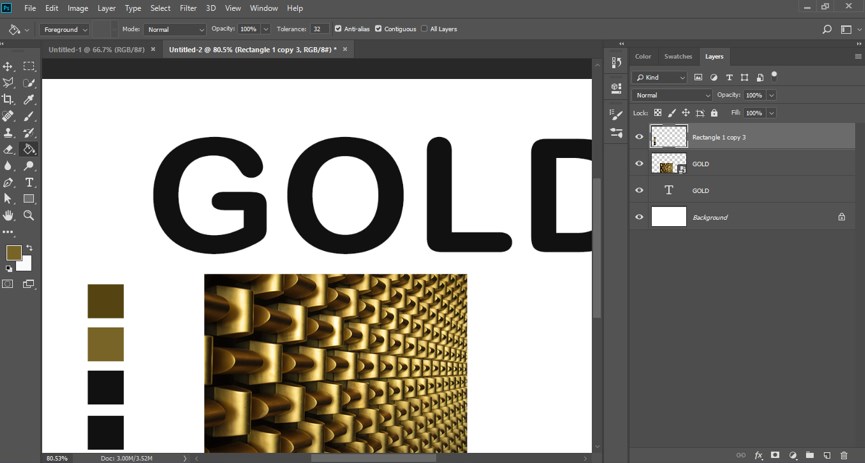
Step 7: Now, let us have an image that has a gold-like color. I have downloaded it from the internet; you can also download it. For placing this image in this software, open that folder of your personal computer where you have saved it the pick it from there then drop it in the display window area of this software.
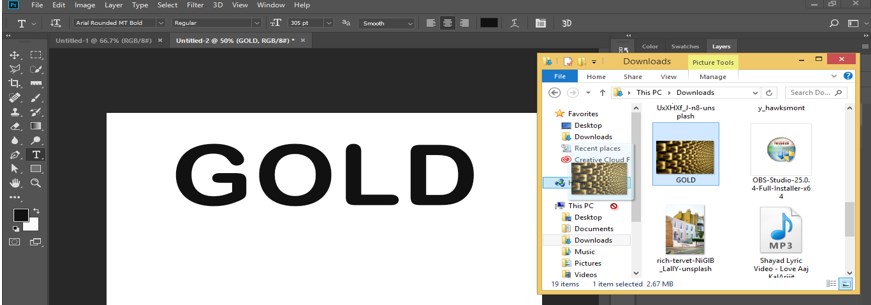
Step 8: Adjust the size of this image according to you and press the ‘commit transform’ button of the property bar of this image, or you can press the Enter button of the keyboard.
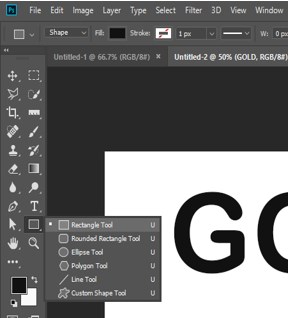
Step 9: Again, go to the tool panel and take the Rectangle tool.
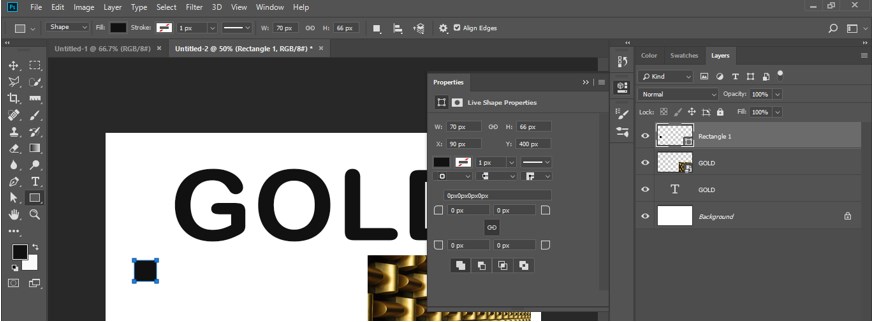
Step 1o: Make Small Square with this rectangle tool.
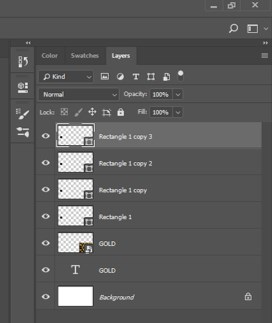
Step 11: Now go to the layer panel of this software and select this rectangle layer by click on it. Press the Ctrl + J button from the keyboard for making a copy of this layer. Make two more copies of this layer by the same method.
Step 12: Adjust these rectangles in rows like this.
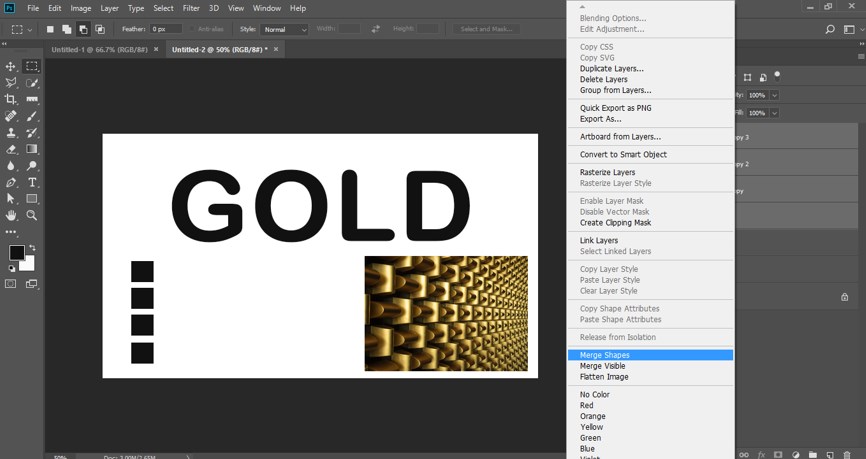
Step 13: Now go to the layer panel and select the layer of these rectangle shapes by holding the shift button of the keyboard, then make a right click and click on the Merge Shapes option of the drop-down list for merging them in one layer.
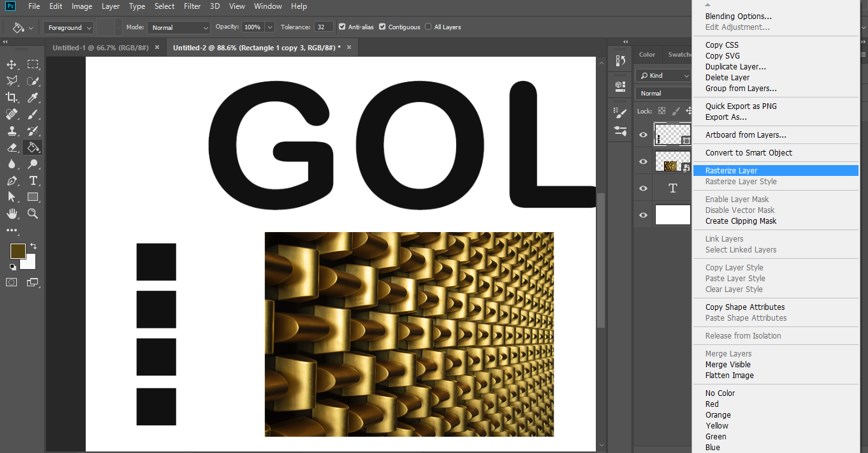
Step 14: Now again, make right-click on the merged layer and click on the Rasterize Layer option of the list for making this layer editable.
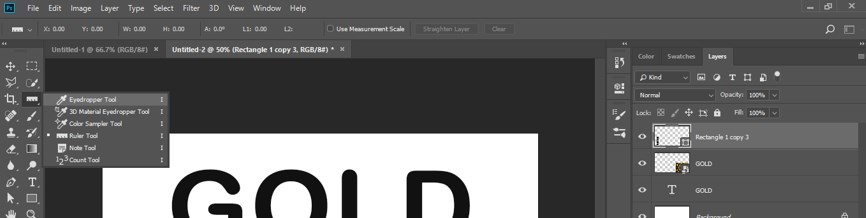
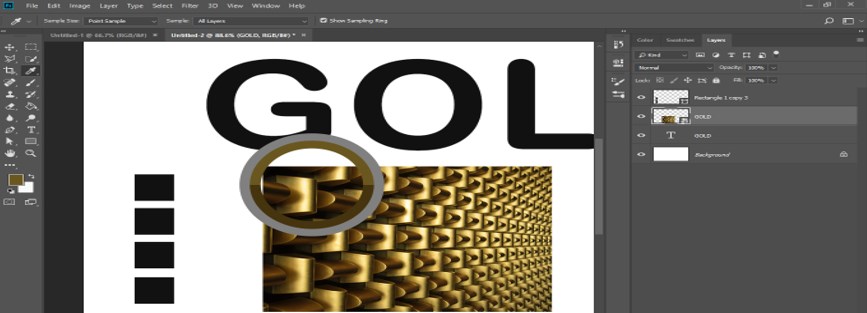
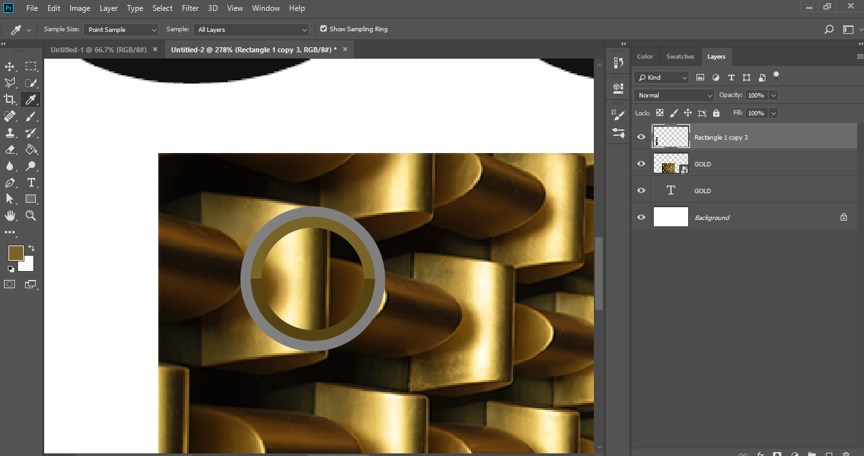
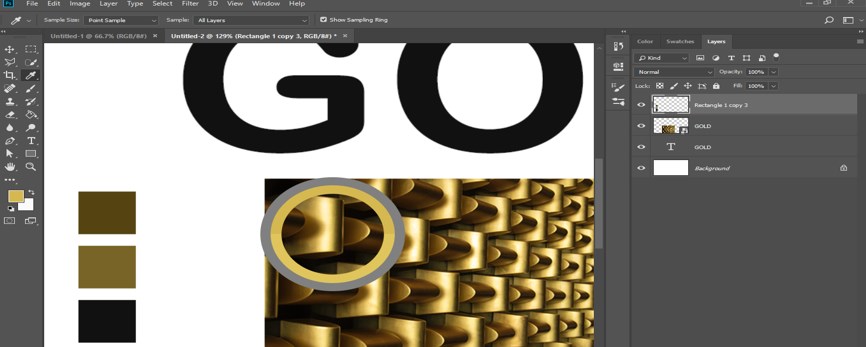
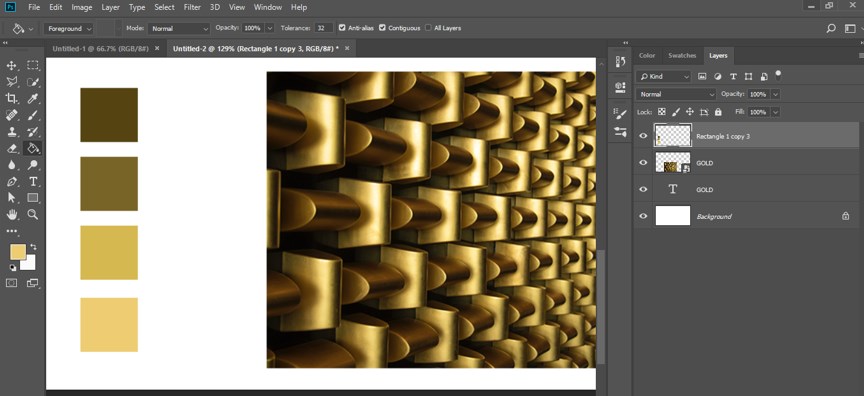
Step 15: Now, take the Eyedropper tool from the tool panel of this software by click on it.
Step 16: Zoom out the image of golden color and choose a dark color range of golden color from this image with the help of the eyedropper tool.
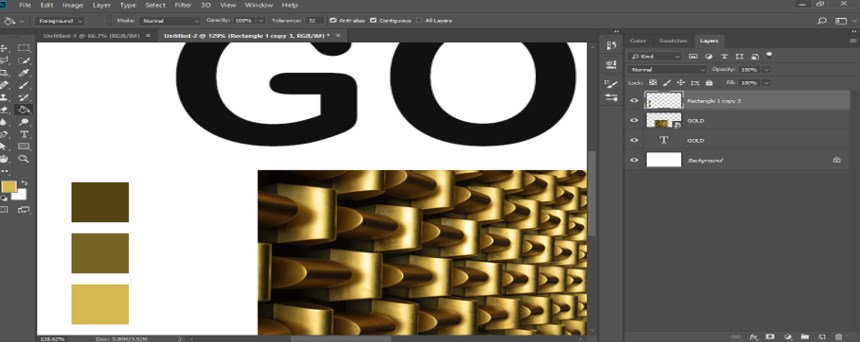
Step 17: Now, take the Paint Bucket tool from the tool panel or press the G button of the keyboard.
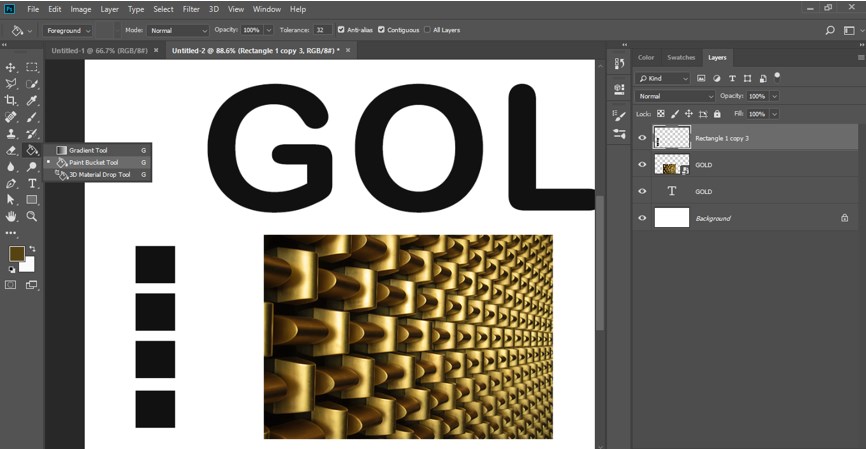
Step 18: Make click on the first rectangle with this bucket tool for filling color in it you have chosen from the image.
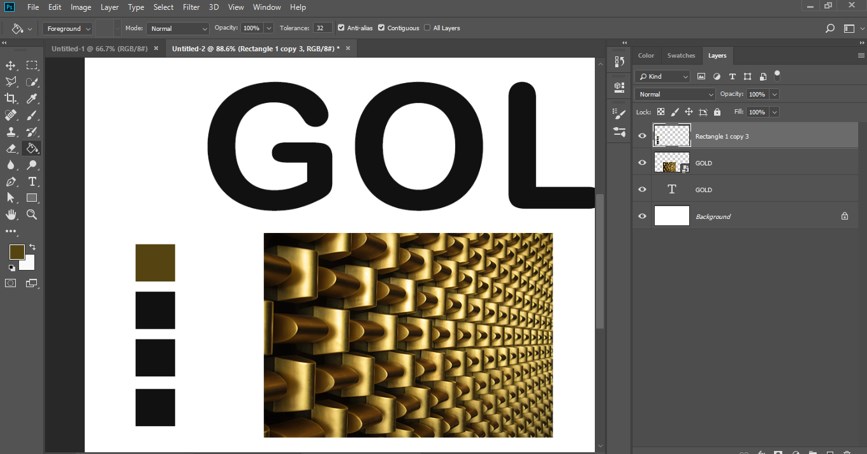
Step 19: Now, choose a lighter color than the previous one with the help of the eyedropper tool from the image.
Step 20: And drop it in the second rectangle with the help of the Bucket tool. You can press the I button for the eyedropper tool and the G button for the bucket tool for quick excess between these two tools.
Step 21: Again, take a lighter color than the second color.
Step 22: And drop it in Third Square.
Step 23: Now, again, choose the lighter color with the help of the eyedropper tool.
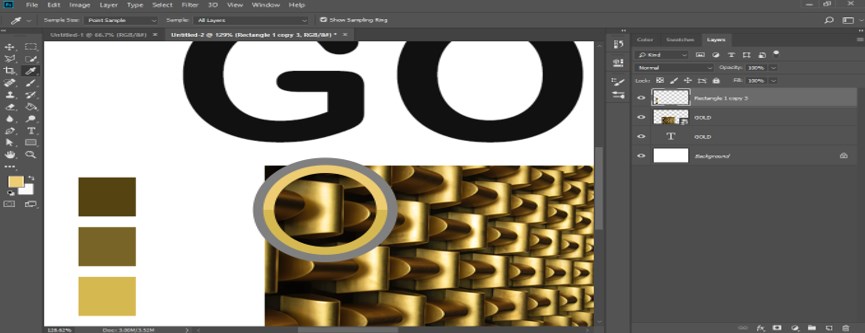
Step 24: And drop it in the fourth rectangle.
Step 25: Now go to the layer panel and make double click on the Text layer. A Layer Style box will be open.
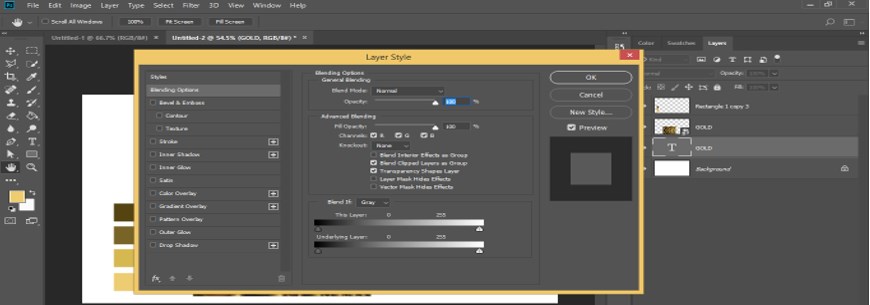
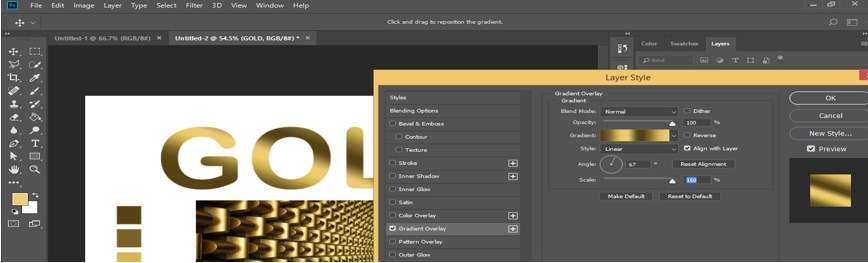
Step 26: Click on the Gradient Overlay option of the list. Now click on the Gradient scale option of this option.
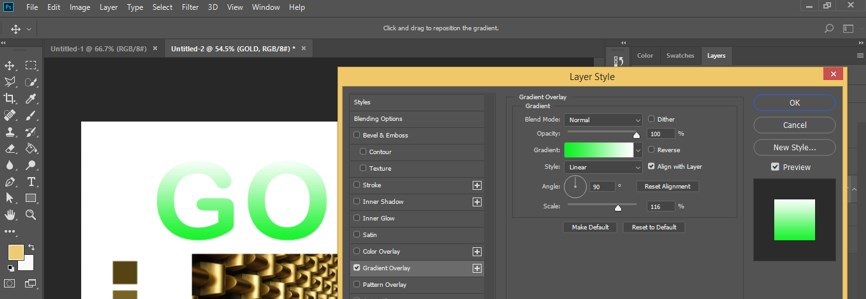
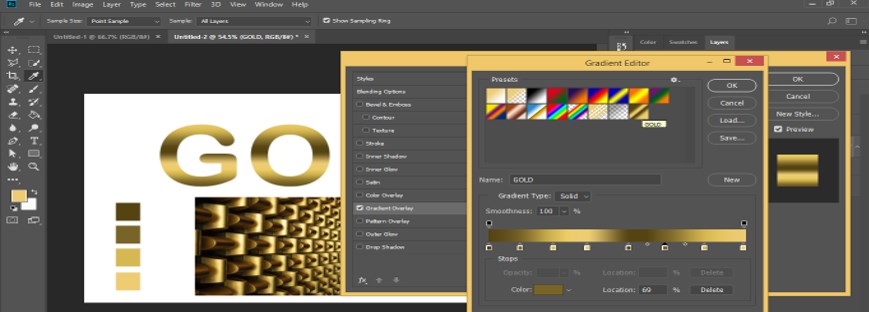
Step 27: A Gradient Editor box will be open.
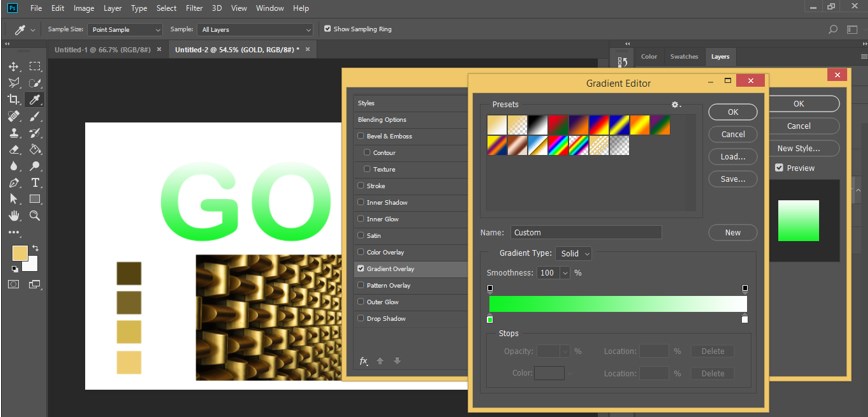
Step 28: Add gradient stop at a gradient scale of this box like this.
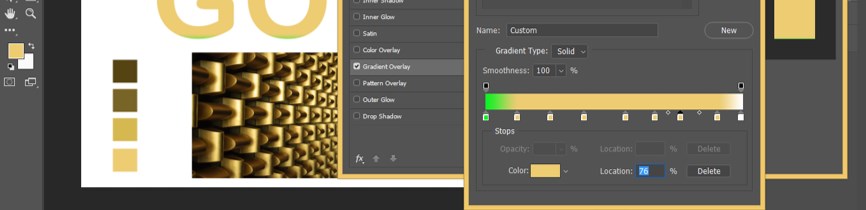
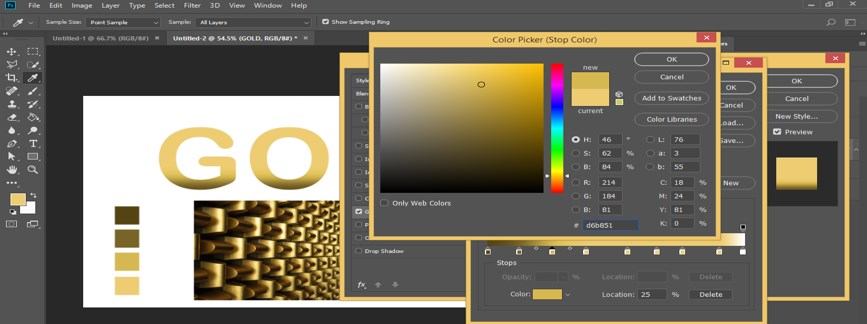
Step 29: Now make double click on the first stop of gradient color.
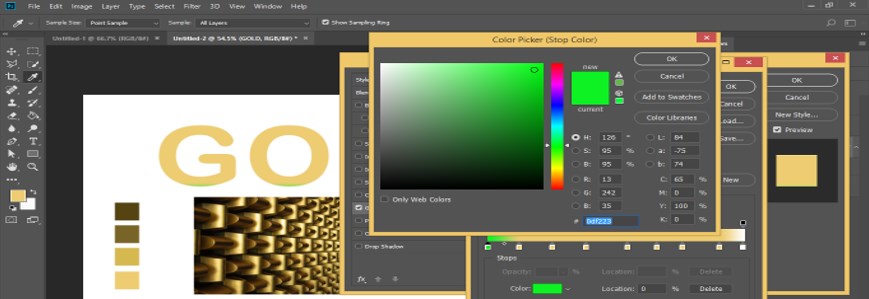
Step 30: Click on the first rectangle color with the eyedropper tool of this stop.
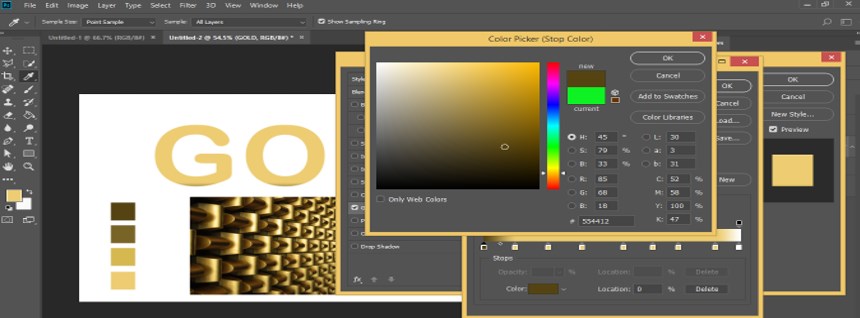
Step 31: Now make double click on the second stop of gradient color.
Step 32: Click on the second rectangle color with the eyedropper tool of this stop.
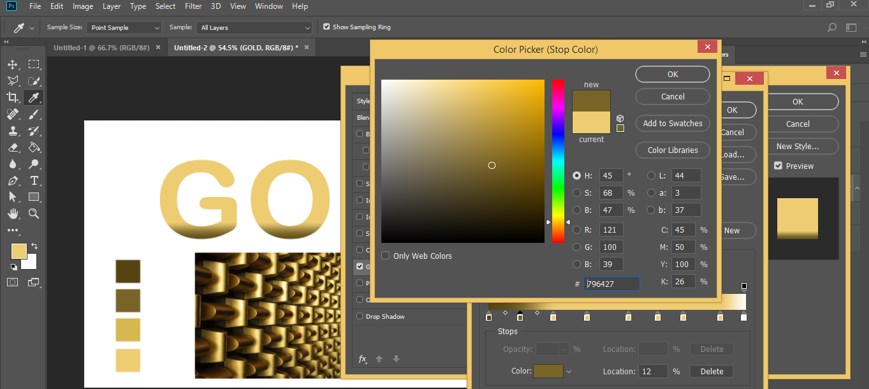
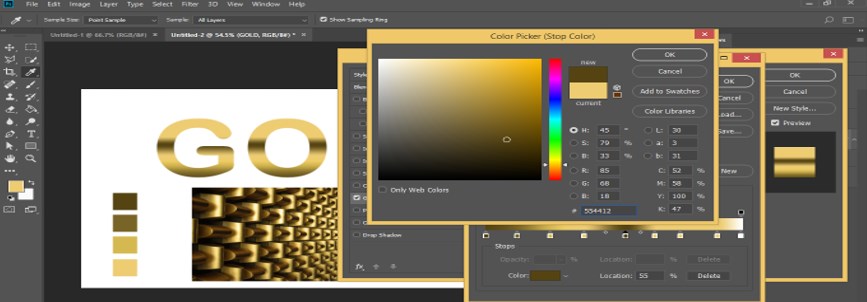
Step 33: Repeat this for all stops of gradient color.
Step 34: Now, you will get this type of gradient, giving you a gold effect. Now name this gradient according to you and click on the New button of this dialog box.

Step 35: And gold gradient made by you will add in the presets of the gradient. Press the Ok button of this box.
Step 36: You can change the angle of gradient from the angle option of this gradient.
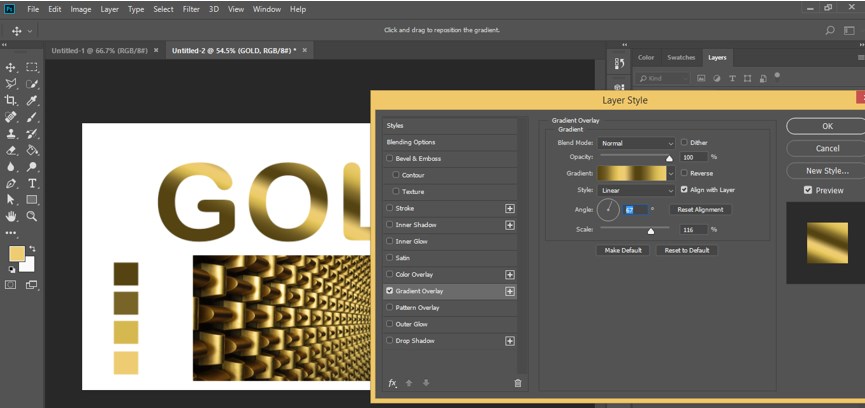
Step 37: You can also change the style of gradient from these options.
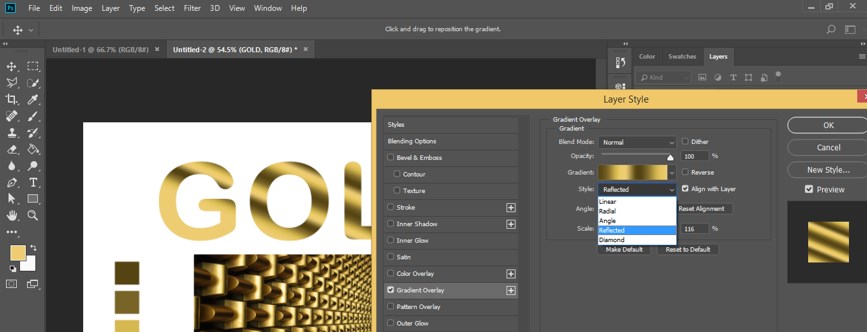
Step 38: Increase the scale of the gradient for getting different gold gradient effect.
Step 39: Now click on the Stroke option for adding stork to this text and increase the width of the stroke.
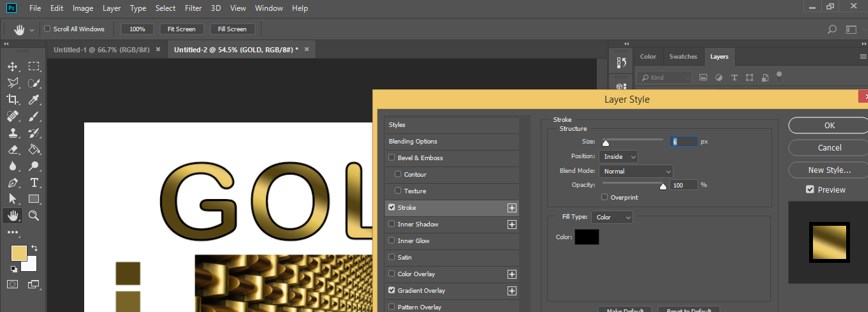
Step 40: Choose the Gradient option in the Fill type of stroke option.
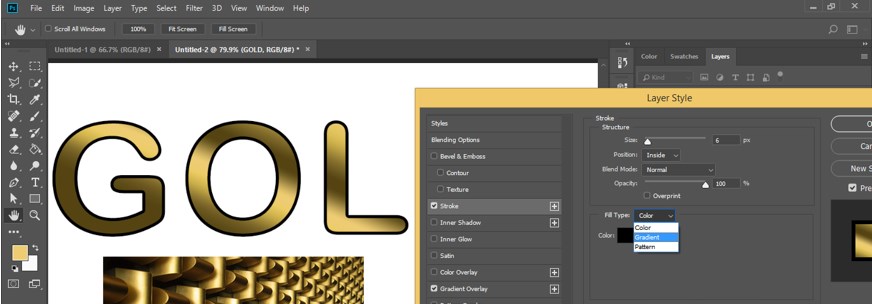
Step 41: Click on the Edit gradient option.
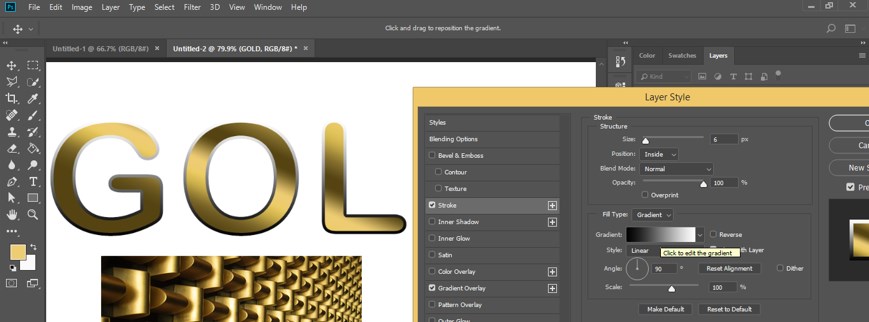
Step 42: And choose a Gold gradient made by you from presets of gradient, then press the Ok button of this box.

Step 43: In this way, you can use the gold gradient made by you again and again for your different purpose.
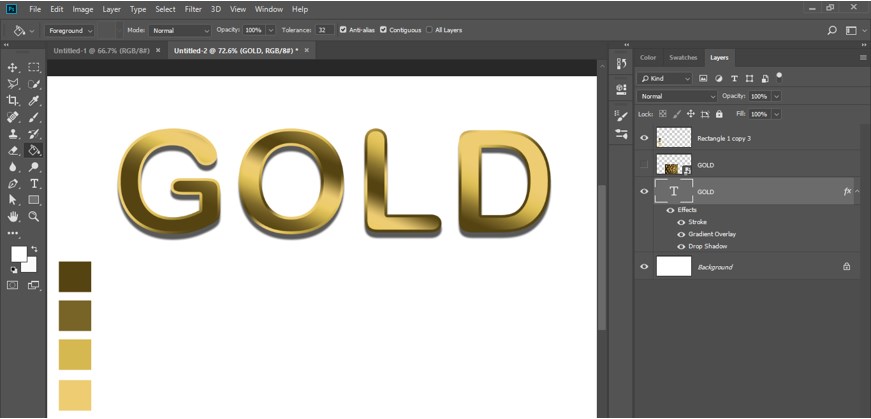
By these steps, you can create this effect in Photoshop.
Conclusion
After this article, you can easily understand this effect and create it by managing different parameters of the gradient scale of this software. You can try another type of gold color combination by getting ideas from this article.
Recommended Articles
This is a guide to Photoshop Gold Gradient. Here we discuss the introduction, how to create Gold Gradient in photoshop in a step by step manner. You can also go through our other related articles to learn more –
