Updated May 23, 2023

Introduction to Django one to many
One-to-many is a situation where one field is pointed to more than one. So, one specific field will point to more than one field in the database. This relational correlativity will lead to one-to-many relationships in Django. Django doesn’t have any default built-in fields in Django to support one-to-many relationships. The statement foreign-key in Django achieves this field combination. So foreignkey statement supports the correlation of one-to-many statements. Columns from one table can extend the connection with more than one column in various other tables.
Syntax:
Object_Name = model_name.ForeignKey(Table_name, null_argument, Ondelete_arguemnt)How does one to many work in Django?
- Here the primary argument represents a table call. So we assign this call of the table because the first argument of the Foreign key version allows us to specify, for example, the table from which we borrow the respective secret. Therefore, we can note the table from which we take the overseas key cost here. This is the primary argument of the method. We use the null argument to indicate whether the cost field should relate to incoming or existing data in the table. By specifying this argument as null=True, we allow both existing data in the backend and new data to be saved without specifying a cost.
- The subsequent argument is the maximum vital argument. This argument decides how the effect of deletion at the staging table wants to affect the distinguish table. While deleting table data, the corresponding document must undergo the impact, or else the effect may be overlooked. So, based on this, the alternative to the distinguished table might be considered right here. Additionally, at the left facet of the equation is the call of the overseas key column. This call specifies the newly created column. So the call cost given right here might be the column’s call further.
Create a Django one-to-many Field
Given below shows the creation of one to many fields:
1. Changes in the Models.py file
As the syntax section mentions, the one-to-many field must be declared in the models.py file. The model declares the one-to-many field as the age field.
models.py:
from django.db import models
from django.contrib.auth.models import User
# Model variables
# Create your models here.
class Bride(models.Model):
    OnetoMany_Example_name = models.CharField(max_length=200,null=True)
    OnetoMany_Example_thegai = models.CharField(max_length=200,null=True)
    OnetoMany_Example_State =  models.CharField(max_length=50,null=True)
    OnetoMany_Example_District = models.CharField(max_length=50,null=True)
    OnetoMany_Example_Address = models.TextField(null=True)
    OnetoMany_Example_Phone = models.BigOnetoMany_Example_Field(null=True)
    OnetoMany_Example_profession = models.CharField(max_length=200,null=True)
    OnetoMany_Example_salary = models.BigOnetoMany_Example_Field(null=True)
    OnetoMany_Example_Under_Graduation_Degree = models.CharField(max_length=200,null=True)
    OnetoMany_Example_Under_Graduation_college = models.CharField(max_length=400,null=True)
    OnetoMany_Example_Post_Graduation_Degree = models.CharField(max_length=200,null=True)
    OnetoMany_Example_Post_Graduation_college = models.CharField(max_length=400,null=True)
    OnetoMany_Example_Rasi = models.CharField(max_length=200,null=True)
    OnetoMany_Example_Nakshatra = models.CharField(max_length=200,null=True)
    OnetoMany_Example_Creator  =  models.ForeignKey(User, null=True, on_delete=models.CASCADE)
    def _str_(self):
        return self.name
2. Changes in Forms.py file
Below are the changes associated with the forms.py file. The changes added on to add the table bride in this forms.py file. So all the fields from the table will be associated here by declaring them in the forms.py file.
forms.py:
from django import forms
from .models import Bride
from django.contrib.auth.forms import UserCreationForm
from django.contrib.auth.models import User
class Valueform(forms.ModelForm):
 #   Rasi = forms.ChoiceField(choices = Rasi_CHOICES)
    class Meta:
        model = Bride
        fields = "__all__"
3. Changes in the Settings.py file
Ensure all values and the database connects are set nicely within the settings.py record so the undertaking may be kicked for execution flexibly.
Settings.py:
MIDDLEWARE = [
    'django.middleware.security.SecurityMiddleware',
    'django.contrib.sessions.middleware.SessionMiddleware',
    'django.middleware.common.CommonMiddleware',
    'django.middleware.csrf.CsrfViewMiddleware',
    'django.contrib.auth.middleware.AuthenticationMiddleware',
    'django.contrib.messages.middleware.MessageMiddleware',
    'django.middleware.clickjacking.XFrameOptionsMiddleware',
]
ROOT_URLCONF = 'Matrimony.urls'
TEMPLATES = [
    {
        'BACKEND': 'django.template.backends.django.DjangoTemplates',
        'DIRS': [Template_DIR,],
        'APP_DIRS': True,
        'OPTIONS': {
            'render_dict_processors': [
                'django.template.render_dict_processors.debug',
                'django.template.render_dict_processors.request',
                'django.contrib.auth.render_dict_processors.auth',
                'django.contrib.messages.render_dict_processors.messages',
            ],
        },
    },
]
4. Changes in the url.py file
The media root and document root variable must be instantiated inside the url.py file like below.
The changes for the url.py file are mentioned below.
url.py:
from django.contrib import admin
from django.urls import path
from django.conf.urls import url
from matrimony_pages import views
from django.conf import settings
from django.conf.urls.static import static
urlpatterns = [
    url(r'^$',views.Welcome_page,name='Welcome_page'),
    url(r'Mainpage/',views.Main_page,name='Main_page'),
    url(r'form/',views.form_view,name='form_view'),
    url(r"signup/", views.Sign_up_request, name="register"),
    url(r"login/", views.login_request, name="login"),
    path(r'profile//',views.OnetoMany_Example_page,name='profile'),
    url(r'logout/',views.logout_request,name='logout'),
    url(r'reg/',views.OnetoMany_Example_reg_user,name='reg'),
    path(r'update//',views.form_update,name='update'),
    path('admin/', admin.site.urls),
]+ static(settings.MEDIA_URL,document_root=settings.MEDIA_ROOT)
5. Create a view for the form
While submitting, the one-to-many fee must be saved, and while retrieving, it must be pulled from the database. You can achieve this through the item created for the model. The method of doing this is defined in the given section of views.py.
Ex: views.py:
def form_view(request):
    form = Valueform(request.POST or None)
    if form.is_valid():
        post = form.save()
        post.Creator = request.user
        print('Creator user stored',request.user)
        post.save()
    return  render(request,'form.html', {"form": form})
@login_required
def OnetoMany_Example_page(request,pk):
      rendering_dict = {}
      OnetoMany_key_variable_ = Bride.objects.get(id=pk)
      OnetoMany_Example_name =  OnetoMany_key_variable_.name
      OnetoMany_Example_Age =  Bride.objects.OnetoMany(first_name='Nalandan', last_name='Ranjan',defaults={'birthday': date(1990, 10, 9)})
      OnetoMany_Example_Thegai =  OnetoMany_key_variable_.thegai
      OnetoMany_Example_state =  OnetoMany_key_variable_.State
      OnetoMany_Example_district =  OnetoMany_key_variable_.District
      OnetoMany_Example_Address =  OnetoMany_key_variable_.Address
      OnetoMany_Example_Phone =  OnetoMany_key_variable_.Phone
      OnetoMany_Example_Profession =  OnetoMany_key_variable_.profession
      OnetoMany_Example_Salary =  OnetoMany_key_variable_.salary
      OnetoMany_Example_UG =  OnetoMany_key_variable_.Under_Graduation_Degree
      OnetoMany_Example_UGC =  OnetoMany_key_variable_.Under_Graduation_college
      OnetoMany_Example_PG =  OnetoMany_key_variable_.Post_Graduation_Degree
      OnetoMany_Example_PGC =  OnetoMany_key_variable_.Post_Graduation_college
      OnetoMany_Example_Rasi =  OnetoMany_key_variable_.Rasi
      OnetoMany_Example_Nakshatra =  OnetoMany_key_variable_.Nakshatra
      rendering_dict['Age'] = OnetoMany_Example_Age
      rendering_dict['name'] = OnetoMany_Example_name
      rendering_dict['thegai'] = OnetoMany_Example_Thegai
      rendering_dict['State'] = OnetoMany_Example_state
      rendering_dict['district'] = OnetoMany_Example_district
      rendering_dict['Address'] = OnetoMany_Example_Address
      rendering_dict['Phone'] = OnetoMany_Example_Phone
      rendering_dict['profession'] = OnetoMany_Example_Profession
      rendering_dict['Under_Graduation_Degree'] = OnetoMany_Example_UG
      rendering_dict['Under_Graduation_college'] = OnetoMany_Example_UGC
      rendering_dict['Post_Graduation_Degree'] = OnetoMany_Example_PG
      rendering_dict['Post_Graduation_college'] = OnetoMany_Example_PGC
      rendering_dict['Rasi'] = OnetoMany_Example_Rasi
      rendering_dict['Nakshatra'] = OnetoMany_Example_Nakshatra
      print(OnetoMany_key_variable_.Creator)
      print(rendering_dict)
      return  render(request,'Profilepage.html',rendering_dict)
6. Formulate an HTML file for displaying the form
You need to make corresponding changes to the HTML pages.
Profilepage.html:
<!DOCTYPE html>
<html style="font-size: 16px;">
<head>
<title>Profile</title>
</head>
<body class="body">
<nav class='navbar'>
<div class='navbar_div'>
<a class="navbar" onclick="redirect2()" >Home </a>
<a class="navbar" onclick="redirect2()" >Contact</a>
<a class="navbar" onclick="redirect1()" >Profiles</a>
</div>
</nav>
<div class="formarea">
{% block content %}
<form method="POST" class='formarea'>
<div class='formdiv'>
{{ form.as_p }}
{% csrf_token %}
<input type="submit" class='button' value="submit">
</div>
</form>
{% endblock content %}
</div>
</script>
</body>
</html>
Output:
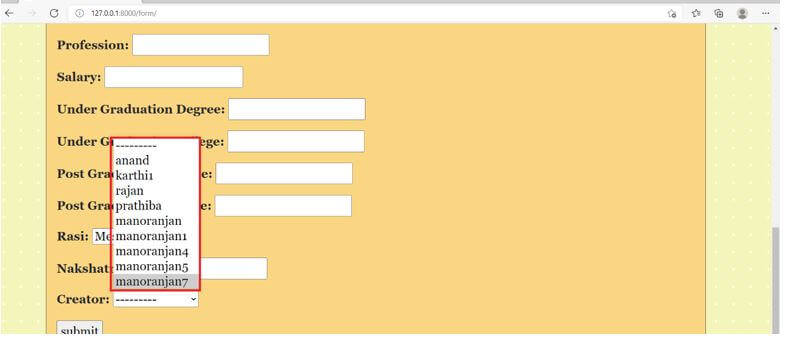
Conclusion
The above-given process mentions how to declare one-to-many field combinations in Django; The discussion includes the same syntax along with an explanation of the working process. A live website example and snaps from the website are also provided. Finally, All the discussed changes to the Django-related files are mentioned above.
Recommended Articles
We hope that this EDUCBA information on “Django one to many” was beneficial to you. You can view EDUCBA’s recommended articles for more information.

