Updated June 23, 2023
Introduction to CSS Overlay
Many times, we click on a page, and another page pops up on the screen and vanishes on clicking. These pop-ups can be advertisements, forms, notifications, or any other thing, depending on the requirement of the page. This screen-over-screen effect is called an overlay. It’s achieved using a combination of html, CSS, and JavaScript. This can be useful in creating dynamic pages where the user can control whether they want to see the popup screen or not. The overlay concept will be better understood as we look into how to achieve it step by step.
Syntax
The procedure to achieve an overlay is done in three steps. First goes the CSS coding for the overlay. Here we can define the type of overlay needed and style it accordingly. Next, we call styling the HTML page. Lastly, we use the JavaScript function for the visibility of the overlay.
A sample CSS overlay styling can be as below:
#overlayCSS{
position: fixed;
display: none;
height: 50%;
width: 50%;
background-color: wheat;
opacity: 50%;
cursor: pointer;
}Example to Implement CSS Overlay
Below are examples to implement:
1. Overlay Screen using JavaScript and External CSS
- Since we use external CSS, we will create the CSS file first.
- In the CSS file, we will define the ID, which has the styling property for the overlay element.
- The final CSS file should look like this:
Code:
#overlayCSS{
position: fixed;
display: none;
height: 50%;
width: 50%;
background-color: wheat;
opacity: 50%;
cursor: pointer;
}- Next, we will code the HTML page. All the magic happens on the HTML page, so we must code it carefully.
- First, in the head section, we will call for the external Style sheet like this:
Code:
<head>
<title>Overlay Demo</title>
<link rel = "stylesheet" href = "overlay.css">
</head>- Next, in the body section, we will define the JavaScript function, which will handle the appearance and vanishing of the overlay screen. The script should look like this:
Code:
<script>
function up() {
document.getElementById("overlayCSS").style.display = "block";
}
function down() {
document.getElementById("overlayCSS").style.display = "none";
}
</script>- We will finally call the ID created in the CSS file using an <div> element. We will define its on-click property, such that clicking on the overlay screen will make it disappear.
- Next, we will create a button on the click property, which calls for the function responsible for the visibility of the overlay screen. The code for the above two points should look like this:
Code:
<div id="overlayCSS" onclick="down()"></div>
<h2>CLICK TO SEE OVERLAY</h2>
<button onclick="up()">Overlay effect UP</button>- The final HTML file should look like this:
Code:
<html>
<head>
<title>Overlay Demo</title>
<link rel = "stylesheet" href = "overlay.css">
</head>
<body>
<script>
function up() {
document.getElementById("overlayCSS").style.display = "block";
}
function down() {
document.getElementById("overlayCSS").style.display = "none";
}
</script>
<div id="overlayCSS" onclick="down()"></div>
<h2>CLICK TO SEE OVERLAY</h2>
<button onclick="up()">Overlay effect UP</button>
</body>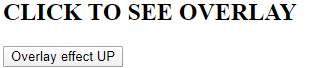
</html>- We will save this html page and open it through a browser. The initial page will look like this:
- Clicking on the button will give this overlay screen:

- Clicking anywhere on the overlay screen will make the overlay screen vanish.
2. Overlay through JavaScript using Internal CSS
- We are using internal CSS in this example. So all the functionalities will be in the HTML file.
- Firstly, in the head section of the page, we will define the style for the overlay screen by creating an ID. We will also create a class for styling the content on the overlay screen. The style tag will be coded like this:
Code:
<style>
#overlayCSS{
position: fixed;
display: none;
height: 50%;
width:50%;
background-color: cyan;
opacity: 50%;
cursor: default;
}
.content{
font-family: 'Segoe UI', Tahoma, Geneva, Verdana, sans-serif;
color: darkblue;
margin: 100px;
}
</style>- Next, in the body section, we will create the JavaScript function for visibility and vanishing of the overlay screen. The script tag should be coded as follows:
Code:
<script>
function up(){
document.getElementById("overlayCSS").style.display="block";
}
function down(){
document.getElementById("overlayCSS").style.display="none";
}
</script>- Finally, we will create content that uses the above-defined style and script. We will call div elements and use the ID, class, and functions to create the overlay effect. The coding should be as follows:
Code:
<div id="overlayCSS">
<div class="content">TEXT ON THE OVERLAY SCREEN
<br><button onclick="down()">Click to Close overlay</button>
</div>
</div>
<h2>CLICK TO SEE OVERLAY</h2>
<button onclick="up()">Overlay Up</button>- The final HTML page should look like this:
Code:
<html>
<head>
<title>Overlay Using Internal CSS</title>
<style>
#overlayCSS{
position: fixed;
display: none;
height: 50%;
width:50%;
background-color: cyan;
opacity: 50%;
cursor: default;
}
.content{
font-family: 'Segoe UI', Tahoma, Geneva, Verdana, sans-serif;
color: darkblue;
margin: 100px;
}
</style>
</head>
<body>
<script>
function up(){
document.getElementById("overlayCSS").style.display="block";
}
function down(){
document.getElementById("overlayCSS").style.display="none";
}
</script>
<div id="overlayCSS">
<div class="content">TEXT ON THE OVERLAY SCREEN
<br><button onclick="down()">Click to Close overlay</button>
</div>
</div>
<h2>CLICK TO SEE OVERLAY</h2>
<button onclick="up()">Overlay Up</button>
</body>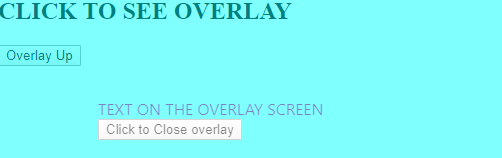
</html>- Saving this html page and opening it through a browser will fetch the following page as an outcome:

- On clicking the button, an overlay screen will pop up like this:
- Clicking the second button will close the overlay screen and return to the initial page.
Explanation: In the above example, we explored the basic usage of the overlay screen. This feature or property of HTML and CSS is very crucial. You can utilize this approach when creating pop-ups triggered by clicking on any element. The pop-up can be an advertisement, a user-fillable form, a notification, or even a warning. Developers can use this basic code and tweak it accordingly to generate the overlay of their choice. There can be images and other content on the popup or overlay screen. Make sure you have explored all the offered options.
Recommended Articles
We hope that this EDUCBA information on “CSS Overlay” was beneficial to you. You can view EDUCBA’s recommended articles for more information.

