Introduction to Blending Modes in After Effects?
Adobe After Effects is a video editing and motion graphics program usually used by graphic designers, video editors and VFX artists. The program has a huge collection of tools and presets that make the program even more demanding and useful. After-effects are one of the most used applications for post-production editing and adding effects and add-ons. Most video editors use Adobe Photoshop for image editing and then Adobe After Effects for video modifications and editing.
The quality that adobe after effects provides is unmatched to any other software of the same field. After Effects is mostly used for 2d animations and video editing by film editors and Television Studios. The Blending mode tool in After effects are very useful and help the designers to a great extent. The Blending modes create amazing effects and VFX effects using multiple layers and work easy and simple.
Important Blending Modes in the Application
The Blending modes are also used as the mini effects in any project. These blending modes are the quickest way to add effects to any layer. These can be applied from the Timeline Panel itself. In After Effects, there are numerous Blending Modes that can be applied to get a result as desired.
- Lighten – This mode is useful in the lightning of the image, and it also removes the black hue of the image.
- Contrast – This mode uses multiple blending modes and enhances the quality of the image.
- Darken – This mode is useful in the darkening of the image and removes the white hue from the image.
- Normal – This mode is served as a normal mode without any effect.
- Color – This mode is applied for Hue, Saturation, and Luminosity.
- Difference – This mode specifies the highlights between the layers.
These blending modes can be applied on any layer to mask and create an effect on the consecutive layer. Applying blending modes is the easiest way to stylize a layer without getting deep into the program. These mini effects can be applied easily from the Timeline section and can also be modified.
Applying Blending Modes in After Effects
We apply the blending mode in such a way that it creates a mask over the top layer and gives an altogether new look and attitude to the scene.
1. Screen
This Blending mode is usually used to remove the darkness of the image. This mode is helpful when the black part of any image has to be removed and blended with another image. This can be achieved by applying the effect on the top layer and keeping the background at the bottom.
Examples of Screen
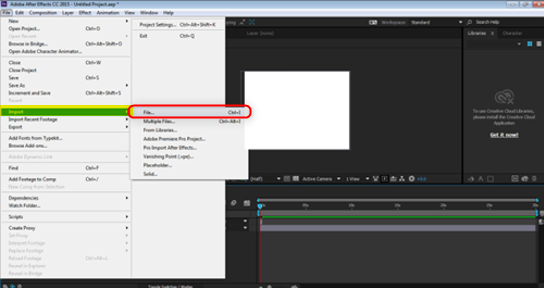
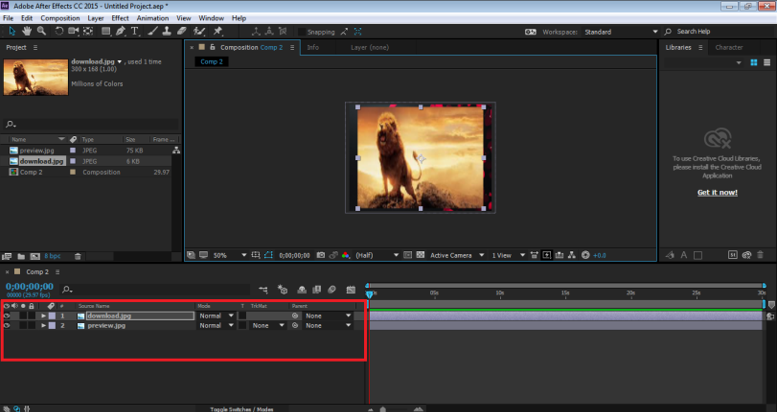
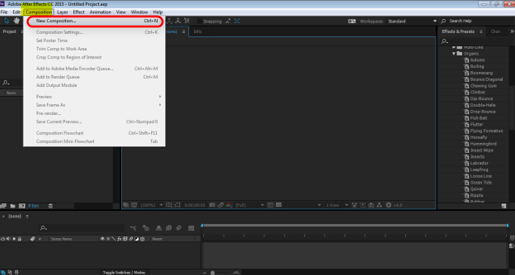
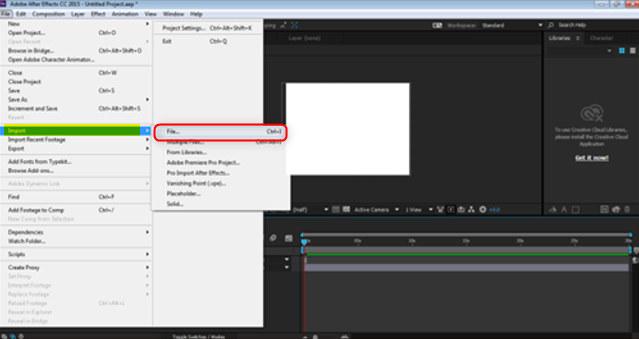
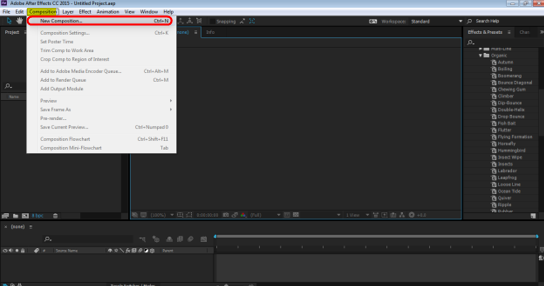
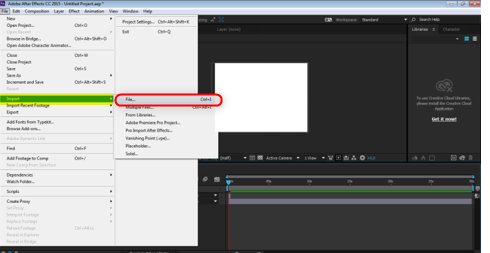
Step 1: Open a new composition from the layers panel.

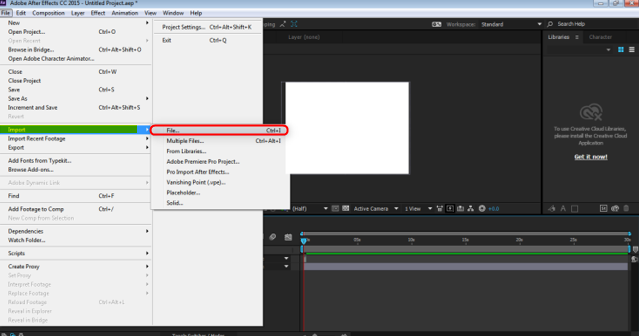
Step 2: From the File menu, Go to Import and click on FILE to import an image from the Device.
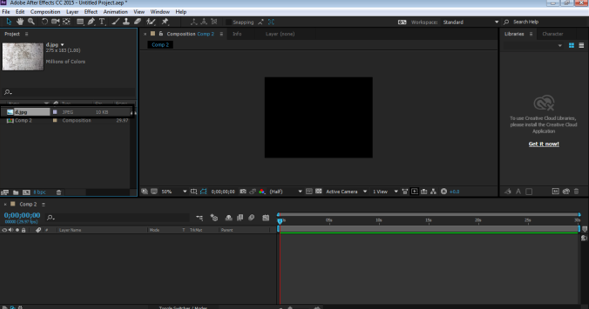
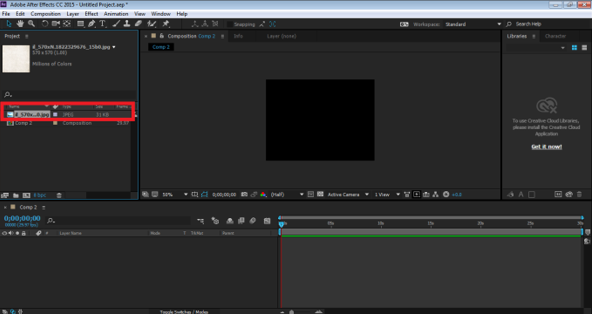
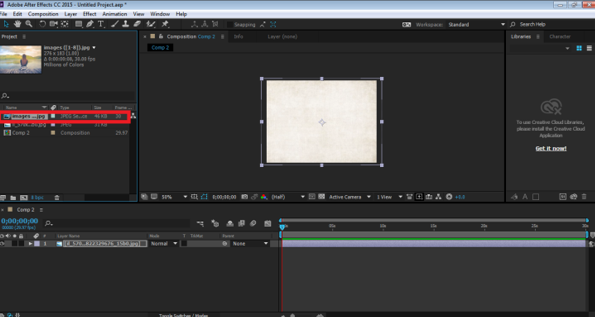
Step 3: Select the image of the background as shown in the image below.
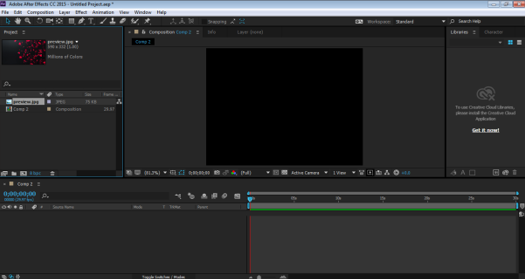
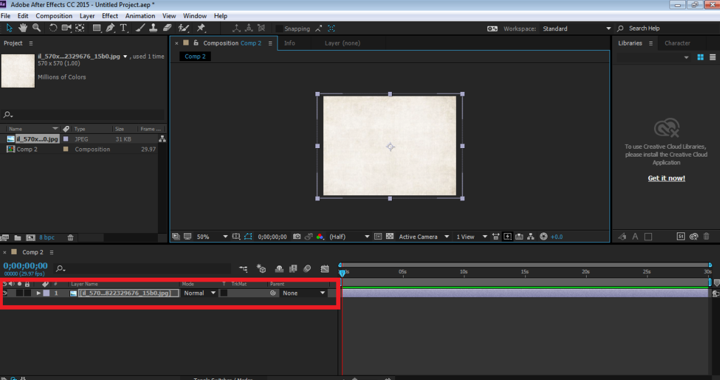
Step 4: Next, drag and drop the image to the timeline panel.

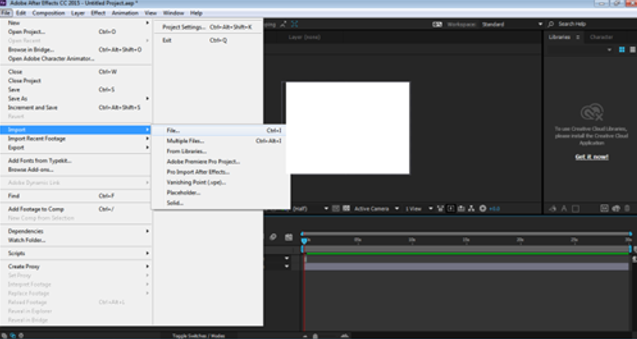
Step 5: Now, Import another file from the device as done previously, as shown below.
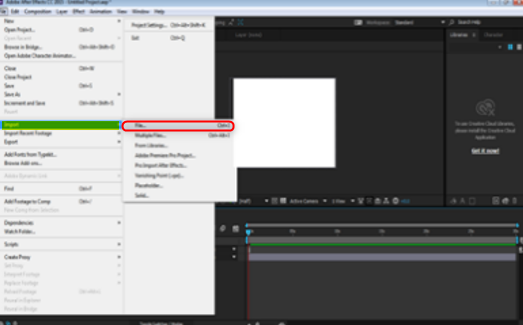
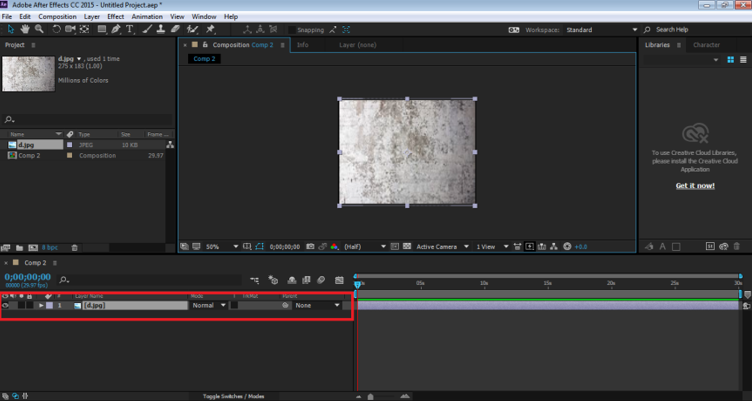
Step 6: Drop the image to the timeline panel.

Step 7: Place this image in the timeline panel above the background image.
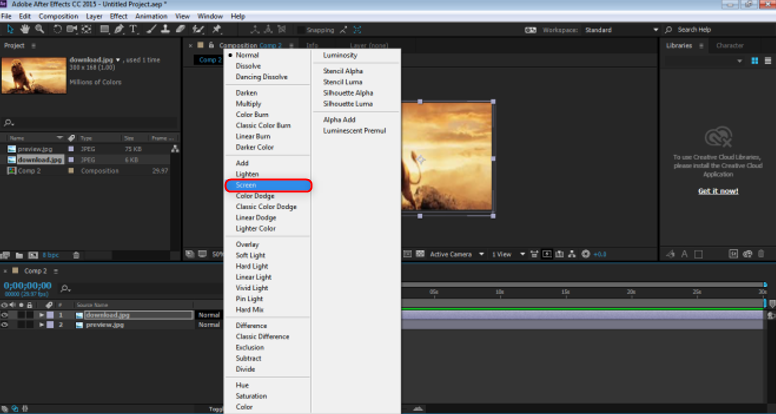
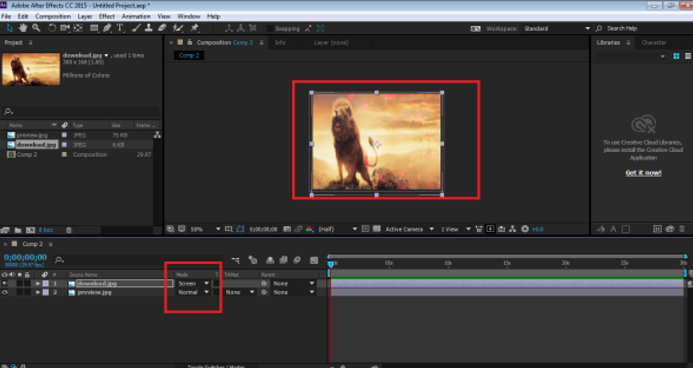
Step 8: Now, using the mode option, select Screen and see the desired result.
You will see that the black part of the image is removed using this blending mode.
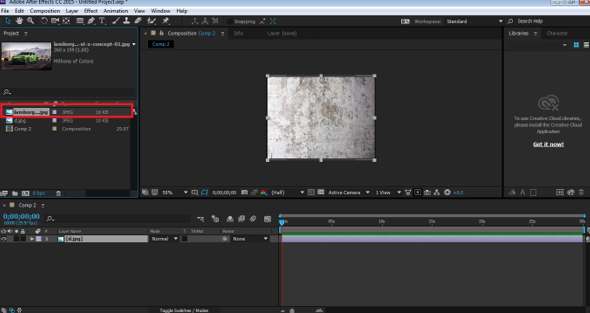
2. Multiply
This mode is just the opposite of Screen Mode. This mode removes the white part of the image and blends the other image accordingly.
Examples of Multiply
Step 1: Open a new composition from the layers panel.
Step 2: From the File menu, Go to Import and click on FILE to import an image from the Device; select the image of the background as shown in the image below.
Step 3: Select the image of the background as shown in the image below.
Step 4: Next, drag and drop the image to the timeline panel.
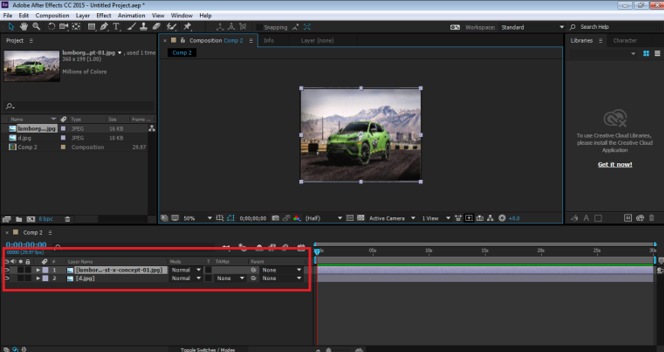
Step 5: Now, Import the image that needs to be edited.
Step 6: Image imported from the device as shown below.
Step 7: Place this image in the timeline panel above the background image.
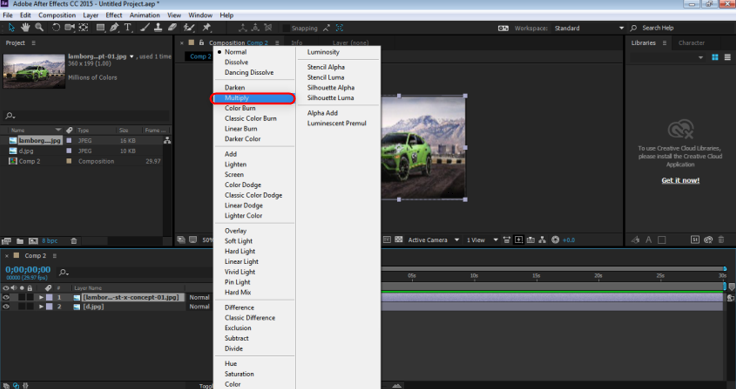
Step 8: Now, we use the mode option and select Multiply to see the desired result.
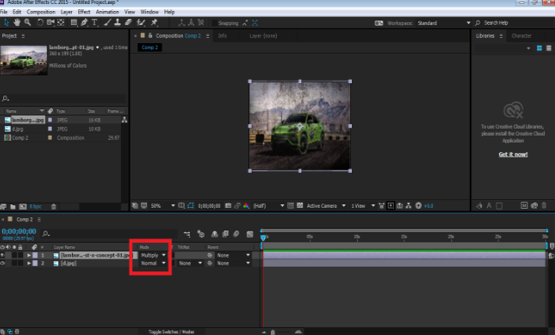
You will see that the White part of the image is removed using this blending mode. Multiply helps in creating a Vintage look to the image.
3. Color Burn
This mode helps in darkening the image, and at the same time, it blends with the Background. Just as the name, the result gives a burnt look to the image.
Examples of Color Burn
Step 1: Open a new composition from the layers panel.
Step 2: From the File menu, Go to Import and click on FILE to import an image from the Device.
Step 3: Select the image of the background as shown in the image below.
Step 4: Next, drag and drop the image to the timeline panel.
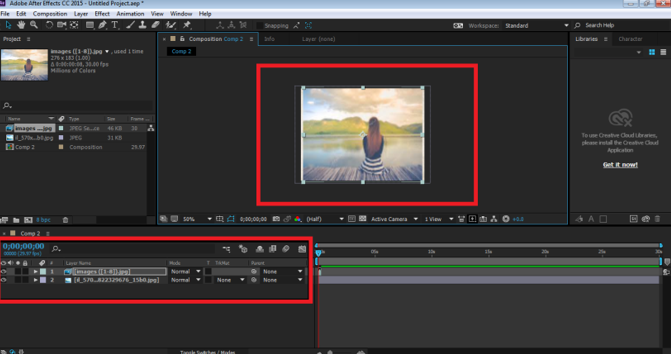
Step 5: Now, Import the image that needs to be edited.
Step 6: Place the same above the background image as shown below.
Step 7: Place this image in the timeline panel above the background image.
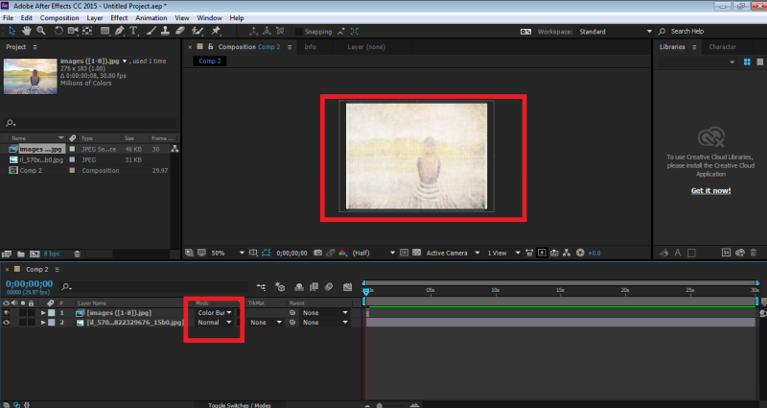
Step 8: Now, using the mode option, select Color Burn and see the desired result.
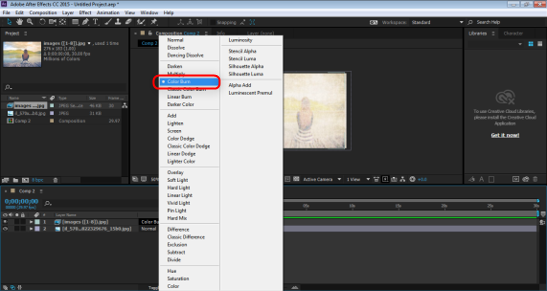
Step 9: You will see that the image has changed its look, and it now gives a burned look while it blends with the background.
Conclusion
These are some of the examples of Blending modes in Adobe After Effects. There are many modes that can be applied for the desired results. No two blending modes are the same; every mode gives a different output and has different functions. The best part of using the blending modes is that they are quick and fast to apply and modify as well. With just one click, we can change the look and style of the image. Most of the designers use only these blending modes and edit their videos using them.
Recommended Articles
This is a guide to Blending Modes in After Effects. Here we discuss the examples of blending modes in after effects, important blending modes in the application, functions and illustrations of various blending modes. You can also go through our given articles to learn more-
