Updated August 30, 2023
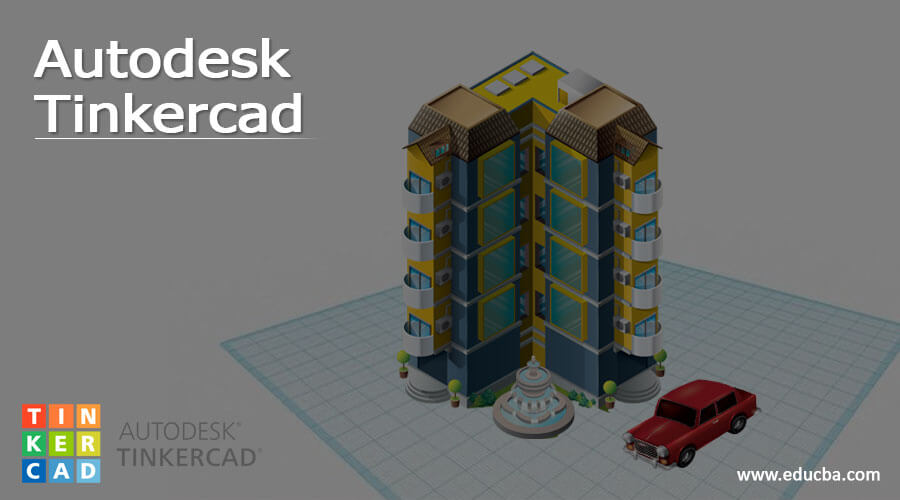
Introduction to Autodesk Tinkercad
Tinkercad is a freeware program acquired and sold by Autodesk Company. The program has a vast audience that use Tinkercad for creating basic and fundamental 3D geometrical shapes and objects on a beginner level. Tinkercad is a user-friendly software that doesn’t require advanced or specially designed operating systems to create 3d objects rather it can be operated from any system with an internet connection.
What is Autodesk Tinkercad?
Tinkercad has generally evolved as a program in itself. The program was created by Google engineer Kai Backman. All he wanted was to create a general platform where users can create and upload their 3d designs. Till date, more than 10 million 3d designs have been posted on the web-based platform by Tinkercad users. It was only in 2013 that AutoCAD purchased the license for Tinkercad and owned it.
Autodesk Tinkercad is a platform created by Autodesk for beginners, students, teachers, and hobbyists who are mainly into creating basic and elementary 3d Graphics. The program can be operated on a web browser online with an internet connection. Tinkercad is a straightforward CAD program that works on Constructive Solid Geometry (CSG) theory. This technique helps the user in creating intricate solid objects by combining basic and simpler shapes together.
Tinkercad is an easy-to-use CAD program that enables the user to not only create 3d models but also to export and print them using a 3D printer. Tinkercad is easier to learn CAD programs in comparison to other Autodesk CAD software such as AutoCAD or Fusion360.
While it is very convenient for beginners and students to work on Tinkercad, at the same time advanced level professionals and 3D artists can also work on the program to create complex and more advanced designs as well.
How to use Autodesk Tinkercad?
The files created on Tinkercad can be saved in SVG, OBJ, and STL file formats. While the STL file formats are used for creating files for slicing or printing programs. The OBJ files can be used for importing and exporting to other Autodesk programs.
Tinkercad also works with scripting as well as AR scenarios. Since Tinkercad works on the CSG theory, which enables the user to create designs with solid basic shapes, in order to create more complex designs, the user needs to add or remove shapes from the original shape created. The simplicity of this process makes Tinkercad an easily accessible program to students and teachers.
With Tinkercad, users can also create 3D electronic circuits and designs that are more advanced with the lighting and camera features. Tinkercad is a fun and smart program that helps the user to export 3D models to Minecraft and also uses a JavaScript editor to create custom geometrical 3d shapes.
How to create Autodesk Tinkercad?
So, since Tinkercad works on web browsers and doesn’t require any special operating system, the users can easily click on the Autodesk Tinkercad website and access their program free of cost. In the following steps, we shall learn how to create designs on Tinkercad-
1. Visit Tinkercad.com
2. You will be asked to sign up or sign in on the website
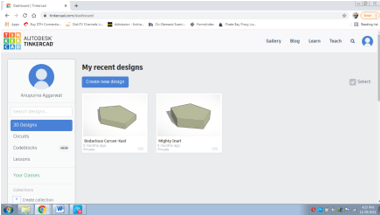
3. A page shown below will be uploaded.
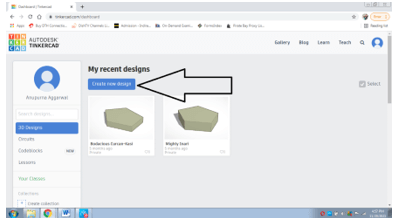
4. Click on CREATE NEW DESIGN as shown below
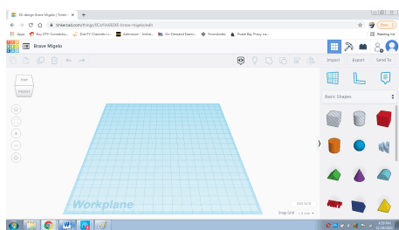
5. Once you click on it a new interface will be uploaded as shown below-
6. In the right corner, we can see different shapes, if we click on the drop-down menu we can change the settings and see other options as well, as shown in the figure below-
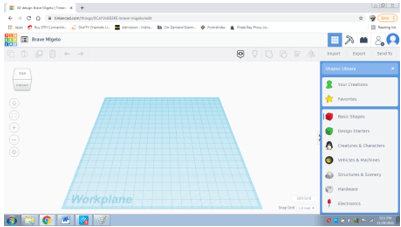
7. In the top right corner, we can see the import/ export options as shown below

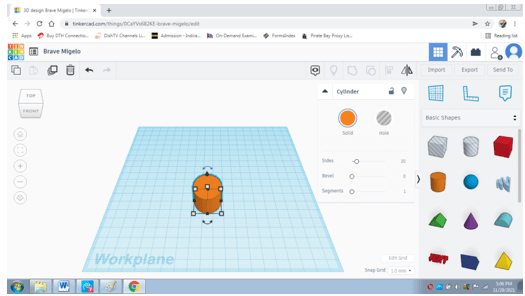
8. Now, using the basic shapes, we create a design on Tinkercad
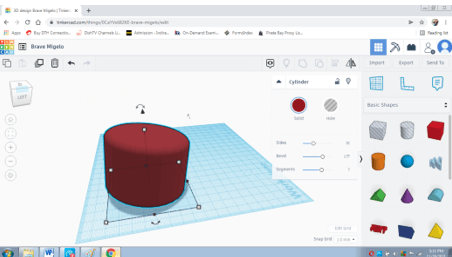
9. First, select the cylinder and click on the workspace. As soon as we will click a dialog box will appear as shown below-
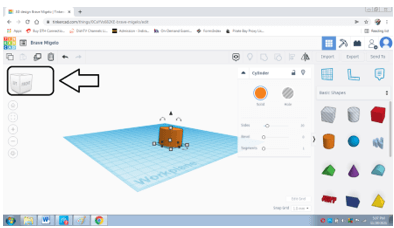
10. With the help of the View cube present on the left corner, we change the views as shown below-
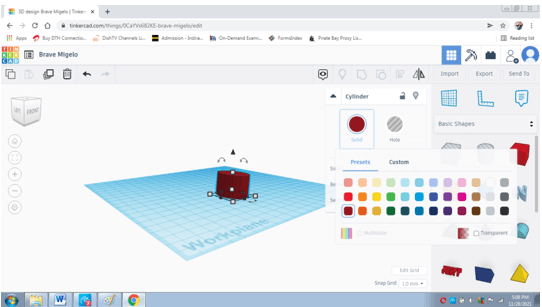
11. We change the color of the shape by clicking on SOLID as shown below-
12. With the help of settings present in the dialog box as SEGMENTS, BEVEL, OR SIDES we can change or modify the shapes as needed as shown below-
13. Similarly, we can change the options from the right menu and work with the different shapes given in those functions. One of the examples is shown below-

14. To export the design click on export as shown below

15. To change the setting or export the design to a 3d printer click on the function and select the required printer as shown below

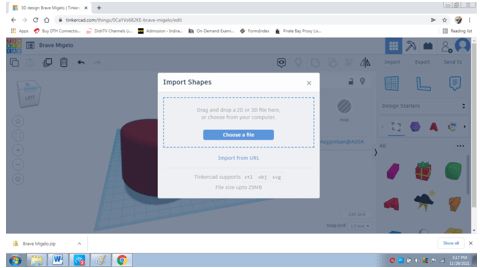
16. We can also import files supported by Tinkercad in the platform. To do so, click on Import and select the necessary files as shown below-
17. Users can also share the designs directly to other apps or with people. Click on SEND TO and select the required settings as shown below-

In this way, without using any additional resources or cost, users can create unique as well as some remarkable 3d designs using Tinkercad.
Conclusion
In the above article, we studied in detail the use and function of Autodesk Tinkercad. The program has many useful benefits that are helpful to a number of users and 3D graphic design lovers. Tinkercad is a simple yet very innovative platform, created for putting ideas and imagination into reality.
Recommended Articles
This is a guide to Autodesk Tinkercad. Here we discuss Introduction, What is Autodesk Tinkercad, How to use Autodesk Tinkercad? You may also have a look at the following articles to learn more –
