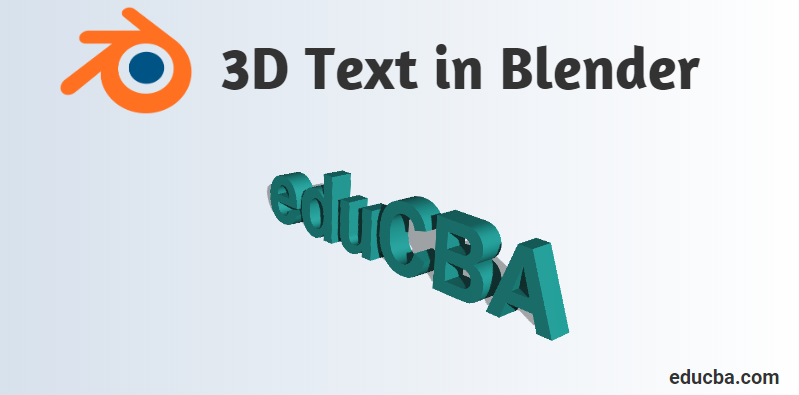
Introduction to 3D Text in Blender
Blender is a free and open-source application in the field of 3d Computer graphic creation for gaming, animation and another system graphic visual effect creations. The software is developed and supported by Blender Foundation since 1998. The blender can do all the 3D related visual works and projects such as 3D animation for games and movies, 3D printing, art, gif, Advertisement, visual effects, and many more things. Many studios use the tool for 3D modeling, texturing, UV unwrapping, Raster graphics editing, smoke, fluid, hair, skin, dynamics, rigging, rendering, soft body, motion graphics, and video creation and composting and for many other effects. If you want to work more efficiently in Blender, especially when rendering complex 3D text, animations, or high-detail scenes, this complete guide to reducing render times in Blender offers practical optimization tips to speed up your workflow without losing quality.
Today we are going to see how to make the 3D text for advertisements and title making for movies and many other purposes in the below section.
How to Create 3D text in a Blender?
Click on the Blender icon and remove the default cube, which opens with the default project screen. Save the project at a location and then continue working as step by step described below:-
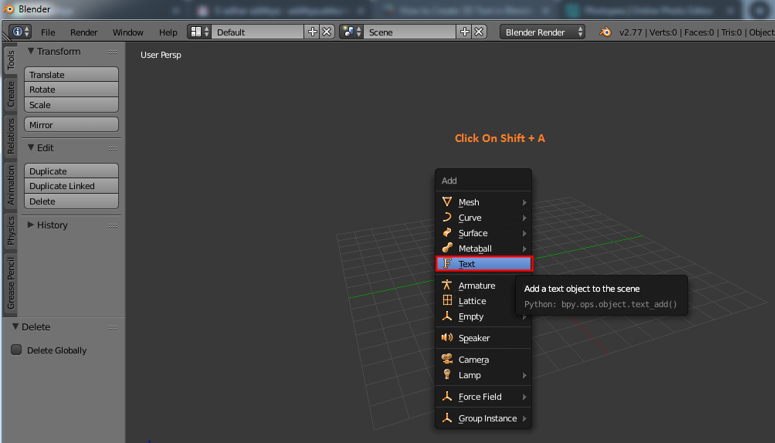
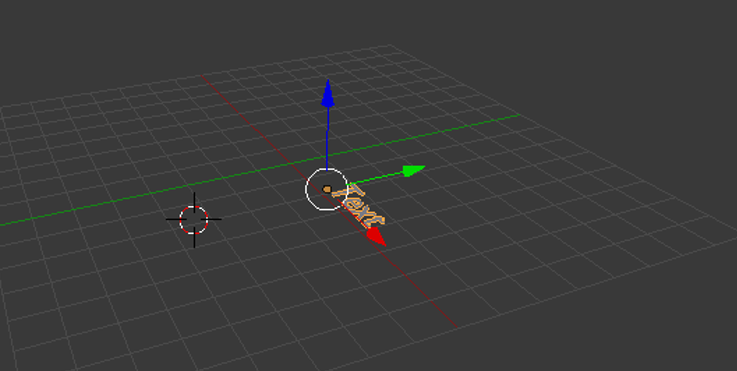
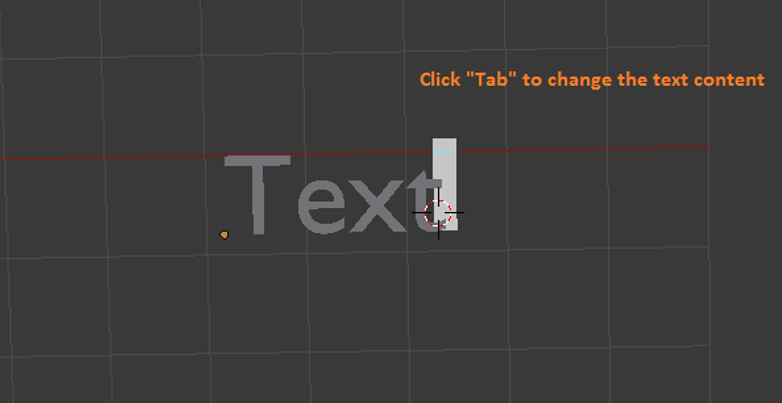
Step 1: Shift A and Add text. Click “Shift + A” from the keyboard a list opens on the screen; select the “Text” option from there.
The blender will create a default text and curser after selection. Tab key from a keyboard that helps in changing the text to text mode and solid mode as required to edit the text, select text area, and click the tab. Curser directly gets highlighted at the corner as the text, same as window word now we can click backspace or select complete text at once and delete it. Type the text which must be appeared as required.
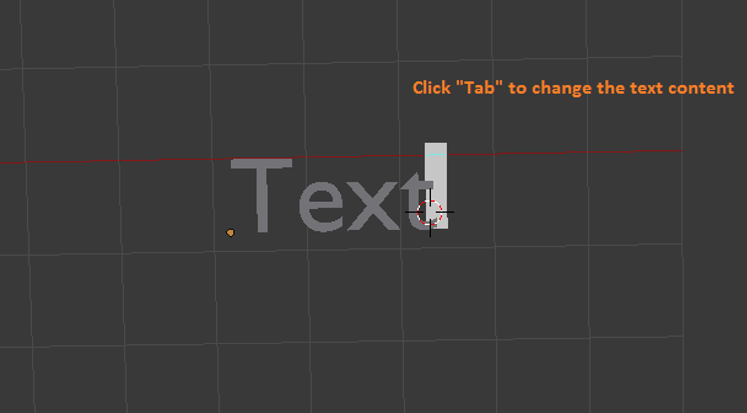
Step 2: After filling the required text in the area, click TAB the text mode changes to object mode. Now we need to learn a few basics of Blender such.
- Pan = Shift + middle mouse button
- Move = axis + right click-drag to move objects
- Rotate = Hot key R
- Scale size = Hot key S
- Selection = Left mouse click
- Rotate view = mouse center button and move mouse.
These keys help in creating and moving objects and viewing them from different angles.
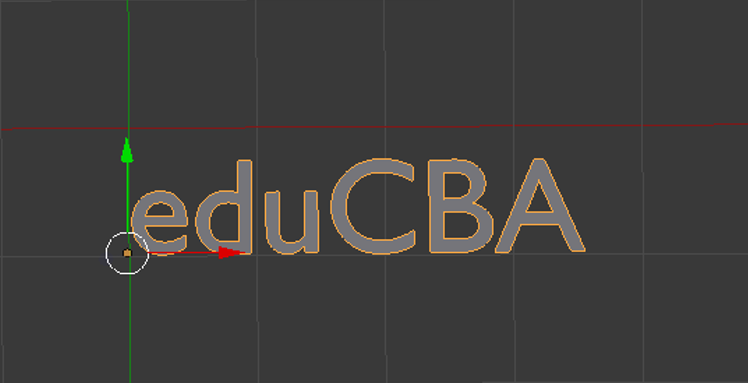
Step 3: Select text and click “Tab” to get text mode on.
Type text needed and remove unwanted words or letters as to how we do in the windows word file.
Once after typing the word apiaries on the screen and click “Tab” to make it an object, then move it to the center of the grid.
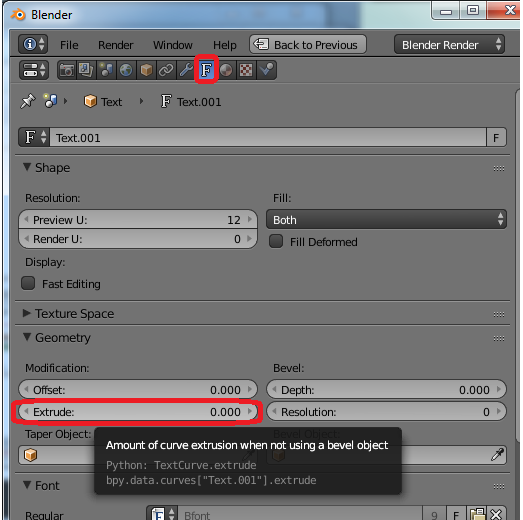
Step 4: 3D text excludes can be done in as shown below.
Select exclude and give the required value of excluding the height required to the text.
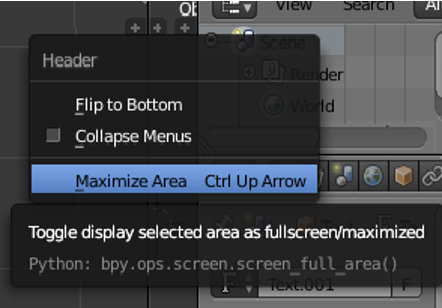
We can even maximize the window by lift clicking and selecting Maximizing option or use Ctrl Up Arrow and Down Arrow to increase and decrease the values.
We can maximize and select the “F” icon to get all Text and Front related attributions for our text selected from the left pane.
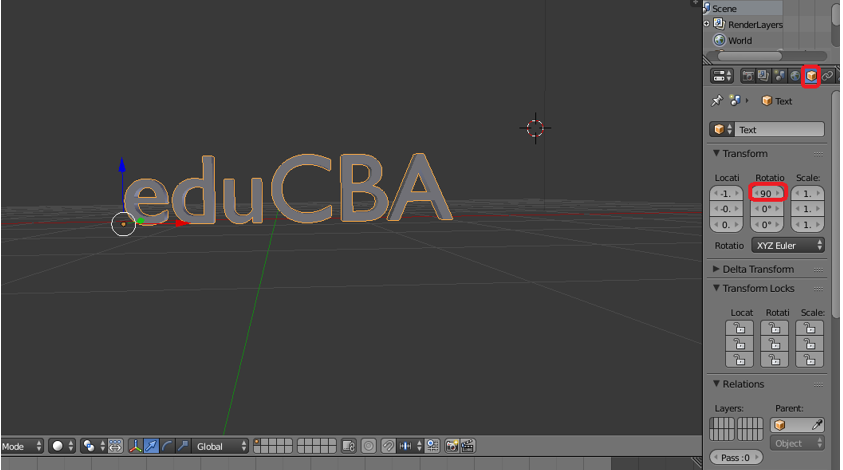
Step 5: Rotate Text
Till now, our text was flat with on the grid now; let’s make the text visible from the front view (let’s wake it up).
Go to rotate options, and on X-axis, give the value as 90 degrees. The text changes its orientation as shown.
Step 6: Go to the Fronts layer in the left panel for all text-related attributions on the pane.
Front -> click on Load a file (Folder symbol)
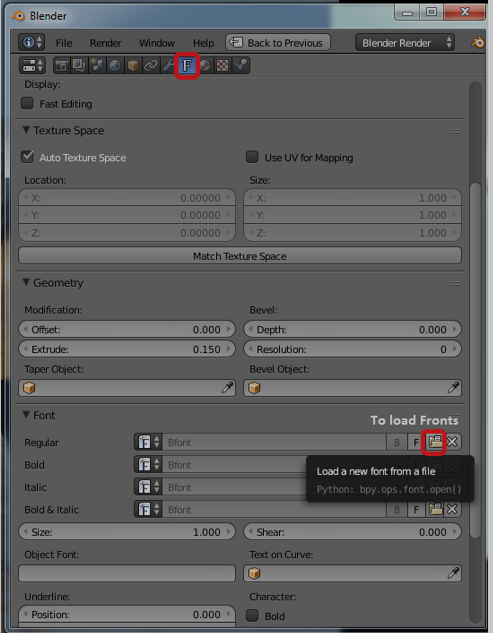
A Blender file browser opens then clicks on C drive
C drive -> click on windows folder
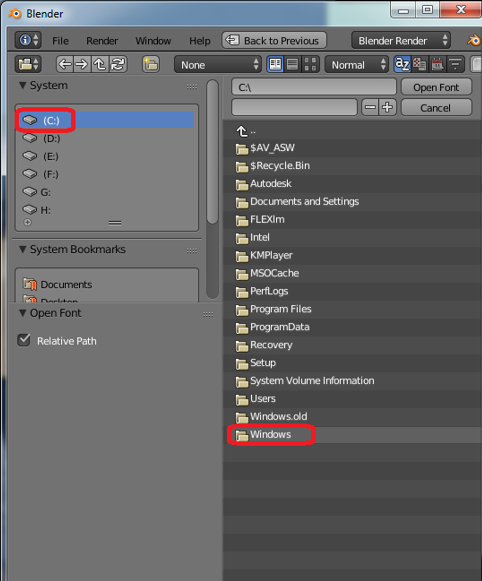
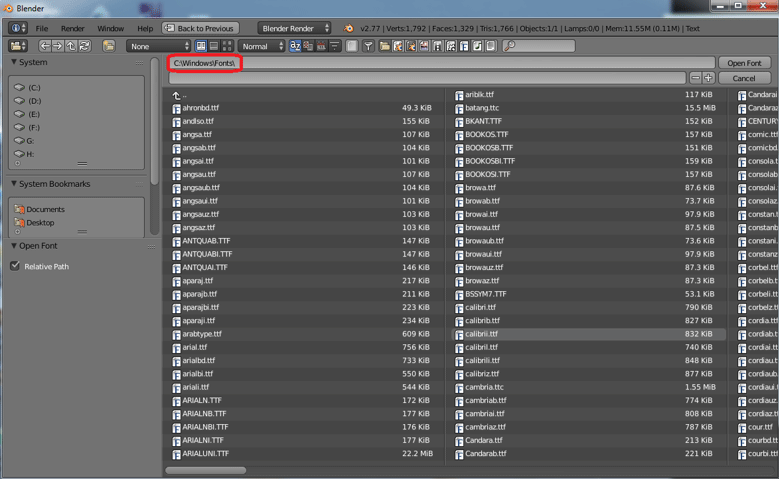
C: – windows -> select Fonts folder

C:\windows\fonts all the default blender installation access fonts will be available here.
Many online plug-ins are also available to use in Blender to have unique title styling. The application contains all most all the fronts by default.
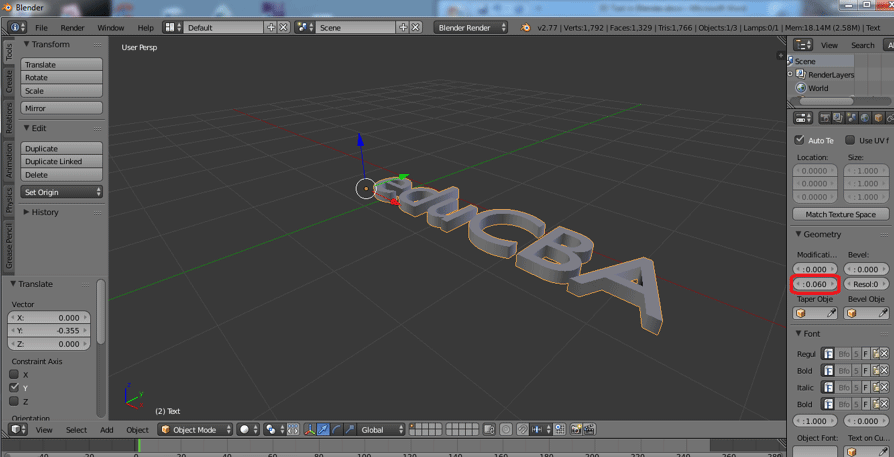
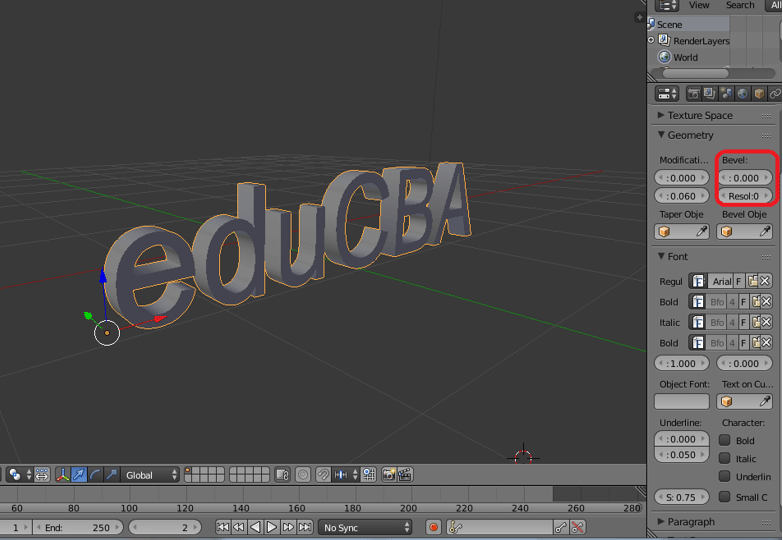
Step 7: After applying the appropriate font to the text, then on the left pane, we have 2 options Level and Bevel. Both help in shaping the corners of the text if there are too sharp at corners.
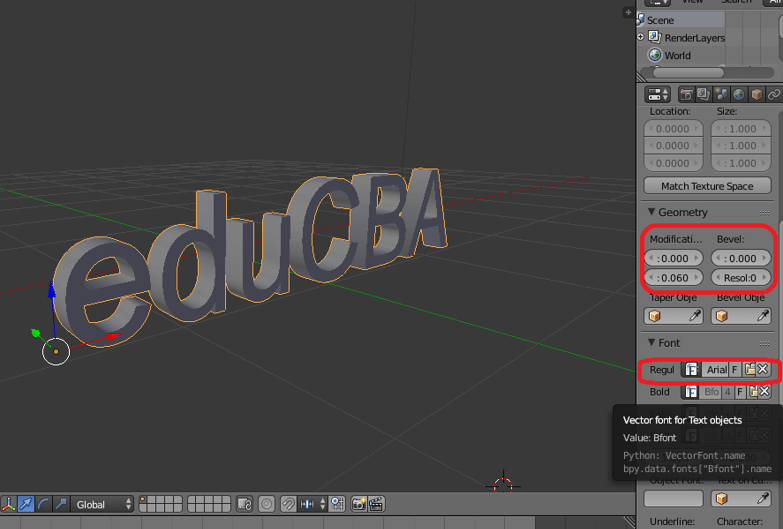
Step 8: Adding resolution adds curviness and a smooth radius to the corner of the text.
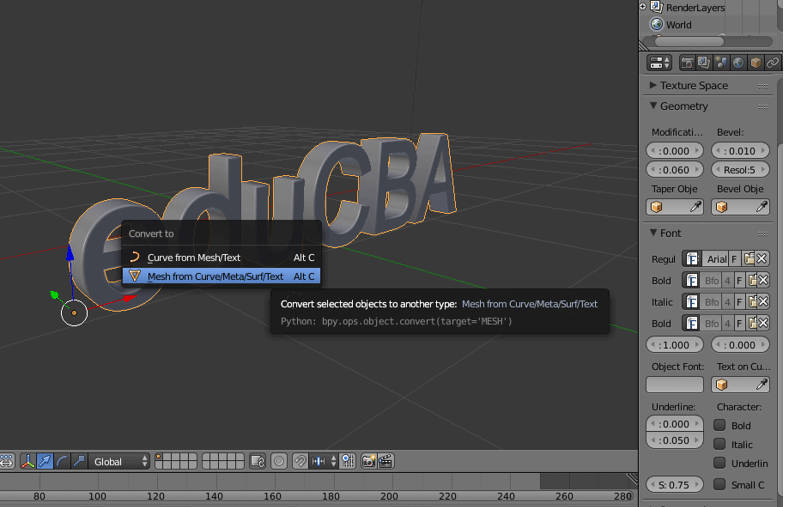
Step 9: Convert from text to mesh object.
Here we are going to change Text to Object by giving mesh attribution to the complete text.
ALT +C from the keyboard is a hotkey to change the content to mesh.
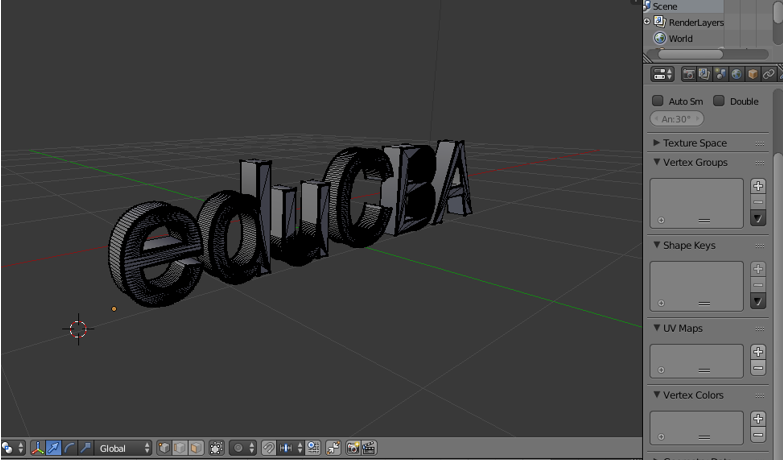
Once the Text becomes mesh, it applies with multiple points, lines, and face. If we change the mode from object to edit mode
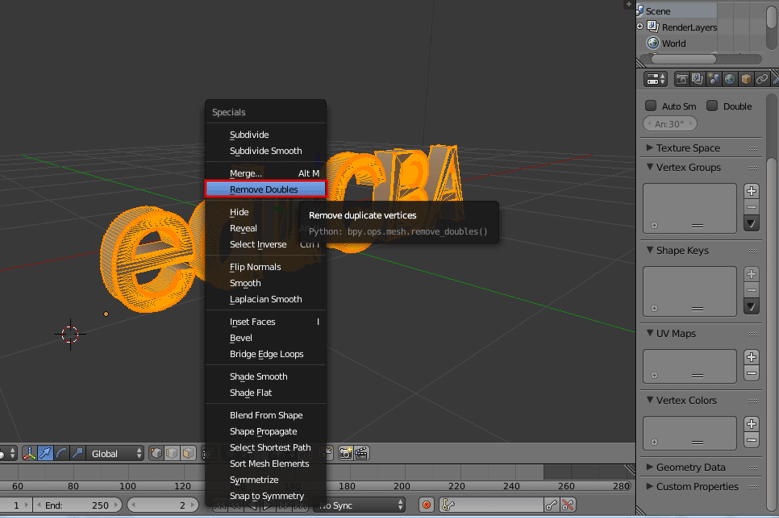
Step 10: By changing the text to mesh a few duplicate vectors (vertices or points), it will be created to delete them; keep the screen on Edit mode, select the text, and click the W key from the options select Remove Doubles.
Edit Mode -> A select text – > W – > Remove Doubles.
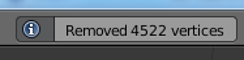
On top of the menu bar, we can see how many points have been removed through a blender message on the screen.
Step 11: It’s easy to add texture to the text Click on Lambert Symbol on the left pane.
Go to the diffuse window and click on the option below diffuse and beside Lambert. A complete color window will appear; we can select the accurate color from there.
If we have any .png or .jpg texture file available for texture, we can insert them to the object using a + new option in the same area.
Here we have given aqua color to the word lambert.
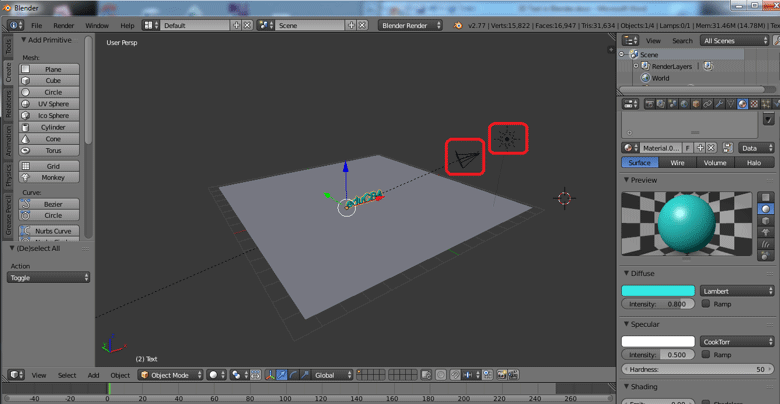
Step 12: Click on the render option on the top right corner of the application screen to have a rendered view of the text.
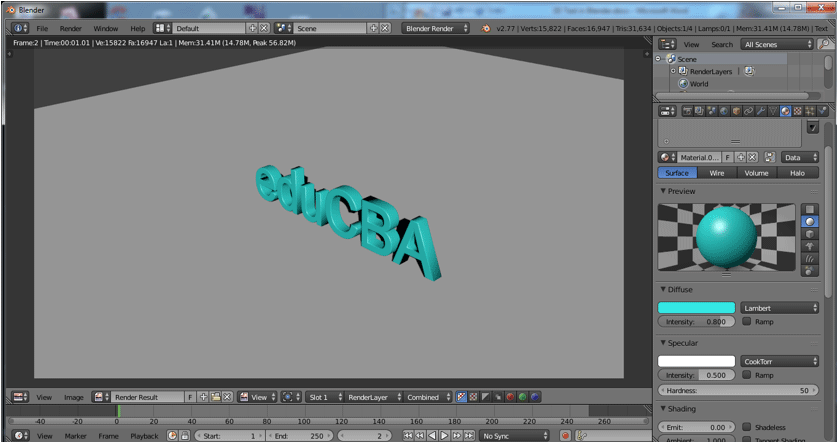
Adding and positioning Camera and lighting also play a key role in showing the text’s view and its shadow details.
Conclusion
This process of making 3D text helps in making visual 3D Names for advertisement, movie title screening, and many other projects can use them. Most of the multimedia studios and news channels use for promotions and scrolling on the screen. Continuous practicing makes the users handle the interface and attribution easily.
Recommended Articles
This has been a guide to the 3D Text in Blender. Here we discuss the concept and step by step explanation of how to create 3D text in Blender. You can also go through our other suggested articles to learn more –
