Introduction to ZBrush Rope
Zbrush Rope can understand creating a model of rope structure that can be used with the 3d model sculpture for different purposes. In Zbrush, we can create Rope using subtools of toolbar panels and make parametrical adjustments in their parameters. You can also create a Rope Curve brush to create a connecting rope of any structure, such as a rope for a circular path, on a wavy path, or any other path. In this article, I will explain how you can create a rope and use that rope structure to create a rope brush that can help you create a Rope on your desired path. So let us look at different aspects those will involve in it.
How to create Zbrush rope?
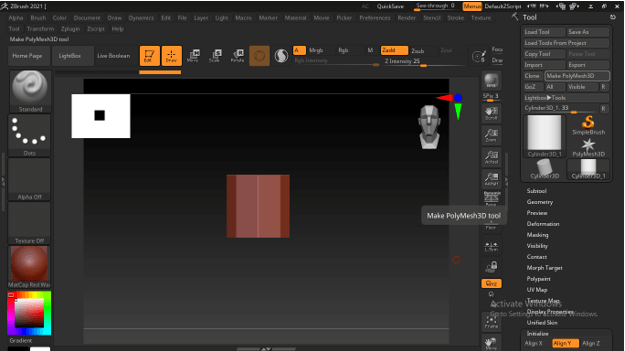
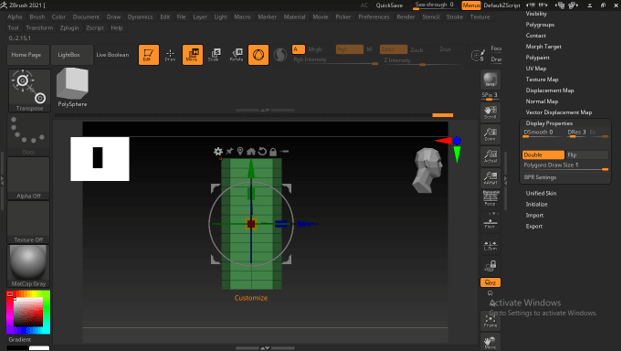
There are many ways you can create rope structure in Zbrush, but I will tell you one of them so that you can have an idea about the basics of it. To explain this method, I will take a cylindrical subtool and draw it like this.
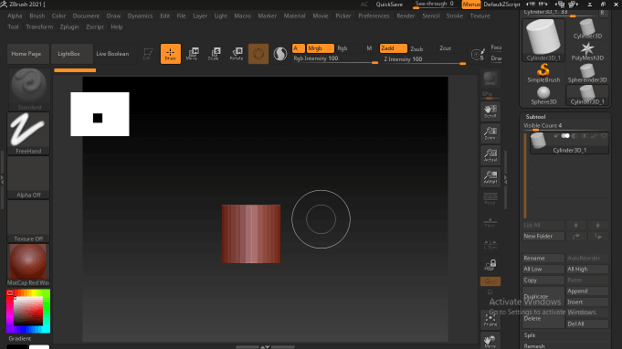
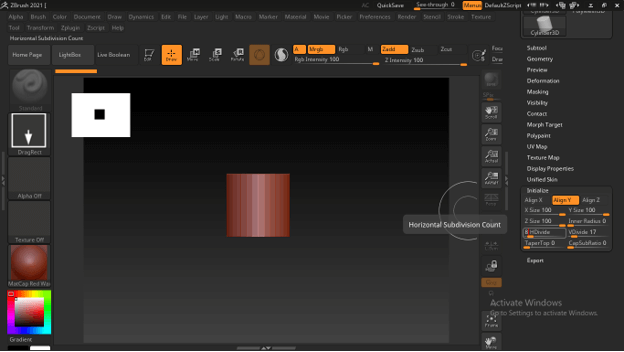
Now go to the Toolbar panel of this software, which is on the right side of the working screen. Here scroll down the list, and you will find the Initialize option at the bottom. From this option, I will decrease the horizontal subdivision count of this cylinder. I will give its value as 8.
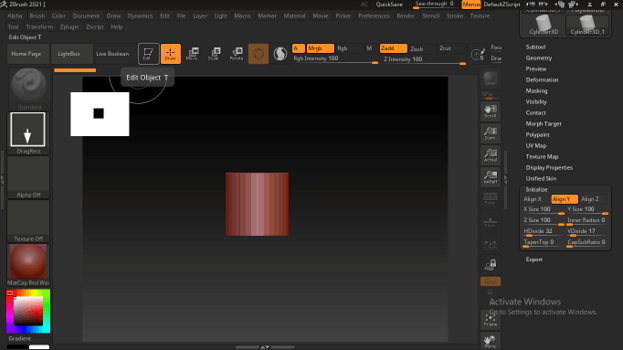
And enable Edit mode by pressing the T button on the keyboard.
Then enable the ‘Make poly mesh 3D’ option from the toolbar section.
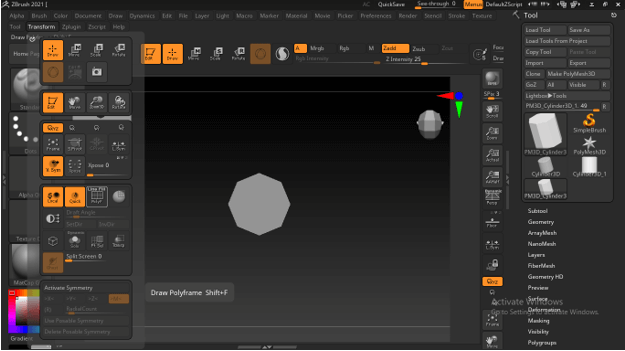
Now I will enable the Poly frame option from the Transform menu of the menu bar. You can press the shift + F button of the keyboard as its shortcut key. Once you enable it, you will have subdivisions visible on this cylinder.
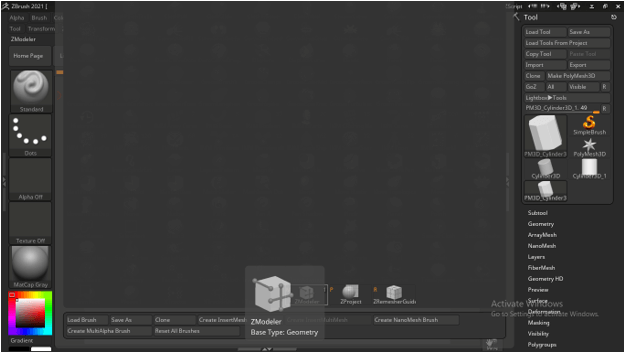
Now from the brush’s preset panel, I will choose this ZModeler brush.
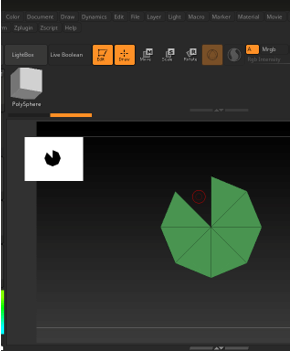
And select this triangular poly mesh.
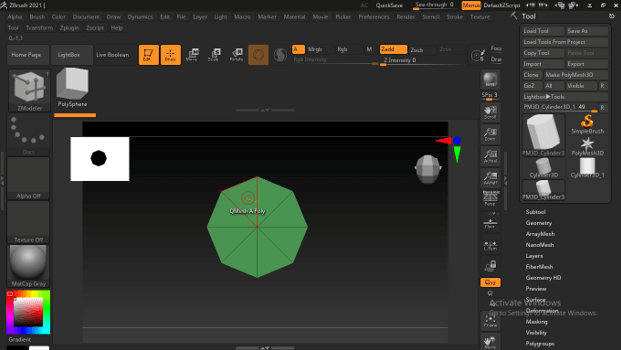
Then, right-click and choose Delete Action from the list of ZModeler brush panels.
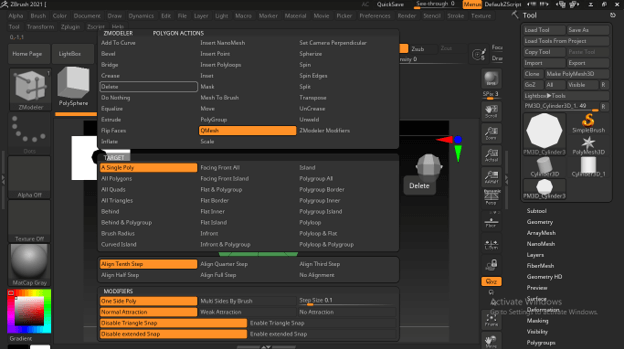
Now I will delete these triangular sections one by one.
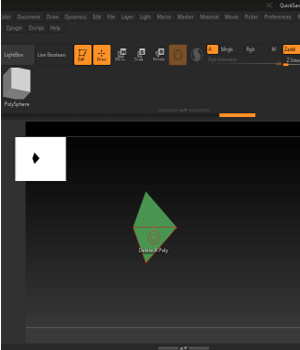
Now I will do the same for the bottom of this cylinder.
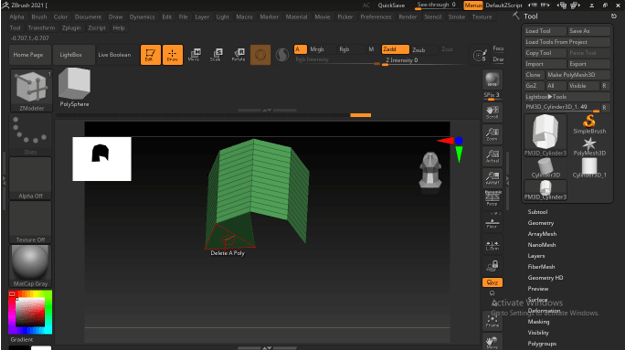
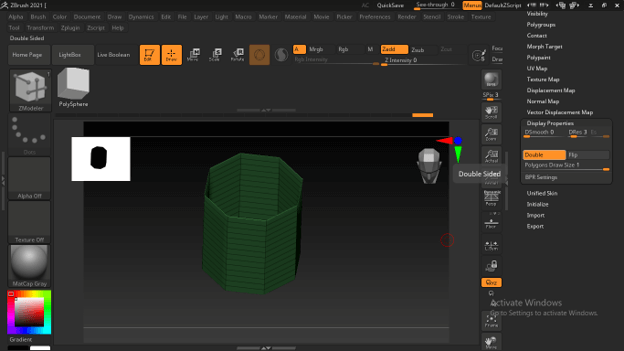
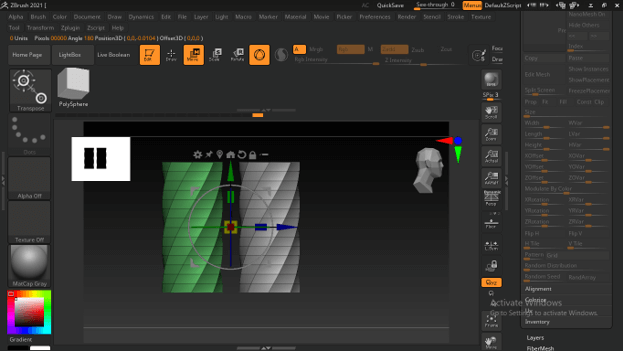
Now go to the Display Properties option of the toolbar and click on the Double tab.
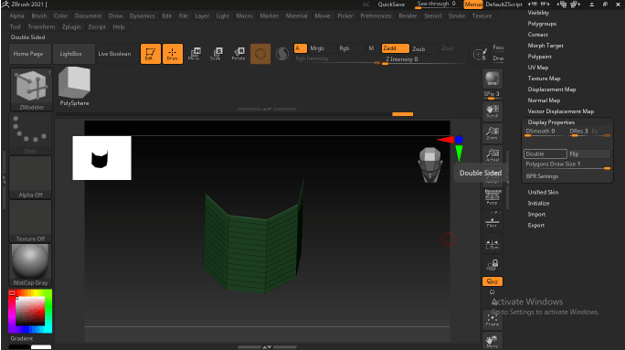
Once you click on it, you will have the same section on the opposite side of this cylinder.
Now enable the Move tool by pressing the W button on the keyboard.
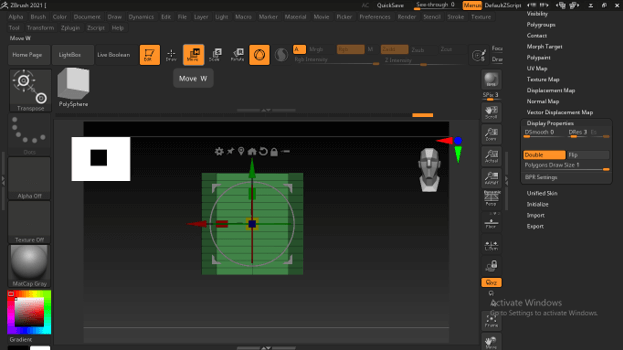
And I will increase the length of this cylinder a little bit like this.
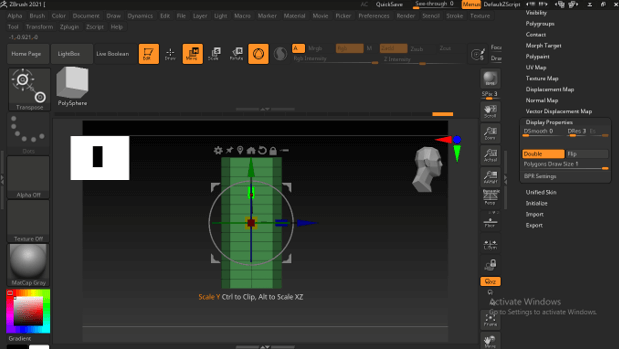
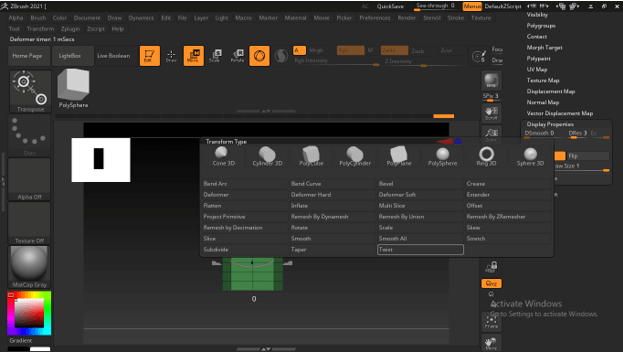
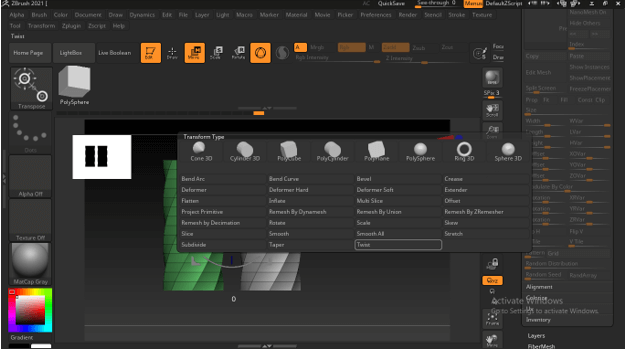
Now click on Customize button of this Move tool option. You will have this button above the move tool mouse icon.
From the opened panel, choose the Twist option.
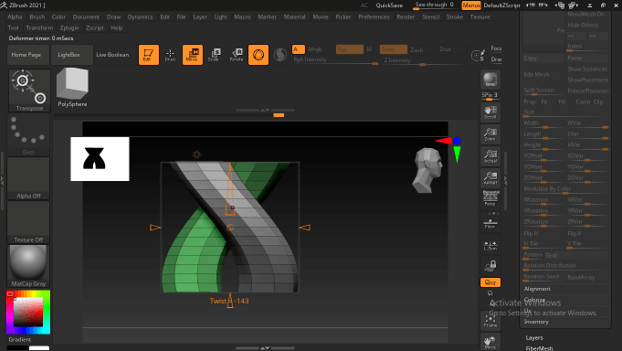
And by moving the anchor points, you can twist this cylinder like this. But, of course, it depends on you how many twists you want to have in your rope structure.
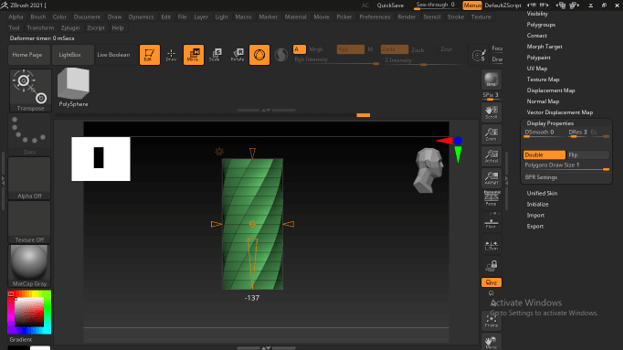
Now again, go to customize panel and click on Accept button of it to apply this twist transformation to this cylinder.

Now I will move this cylinder in this direction by holding the Ctrl + Alt button on the keyboard and making a copy.
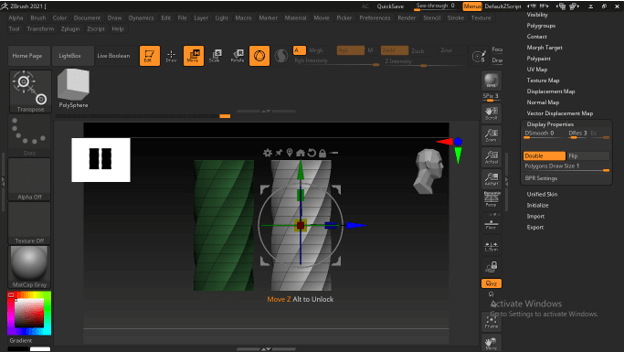
After adjusting the distance between these two subtools, mask them and relocate the move tool like this.
I will again choose the Twist option from the same panel of Customize option of the Move tool.
And twist this subtool like this.
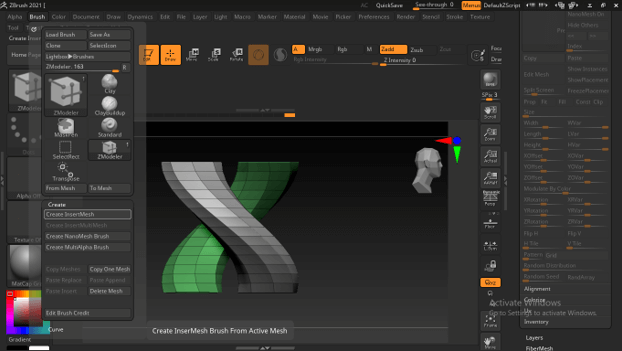
Now our basic rope structure is ready. But, first, let us create a rope curve brush for this rope structure to create a rope of our desired path.
Rope Curve Brush in Zbrush
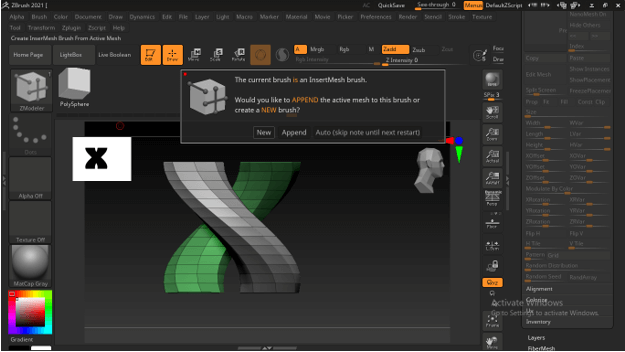
After creating the basic rope structure, go to the Brush menu of the menu bar, click on it, and choose the ‘Create Insert Mesh’ option from the Create tab.
Once you click on this option, it will ask you whether you want to create a new brush or insert it into the Append list. Next, click on the New option of the opened dialog box.
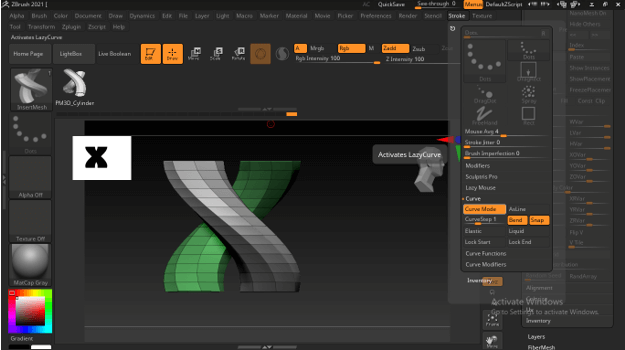
And we will have a rope brush in the preset brush panel. So to start using this brush, you must go through some parametrical settings. So go to the Stroke menu of the menu bar and click on it. You will find the Curve option in its panel, so enable the Curve Mode button by clicking on it.
Now again, go to the Brushes menu of the menu bar and this time, Click on the Modifiers option of this panel. Here we have the Tri Parts option enabled; disable it by clicking on it.

And enable the Weld Points option.
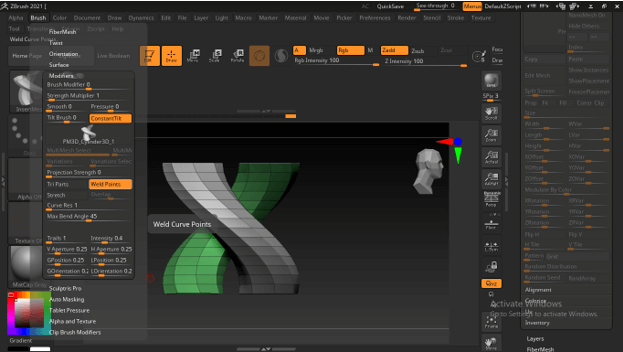
Also, enable the Stretch option button.

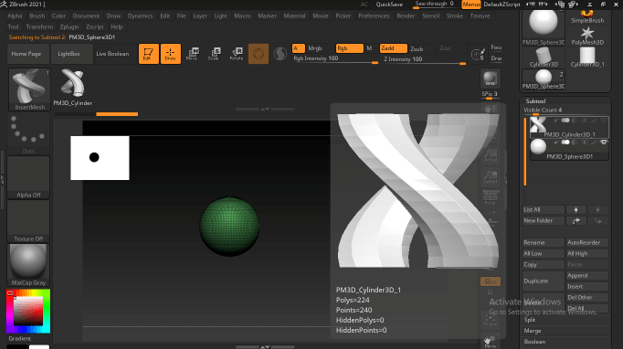
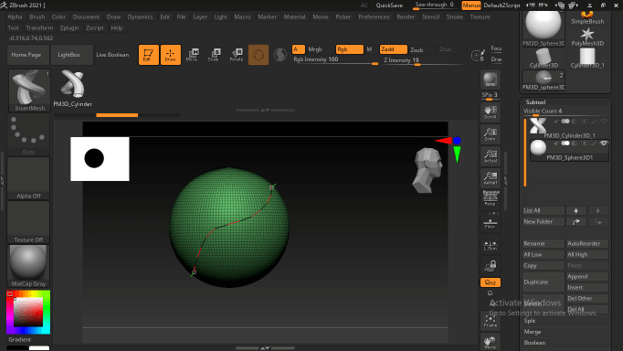
Now our Rope is ready to use. I want to apply it on the curved path so that I will take subtool as a guideline. So I will go to the Append option of the Subtool panel and choose this Sphere. You can choose any other subtool for creating a path for your rope curve.

I will hide this Rope’s basic structure by clicking on the eye button of its layer in the subtool panel.
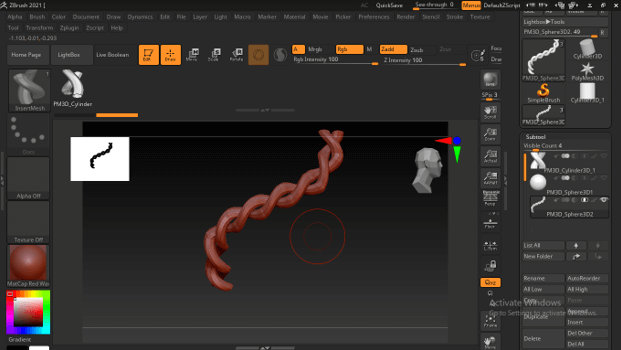
Now with our created rope curve brush, I will draw a curved shape like this here.
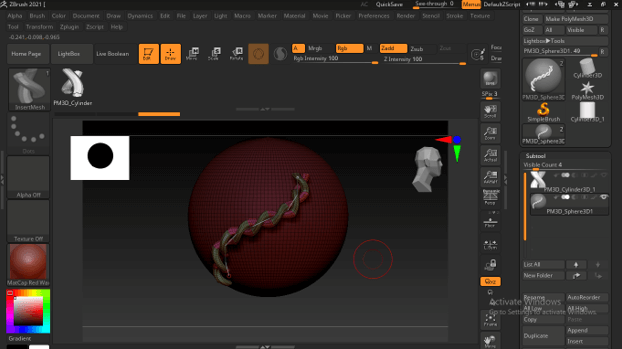
And once you release the mouse button, your rope structure will apply on the path like this.
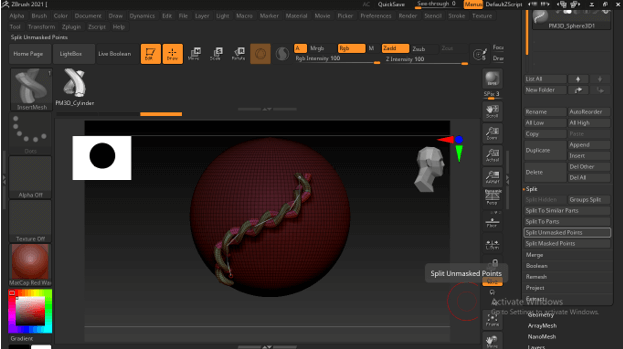
After having your desired shape go to the Split option of this Subtool panel and click on the ‘Split Unmasked points’ option to separate this Rope from the sphere subtool.
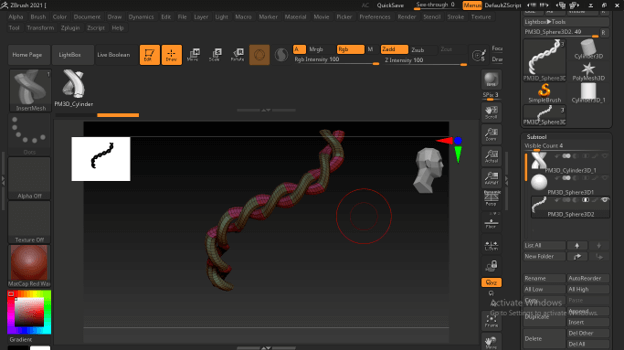
Now you can see we have our separated rope sub tool here.
We can switch to normal mode by pressing the Shift + F button on the keyboard.
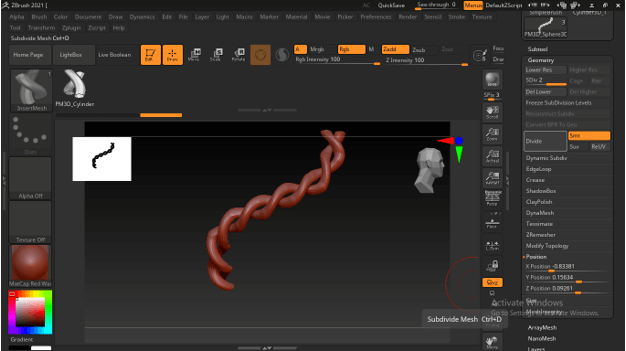
Now you can go to the Geometry panel of the toolbar bar and click on the Divide button to have smooth poly mesh in your rope structure.
This way, you can create a rope and rope curve brush in zbrush.
Conclusion
Creating a Rope to give a more realistic look to your 3D model sculpture will be no more difficult task for you, and you can easily create a rope for your desired path. This was one way to create a rope, but there are more ways to do this, and you can also try them to find the best one for you.
Recommended Articles
This is a guide to ZBrush Rope. Here we discuss the Introduction, How to create Zbrush rope? Examples with code implementation. You may also have a look at the following articles to learn more –
