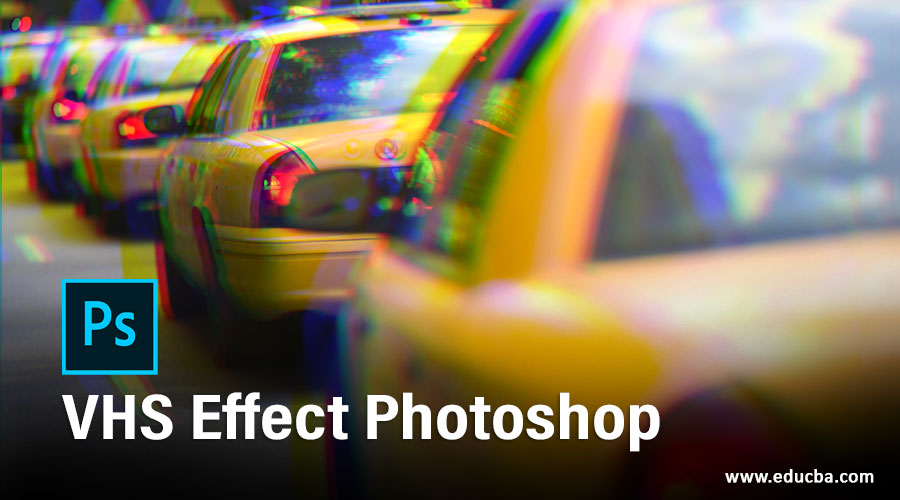
Introduction to VHS Effect Photoshop
Photoshop is one of the raster image editing software and widely used by image editing professionals for their professional work. We can make any type of effect on our image for giving it an old look. VHS effect is one of the old Television VCR effects, and through this effect, you can edit your image, which gives you a look at the old televisions effect. So in this article, we will discuss how we can apply this effect to our image and also analyze different parameters of applying this effect. So let us start our learning about this topic in a very exciting manner.
How to Apply VHS Effect in Photoshop?
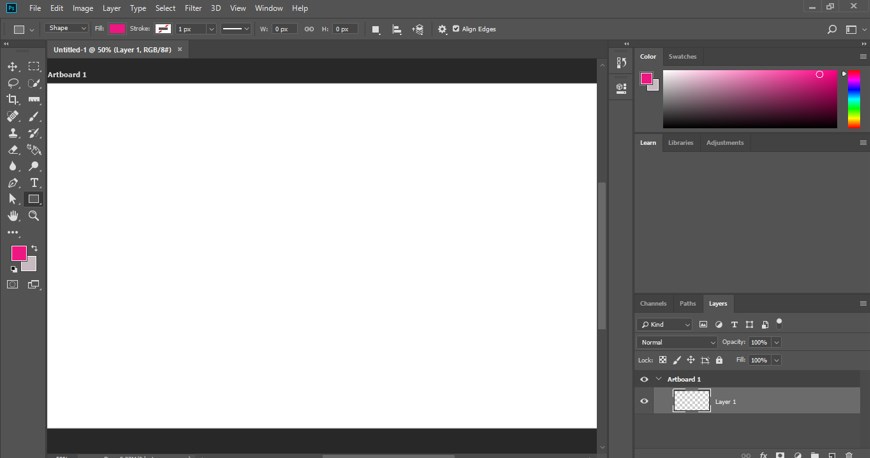
We can apply this effect on our image by using some features and tools of this software in few steps, but we should get introduced with the user screen of this software to properly understand this topic. So let us have a look at the working screen of this software.
Step 1: At the top, we have a Menu bar that has some Menu, which helps us manage different features of this software. Below this menu bar, we have a property bar of different tools and images of this software, which helps change the parameters of them during our work. Below this bar, we have three sections: A tool panel on the left side, a display window at the center of this section, and on the right side, we have some panels that help in the management of our work. You can adjust all the sections as per your requirement at any place in the user screen of this software.
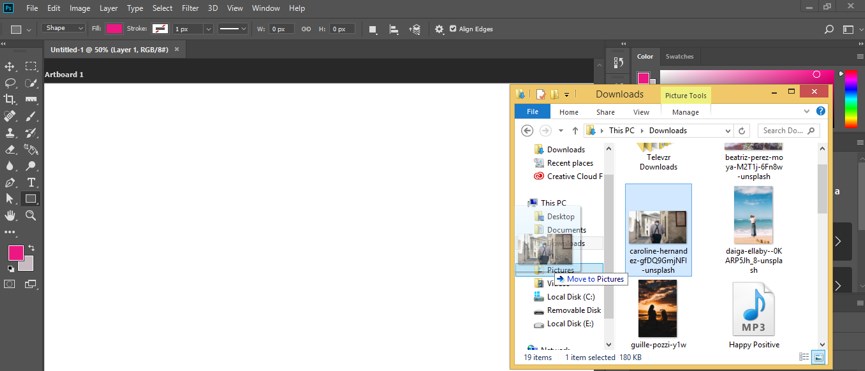
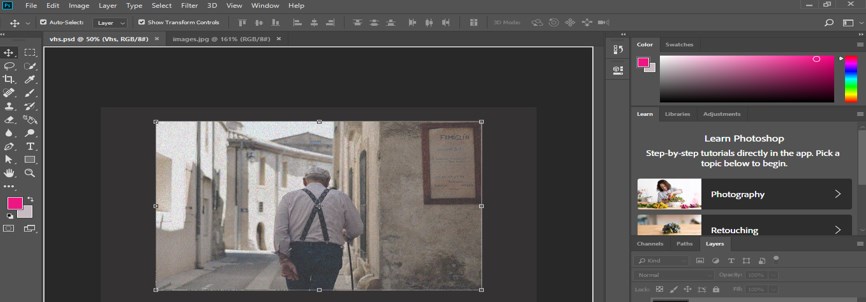
Step 2: Let us place an image in this software for learning this topic. For placing an image, open the folder of the saved image and place it in the display window area of this software with the help of the mouse left button. You can have your own image or download it from the internet.
Step 3: Now adjust the size of this image according to you by adjusting the transform box’s handling points.
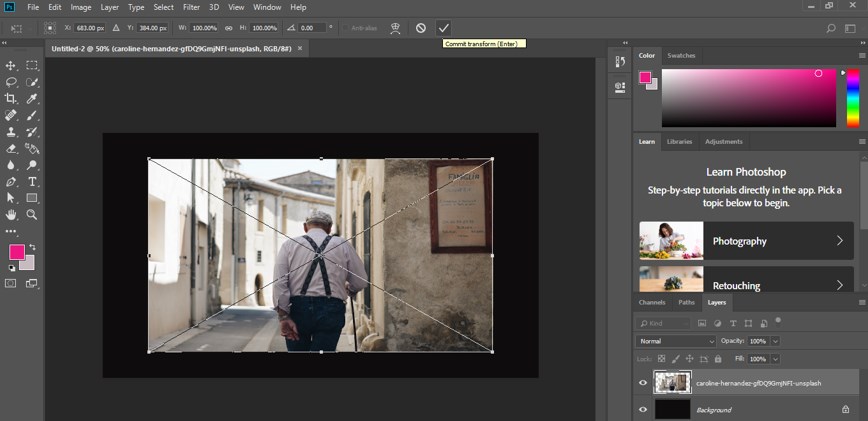
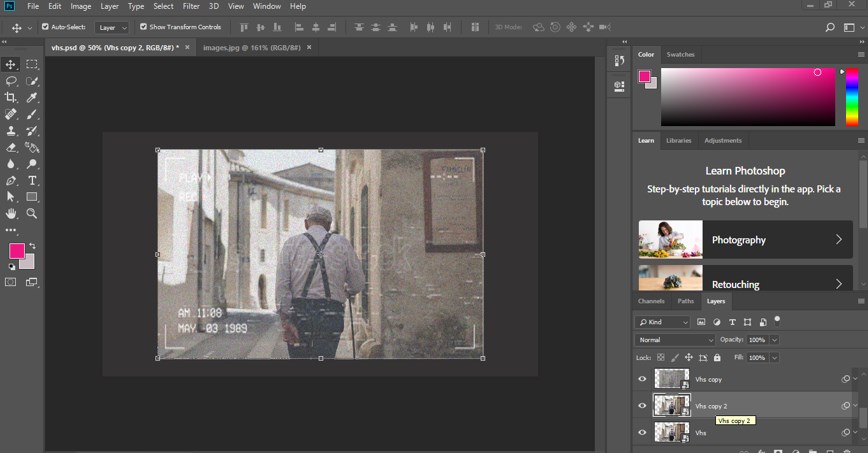
Step 4: Now rename this image as per your choice. For rename, it makes a double click on the name of this image. I will name it as VHS.

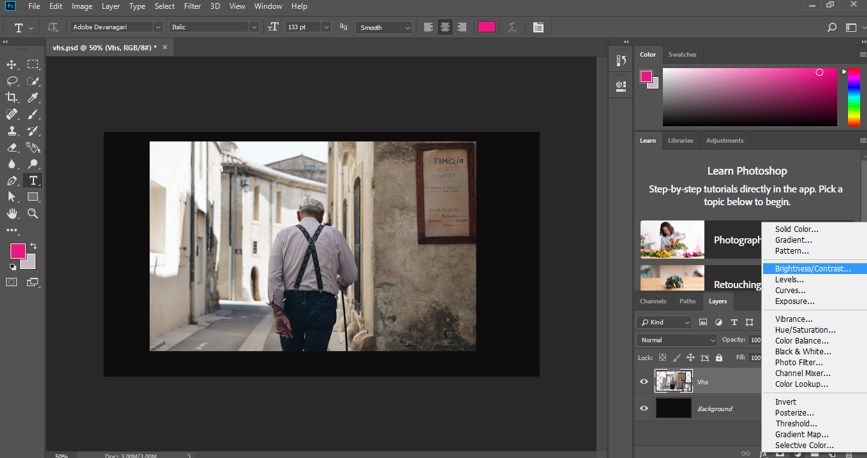
Step 5: Now go to the bottom of the layer panel and click on the Adjustment layer button. Choose the Brightness/Contrast option from the drop-down list for adjusting the brightness and contrast of your image.
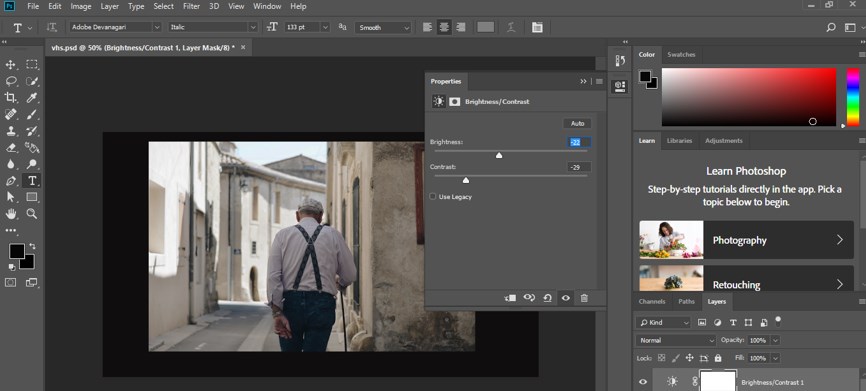
Step 6: Adjust the value of brightness and contract in this way so that image looks a little bit dull.
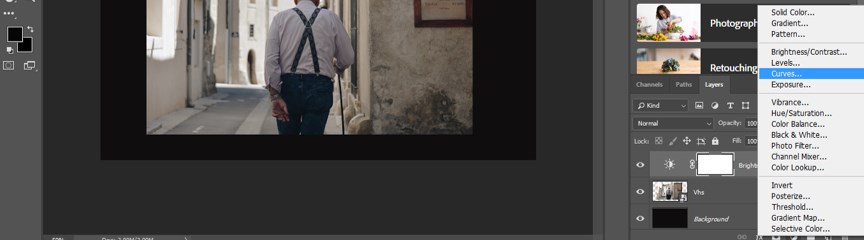
Step 7: Now, again click on the adjustment layer button and choose the Curves option from the list.
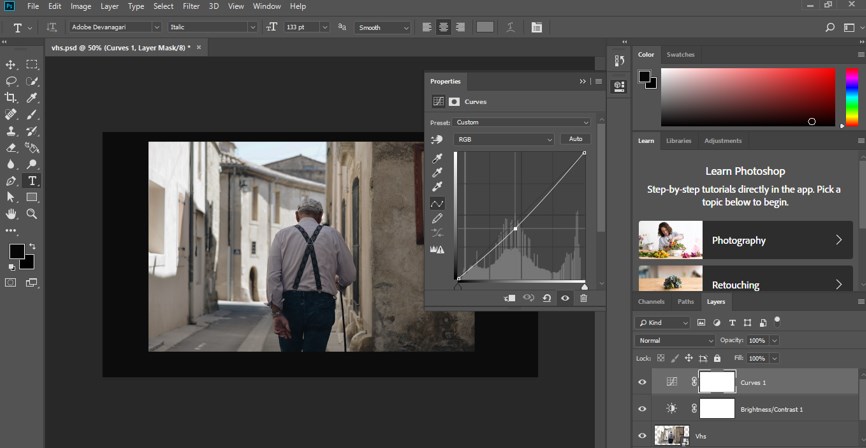
Step 8: Now down the curve a little bit to have more clarity in the dullness of your image.
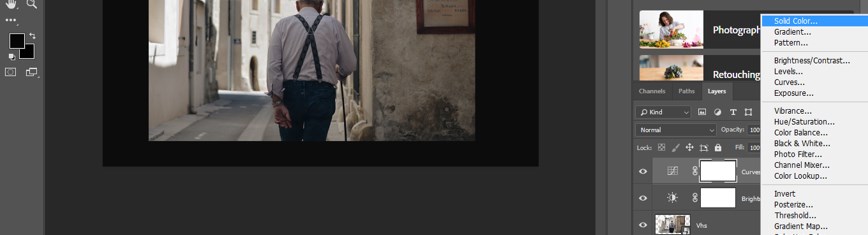
Step 9: Again, click on the Adjustment layer button and choose a solid color option from the drop-down list.
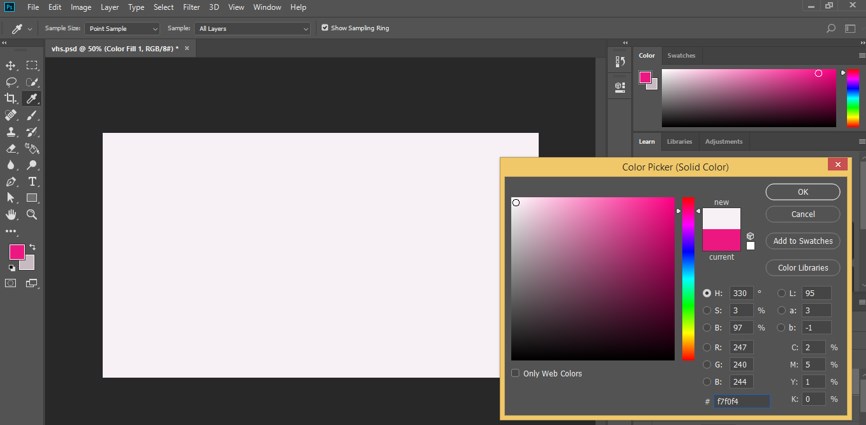
Step 10: Now, a color box will be open to choosing a white color from this box, then press the Ok button of this box.
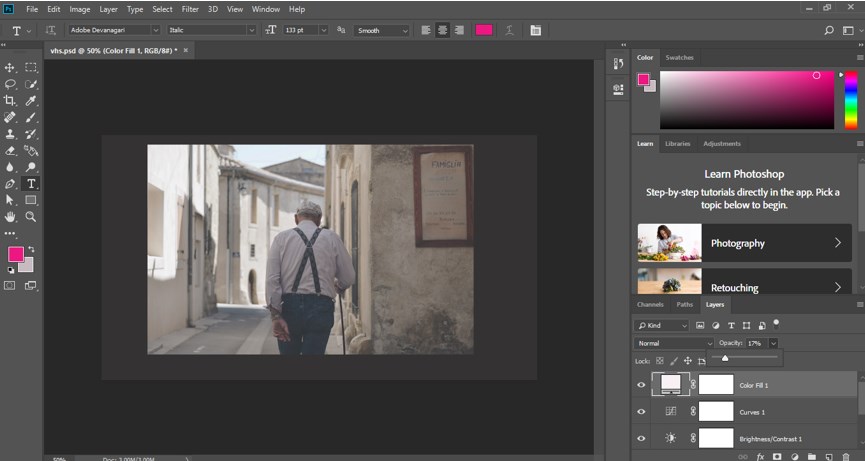
Step 11: Now select this solid layer in the layer panel of this software and decrease its opacity value from the opacity option of this layer.
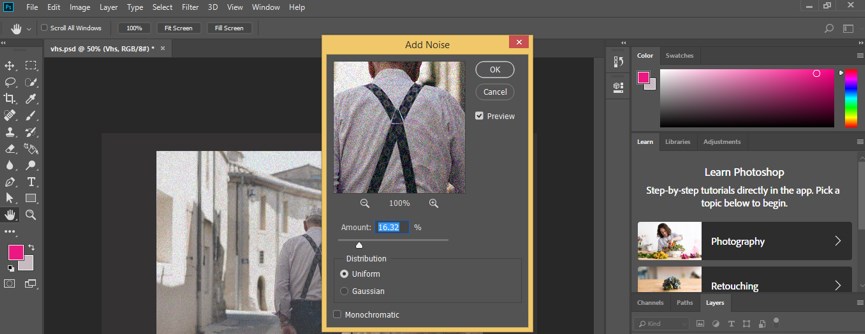
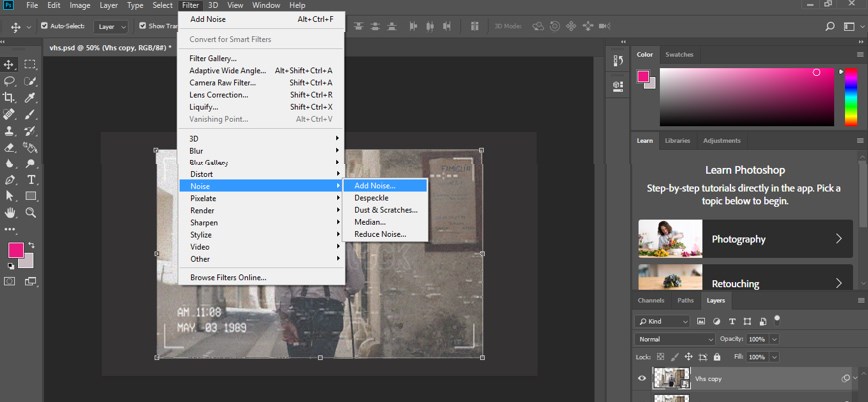
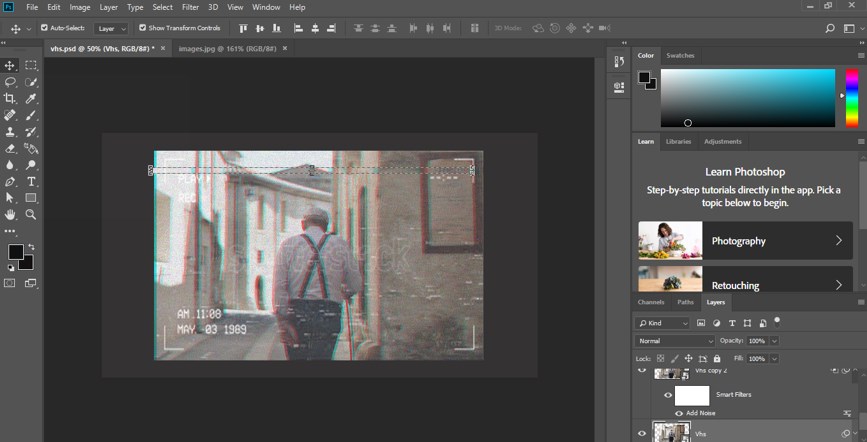
Step 12: Now click on the VHS image layer for selecting it with the mouse left button and go to the Filter menu of the menu bar of this software. Go to the Noise option of the drop-down list and choose to Add Noise option from the new drop-down list by click on it.
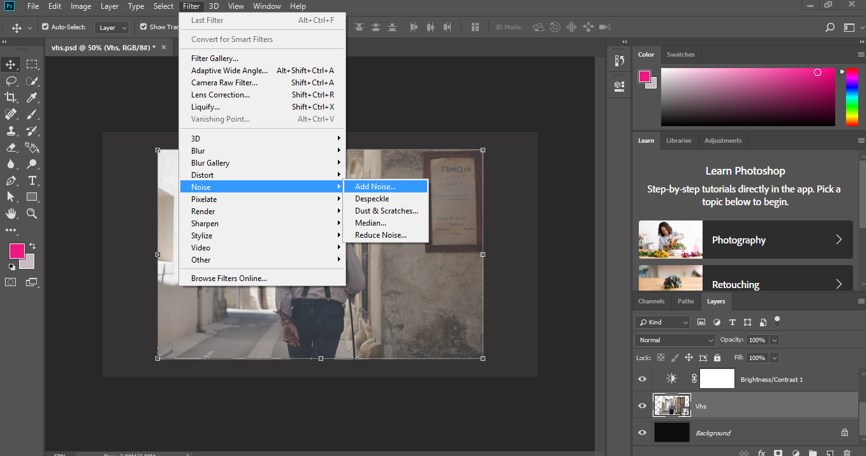
Step 13: A box of adding noise will be open. Set the value of noise to less than 20 percent the press Ok button of this box.
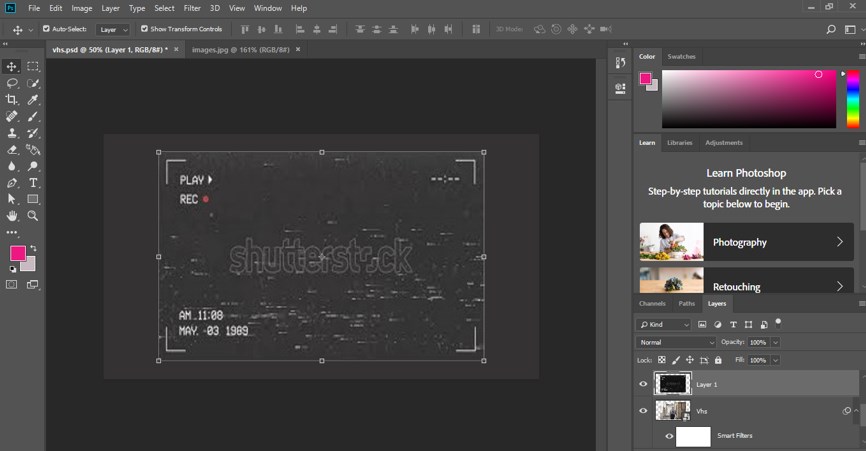
Step 14: Now go to the File menu of the menu bar and click on it. Click on the Open option of this drop-down list.
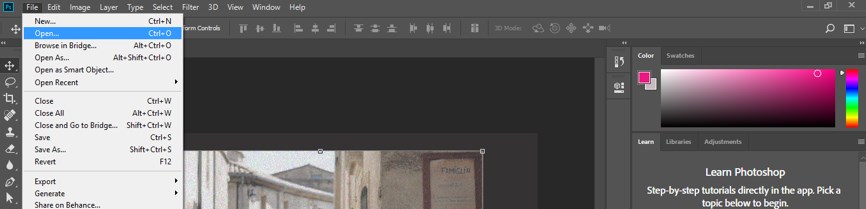
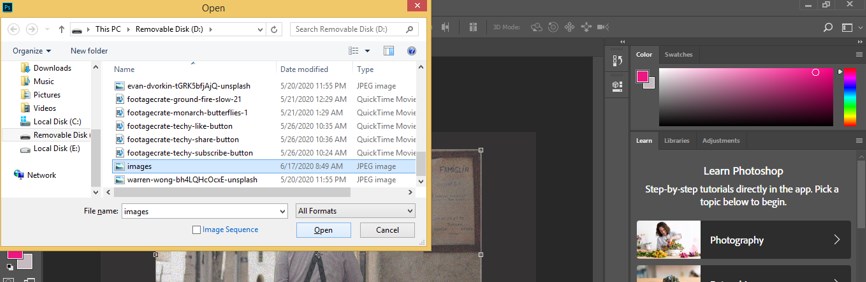
Step 15: A dialog box will be open to choosing your desired image from this box by click on it. Once you have chosen, make click on the Open button of this box.
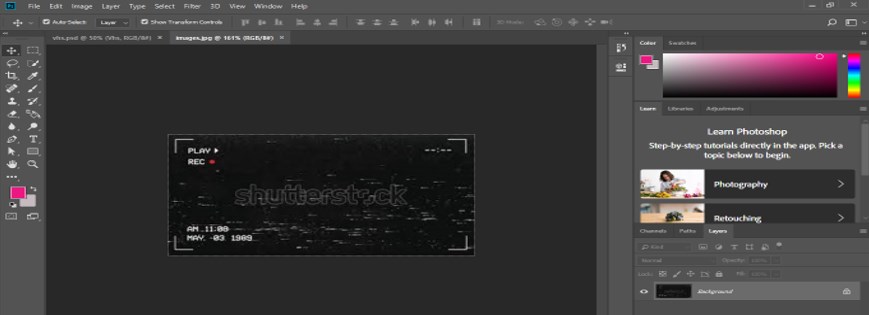
Step 16: Now, this image will open in a new tab of Photoshop software. I have downloaded an image of the VCR effect from Shutterstock. You can also download it from there.
Step 17: Now, take this image into the tab of your original image by dragging it with the help of the mouse left button.
Step 18: Now adjust its size in this way so that it will cover your original image like this.
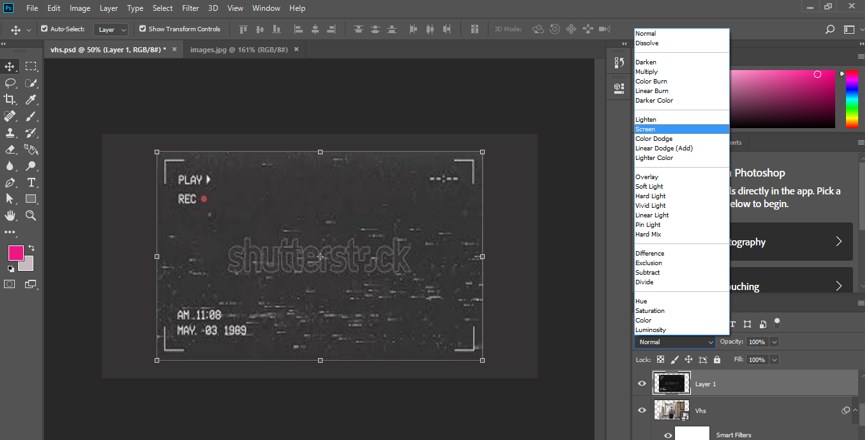
Step 19: Now go to the Mode option of this layer and click on the drop-down arrow of the mode option. Choose the Screen option from the drop-down list.
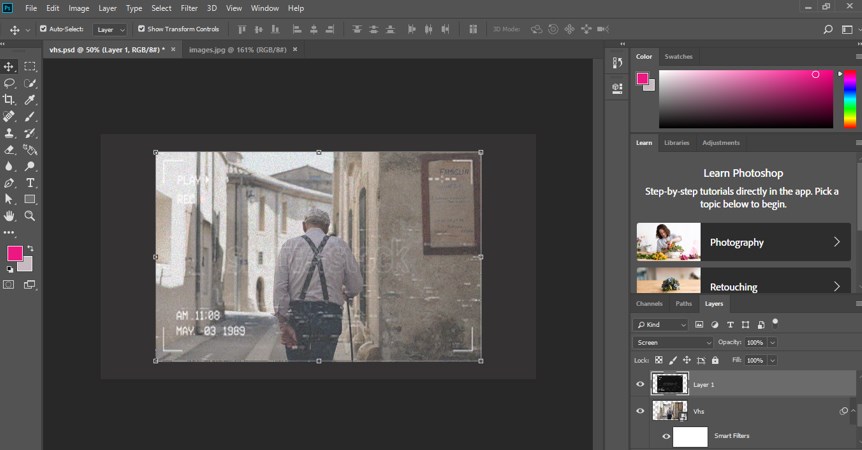
Step 20: Once you choose this option, this image will blend with your original image like this.
Step 21: Now select the VHS image layer by clicking on it and press Ctrl + J button from the keyboard to make a copy of this image.

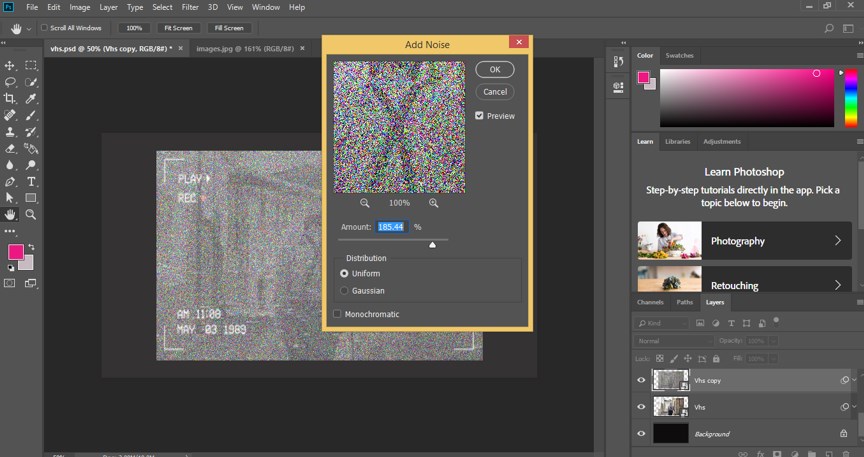
Step 22: Now select the copy layer of VHS and go to the Filter menu of the menu bar. Go to the Noise option of the drop-down list and choose to Add Noise option from the new drop-down list.
Step 23: A ‘Add Noise’ box will be open. Increase the value of noise by more than 150 percent, then press the Ok button of this box.
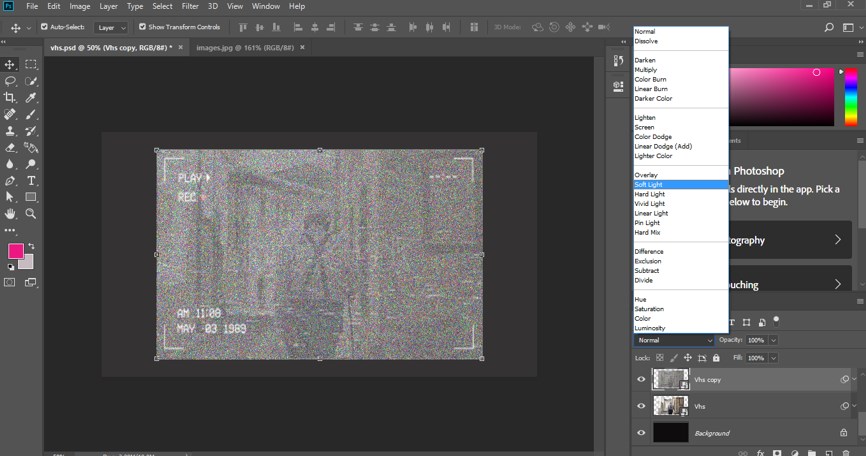
Step 24: Now again, go to the blending mode of this layer and click on the Soft Light option of a drop-down list.
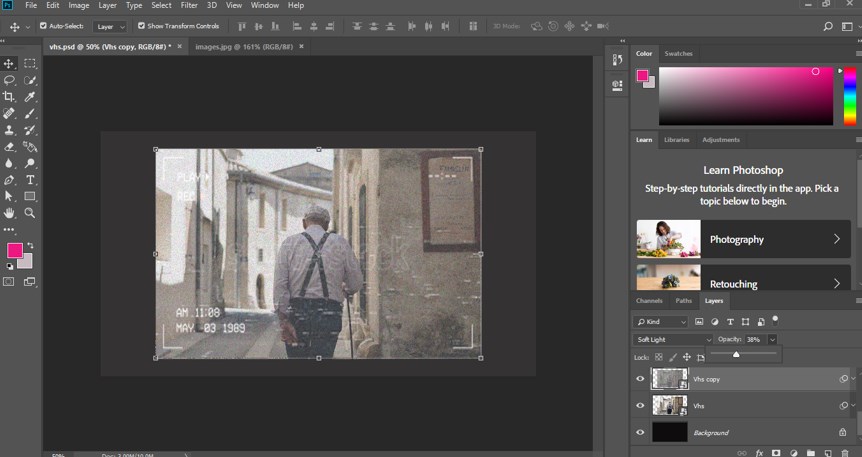
Step 25: Now, it will blend with the original image like this.
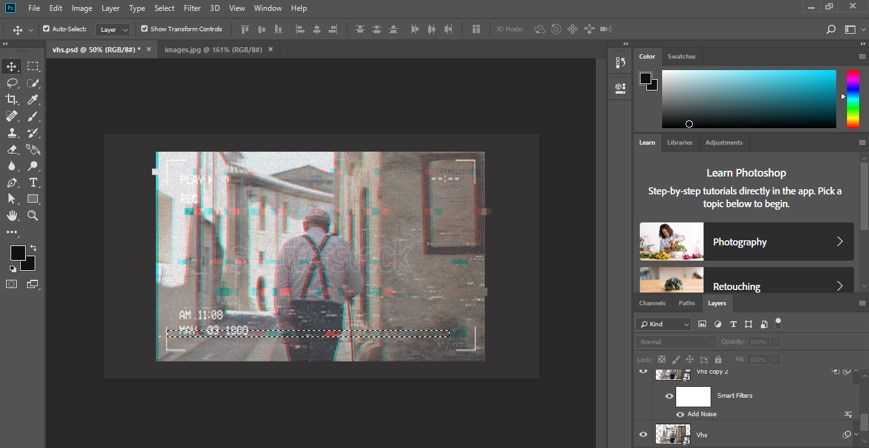
Step 26: Now again, make a copy of this image.
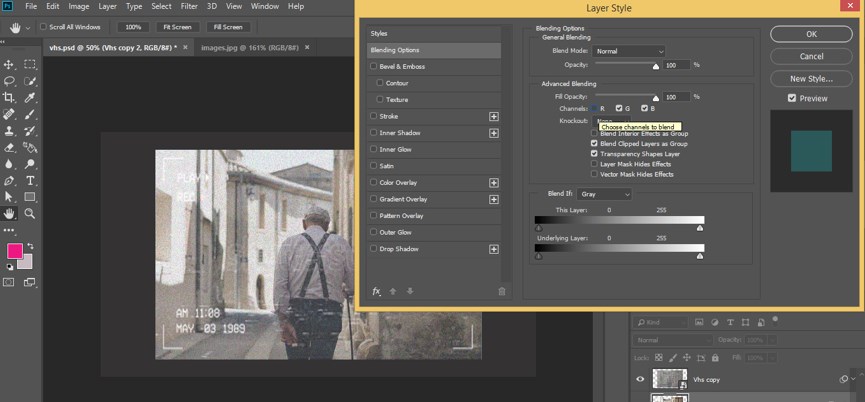
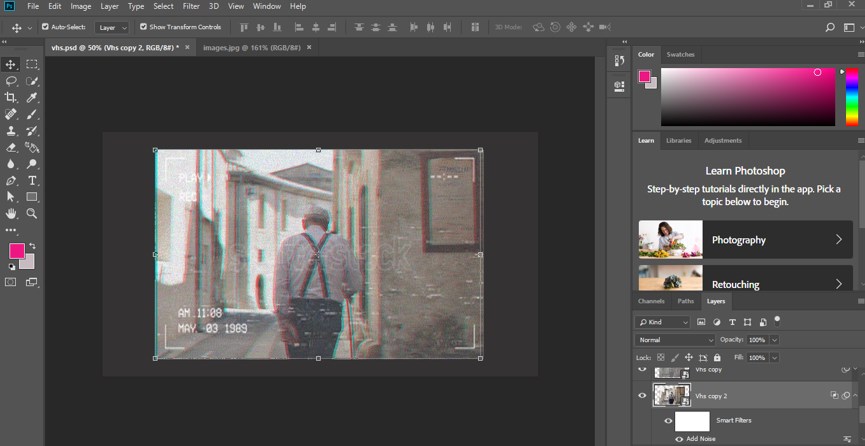
Step 27: Now make double click on this layer, and a layer style box will be open. Make uncheck the R-value of the channel of this layer.
Step 28: Now press the left arrow button of the keyboard for moving this layer a little bit to the left for giving it the VHS effect.
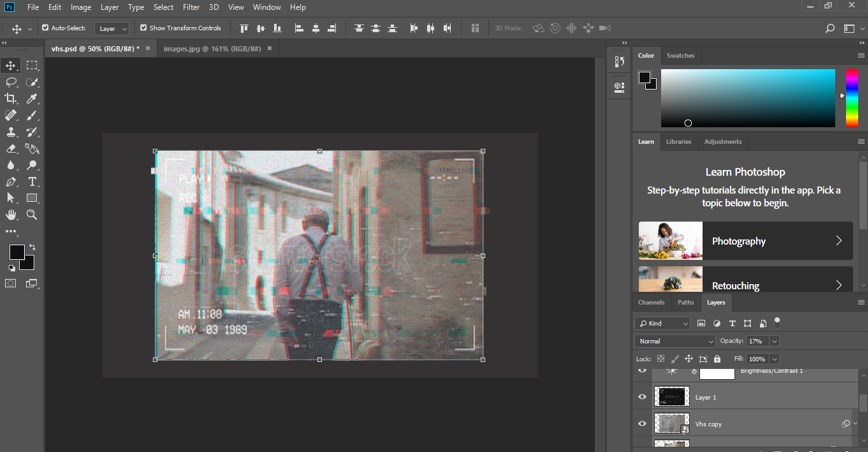
Step 29: Now go to the tool panel and take a rectangular Marquee tool.

Step 30: Now, make a rectangular selection like this.
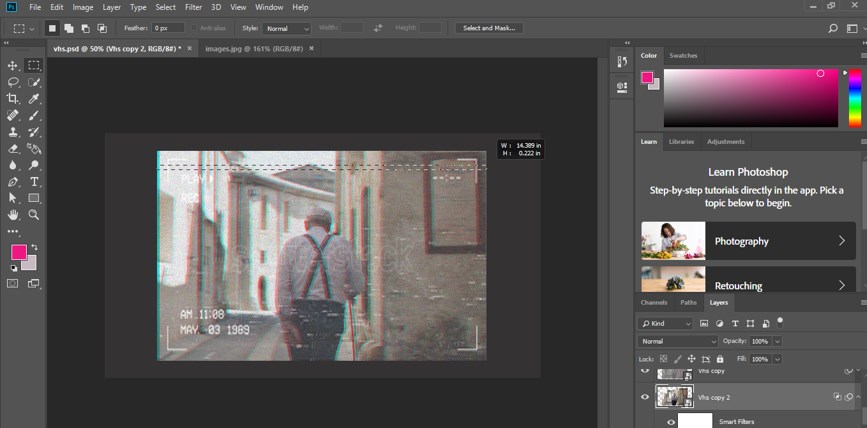
Step 31: Then go to move tool and press arrow key of keyboard left or right again and again for displacing this selected area of your image a little bit in that direction.
Step 32: Now repeat this for adding more displaced areas like this.
Step 33: In this way, you can have a VHS effect on your Image.
Conclusion
Now, after this article, you can understand the VHS effect in Photoshop software and make it for your own image. You can also handle the parameters of the process of applying this effect very easily. So keep practics on this feature of Photoshop for having a good command of it.
Recommended Articles
This is a guide to VHS Effect Photoshop. Here we discuss the introduction and apply VHS Effect in Photoshop in a step-by-step manner. You can also go through our other related articles to learn more –
