Updated August 25, 2023
Introduction to Ice Effect in Photoshop
Adobe Photoshop is a huge and robust program used to create image effects and edit the raw images with the most popular and used tools and functions. The program also has an effective filter gallery that is used to apply effects and create stunning water, fire, ice clouds, and more such effects. In this article, we will study how to create the ice effect in Adobe Photoshop. Although, the program is the most used program for creating effects. But, it does not have any specific effect or function that helps the user to create any specific effect. Effects are created using multiple functions on the same image in a sequential process to achieve the desired output.
How to Create an Ice Effect in Photoshop?
We will learn and understand the basic procedure and techniques to create a realistic ice effect using any image in this topic. As discussed earlier, the ice effect created on the software is not made using a single effect, but it has been created using a group of filters and sequentially.
If any of the steps are not completed or are interchanged, then we will not have the desired realistic result of the ice effect. The program has a broad set of tools that make the process easier and simpler for the users.
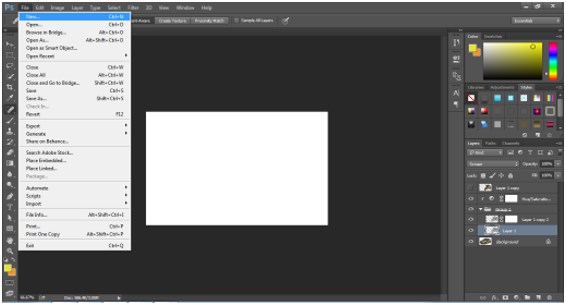
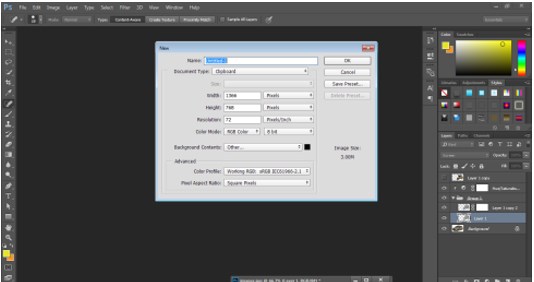
Step 1: Open a New Document in Photoshop.
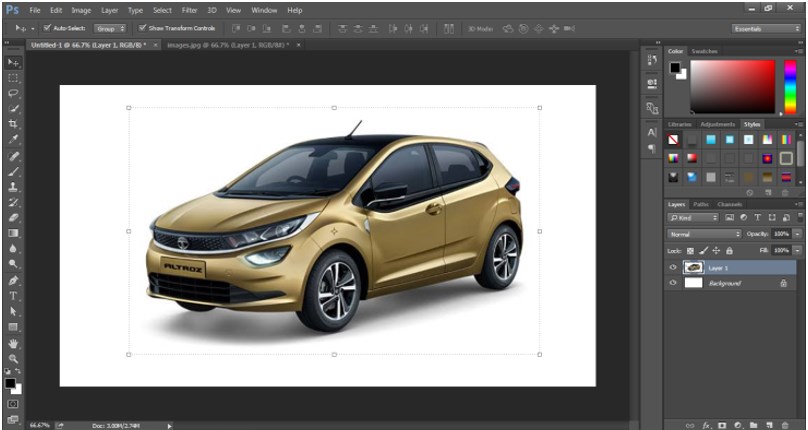
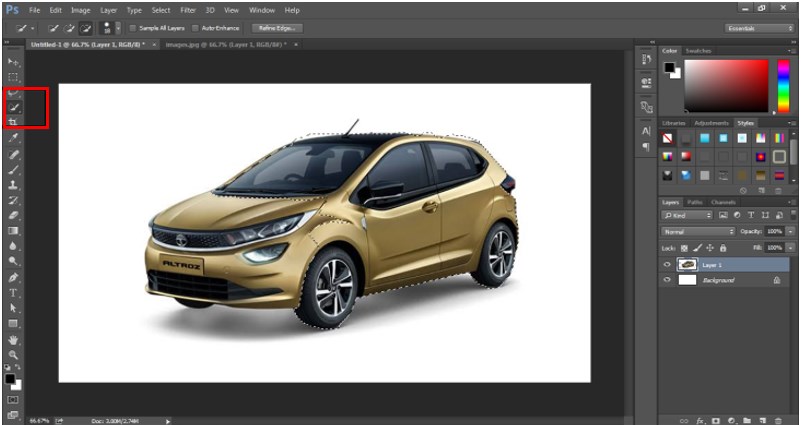
Step 2: Download any image from the internet to apply the effect on the part of the image. Here, I have downloaded an image of a car.
Step 3: Use the quick selection tool from the toolbox and select the part of the image where the effect needs to be applied.
Step 4: Next, copy and paste this part of the image on another layer. As shown in the image below.
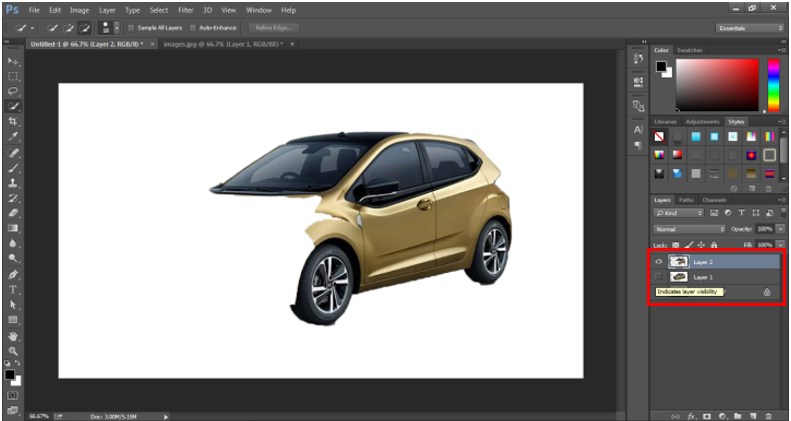
Step 5: Now, create a copy of this layer and click on the eye button just beside the layer. So that this layer is not visible on the screen.
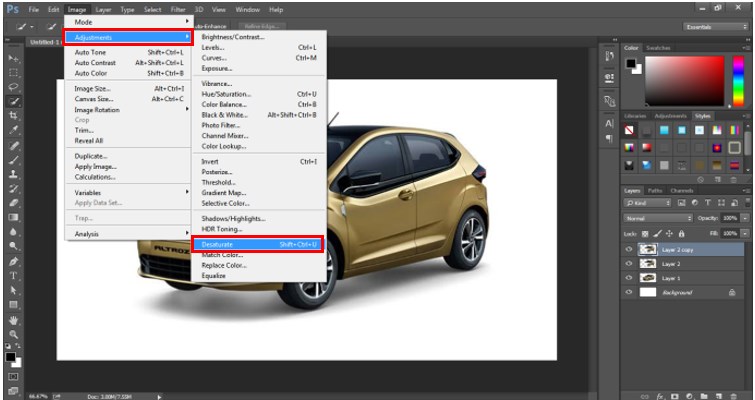
Step 6: Now, go to the IMAGE option from the menu bar and click on Adjustments. In the Adjustment, the panel uses the Desaturation option on the selected layer.
Step 7: Now, go to Filter and click on the Filter gallery and use the Plastic Wrap option as shown in the image below.
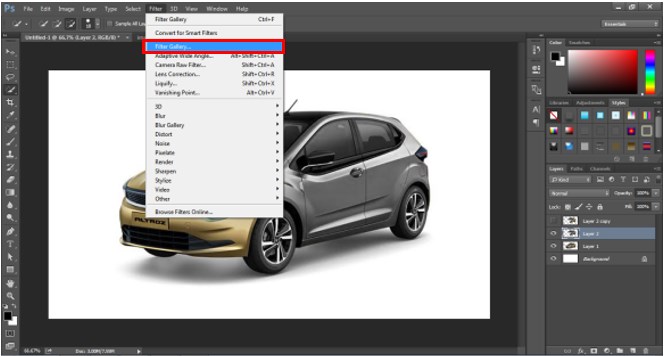
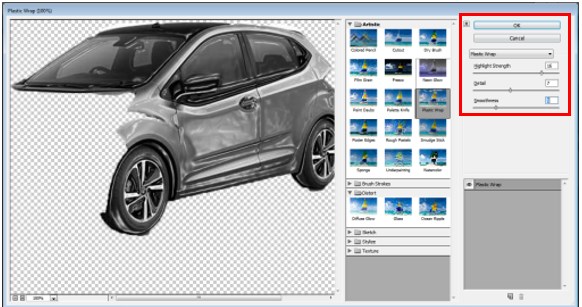
Step 8: The Plastic Wrap filter is used to create a plastic effect that is the first step to create the ice effect.
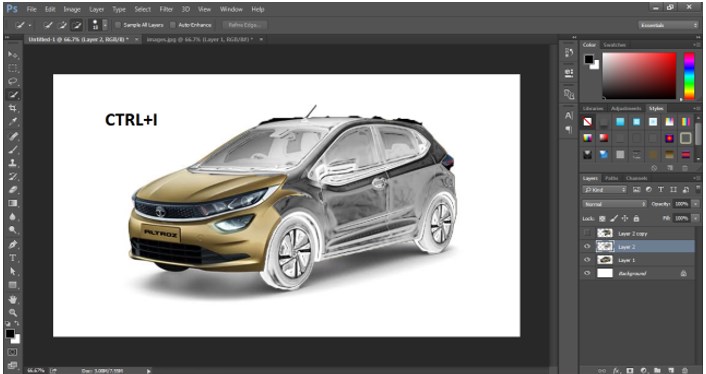
Step 9: Now, we will invert the effects on the layer. To do so, use the Ctrl + I option on the keyboard.
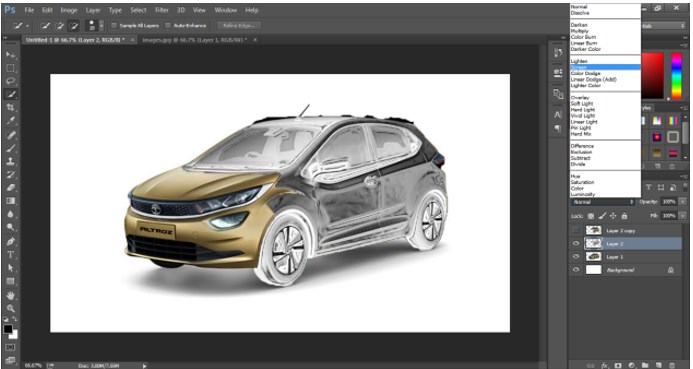
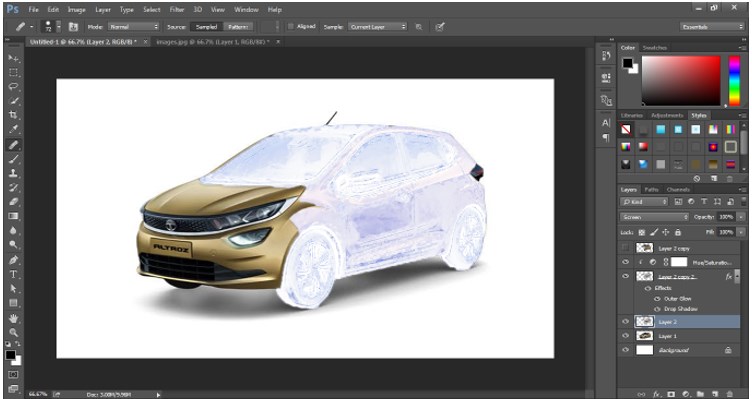
Step 10: Next, in the layers panel us the Screen option for the blending modes for the selected layer. As shown in the image below.
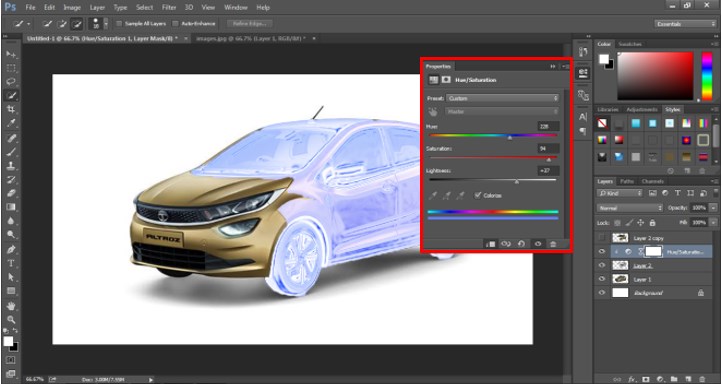
Step 11: Now, from the layers option, click on the new fill or adjustment layer option and select the Hue and saturation option.
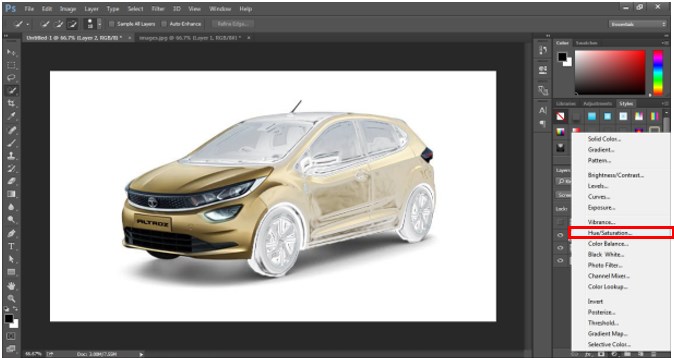
Step 12: Adjust the settings for hue and saturation in a manner that the effect looks in a bluish color. Also, use the colorize option, the Hue/ Saturation.
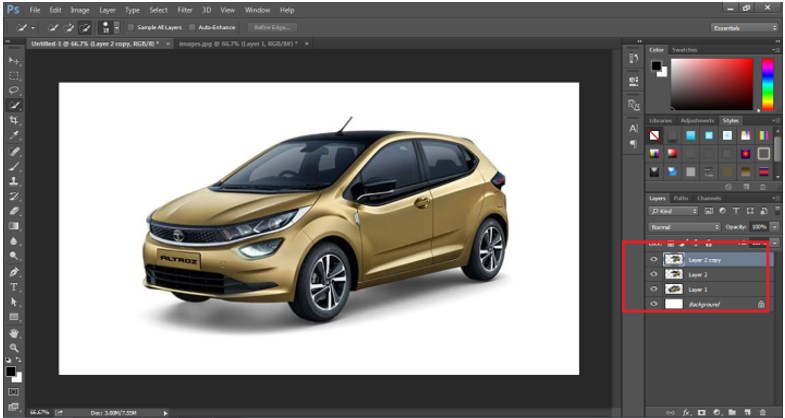
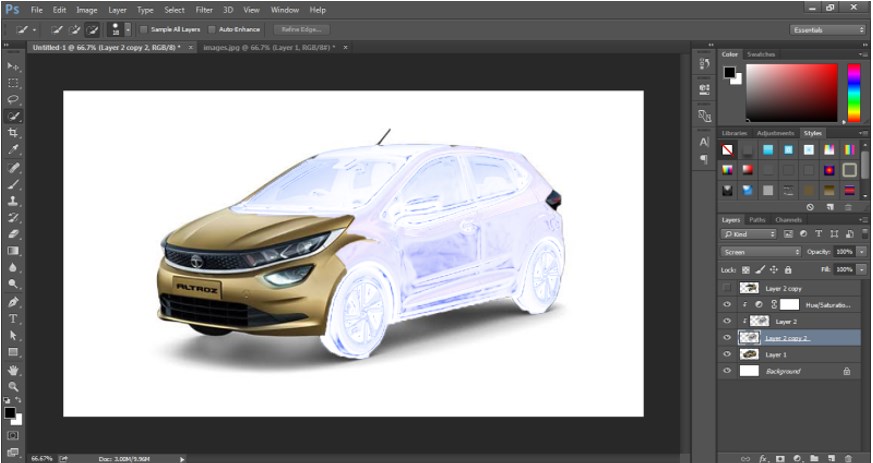
Step 13: Now, create another copy of the same layer on which the effect has been created.
Step 14: Now, go to the filter gallery and use the Glass option from the same.
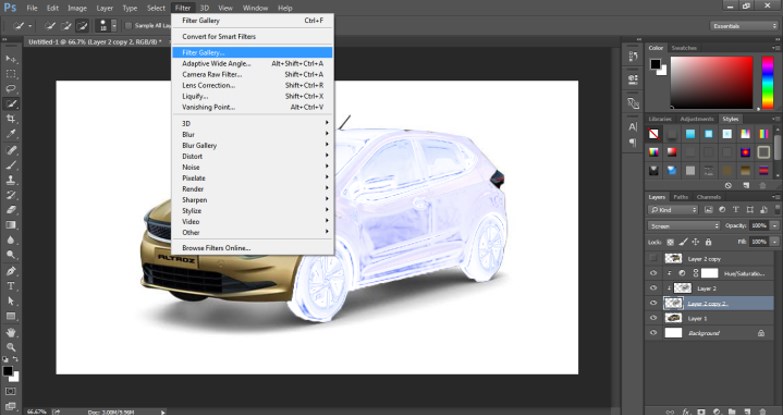
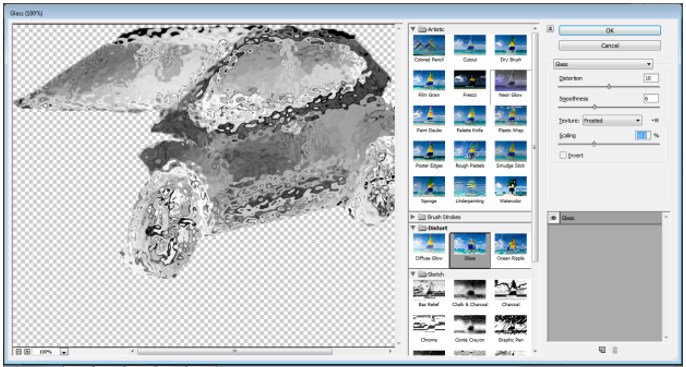
Step 15: In the glass option, use the frosted option and adjust the settings of the effect, as shown in the image below.
Step 16: Now, the effect is ready. While there are still some adjustments that need to be made.
Step 17: Select the layer and click on the masking option. Use the brush tool to create the masks and give the effect a more realistic look. The mask is created so that the effect looks very realistic and natural.
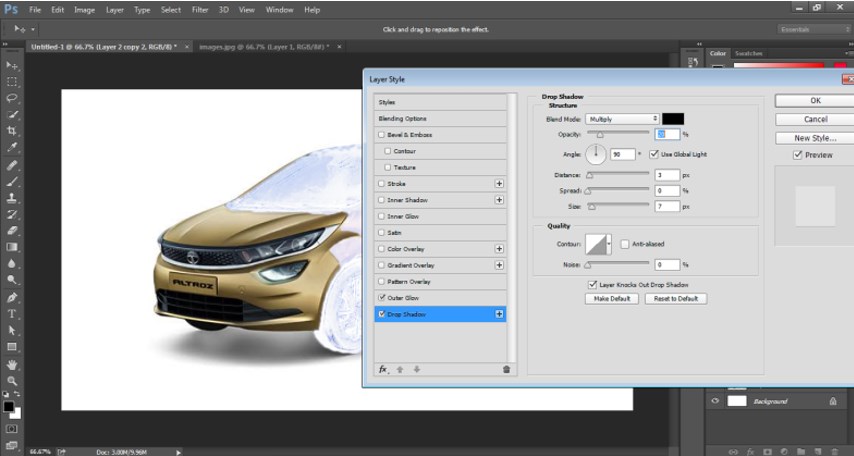
Step 18: Next, we can add the glow and drop shadow effects on the layer. We need to use the blending modes and use the outer glow and drop shadow option for a more realistic look.
Step 19: This is the final ice effect created on Adobe Photoshop. Similarly, we can create the Ice effect on any of the images and give it a realistic look by adjusting the setting of the effects used in the procedure of creating the ice effect.
- Although, this process may seem to be a lengthy task for the beginners. But, on the whole, the process is quite easy to understand and use on the given projects. Just like Fire effects or rain effects, the ice effect is also created with much patience and creativity. The user should have the creative imagination and the ideas to create a realistic effect using the software. The software acts as a bridge between the user and the projects created by them, and they can learn a lot from the same.
Conclusion
In this article, we learn about the different steps and techniques used to create the Ice effects. The article also includes one detailed example to make the users understand the major and basic process of creating an effect. Because of Photoshop, creating such effects has become easier and simple with time and updates that keep coming with the program itself.
Recommended Articles
This is a guide to Ice Effect in Photoshop. Here we discuss an introduction, different steps and techniques used to create the Ice effects. You can also go through our other related articles to learn more –
