Updated April 8, 2023
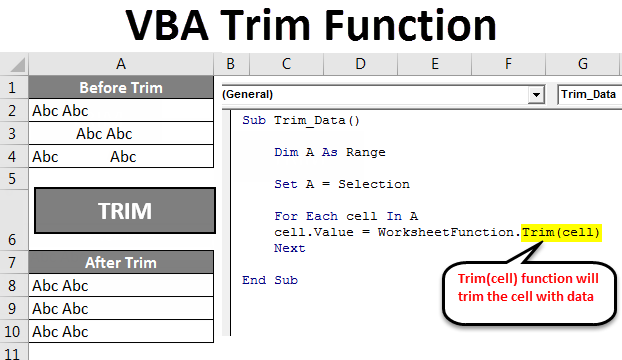
Excel VBA Trim Function
Excel VBA Trim Function is used for removing the extra spaces from any cell or text and gives us the output which has a standard in terms of required spaces. VBA Trim function works exactly as the Excel Trim function and Trim function also removes the extra spaces in 3 ways;
- Spaces from the starting of the text.
- Spaces from the end of the text.
- Spaces from the middle of the text if more than 1 extra space is seen.
This mostly happens when we download data from some server, data warehouse or while incorrectly inserting the extra spaces manually. Even though we can easily see the spaces at the middle of the text, but spaces at the beginning and end of text cannot be seen easily until and unless we go to edit mode of that specific cell. This can be done by VBA Marco.
How to Use Excel VBA Trim Function?
We will discuss how to use VBA Trim Function by using some examples.
VBA Trim Function – Example #1
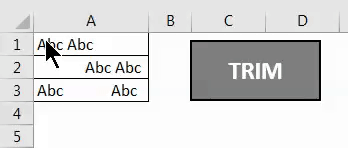
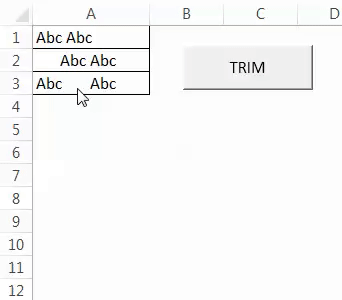
Here we have 3 cells in the below screenshot.
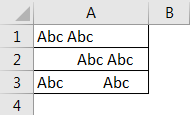
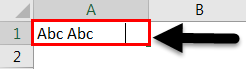
And each cell has some spaces associated with them. Cell A1 has spaces at the end.
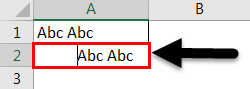
Cell A2 has spaces at the beginning of the text.
And cell A3 has space in between the text which is highlighted in the below screenshot.

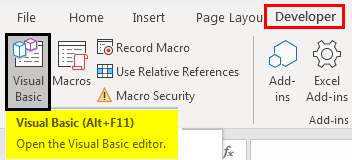
For trimming these cells we will use Excel VBA. For that, press Alt + F11 keys together or under Developer tab click on Visual Basic as shown below.
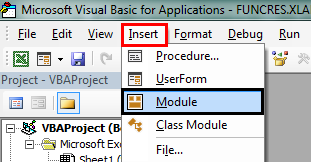
This will take us to Visual Basic coding window. Now go to the Insert menu from VBA window and select Module as shown below.
This will create a new Module where we will write a code for trimming. Below are the steps for creating and writing trimming code:
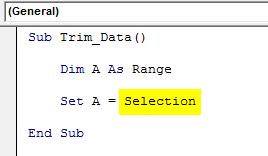
- First, choose a variable and define a range. Here we have selected the variable “A”. This variable can be anything.
- As our data set has already some text or object then we need to set the range for it. And for that, we will use “Selection”. It will automatically select the data in the present sheet.
Code:
Sub Trim_Data()

    Dim A As Range

    Set A = Selection

End Sub
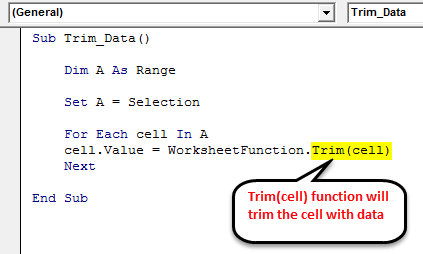
- For selecting each filled cell of the sheet “For Each” is the function And Value function is used for selecting the value with Trim(Cell) selection.
Code:
Sub Trim_Data()

    Dim A As Range

    Set A = Selection

    For Each cell In A
    cell.Value = WorksheetFunction.Trim(cell)
    Next

End Sub
By this, we complete the coding work for creating macro through VBA Trim. Now let’s apply the created code into some tab. For this go to Insert Menu and under Illustrations select Shapes.
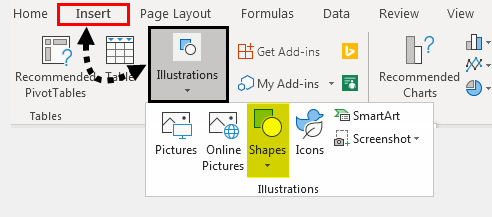
From that Shapes option, create any shape using shape formats and styles.

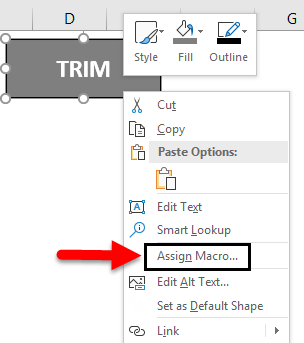
Here we have created a rectangular box and named it TRIM as shown below.

Now click on the Design Mode in Developer menu and right-click on the created box or shape. From the right-click, menu list select Assign Macro to link our created code as shown below.
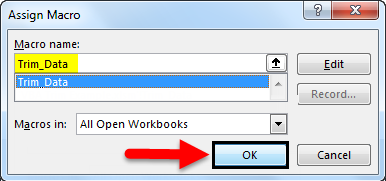
We will get the Assign Marco window, from there select already created macro code, here we have Trim_Data and then click on OK.
Now select the data and click on the TRIM button. We will get the selected trimmed and spaces that were not required are now removed as shown below.
VBA Trim Function – Example #2
VBA Coding shown above can be written in one more way. In the above example, we only trimmed the selected data. In this we will insert the function in the message box as well it will show once the data is trimmed.
For this, we will use the same data which we used in example 1. Follow the same steps, go to the Developer tab and click on Visual Basic.
Once we do that, we will get the Visual Basic window. Now open a fresh Module and start coding on that page.
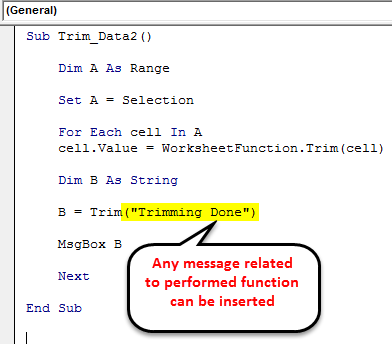
Now consider the same code which we have written in example-1. But here for printing a message box with the text we will insert some text.
Code:
Sub Trim_Data2()

    Dim A As Range

    Set A = Selection

    For Each cell In A
    cell.Value = WorksheetFunction.Trim(cell)

    Dim B As String

    B = Trim("Trimming Done")

    MsgBox B

    Next

End Sub
Once we are done with writing the code, close the Visual Basic windows.
Now go to the Developer tab again and click on Insert menu as shown below. We will get a drop-down menu of different button shapes as shown below.
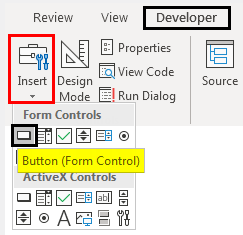
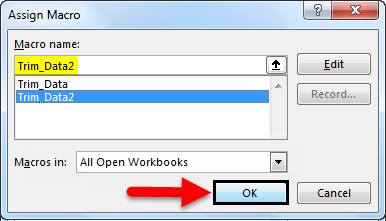
Now select any of the button shapes and draw it on anywhere on your workbook. From the list of created macros select the required option. Here we have selected Trim_Data2 which we created for this example and then click OK.

After that, we will get the button created on the screen.
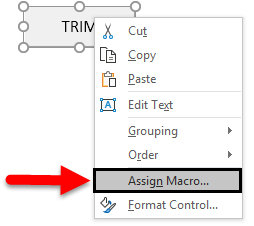
We can name the button as per function which we will be performing. Let’s name it TRIM as per function. Now right click on the created TRIM button and select Assign Marco. Once we do that we will get the window Assign Marco as shown below. Now select the required macro and click OK.
By this, our trim coding will get assigned to TRIM Button. Now for testing select the data first and then click on this TRIM Button.
As we can see above, here our data got trimmed and we can see the message as well of “Trimming Done”.
Pros of Excel VBA Trim Function
- We can trim huge sets of data in one shot without checking the number of extra spaces the cells have.
- Coding of trimming function is also quite small.
- There are very less or no chances that any extra space will get spared.
Things To Remember
- Always save the file as Macro-Enabled Worksheet. By doing this, we can use assigned macro multiple time.
- Compile the code before assigning it to any button.
- There are 2 different ways are shown for creating a button and both can be used as per individuals need or wish.
- Consider writing VBA Code as shown in example-2 which will give the message as well.
Recommended Articles
This has been a guide to Excel VBA Trim. Here we discussed how to use VBA Trim Function to remove spaces in Excel along with some practical examples and downloadable excel template. You can also go through our other suggested articles–
