Updated June 15, 2023
Excel VBA Resize
VBA Resize is a method where we use it to highlight the cells by changing their size for visualization. The important thing which needs to be noted is that this method is used only for illustration purposes. Resize is a property that is used with the range property method to display the selection of rows and columns provided as an argument concerning a given range.
Syntax of VBA Resize:
The syntax for this property is as follows:
![]()
Row size is the number of rows we want to select or highlight, and column size is the number of columns we want to select and highlight. This property needs a reference to a range. If one of the arguments from row size or column size is not provided, this function selects the entire row or the column from the range. The methods to use Resize property in VBA are as follows:
- First, we need to provide a range for reference.
- The next step is to provide the arguments for the rows and size for resize property.
- To illustrate it, we need to use the select property method.
Using the Resize Property in Excel VBA
The following examples will teach us how to use Resize Property in Excel using the VBA Code.
Example #1
Let us first begin with the essential resize property. In this example, we will see how to use resize the property and how we need to provide the inputs for this resize function in general. For this, follow the below steps:
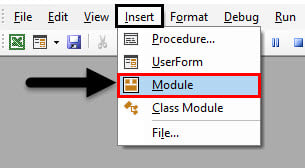
Step 1: Insert a new module inside Visual Basic Editor (VBE). Click on Insert tab > select Module.
Step 2: Now write the sub-procedure for VBA Resize.
Code:
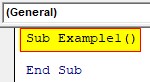
Sub Example1()

End Sub
Step 3: Resize is a range property of VBA; let us select a range.
Code:
Sub Example1()

Range("A1")

End Sub

Step 4: After that, we can use the dot operator and resize method to select the number of columns and rows.
Code:
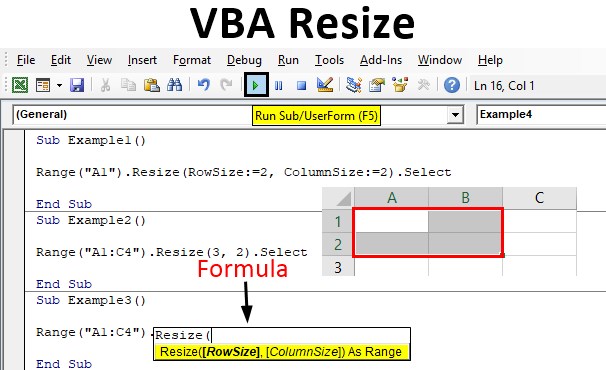
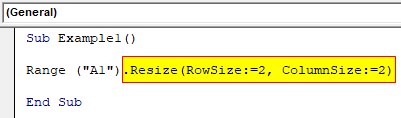
Sub Example1()

Range("A1").Resize(RowSize:=2, ColumnSize:=2)

End Sub
Step 5: We can use the select method property for illustration purposes.
Code:
Sub Example1()

Range("A1").Resize(RowSize:=2, ColumnSize:=2).Select

End Sub
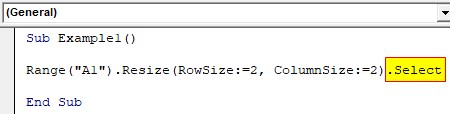
Step 6: Run the Code by hitting F5 or the Run button and see the result in worksheet 1.
We have selected two rows and two columns for the range.
Example #2
In the above example, we have used the same number of rows and columns for the range. Let us try a different approach and use diverse selection such as row size to be 3 and column size to be 2. For this, follow the below steps:
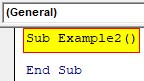
Step 1: We can use the same Module and begin with our sub-procedure for the second example.
Code:
Sub Example2()

End Sub
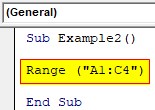
Step 2: As this is a range property, we will use the range method to reference a cell.
Code:
Sub Example2()

Range("A1:C4")

End Sub
Step 3: Then, we will use the resize method and select the row and column size for the arguments.
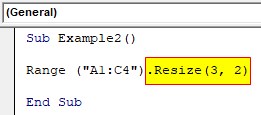
Code:
Sub Example2()

Range("A1:C4").Resize(3, 2)

End Sub
Step 4: The final step is to use the Select property method for the illustration.
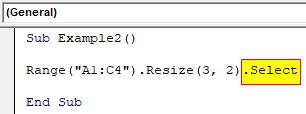
Code:
Sub Example2()

Range("A1:C4").Resize(3, 2).Select

End Sub
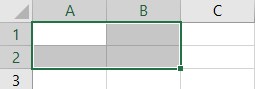
Step 5: When we execute the above code by hitting F5 we can see the following result in sheet 1.
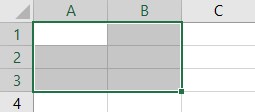
Out of the range A1:C4, this code has selected three rows and two columns.
Example #3
So in the above examples, we saw how to resize property works if there is the same number of rows and columns or a different number of rows and columns as the argument. Now let us see what happens when we do not provide one of the arguments to the function. For this, follow the below steps:
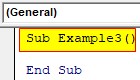
Step 1: Declare another Subprocedure.
Code:
Sub Example3()

End Sub
Step 2: Now, we can select any random range.
Code:
Sub Example3()

Range("A1:C4")

End Sub

Step 3: Now, we will use the resize property, but we will remove the row specification from the code.
Code:
Sub Example3()

Range("A1:C4").Resize(, 1)

End Sub
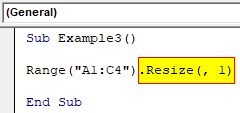
Step 4: Now, we will use the select method.
Code:
Sub Example3()

Range("A1:C4").Resize(, 1).Select

End Sub
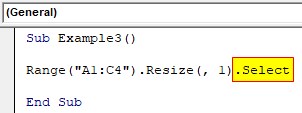
Step 5: Run the Code by hitting F5 or the Run button.
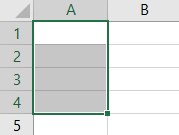
It selected one column but the entire four rows.
Example #4
Now let us use this resize property in a dynamic example. For this example, we will first select some range with a number of rows and columns and use this resize property to select 2 extra rows and columns from the selection. For this, follow the below steps:
Step 1: Let us begin with a sub-procedure in the same Module.
Code:
Sub Example4()

End Sub

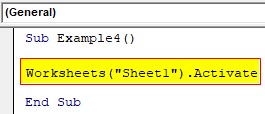
Step 2: First, we activate sheet 1 using the worksheet property method.
Code:
Sub Example4()

Worksheets("Sheet1").Activate

End Sub
Step 3: Now, let us provide the selection with the number of rows and a number of columns using the selection property method, as shown below.
Code:
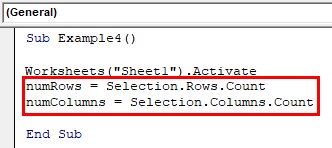
Sub Example4()

Worksheets("Sheet1").Activate
numRows = Selection.Rows.Count
numColumns = Selection.Columns.Count

End Sub
Step 4: Now, we can use the resize property to increase the selection by two rows and two columns.
Code:
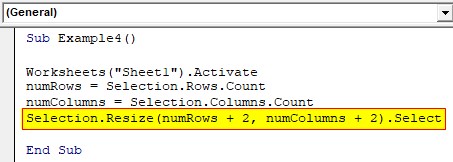
Sub Example4()

Worksheets("Sheet1").Activate
numRows = Selection.Rows.Count
numColumns = Selection.Columns.Count
Selection.Resize(numRows + 2, numColumns + 2).Select

End Sub
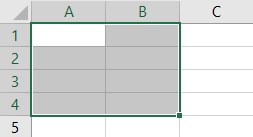
Step 5: So here is our selection before the execution of the code.
Code:
Step 6: When we execute the code.
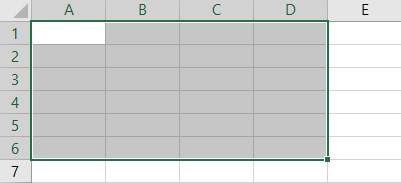
The following code extended the selection by two rows and two columns.
Things to Remember
There are a few things that we need to remember about VBA Resize:
- This is a range property method.
- It illustrates the selection of rows and columns from a given range.
- The first argument in this function is a row reference, and the second argument is a range reference.
- If one of the arguments from row size or column size is not provided, this function selects the entire row or the column from the range.
Recommended Articles
This is a guide to the VBA Resize. Here we discuss how to use the Resize property in Excel VBA, practical examples, and downloadable Excel template. You can also go through our other suggested articles –
