Updated August 11, 2023
Excel Timeline (Table of Contents)
Introduction to Timeline in Excel
Timeline in Excel actually represents the time span from the start to end on a bar. So for this, we should have any time frame such as Dates, Months, Minutes, Hours, etc.
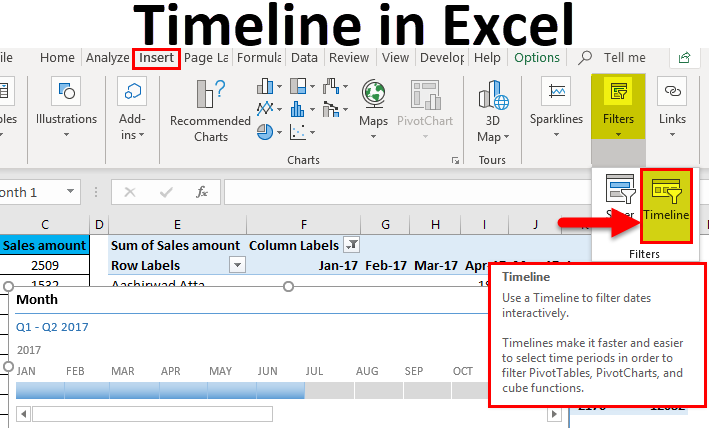
To apply the Timeline in Excel, first, we need to create a pivot table. Then from the Insert menu ribbon, select Timeline from the filters section. Then click right on Timeline, and from the Report Connections, choose the fields which we want to connect with Timeline. Now just drag the bar right to left as per the need to filter the data with time.
How to Create a Timeline in Excel?
For adding the timeline feature in Excel, you must have a pivot table first.
Let’s understand the working of creating timelines in excel with some examples.
Example #1
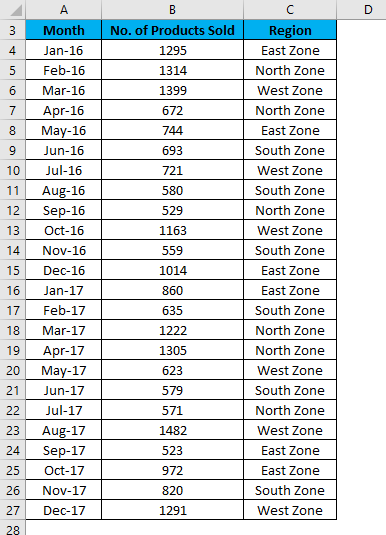
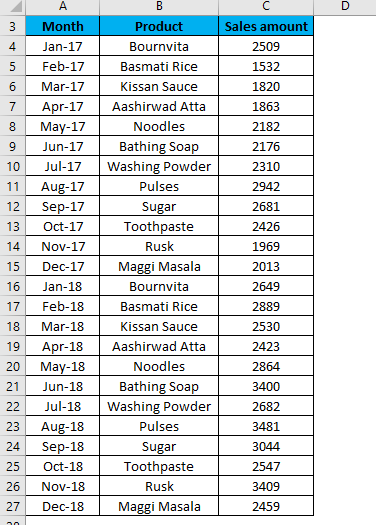
We have given a list of the number of products sold region-wise and month-wise.
Follow the below steps to do this:
- First, create a Pivot table for the given data.
- Click on any cell in the table and go to the Insert tab.
- Click on the Pivot Table option under the Tables section.
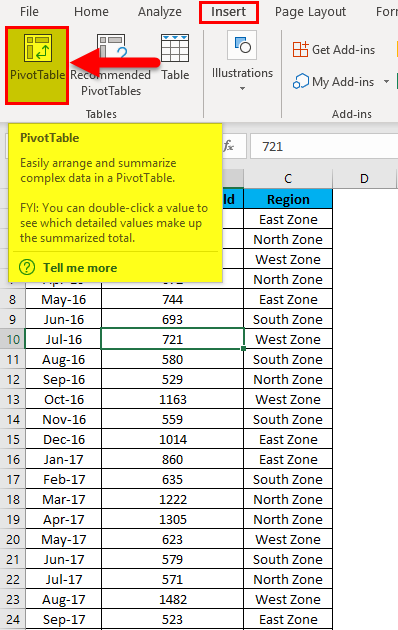
- Now the Pivot table is created, as shown in the below screenshot.
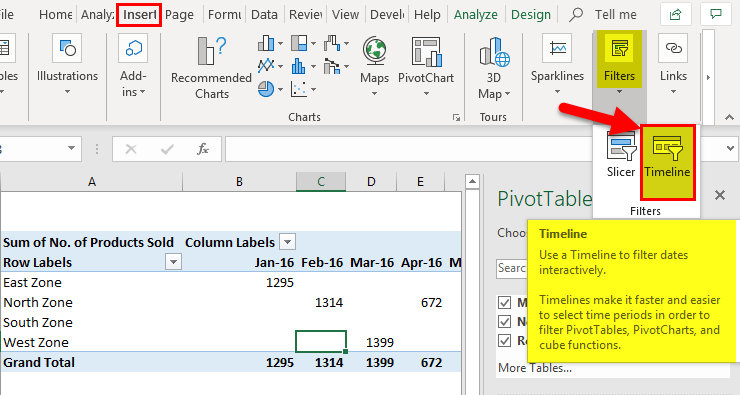
- Click anywhere in the Pivot table and go to the Insert tab.
- Click on the Timeline filter under the Filters section. Then, refer to the below screenshot.
- It will open an Insert Timelines dialog box. Refer to the below screenshot.
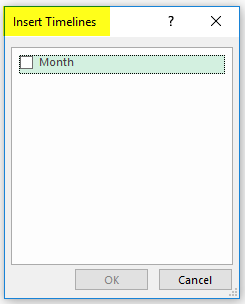
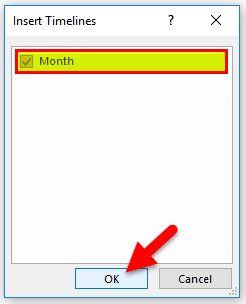
- Click on the Month checkbox inside the dialog box and click on OK.
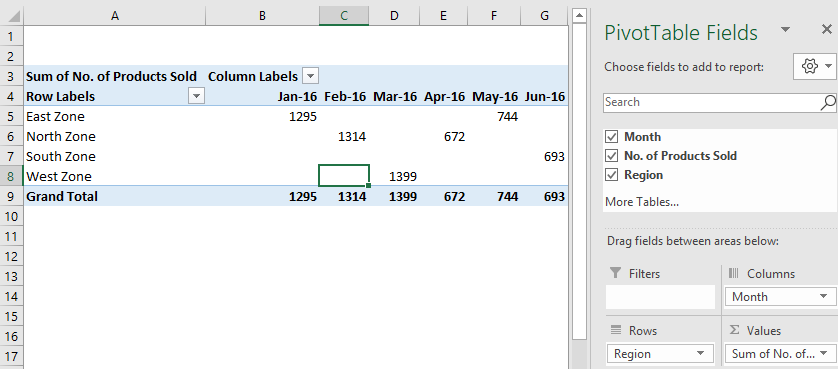
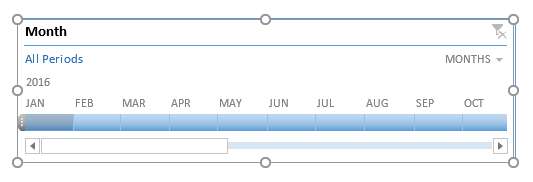
- It will show you the timeline, and by default, it’s showing the month’s data year-wise. For example, refer to the below screenshot.
- Now with the help of this excel timeline, you can arrange the records in the Pivot table by adjusting and clicking. Refer to the below screenshot.
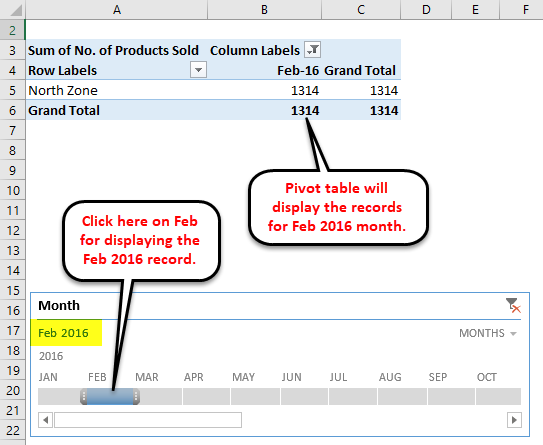
- The above screenshot shows that we have clicked on Feb month under the 2016 year; it is displaying the data accordingly in the Pivot Table.
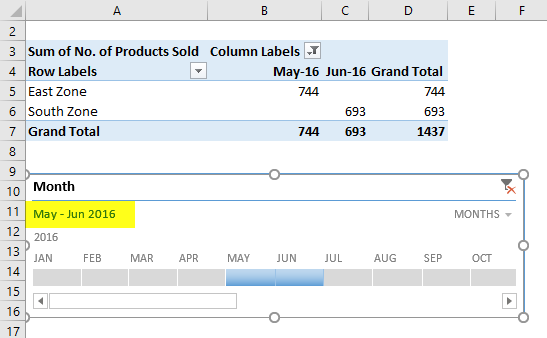
- If you want to see the data for a continuous month, you need to drag the bar across those months like the screenshot below. For example, we have selected the data for May & June 2016 month.
- We also can see the data day, quarter, and year-wise.
- For this, click on the drop-down arrow on the timeline box, as shown in the below screenshot.
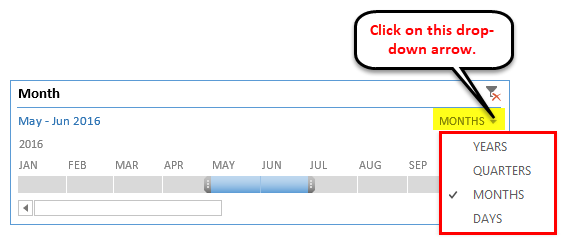
- Choose another date component like Quarters.
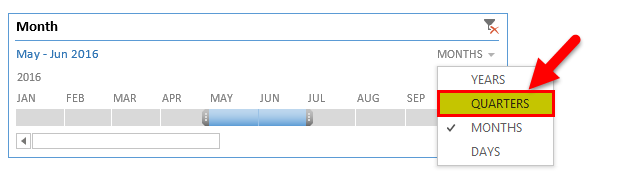
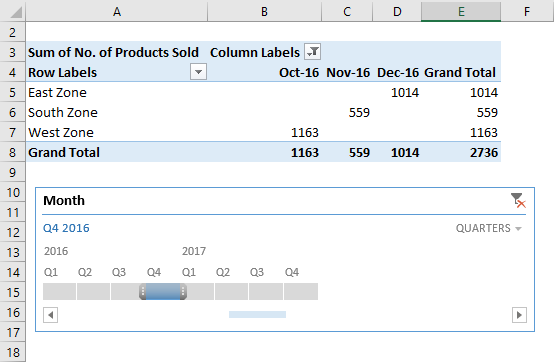
- It will show the quarter wise data like below:
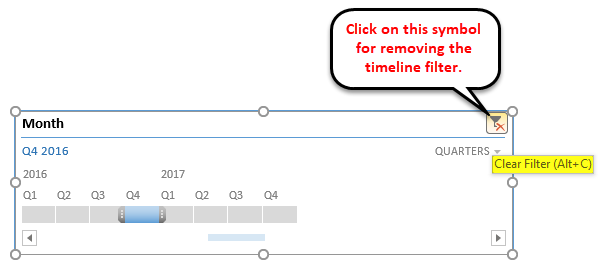
- If you want to remove the data timeline, click on the icon in the upper right corner, as shown below. You also can use the shortcut key ALT+C for this.
You also can customize an excel timeline according to your preference. Follow the below steps:
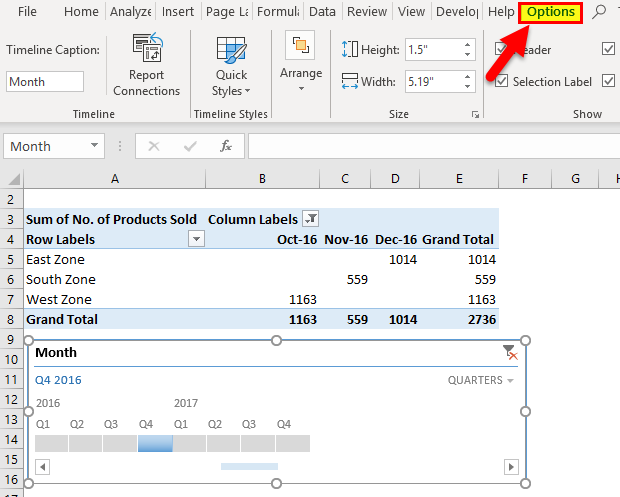
- Click on the Timeline window. Then, go to the Options tab.
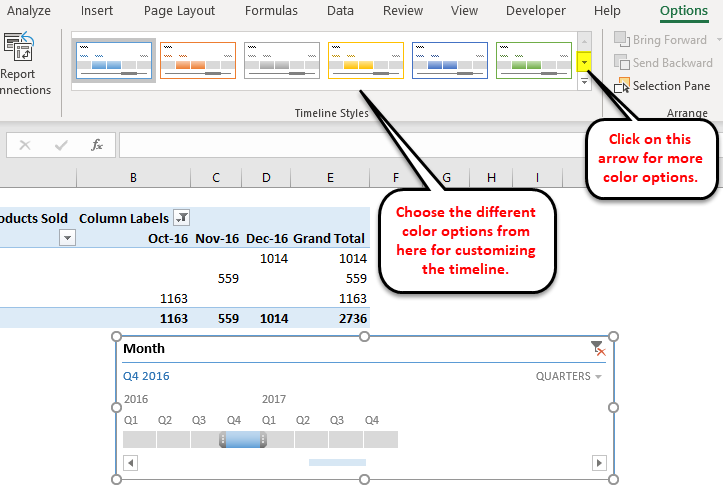
- Click on any color option under the Timeline Styles section, as shown in the below screenshot.
- You also can change the size of the timeline window.
- Finally, you can change the name of the timeline window by clicking on Timeline Captions under the Timeline section.
Example #2
Let’s take another example of a grocery shop.
- Now we will create a table for the above data. Here, we are inserting the pivot table in the same sheet with the data set.

- Now repeat the same steps of example 1 for creating timelines here. It will show you the timeline.
Refer to the below screenshot:
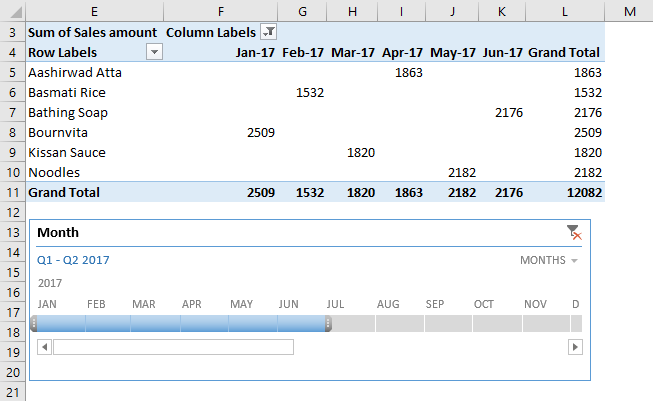
As we can see that we have clicked for 6 months result (from Jan – June) of the year 2017.
Hence, you can select the months accordingly by clicking on this timeline bar.
Things to Remember about Timeline in Excel
- If your Pivot Table doesn’t have a field formatted as a Date, Excel displays an error.
- An Excel timeline is useful for filtering the data in the Pivot table very quickly.
Recommended Articles
This is a guide to Timeline in Excel. Here we discuss how to create a timeline in Excel, practical examples, and a downloadable excel template. You can also go through our other suggested articles to learn more –
