EDUCBA

EDUCBA

MENUMENU
  • Free Tutorials
  • Free Courses
  • Certification Courses
  • 280+ Courses All in One Bundle
  • Login
Home Design Design Tutorials Design Basic Tutorial SketchUp Woodworking
Secondary Sidebar
Design Basic Tutorial
  • SketchUp
    • SketchUp Keyboard Shortcuts
    • SketchUp geolocation
    • SketchUp animation
    • SketchUp Change Dimensions
    • SketchUp Import
    • SketchUp 2D
    • SketchUp rendering
    • Sketch software
    • Figma Shortcuts
    • SketchUp Layers
    • SketchUp landscape design
    • SketchUp group
    • SketchUp intersect faces
    • SketchUp Rotate
    • SketchUp Architecture
    • SketchUp 3D Models
    • SketchUp Vray
    • SketchUp Units
    • SketchUp garden design
    • SketchUp Layout
    • SketchUp Mirror
    • SketchUp Extensions
    • SketchUp Unhide
    • SketchUp kitchen
    • SketchUp background
    • SketchUp library
    • SketchUp dynamic components
    • SketchUp CutList
    • SketchUp Array
    • SketchUp Woodworking
    • SketchUp resize component
    • SketchUp Ungroup
    • SketchUp Deck Design
  • Basics and Advanced
    • Pro Tools Version
    • What is Autodesk BIM?
    • Animation Character
    • Autodesk Pixlr
    • Sketch plugins
    • Graphic designer requirements
    • Online Gaming Platforms
    • InDesign eyedropper tool
    • InDesign rounded corners
    • InDesign align
    • InDesign resize image
    • InDesign scripts
    • InDesign export to word
    • InDesign newsletter templates
    • InDesign Magazine
    • InDesign Missing Fonts
    • InDesign line spacing
    • InDesign Fonts
    • InDesign Preview Shortcut
    • InDesign Extension
    • InDesign columns
    • InDesign overset text
    • InDesign data merge
    • InDesign grid template
    • InDesign layers
    • InDesign reset preferences
    • InDesign master pages
    • InDesign layout
    • InDesign portfolio template
    • InDesign invoice template
    • InDesign word count
    • InDesign underline
    • InDesign superscript
    • InDesign presentation templates
    • InDesign drop cap
    • InDesign how to add page numbers
    • InDesign resume template
    • InDesign import pdf
    • InDesign table of contents
    • InDesign change page size
    • InDesign book templates
    • InDesign link text boxes
    • InDesign vertical text
    • InDesign Bullet Points
    • InDesign center text vertically
    • InDesign newspaper template
    • InDesign shortcuts
    • InDesign gap tool
    • InDesign paragraph styles
    • InDesign Grid
    • InDesign margins
    • InDesign highlight text
    • InDesign Wrap Text
    • ZBrush ZRemesher
    • Animation Software
    • Principles of Animation
    • 3d Animation Software
    • 3D Modeling Software
    • 3D Software Design
    • 2D Animation Software
    • 10 Quick Tips For Adobe InDesign Users
    • ADOBE FLASH CS6
    • Affinity Photo Brushes
    • Adobe Lightroom For Free
    • Lightroom Background Color
    • Lightroom?Shortcuts
    • Lightroom XMP
    • Lightroom editing
    • Masking Layers in Adobe After Effects
    • Adobe Premiere Pro Plugins
    • Adobe Speedgrade
    • Install Adobe Creative Cloud
    • Install Adobe Premiere Pro
    • What is Adobe Creative Cloud
    • What is Adobe Illustrator
    • Adobe InDesign Templates
    • What is Adobe InDesign
    • Adobe Indesign Uses
    • InDesign Background Color
    • What is Adobe Lightroom
    • What is Adobe Muse
    • What is Adobe Prelude
    • What is Adobe Premiere Pro
    • Careers in 3D
    • Careers in 3D Modeling
    • Careers in 3D Printing
    • Best Editing Software
    • Video Editing Application
    • Video Editing Tools
    • Career In Designing
    • Careers in Game Development
    • 3D Printing Models
    • Adobe Editing Softwares
    • Types of Adobe
    • Types of Illustration
    • What is Graphic Design
    • Best Graphic Design Software
    • Best Photo Editors
    • Game Testing Interview Questions
    • VFX Softwares
    • Unity Scripting
    • Unity Principle of Design
    • Unity JSON
    • Unity webGL
    • Unity 2D
    • Unity 3D Games
    • VFX Companies
    • How To Use Indesign
    • New Features InDesign CS6
    • What is Houdini?
    • Advantages of 3D Printing
    • What is Autodesk
    • Autodesk Character Generator
    • Autodesk Vault
    • Autodesk Viewer
    • Autodesk Navisworks
    • Autodesk Desktop Connector
    • Designers and Architects
    • 2D and 3D Shapes
    • Keyboard Shortcuts for Premiere Pro
    • Unreal Engine Tutorial
    • Best Audio Editors
    • Digital Image Processing
    • What is Motion Graphics
    • What is Digital Design
    • Design Pattern Interview Questions
    • Graphic Design Interview Questions
    • UX designer Interview Questions
    • Is Unreal Engine Free
    • What Is Design Pattern
    • What is VFX
    • What is Audacity
    • What is Unreal Engine
    • What is CATIA
    • What is Blueprint
    • Sony Vegas Pro for Free
    • 3D Graphics Software
    • Best Online Photo Editor
    • Photo Editing App
    • Vector Graphics Editor
    • ArchiCAD
    • ArchiCAD Shortcuts
    • Audacity Keyboard Shortcut
    • Davinci Resolve Shortcuts
    • What is pixel art?
    • Picmonkey Alternatives
    • Adobe Flash Player Alternative
    • Pro tools shortcuts
    • Pro Tools Plugins
    • Architectural Design Software
    • Architectural Design Principles
    • Architecture Design Types
    • Architectural design tools
    • Application of Digital Image Processing
    • Digital Image Processing Fundamentals
    • OpenGL Versions
    • Revit Keyboard Shortcuts
    • Revit plugins
    • Indesign version
    • What is DirectX?
    • DirectX Versions
    • Cinema 4D Plugins
    • Cinema 4d shortcuts
    • Godot Engine
    • Godot tilemap
    • Krita Animation
    • Krita Software
    • Krita Shortcuts
    • Krita eraser
    • Krita brushes
    • Krita Pixel Art
    • Krita Plugins
    • Skencil
    • Fusion 360 Keyboard Shortcuts
    • Anim8or
    • Affinity photo plugins
    • What is Affinity Photo?
    • FL Studio Plugins
    • Vectorworks
    • Architectural Design Elements
  • Inkscape
    • What is Inkscape?
    • Inkscape layers
    • Inkscape Crop
    • Inkscape text
    • Inkscape G-code
    • Inkscape mirror
    • Inkscape rounded rectangle
    • Inkscape EPS
    • Inkscape image to vector
    • Inkscape unlock
    • Inkscape Curved Text
    • Inkscape laser cutting
    • Inkscape background color
    • Inkscape arrow
    • Inkscape vector
    • Inkscape animation
    • Inkscape 3D
    • Inkscape SVG
    • Inkscape Dark Theme
    • Inkscape trace bitmap
    • Inkscape gradient
    • Inkscape Greek Letters
    • Inkscape shadow
    • Inkscape snap to grid
    • Inkscape Fonts
    • Inkscape extensions
    • Inkscape PNG to SVG
    • Inkscape Art
    • Inkscape transparent background
    • Inkscape Alternatives
    • Inkscape Remove Background
    • Inkscape text to path
    • Inkscape logo
  • Figma
    • Figma Libraries
    • Figma fonts
    • Figma Plugins
    • Figma grid
    • Figma Alternatives
  • GIMP
    • What is GIMP
    • GIMP Versions
    • GIMP brushes
    • GIMP line tool
    • GIMP blend tool
    • GIMP clone tool
    • GIMP magic wand tool
    • GIMP 3D Text
    • GIMP healing tool
    • GIMP Layers
    • GIMP Fonts
    • GIMP Toolbox
    • Blur Effect in GIMP
    • GIMP Change Background Color
    • GIMP Floating Selection
    • GIMP?batch processing
    • GIMP Crop
    • GIMP Filters
    • GIMP GMIC
    • GIMP?opacity
    • Animation in GIMP
    • GIMP import image
    • GIMP replace color
    • GIMP text outline
    • GIMP video editing
    • GIMP Alternatives
    • GIMP vector graphics
    • GIMP text shadow
    • GIMP resize image
    • GIMP pixel art
    • GIMP invert colors
    • GIMP GIF
    • GIMP move selection
    • GIMP normal map
    • GIMP remove background
    • GIMP rotate
    • GIMP grid
    • GIMP text effects
    • GIMP erase to transparent
    • GIMP resize layer
    • GIMP Patterns
    • GIMP extensions
    • GIMP blur background

Related Courses

Maya Course

Photoshop course

After Effects Course

SketchUp Woodworking

SketchUp Woodworking

Introduction to SketchUp Woodworking

SketchUp Woodworking is related to designing of 3D model of wood material with all precise dimensions so that woodworkers can prepare a layout for cutting wood for that model. Woodworking is the same as designing another model that we create in this software, but you have to keep some points in your mind during creating that model. For example, if you are making any table, then there are many grooves that the woodworker will cut at the time of creating that table in the sawmill so you can enter the value of that groove and check the fitting in this software. Same as this we can do many things.

How to Perform Woodworking in Sketchup?

For performing woodworking in the right manner, you have a good understanding of the dimensions of the wooden model. Then, I will tell you about woodworking by making an open wooden cupboard.

In default Templates of SketchUp, you will have a template for Woodworking so that you can go with that also. There are two woodworking templates, one is in Inches, and the other is in Millimeters. I will go with the Inches template.

SketchUp Woodworking Output 1

Start Your Free Design Course

3D animation, modelling, simulation, game development & others

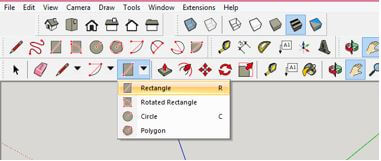
Now, after choosing a template, I will take the Rectangle tool for making the main body of the cupboard. I take rough dimensions, not standard dimensions, for this cupboard. All the dimensions are just for giving you an idea about woodworking.

All in One Design Bundle(280+ Courses, 100+ projects)
AutoCADHoudiniAdobe Premiere ProPhotoshop
SolidworksVFX Visual EffectsCorelDrawUnreal Engine
Price
View Courses
280+ Online Courses | 100+ projects | 2000+ Hours | Verifiable Certificates | Lifetime Access
4.6 (64,868 ratings)

SketchUp Woodworking Output 2

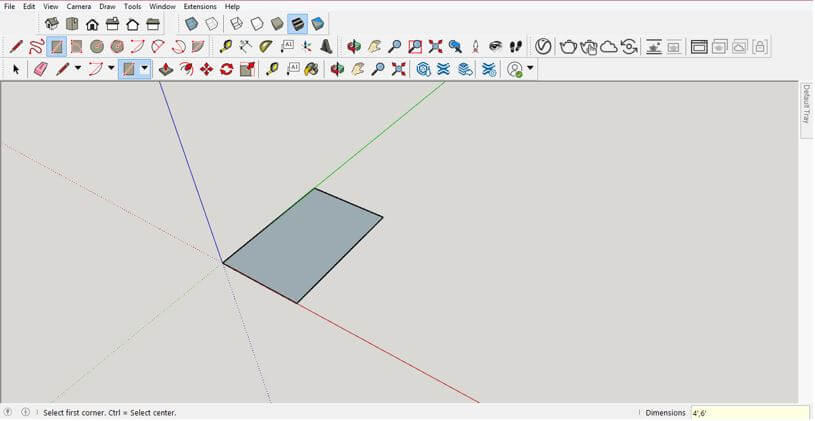
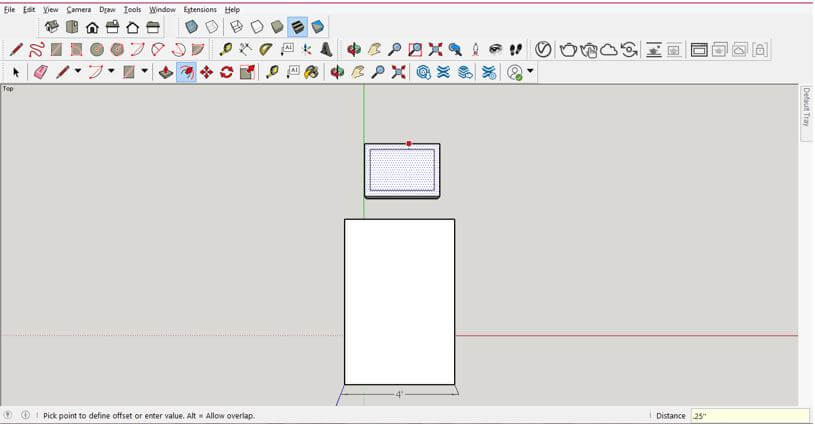
And draw a rectangle of 4’’ x 6’’.

SketchUp Woodworking Output 3

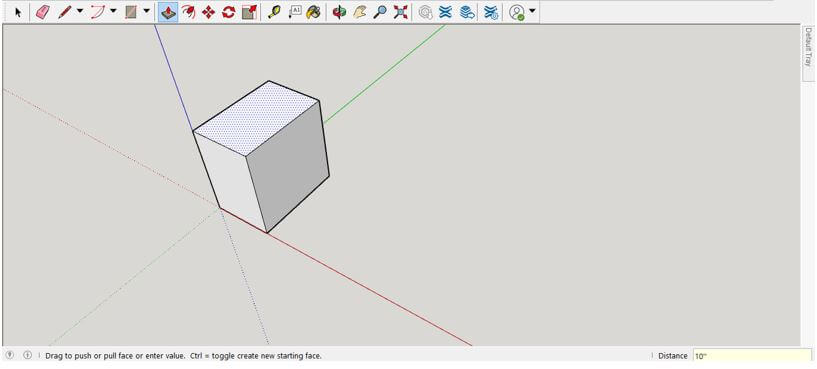
And add some height with the help of the Push/Pull tool. For example, I will add a height of 10’’.

SketchUp Woodworking Output 4

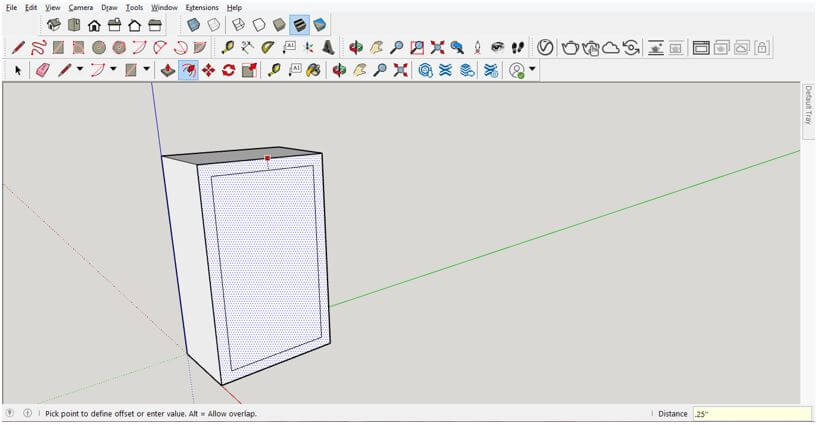
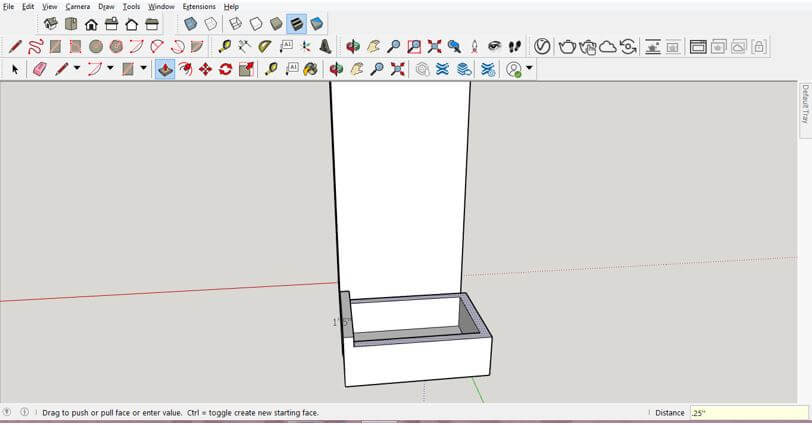
Now come to the front face of this model, take the offset tool, and then click on the edge of this face. I will drag the mouse pointer of this tool inside this face because I want to offset it in the inside direction. I will enter 0.25’’ as offset distance. It will be the thickness of the plywood board from which this cupboard will be made.

SketchUp Woodworking Output 5

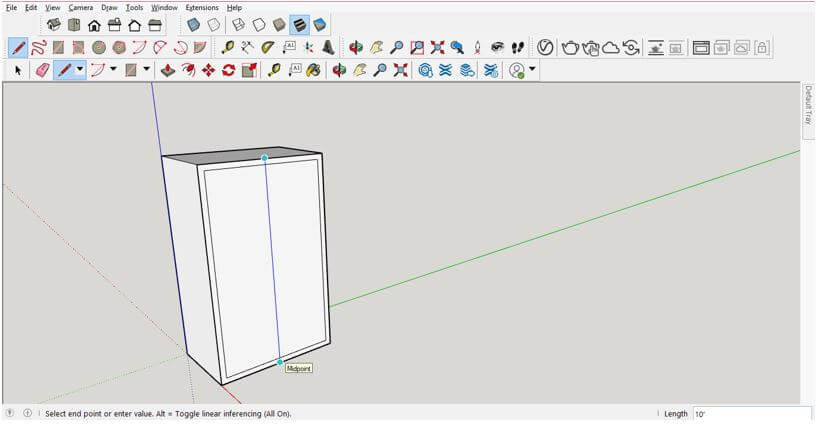
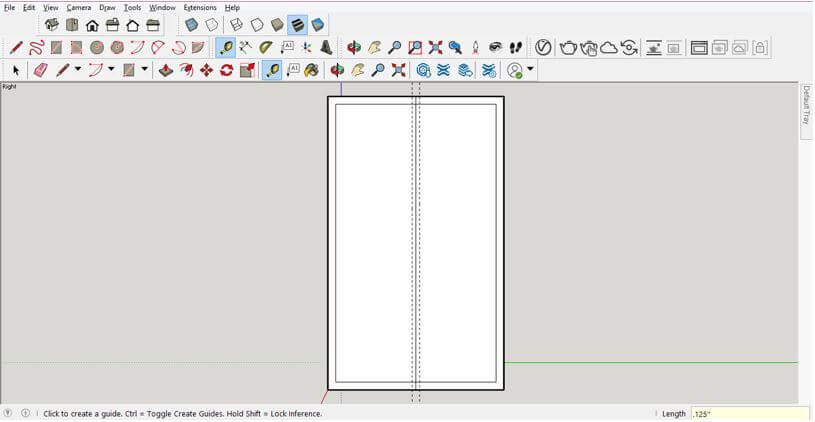
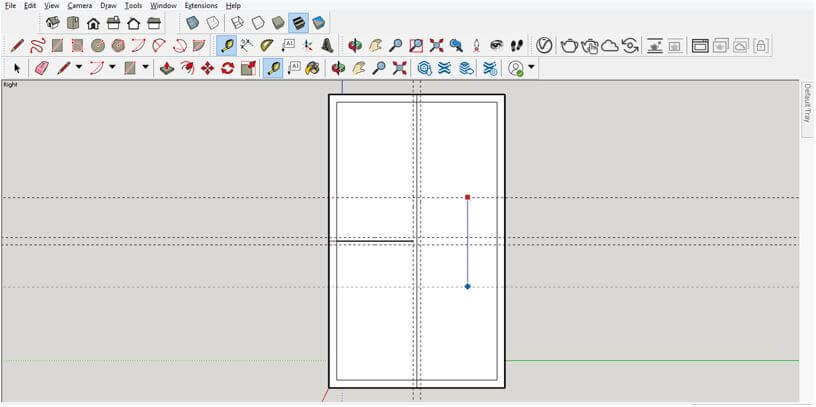
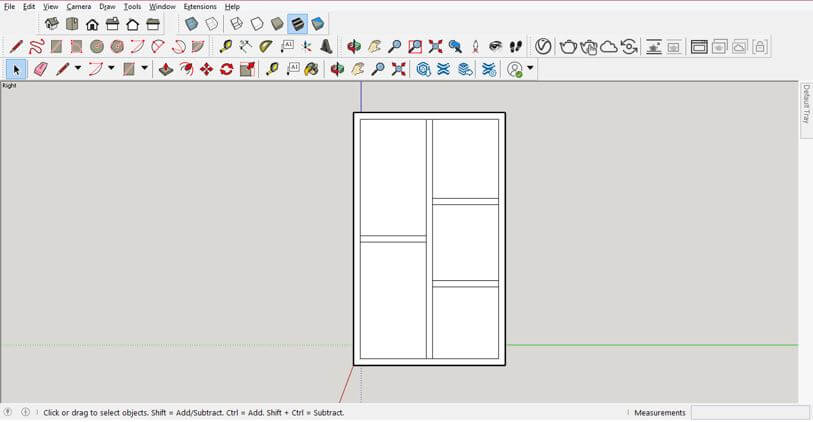
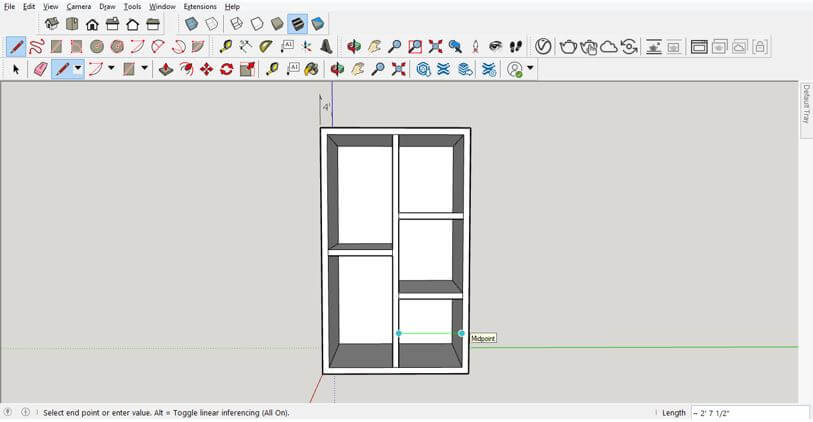
Now take the Line tool and draw a line in the center of this face from upper mid-point to lower mid-point.

SketchUp Woodworking Output 6

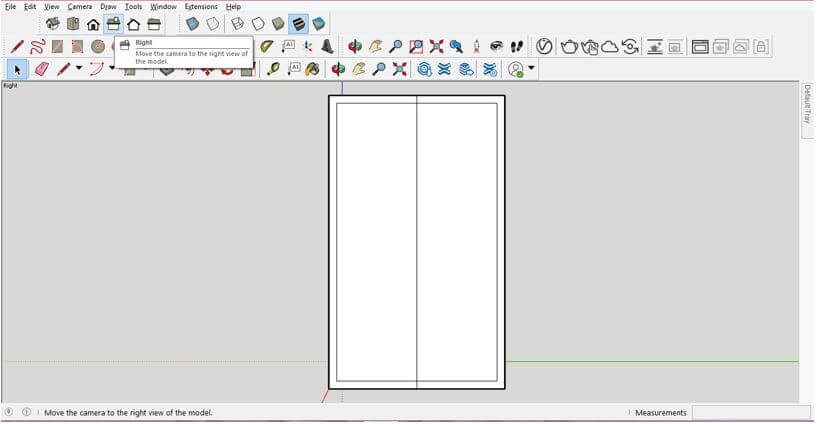
Now I will click on the right view icon for the right view, and this will show me the front face of this cupboard.

SketchUp Woodworking Output 7

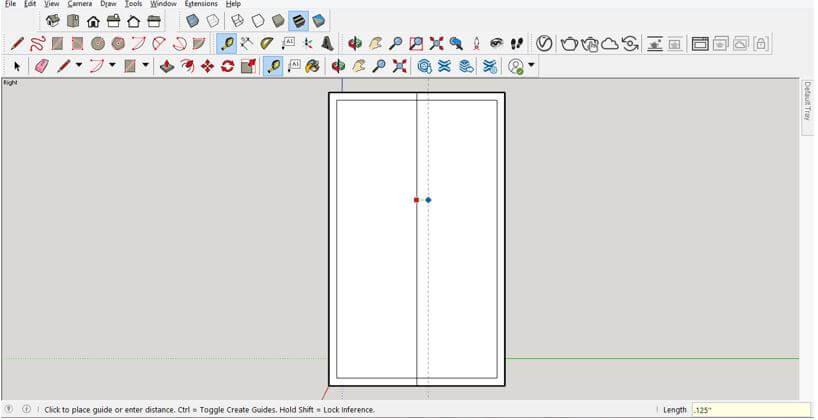
Now take the Tape Measurement tool and click on this center line, then drag the mouse cursor in the right direction and enter the value as 0.125’’, which is half of .25’’.

SketchUp Woodworking Output 8

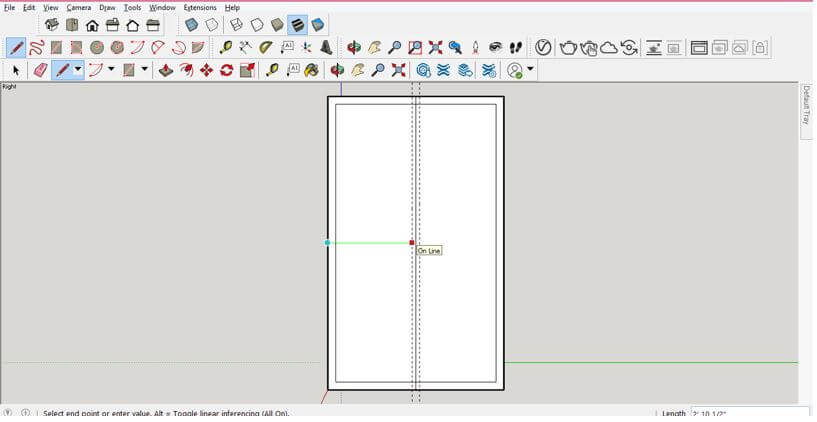
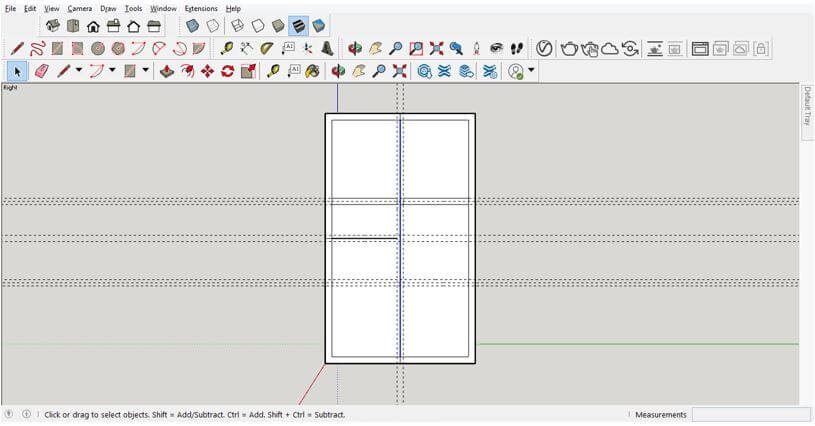
I will do the same on the left side of this centerline. I am drawing these guidelines because I want to create a plywood board of 0.25’’ thickness at the center of this cupboard.

SketchUp Woodworking Output 9

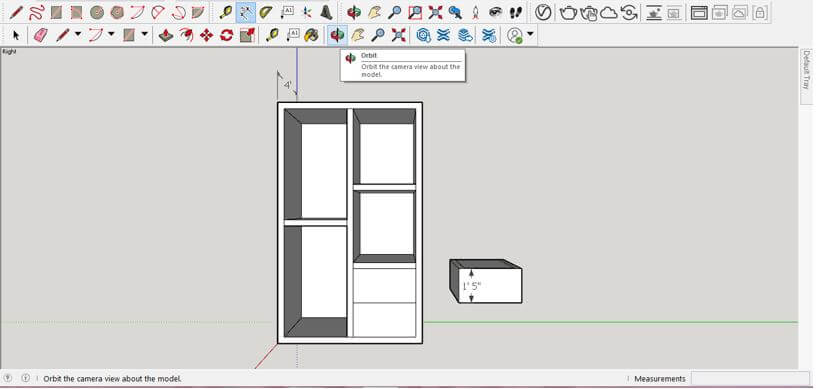
Now I want to divide the left section of this cupboard into two sections so that I will draw the line at the center of this section.

SketchUp Woodworking Output 10

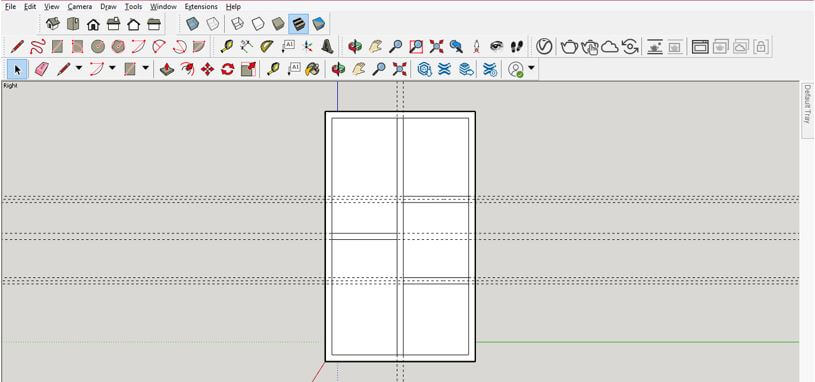
And draw two guidelines so that I can create a 0.25’’ thickness board here also.

SketchUp Woodworking Output 11

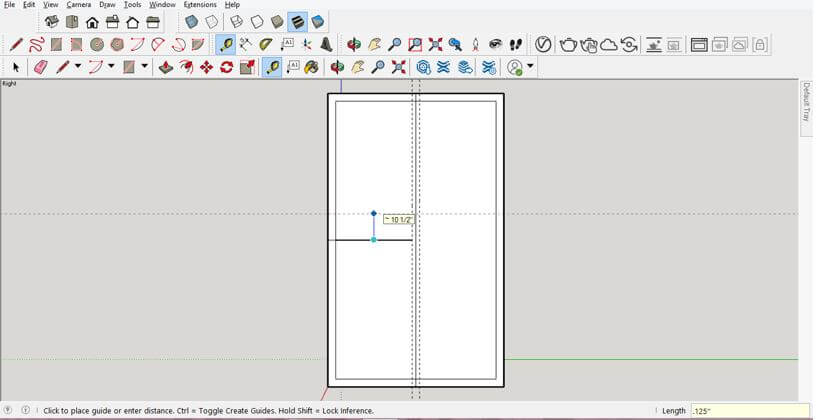
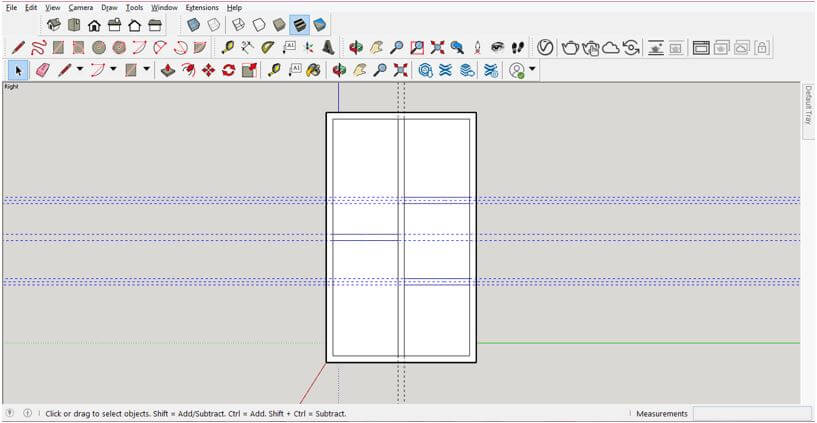
I will divide the right side section into three parts. You can see the height of this cupboard is 10’’ and if we leave the thickness of plywood board from both sides that is 0.25’’ + 0.25’’ = 0.50’’ then it will be 9.5’’ left so you can divide this left dimension into three sections that are 9.5/3 = 3.167. So I will take a tape measurement tool and add a guideline at 3.167 distances.

SketchUp Woodworking Output 12

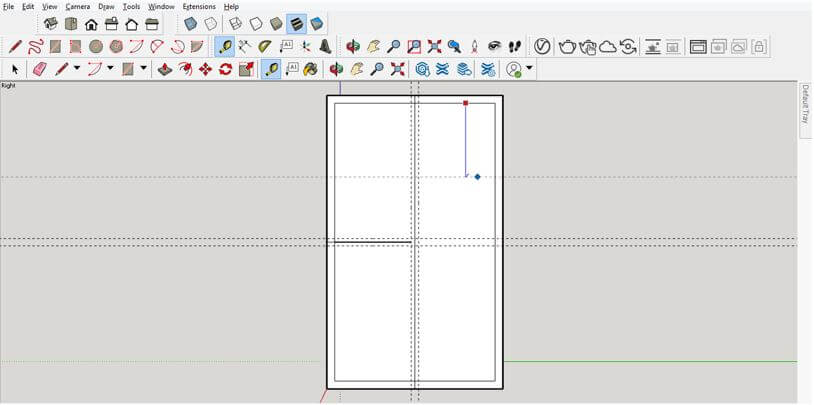
Repeat it from the guideline for the next section.

SketchUp Woodworking Output 13

Now delete all the lines which we have drawn with the line tool.

SketchUp Woodworking Output 14

And with the help of a line tool, draw plywood board thickness like this which divides this cupboard into sections.

SketchUp Woodworking Output 15

Now select all guidelines and delete them. Then, if you drag the mouse cursor from right to left, it will select the whole object you drag it.

SketchUp Woodworking Output 16

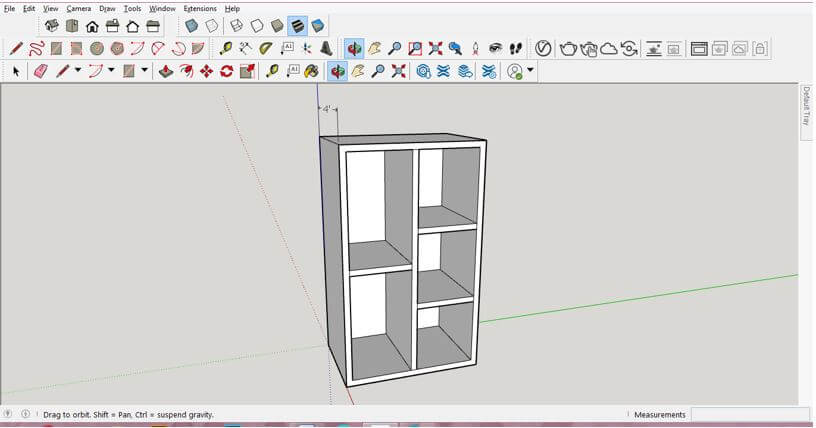
You can see our sections are ready now.

SketchUp Woodworking Output 17

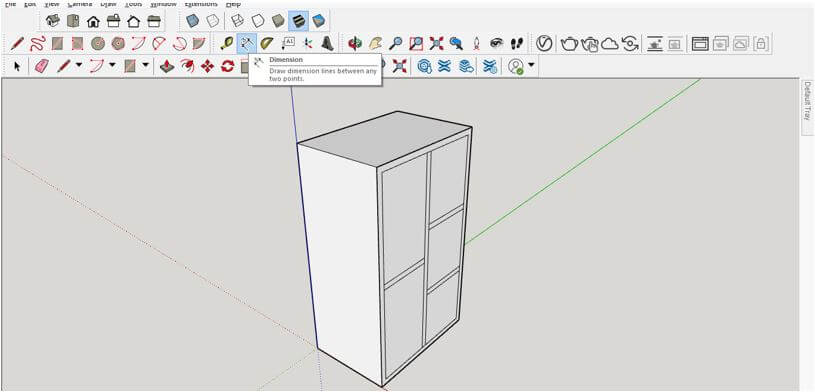
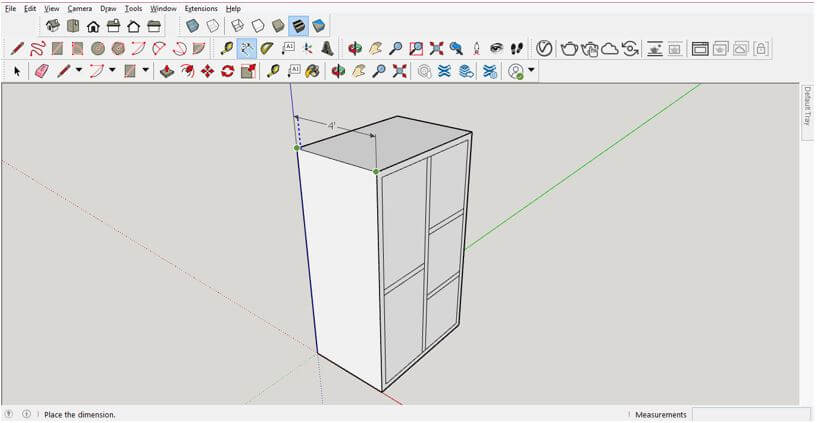
If you want to remember the dimensions of your model, then you can mention dimensions on your model with the Dimensions tool. Just take this tool from the tool panel.

Dimensions tool Output 18

And first, click on the start point of dimension, then endpoint, and drag it in an upward direction for seeing it properly.

SketchUp Woodworking Output 19

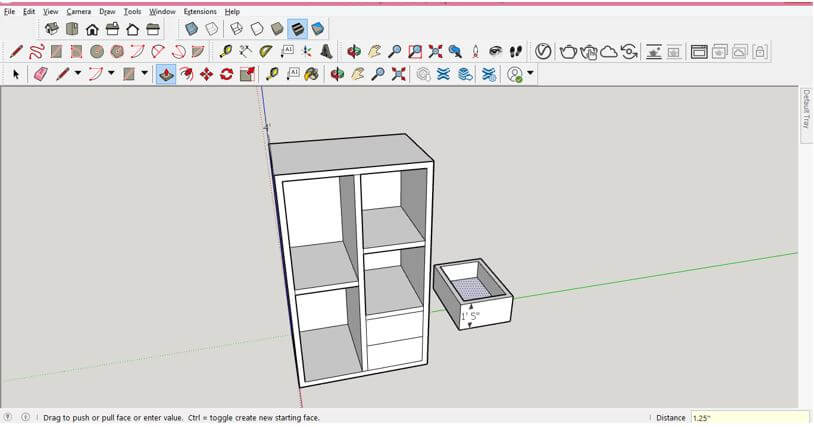
Now I will take the Push/Pull tool and drag this section in an inward direction and enter the pull value as 4’’- 0.25’’ = 3.75’’ for having a hollow section in this cupboard.

SketchUp Woodworking Output 20

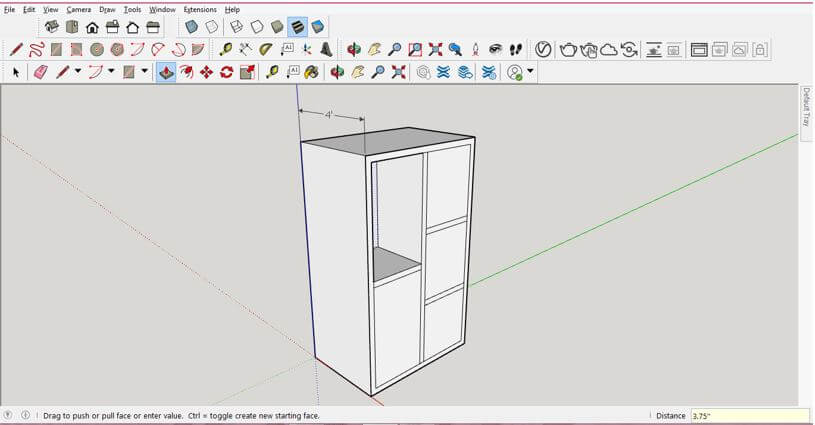
I will do the same for all sections.

SketchUp Woodworking Output 21

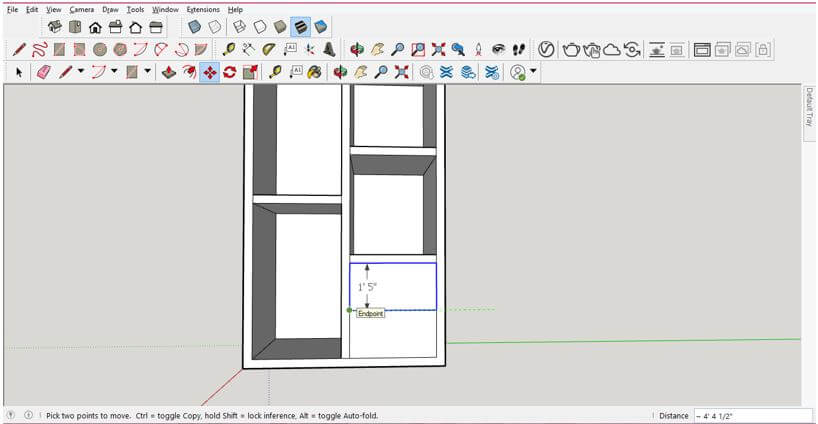
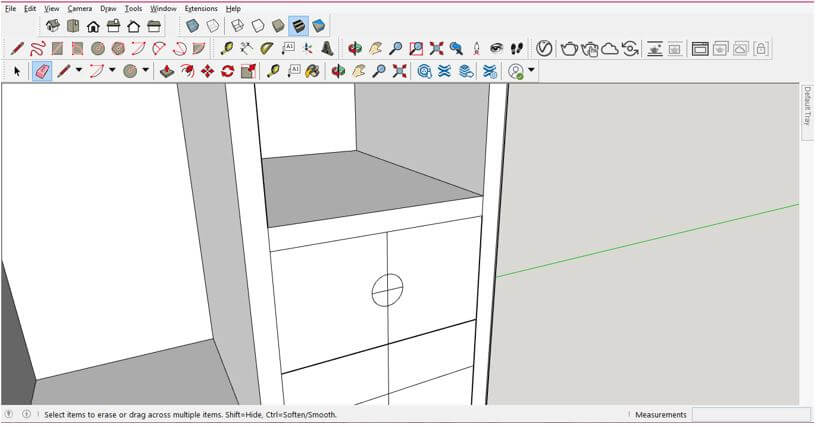
Now I want to make two drawers here in this section so that I will divide this section into two sections with the help of the line tool.

Line tool Output 22

Now I will move the upper rectangle like this.

SketchUp Woodworking Output 23

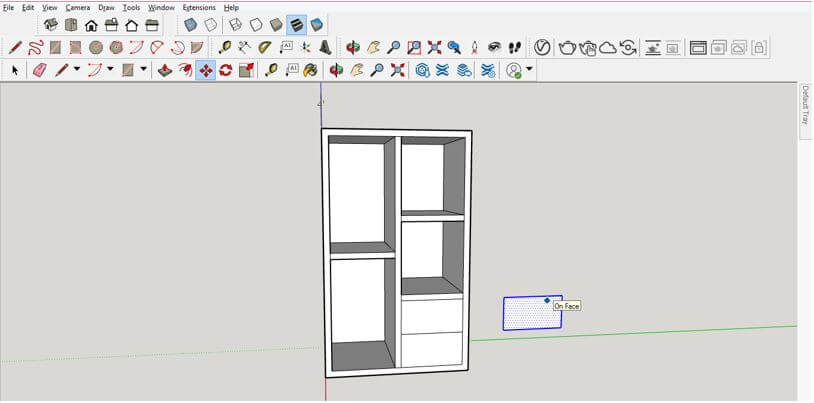
And extrude it at 3.75’’.

SketchUp Woodworking Output 24

Now come to Top view by clicking on the Top view icon.

Top view icon Output 25

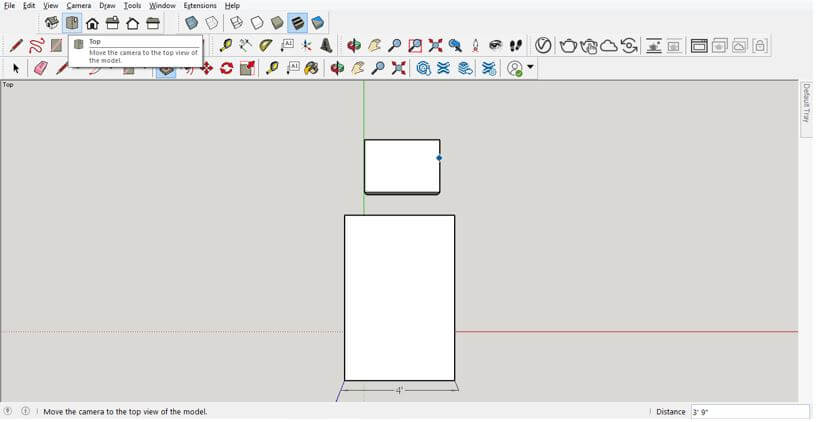
And take the offset tool for offsetting its upper face at the distance of 0.25’’.

SketchUp Woodworking Output 26

You can check the height of this draw with the dimensions tool.

Dimensions tool Output 27

Now I will add depth to this drawer with a push/pull tool according to dimensions.

Push/pull tool Output 28

Then I will add lines here in the top face of the draw.

SketchUp Woodworking Output 29

Then pull it in the downward direction by entering a downward height as 0.25’’.

Output 30

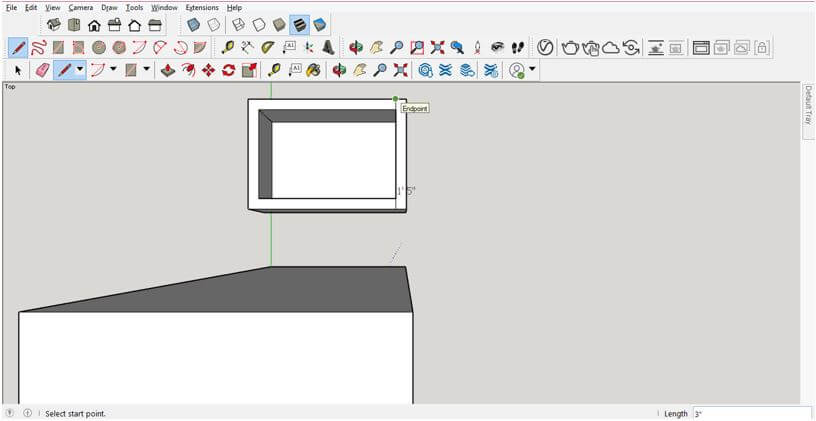
Now move it here to the hollow section of this cupboard. Before moving it, make it a group.

Output 31

I will find min point of it by drawing lines like this.

Output 32

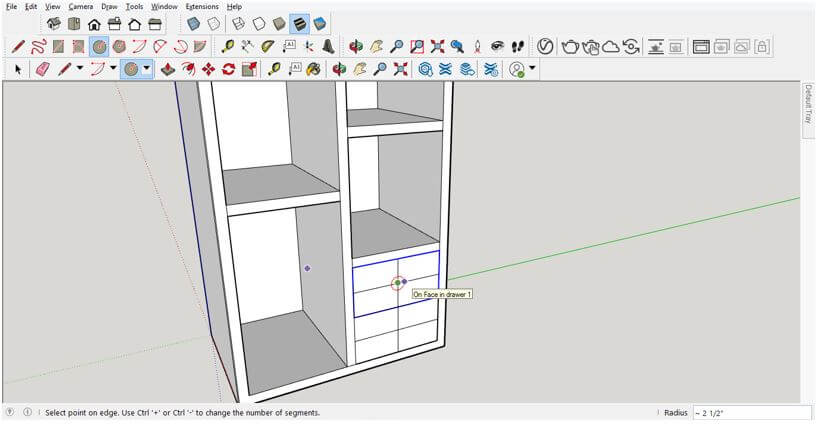
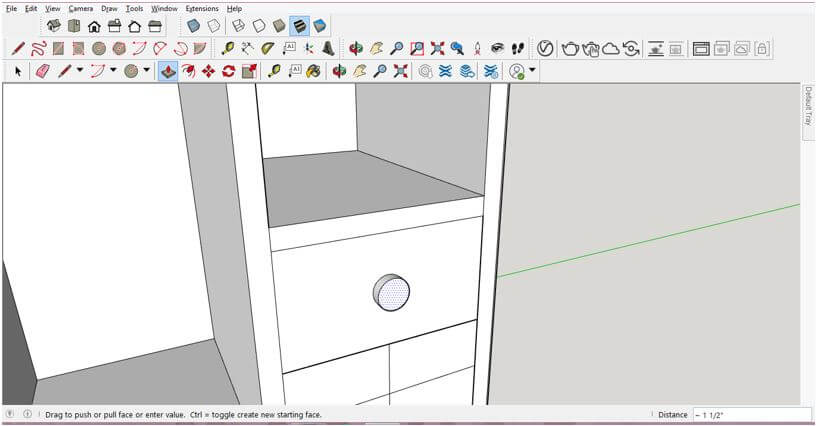
And with the help of the Circle tool, I will draw a circle in its center.

Output 33

Remove all the lines one by one with the eraser tool.

Output 34

And extrude it at some height so that it becomes the handle of this drawer.

Output 35

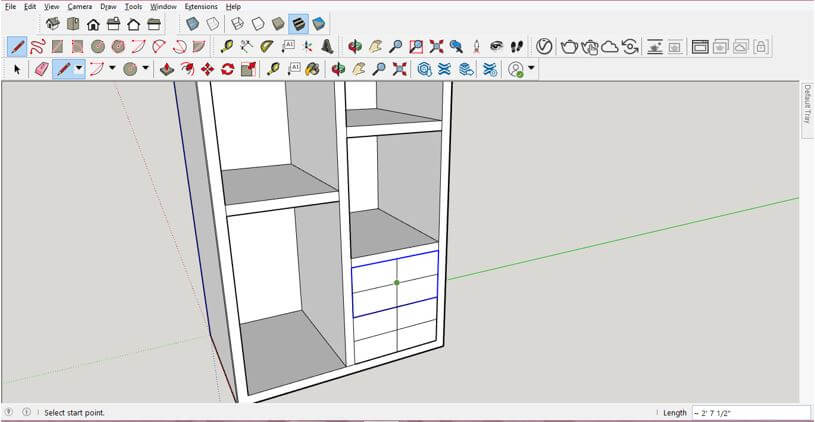
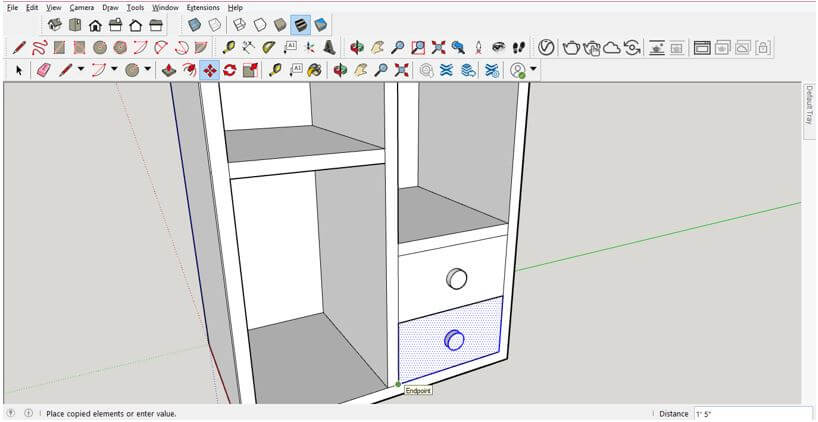
Now select draw and this handle by holding the shift key of the keyboard. Make sure you have grouped them separately before doing this. Now make them as a component. Next, do the same for each separate part of this cupboard.

Output 36

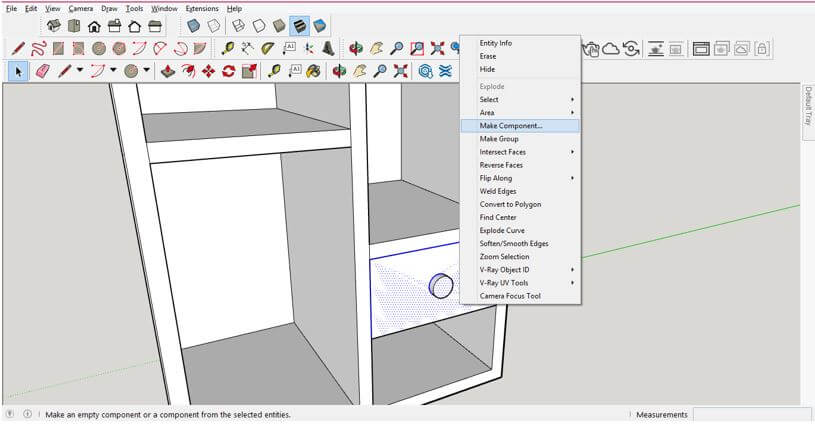
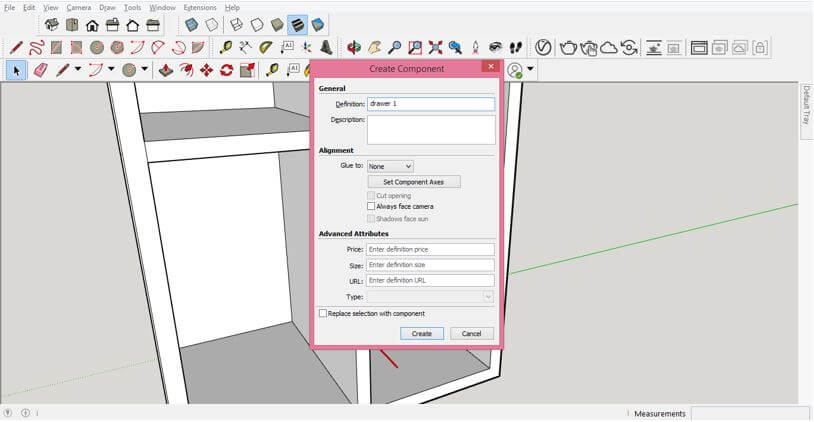
I will name it drawer 1.

Output 37

Now move it in a downward direction for making a copy of it. Hold Ctrl key during moving for making a copy.

Output 38

This way, you can create an open cupboard with all dimensions.

Output 39

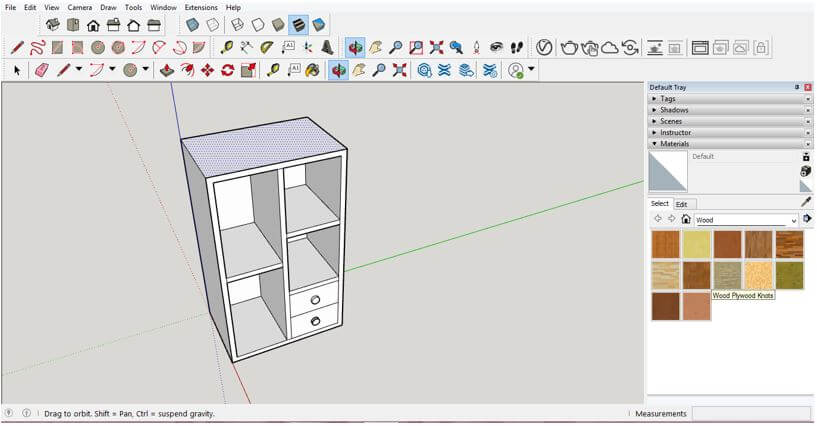
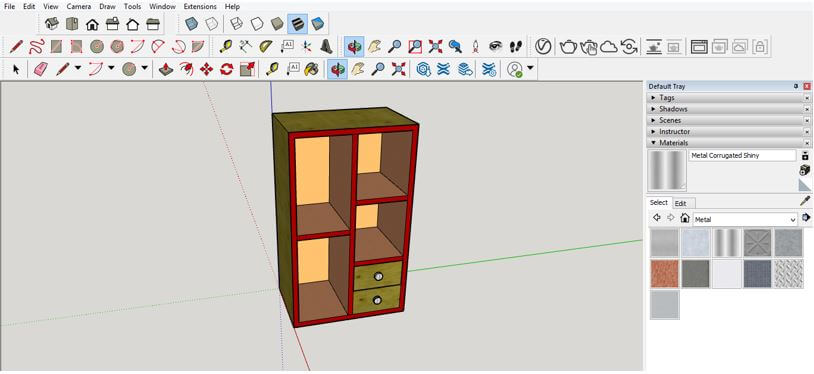
You can also assign wood materials to different sections of the wooden models.

Output 40

Conclusion

As I have given you an overview of woodwork, you can create your own design. You just have to follow the appropriate dimensions of your desired model to easily create a layout before cutting wood for that model. After creating your wooden model, you can create Cutlist for that, and it will prepare the cutting layout automatically for you.

Recommended Articles

This is a guide to SketchUp Woodworking. Here we discuss How to perform Woodworking in SketchUp. You may also look at the following articles to learn more –

  1. SketchUp Alternative
  2. SketchUp Rotate
  3. SketchUp AutoCAD
  4. 3D Text Effect in Photoshop
Popular Course in this category
Maya Training (10 Courses, 7+ Projects)
  10 Online Courses |  7 Hands-on Projects |  100+ Hours |  Verifiable Certificate of Completion
4.7
Price

View Course

Related Courses

Photoshop Training (10 Courses, 12+ Projects)4.9
After Effects Training (3 Courses, 3+ Projects)4.8
0 Shares
Share
Tweet
Share
Primary Sidebar
Footer
About Us
  • Blog
  • Who is EDUCBA?
  • Sign Up
  • Live Classes
  • Corporate Training
  • Certificate from Top Institutions
  • Contact Us
  • Verifiable Certificate
  • Reviews
  • Terms and Conditions
  • Privacy Policy
  •  
Apps
  • iPhone & iPad
  • Android
Resources
  • Free Courses
  • Photoshop Tutorial
  • 3ds Max Tutorial
  • All Tutorials
Certification Courses
  • All Courses
  • Design Course - All in One Bundle
  • Photoshop Course
  • Maya Course
  • Unreal Engine Course
  • Unity Course
  • DaVinci Resolve Course
  • Pro Tools Course

ISO 10004:2018 & ISO 9001:2015 Certified

© 2022 - EDUCBA. ALL RIGHTS RESERVED. THE CERTIFICATION NAMES ARE THE TRADEMARKS OF THEIR RESPECTIVE OWNERS.

EDUCBA
Free Design Course

Banner Creation, Object Selection, Sky Replacement, Advance Filters & others

*Please provide your correct email id. Login details for this Free course will be emailed to you

By signing up, you agree to our Terms of Use and Privacy Policy.

EDUCBA Login

Forgot Password?

By signing up, you agree to our Terms of Use and Privacy Policy.

EDUCBA
Free Design Course

3D animation, modelling, simulation, game development & others

*Please provide your correct email id. Login details for this Free course will be emailed to you

By signing up, you agree to our Terms of Use and Privacy Policy.

EDUCBA

*Please provide your correct email id. Login details for this Free course will be emailed to you

By signing up, you agree to our Terms of Use and Privacy Policy.

Let’s Get Started

By signing up, you agree to our Terms of Use and Privacy Policy.

This website or its third-party tools use cookies, which are necessary to its functioning and required to achieve the purposes illustrated in the cookie policy. By closing this banner, scrolling this page, clicking a link or continuing to browse otherwise, you agree to our Privacy Policy

Loading . . .
Quiz
Question:

Answer:

Quiz Result
Total QuestionsCorrect AnswersWrong AnswersPercentage

Explore 1000+ varieties of Mock tests View more