Introduction to SketchUp joint push-pull
SketchUp Joint Push/Pull is a plugin or extension for doing push/pull of surfaces in an advanced manner for making them 3D model in SketchUp. With these joint push/pull plugins we can create complex shapes in SketchUp very quickly and easily. You can find this plugin with the name Fredo 6 Joint Push Pull-in Sketchucation website by registering there as a free member login. In this extension, you will find more similar tools with Joint push/pull tools such as Round Push/Pull, Vector Push/Pull, and so on. Here we will first tell you how you can install the Joint Push/Pull plugin for starting working with it.
How to Install Fredo 6 Joint Push/Pull plugin?
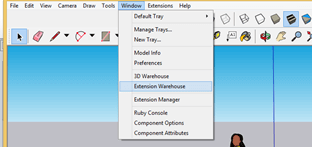
Before telling you how you can install this plugin we would like to tell you that there is an Extension Warehouse in the Window menu of Sketchup where you can find extensions for performing different types of tasks in this software. But you will not find Fredo 6 Joint Push/Pull plugin here. So let us find where we can find it.
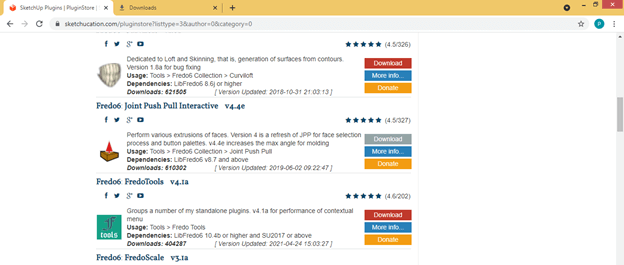
Go to the official website of Sketchucation which is www.Sketchucation.com and here search for Fredo 6 Joint Push Pull and you will find this Fredo 6 Joint Push Pull tool. You can download it free of cost from here if you have a login id on this website. If you haven’t then you can register here first.
After downloading it go to the Window menu of the menu bar and click on the Extension Manager option of the drop-down list of it.
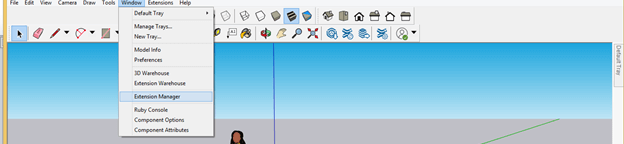
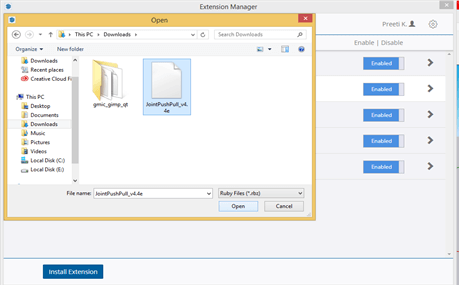
Now Click on the Install Extension button of the Extension Manager dialog box then choose the .rbz downloaded file of the Joint Push Pull plugin from its saved location in the opened new dialog box.
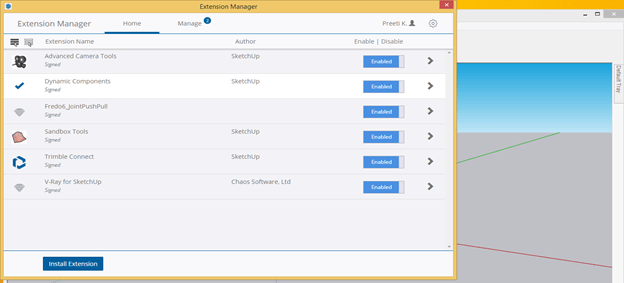
Now it will install like this. Make sure it is enabled in this extension manager dialog box.
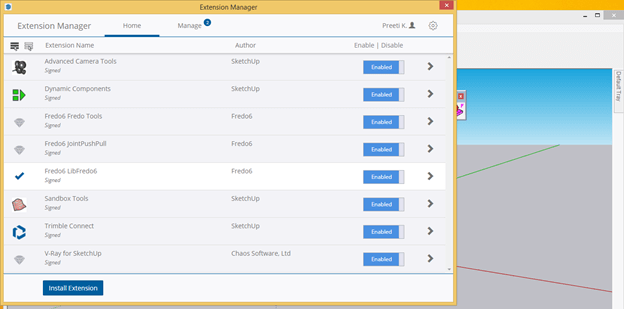
To start working with the Fredo Joint Push Pull plugin, you have to install Fredo 6 Lib Fredo6 extension also which you can download from the same website and install it in the same way as we install the Joint Push Pull plugin.
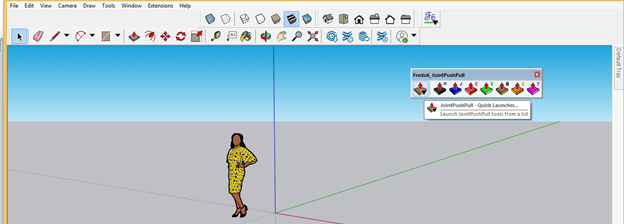
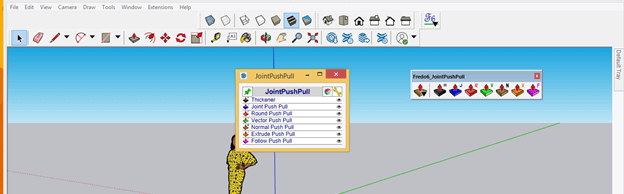
After installing both software restart SketchUp software and the Joint Push Pull panel will come on the working screen like this.

The first tool of this panel is Joint Push Pull Quick Launcher.
You will find all the tools as well as parameters of this panel in the dialog box of this Quick Launcher tool. Before you go through this quick launcher you have to know about the basic tools of the panel of Joint Push Pull tool which we will discuss now. So let us get started.
How to work with the Joint Push Pull tool in SketchUp?
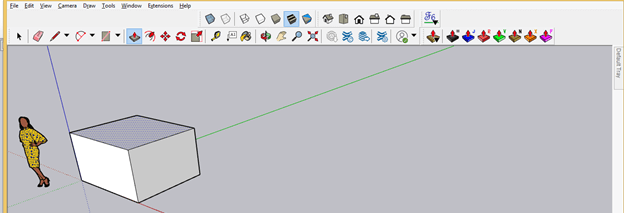
We will place this panel in the toolbar area of this software. You can place it anywhere on the working screen as per your suitability.

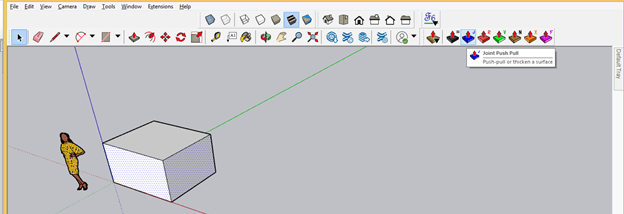
Now we will make a block like this with the help of the Push/Pull tool of SketchUp.
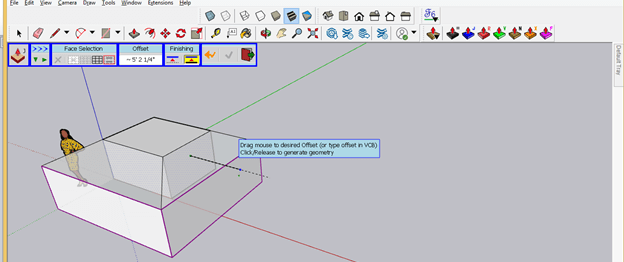
With the Joint Push/Pull tool you can push-pull two or more surfaces at one time. Let’s take a look at it. we will select these two surfaces of this block with the Select tool of the tool panel then take the Joint Push Pull tool from its panel.
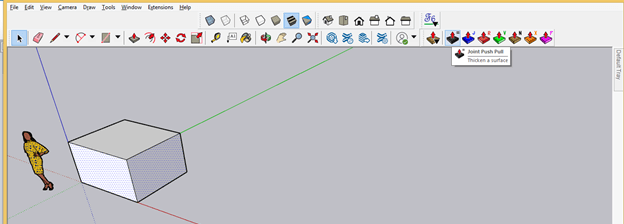
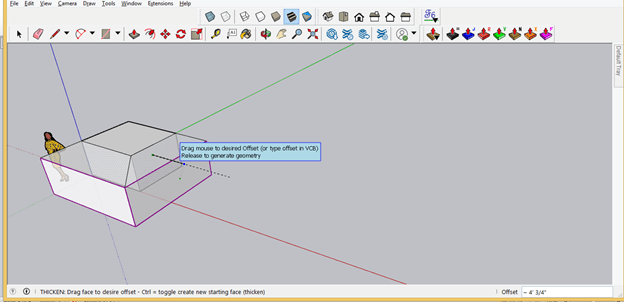
And you can see that both of the surfaces extruding like this in their own direction. You can enter the exact value for extruding these two surfaces in the Measurement box of this software. This was Thicken tool that means you can use it for providing thickness to any surface.
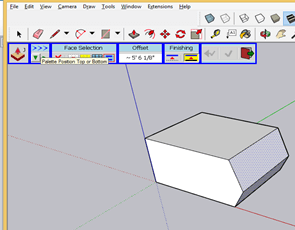
Now next is the Joint Push Pull tool which you can recognize by the icon of the Push/Pull tool with a J letter on its top.
Now when you extrude the same surface with this tool then you will have a parameters box also. With this tool, you can pull this surface also.
With this Palette Position button, you can move this panel on the working screen according to your suitability.
There are some options in the Face Selection tab of this parameters box of this Joint tool. First, one is Face by Face.
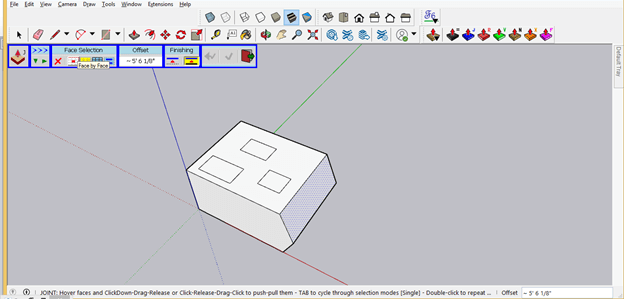
If this selection button is on then you can select each face on any surface one by one. It may be on any surface whether it is on a round surface or complex surface.
The next option of this tab is Surface so let us enable it by clicking on it.
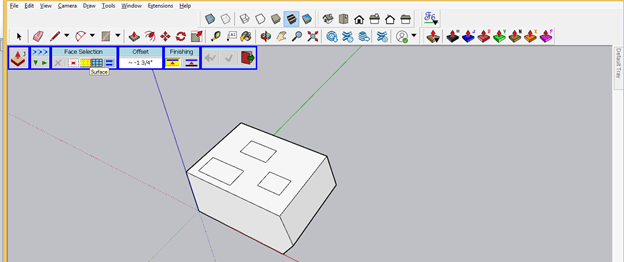
Now it will select the whole surface no matter how many sections are there on that surface and when you push-pull it will extrude those sections also with that surface.
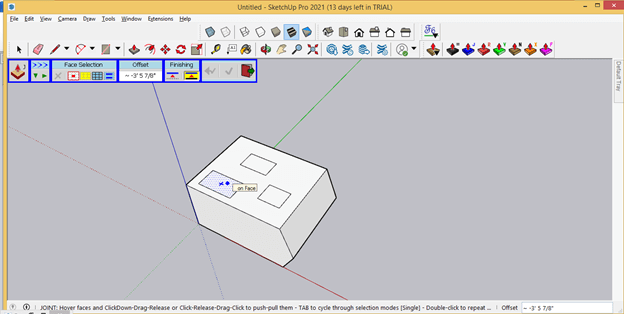
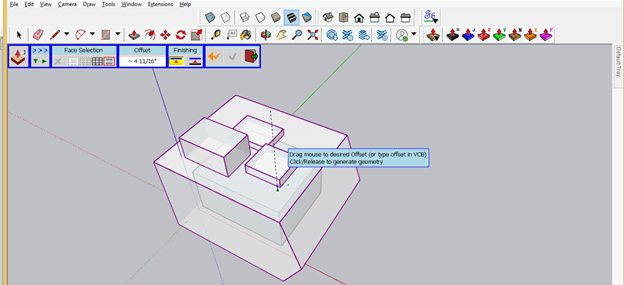
The next option is face selection by All Connected Faces so we will enable this now.
Now it will extrude all the sections along with the surface on which they are lying.
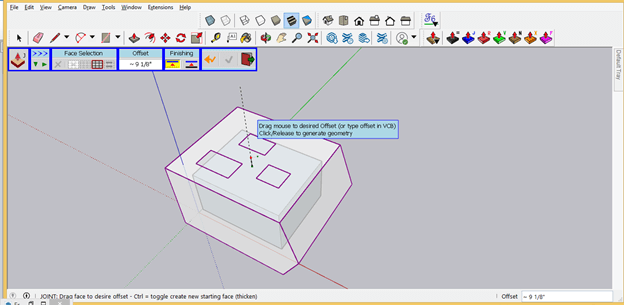
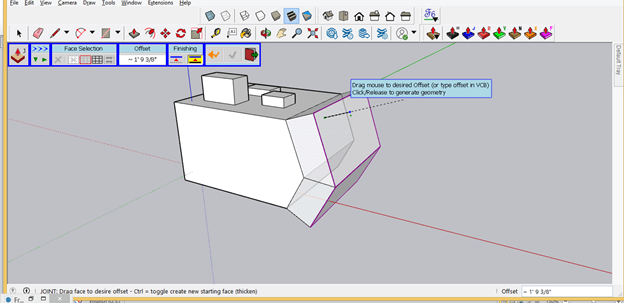
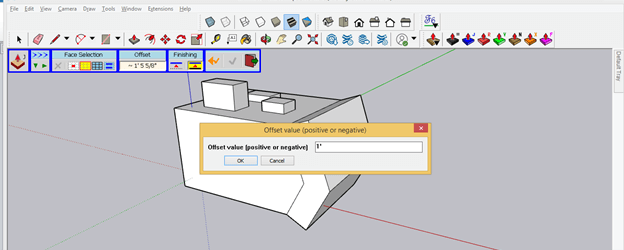
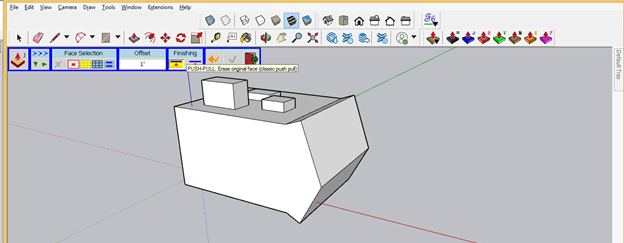
You can enter the value of the offset distance of extruding surface and for that extrude your desire surfaces and make click then click on value box of Offset tab of this parameters panel of Joint Push Pull tool.
A dialog box will open in which you can enter your desired value like this.
And it will offset it at your entered value.

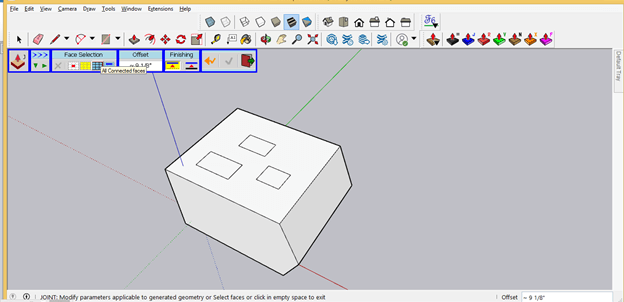
If you want you can merge this offset surface with the original face and for that, you can click on the ‘Push-Pull- Erase Original face button.
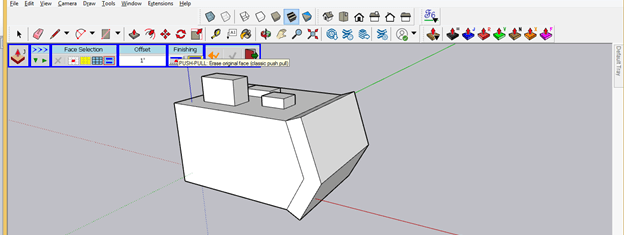
And it will erase the original face on which we have been extruded this surface and it will become one object.
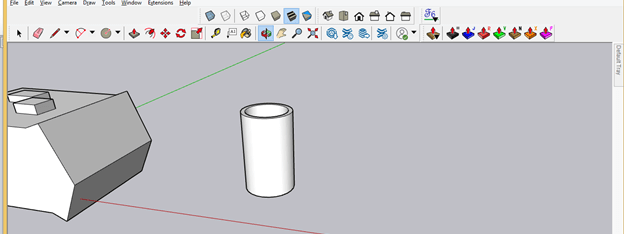
Now let us take a cylindrical object like this and we cannot push-pull its outer rounded surface with the help of the Push/Pull tool of this software.
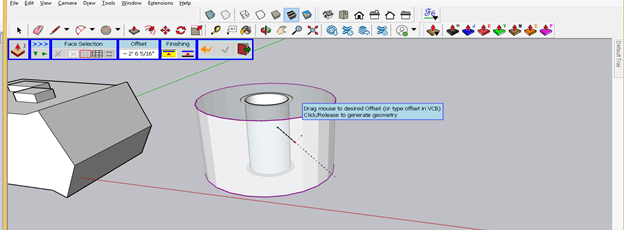
But with Joint Push Pusll you can extrude this surface too and for that just select the surface of this cylindrical object then take the Joint Push/Pull tool and it will extrude this object like this.
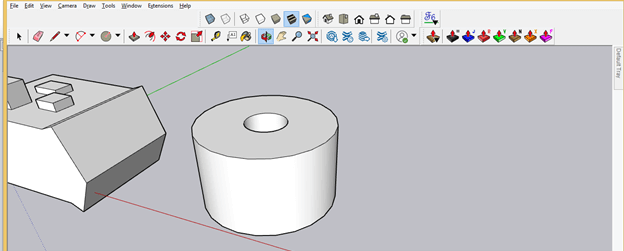
And it will become a rounded 3D object.
There are other tools in this plugin that you can learn for making complex designs very quickly.
Conclusion
Here in this article, we explained to you all possible aspects of the Joint Push Pull tool and by going through this you can understand the basic working methodology of this extension, and once you have command on this tool you can easily use other tools as well as parameters of its panel.
Recommended Articles
This is a guide to SketchUp joint push-pull. Here we discuss the basic working methodology of this extension step by step in detail. You may also have a look at the following articles to learn more –
