EDUCBA

EDUCBA

MENUMENU
  • Free Tutorials
  • Free Courses
  • Certification Courses
  • 280+ Courses All in One Bundle
  • Login

Sharpen Tool in Photoshop

Home » Design » Design Tutorials » Photoshop Tutorial » Sharpen Tool in Photoshop

Before and after image of Sharp tool

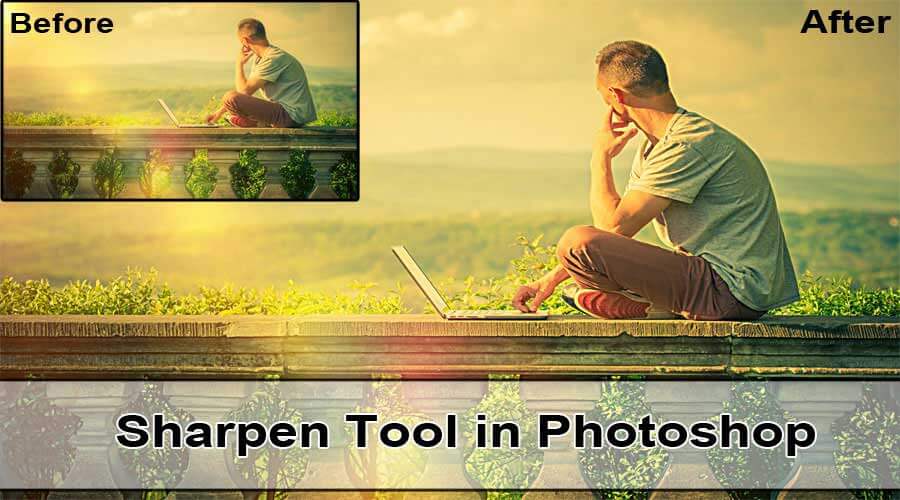
Introduction to Sharpen Tool in Photoshop

Photoshop is excellent software used for multiple images and video editing purposes with all finest tools with it, today we are going to see the use of Sharpen tool in Photoshop for editing images to enhance the degree of sharpness for visual appearance can be changed to high and low which depends on the quality of the image the more sharpen we do there is a possibility of blurred the image so be very sure while making the sharpen reputation on the same image.

The sharpen tool has in adding a smart sharpen filter to the image using a mask layer or an extra layer to differentiate the edit done on the image. We can use all types of brushes with adjustments in size and shape. There are various modes of sharpening the image which personal depends on the requirement for sample take an image to try different modes on an image with different layers and select the best suitable to your image as required.

Start Your Free Design Course

3D animation, modelling, simulation, game development & others

The edges of the color enhancement will be done using this tool with different preset configurations. The correct amount of sharpening movement on the picture will be unnoticeable after the edit over moving the brush makes it look odd or even unrealistic which is not entertained professionally. We can use sharpen using a direct tool in Photoshop or also by sharpening filters both have their own way of performance we insist users to try both of them and use whichever is flexible for them as per project demand. Sharpen tool has a few more configurations technically which will be discussed in the below-using content of the tool.

Photoshop has all the needs of images, graphics, and enhancing the richness of images with multiple tools, properties, and effects. Out of with sharpen tool is one such tool. Let’s see how to use it and discuss its available attributions setting to set before applying it on the image. There are few steps by step process to enhance the image sharping which are listed below in a proper manner which includes smart managing of the image sharpness as required for the project. We will be using the mask, duplicating, and working on multiple layers till we get our output.

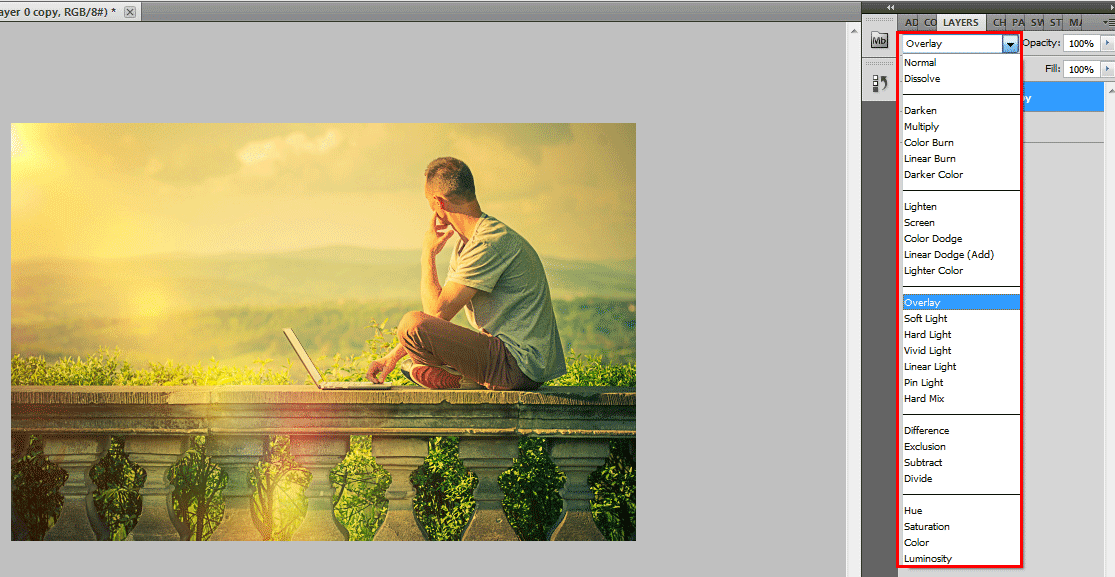
There are different technical aspects such as Normal, Darken, Lighten, Hue, Saturation, Colour, and Luminosity. All this has their own purposes and professionals are familiar with them for beginners must try all of these on different images and test the best suitable for their needs. Next is smart sharpening options from filters which takes control of the sharpness of the image, it has basic and advanced settings and more, Un-sharp mask can be used to reduce sharpness helps in quickly changing Amount, Radius and Threshold controls of sharpness image there are few more changes such as colors, brushes, and a few other technical tools on Photoshop.

How to use the Sharpen Tool?

Photoshop has a sharpened option to slightly add a raw and sharp look to the image which changes the image from classic feel to some sharp and interesting aggressive shade on the image which makes the image interesting and visually good.

Steps to handle the Sharpen Tool

The step by step processes for handling the sharpening effect in Photoshop is below.

Step #1

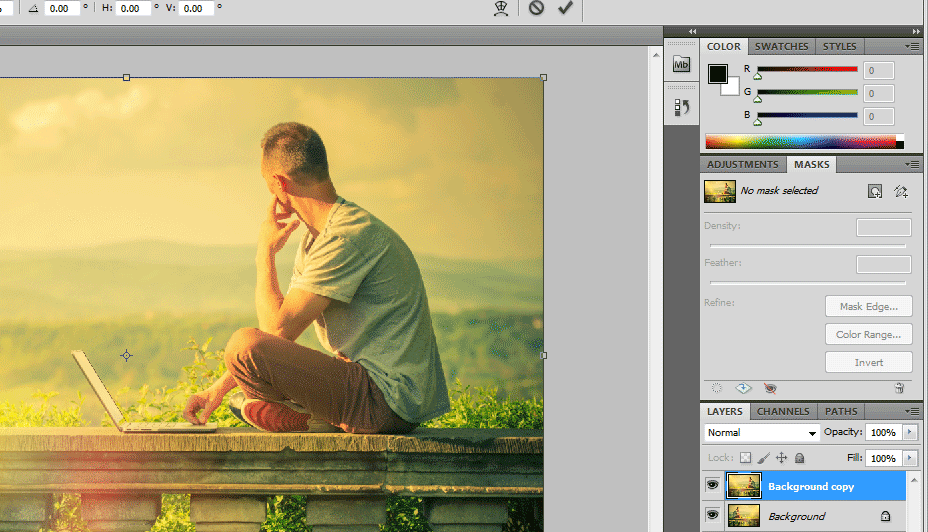
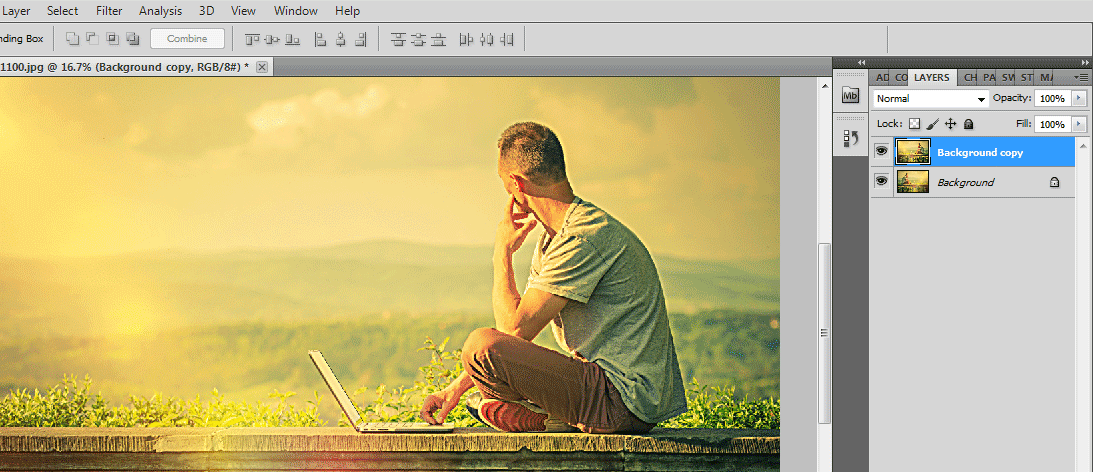
Double click to open Photoshop or right-click on Photoshop icon and select run as administrator let the application launch once the application is open import or open the image which needs to be sharpened and right-click on the image and select duplicate, we can see the image in two layers that mean we have one original loaded image and the new one the duplicate copy (shortcut Ctrl+J) of the same image. Right-click on the newly created layer and select Convert to a smart object which keeps the original image safe and helps in applying the sharpness effects and filters with the best results.

Popular Course in this category
Photoshop Training (9 Courses, 12+ Projects)9 Online Courses | 12 Hands-on Projects | 78+ Hours | Verifiable Certificate of Completion | Lifetime Access
4.9 (7,062 ratings)
Course Price

View Course

Related Courses
Adobe Premiere Pro Tutorial (2 Courses, 7+ Projects)All in One Design Bundle (280+ Courses, 100+ projects)

sharpen tool in photoshop layer

Step #2

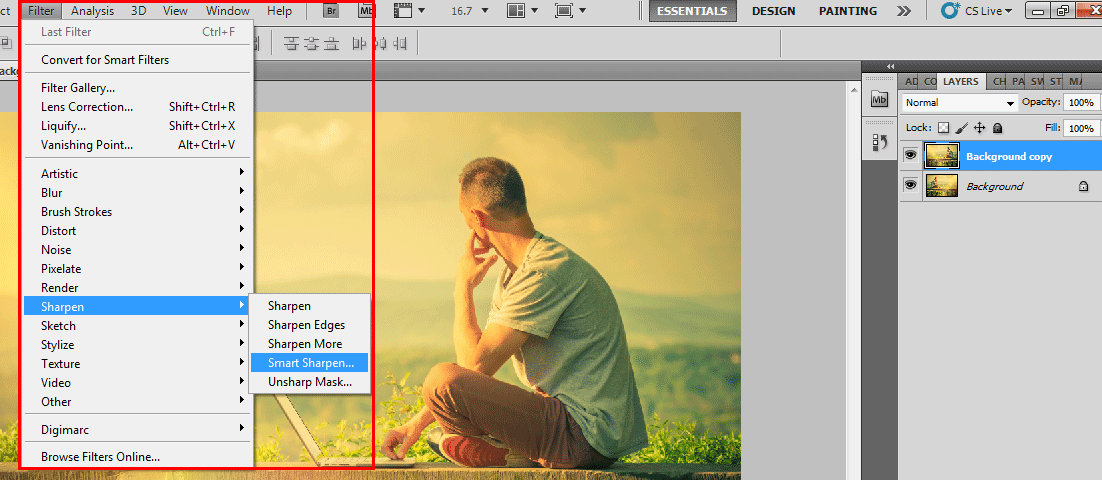
Click on Filters from the top menu bar and select Sharpen we can see an arrow that contains multiple sharpening options available select smart sharpness from them.

sharpen tool in photoshop(smart sharp)

Step #3

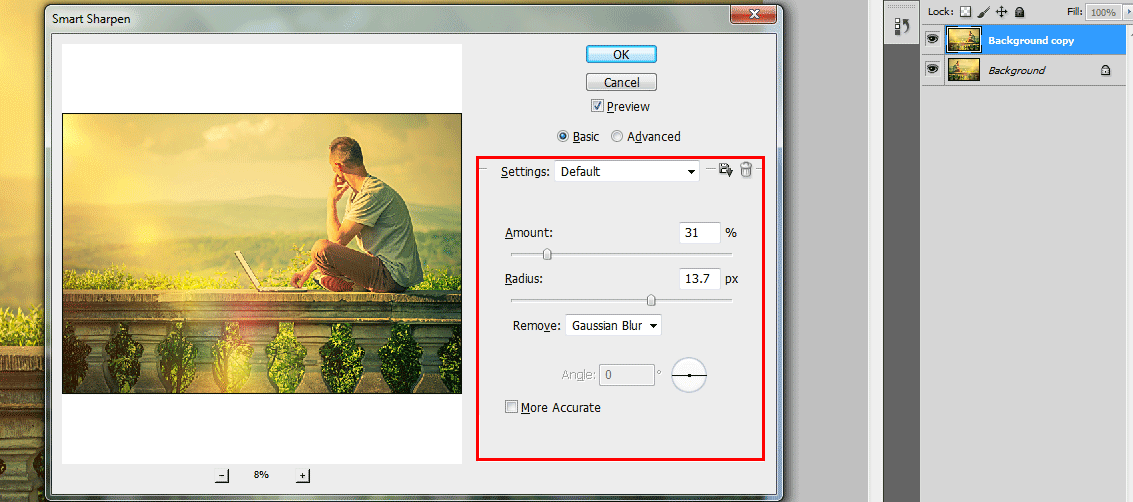
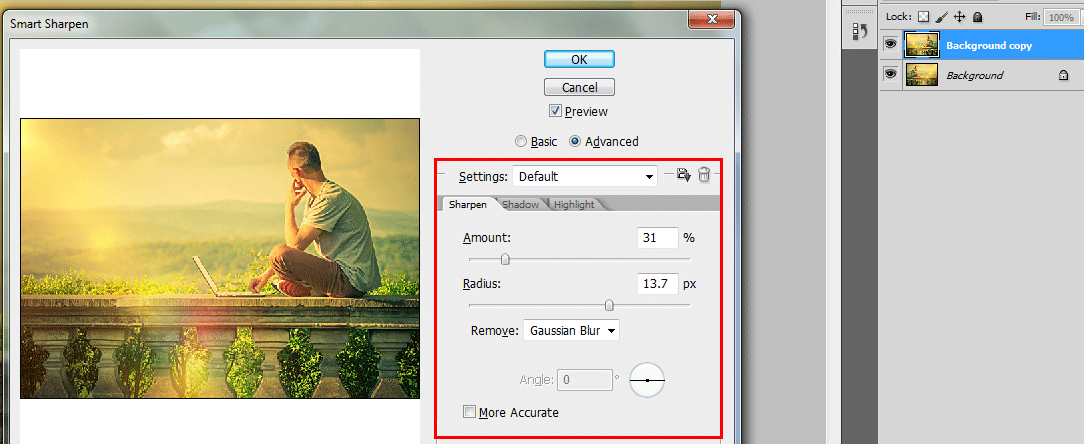
Smart sharpness window opens with multiple options in it like the amount of sharpening % to be added which controls the sharpness of the image, it has both basic and advance image sharpening options with also deals with adding shadows, highlights the detailings and more.

Basic Options:-

basic sharp

Advanced Options:-

advance sharpness

Step #4

We can save the sharpen filter settings and can compare the original with the sharpness filters applied layer by toggling between both to know the difference, which helps in achieving sharpness to the image in less time.

final sharpness

Step #5

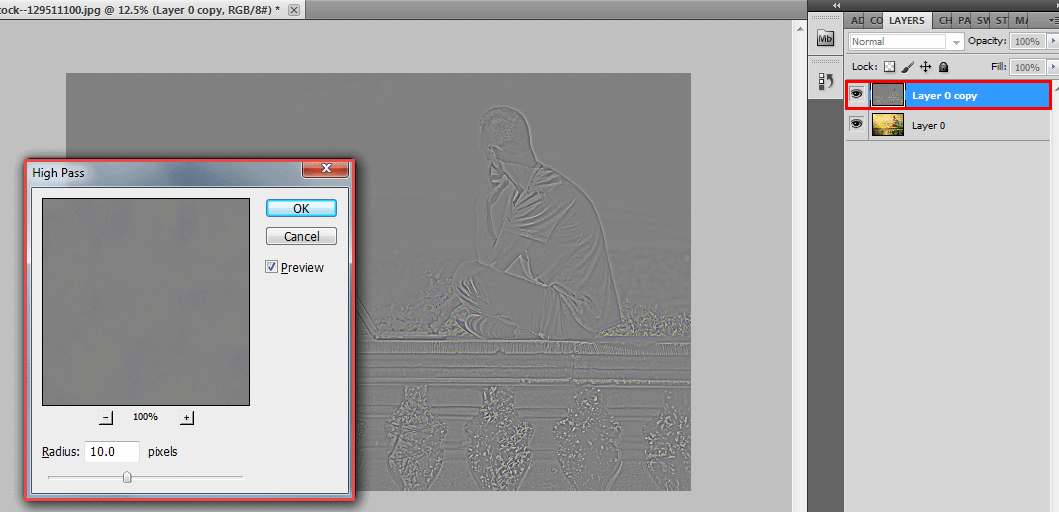
High Pass is a simple image sharpening filter with a step process setting which is more effective. Select the duplicated layer and toggle o Filters and go to others and select High Pass.

sharpen tool in photoshop (high pass sharpness)

High pass will be applied to a layer and the image becomes more sharp and effective. We can see a High Pass window opens with setting the radius range of pixels count adjusting can be done using scrolling the point of radius value. And click on ok.

high pass layer

This option will add scale to the image and using blending modes of the photo we can get a suitable look to the image there are few recommended modes to use such as Overlap, Soft light, Hard light, and linear light. Based on the mode the appearance of the image keeps on changing. High filter sharpness adjustments can be done accordingly.

final high

Conclusion

Sharpen filters effect is one of the effectively used options in Photoshop it helps in getting low-value % of a good image by using slow sharpness uses must carefully fill and periodic while using this tool. There is a chance of having noisy and grained pixels if we go more reputation so be careful. Use all layers to reduce work tool takes algorithms to fix the effect on all layers. The tool also adjusts the contrast level of the image at the effect portion. Proper details and enhancements can be given to an image by sharpening the tool.

Recommended Articles

This has been a guide to the Sharpen Tool in Photoshop. Here we discuss how to use Sharpen Tool in Photoshop and its Steps with appropriate Screenshots for better understanding. You can also go through our other suggested articles to learn more –

  1. Transform Tool Photoshop
  2. Warp Image Photoshop
  3. Blender Tools
  4. CorelDRAW Tools

Photoshop Training (9 Courses, 12+ Projects)

9 Online Courses

12 Hands-on Projects

78+ Hours

Verifiable Certificate of Completion

Lifetime Access

Learn More

2 Shares
Share
Tweet
Share
Primary Sidebar
Photoshop Tutorial
  • Tools
    • Adobe Photoshop Tools
    • Clone Stamp Tool in Photoshop
    • Eraser Tool in Photoshop
    • Selection Tool in Photoshop
    • Blur Tool in Photoshop
    • Eyedropper Tool in Photoshop
    • Move Tool in Photoshop
    • Paint Bucket Tool in Photoshop
    • Patch Tool in Photoshop
    • Pencil Tool in Photoshop
    • Line Tool in Photoshop
    • Color Replacement Tool in Photoshop
    • Background Eraser Tool in Photoshop
    • Burn Tool in Photoshop
    • Custom Shape Tool in Photoshop
    • Magic Wand Tool in Photoshop
    • Quick Selection Tool in Photoshop
    • Red Eye Tool in Photoshop
    • Ruler Tool in Photoshop
    • Sharpen Tool in Photoshop
    • Smudge tool in Photoshop
    • Sponge Tool in Photoshop
    • Rectangle Tool in Photoshop
    • Lasso Tool in Photoshop
    • Adobe Photoshop Elements tools
    • Photoshop Mixer Brush Tool
    • Watercolor Brushes in Photoshop
    • Artboard in Photoshop
    • Crop Tool in Photoshop
    • Healing Brush Tool in Photoshop
    • Transform Tool Photoshop
  • Basic
    • Introduction to Photoshop
    • What is Photoshop
    • Career in Photoshop
    • Install Adobe Photoshop
    • Plugins in Photoshop
    • Photoshop Versions
    • Uses Of Photoshop
    • Adobe Photoshop Shortcut Keys
    • Adobe Photoshop Commands
    • Adobe Photoshop
    • Is Photoshop Free
    • Top 10 Features in Adobe Photoshop
    • Layers in Photoshop
    • 10 Free UI Kits For to Download
    • Smart Objects in Photoshop
  • Effects
    • Text Effects in Photoshop
    • Metal Text Effect in Photoshop
    • Reflection Effect in Photoshop
    • Snow Effect in Photoshop
    • Mirror Effect in Photoshop
    • Motion Effect in Photoshop
    • Oil Paint Filter in Photoshop
    • Plastic Effect in Photoshop
    • Rain Effect in Photoshop
    • Gold Text Effect in Photoshop
    • 3D Text in Photoshop
    • 3D Text Effect in Photoshop
    • Clipping Mask in Photoshop
    • Fill Color in Photoshop
    • Delete Background in Photoshop
    • Transparent Text in Photoshop
    • Make Logo in Photoshop
    • Blend Images in Photoshop
    • Website Layout in Photoshop
    • Change Hair Color in Photoshop
    • Change Color in Photoshop
    • Highlight Text in Photoshop
    • Change Text Color in Photoshop
    • Change Shirt Color in Photoshop
    • Filters in Photoshop
    • Portrait Effect in Photoshop
    • Fire Effect in Photoshop
    • Ice Effect in Photoshop
    • Metallic Effect Photoshop
    • Photoshop Font Effects
    • Glow Effects in Photoshop
    • Tree Brush Photoshop
    • Shiny Effect Photoshop
    • Morphing in Photoshop
    • Dispersion Effect in Photoshop
    • Photoshop Distort Effect
    • Typography in Photoshop
    • Photoshop Cinemagraph
    • Glitch Effect in Photoshop
    • Photoshop Straighten Image
    • Stamp Effect in Photoshop
    • Warp Image Photoshop
    • Fix Perspective in Photoshop
    • Vanishing Point in Photoshop
    • Fisheye Effect in Photoshop
    • Distortion Effect Photoshop
    • Resize Object in Photoshop
    • How to Paint in Photoshop?
    • How to Print in Photoshop?
    • Perspective Correction in Photoshop
    • Photoshop Sun Effect
    • Photoshop Gold Gradient
    • Night Effect in Photoshop
    • What is Masking
    • Photoshop Polaroid
    • Pixel Effect Photoshop
    • Vaporwave Photoshop
    • Vintage Effect Photoshop
    • Photoshop hologram effect
    • Templates in Photoshop
    • MP4 to GIF Photoshop
    • Photoshop Cheat Sheet
  • Interview Questions
    • Photoshop Interview Questions

Related Courses

Photoshop Training Course

Adobe Premiere Pro Training Course

Design Training Course

Footer
About Us
  • Blog
  • Who is EDUCBA?
  • Sign Up
  • Corporate Training
  • Certificate from Top Institutions
  • Contact Us
  • Verifiable Certificate
  • Reviews
  • Terms and Conditions
  • Privacy Policy
  •  
Apps
  • iPhone & iPad
  • Android
Resources
  • Free Courses
  • Photoshop Tutorial
  • 3ds Max Tutorial
  • All Tutorials
Certification Courses
  • All Courses
  • Design Course - All in One Bundle
  • Photoshop Course
  • Maya Course
  • Unreal Engine Course
  • Unity Course
  • DaVinci Resolve Course
  • Pro Tools Course

© 2020 - EDUCBA. ALL RIGHTS RESERVED. THE CERTIFICATION NAMES ARE THE TRADEMARKS OF THEIR RESPECTIVE OWNERS.

EDUCBA Login

Forgot Password?

EDUCBA
Free Design Course

3D animation, modelling, simulation, game development & others

*Please provide your correct email id. Login details for this Free course will be emailed to you
Book Your One Instructor : One Learner Free Class

Let’s Get Started

This website or its third-party tools use cookies, which are necessary to its functioning and required to achieve the purposes illustrated in the cookie policy. By closing this banner, scrolling this page, clicking a link or continuing to browse otherwise, you agree to our Privacy Policy

EDUCBA

*Please provide your correct email id. Login details for this Free course will be emailed to you
EDUCBA
Free Design Course

3D animation, modelling, simulation, game development & others

*Please provide your correct email id. Login details for this Free course will be emailed to you

Special Offer - Photoshop Training (9 Courses, 12+ Projects) Learn More