Introduction to Resize Image in Adobe Illustrator
Adobe Illustrator is a huge and powerful software loaded with a set of tools and functions used to make the user’s work easier and simpler. The tools and functions in the program are designed in such a way that the user can use one tool for multiple functions. In Adobe Illustrator, we can edit and modify images as well. The methods and techniques involved in resizing and editing images with Adobe Illustrator are unique as compared to other graphic programs. To resizes images in Adobe Illustrator, we can use multiple tools for different purposes. We can use the Scale tool, Bounding Box or Transform Panel as well. We can also use the Shear and Distort Tools for resizing and editing the images in Illustrator.
What is Resize Image in Illustrator?
The method of image-resizing is unique to most other graphic software. Illustrator’s scaling options work together to maintain the integrity of your final image. You can resize your artwork without making it look blurry or pixelated.
How to Resize Images in Adobe Illustrator?
- Scaling an image in Adobe Illustrator can be done by different methods such as using simply the scale tool or using the Bounding Box tool with Selection and Free Transform Tool or scaling objects specifically relative to Height and Width or scaling multiple objects simultaneously.
- The shear tool can be used in the case of casting shadows and editing the image. Distort is used when in case of the user wants to add or create twirls, puckers or wrinkles to the image. The user also has access to transform and scale strokes and effects with reference to text and graphics with the scale tool.
- We can resize an image using the Selection tool as well; the selection tool is useful to edit the anchor points of the object. We can edit each anchor point of the selected image or object using the selection tool.
- We have another tool as Transform Each command that enables us to edit and resize each object in multiple selections. Instead of transforming the selection wholly, we can edit each item individually.
- Lastly, we have the Transform Panel, which helps us edit the height and width of the selected object by entering the exact value the user requires to enter.
Steps to Resize Image in Adobe Illustrator
In the following tutorial, you will learn the steps to resize images or graphics in illustrator.
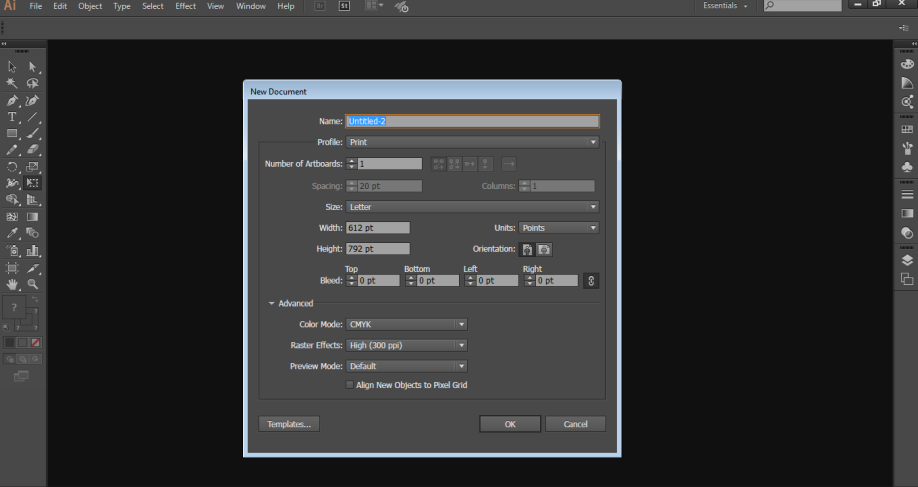
Step 1: Create a new file in Adobe Illustrator.
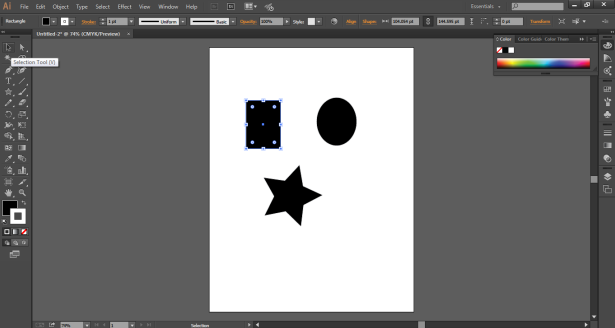
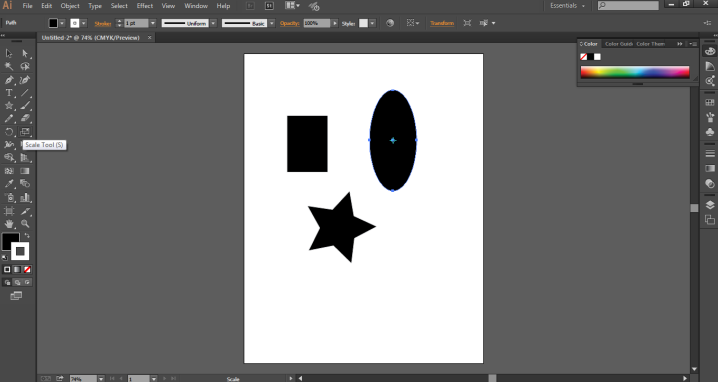
Step 2: Draw a rectangle, an ellipse, and a star on the page.
Step 3: Select the Rectangle and use the Selection tool to resize the object.
Step 4: To resize the object as a whole and with uniform width and height, use the Scale tool as shown in the image below.
Step 5: Use the Free Transform tool from the toolbox. Using this tool, we can edit and resize the image with Free Distort, Distort Perspective, free Transform, and Constraints options. The Distort option modifies the object either freely or in a perspective manner. While the Constraints option rotates the object respective of the angle and uniformity of the object.

Step 6: Go to Objects and select the Transform option. We can use the “Transform Each” option from the options menu and select the necessary setting required in the editing of the object.

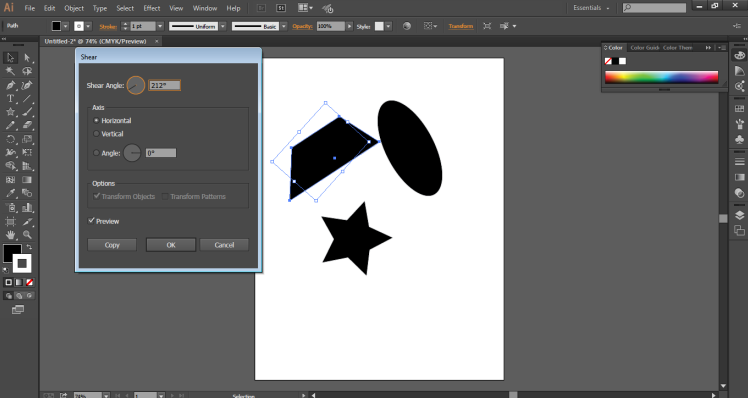
Step 7: Similarly, go to Options and select Shear to cast a shadow of the object and resize the same.
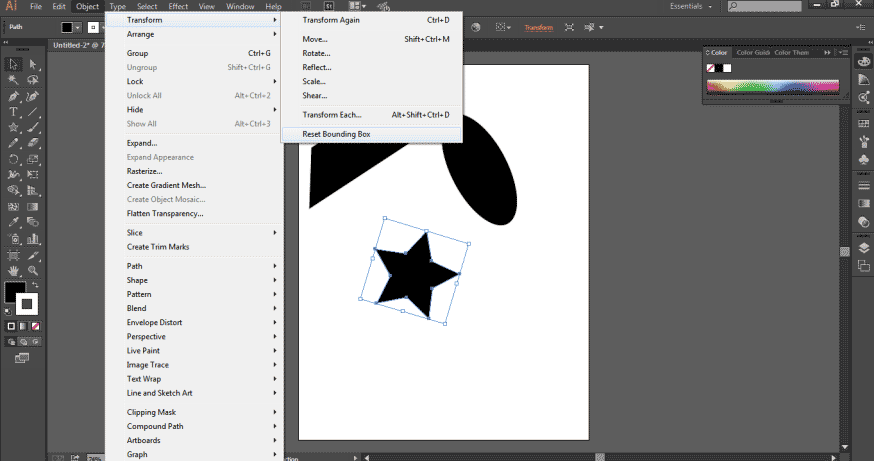
Step 8: We also have the option of “Reset the Bounding Box”, which helps in editing the bounding box of the object and resize the same.
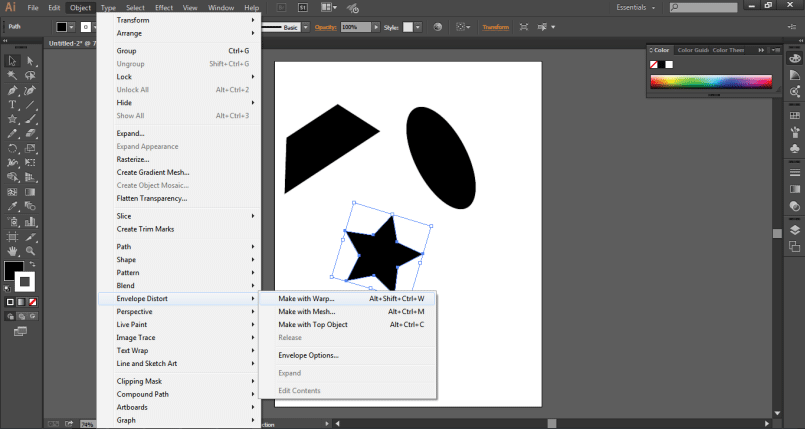
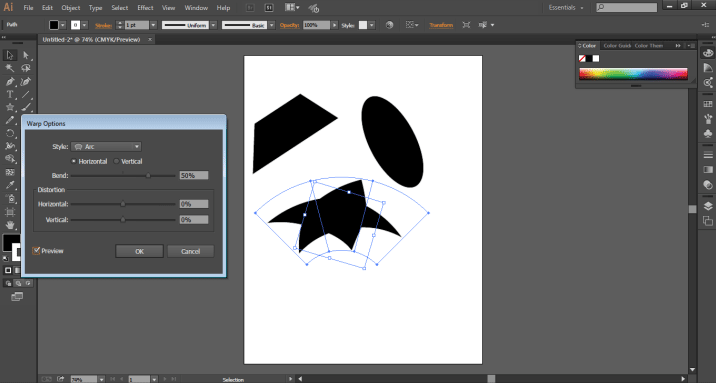
Step 9: Go to Options and select Envelop Distort option to edit and modify the object in the form of Arc, Flag, Wave, squeeze, etc.
Unique and Amazing Effects of Resizing Image in Adobe Illustrator
These are some of the options that are used to resize an image in Adobe Illustrator. Although Adobe Illustrator is vector software and is independent of the pixels and resolution of the image, we can edit the images and objects in the program without causing any damage to the resolution or the quality of the image.
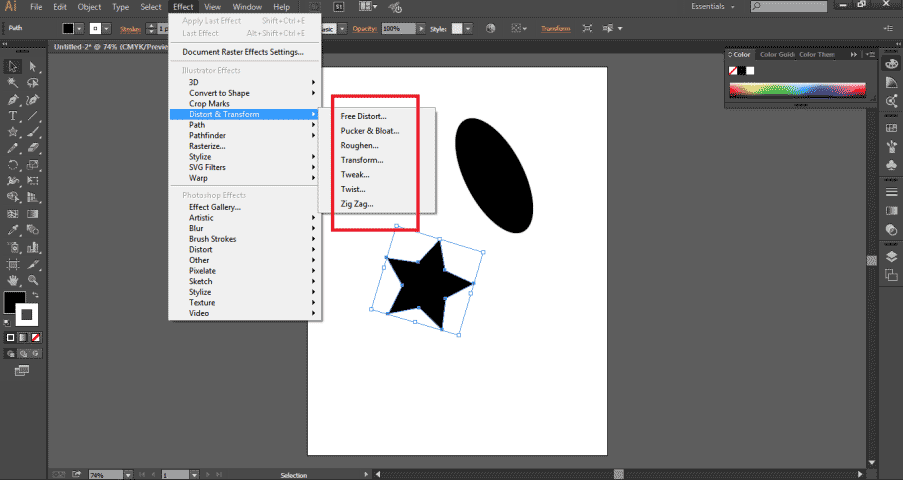
Adobe Illustrator has a unique and amazing set of effects that helps the user resize the object or image in a different shape. One such effect is the use of Distort and Transform options from the Effects menu. We can use this effect that has a twist, Zig Zag, Pucker and Bloat, and Roughen Effects. These are some unique effects that add some styling to the object.
Conclusion
Resizing and editing the images in Adobe Illustrator is as easy as anything. It is the most fundamental and basic function used by any artist or graphic designer in creating proper artwork. While there are many options, tools, effects, and commands used just to transform and scaling the object, adobe Illustrator makes it a point that every command and tool is either more advanced or more upgraded than the other tool. But, there are still commands and tools that perform the same function and same effect on the object. Every artist is aware of these basic tools of resizing and editing the objects as they are the prime and most used tools and commands in the program. To master the art of creating and editing artworks on adobe illustrator, one must know all the program’s basic set of tools and functions.
Recommended Articles
This is a guide to Resize Image in Adobe Illustrator. Here we discuss What Resize Image and the steps to Resize Images in Adobe Illustrator with a few illustrations are. You may also look at the following article to learn more –
