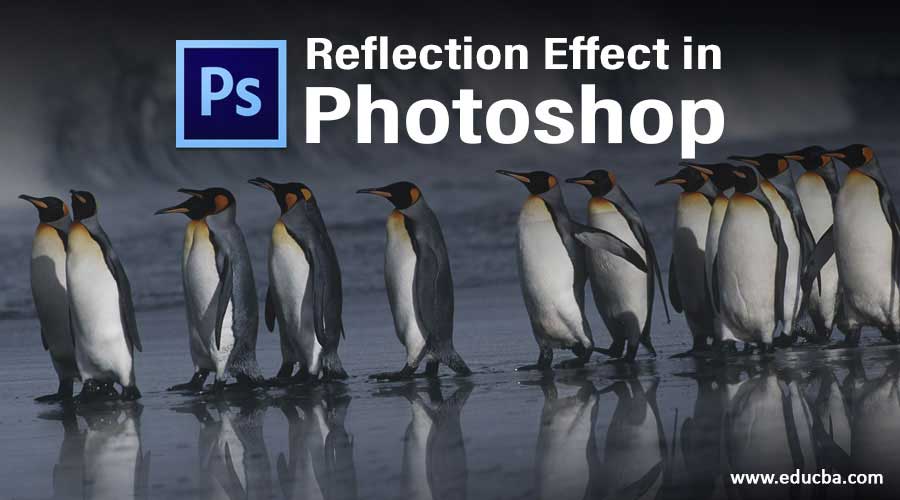
Introduction to Reflection Effect in Photoshop
Photoshop generally comes with a range of graphic enhancing and designing techniques. One such great technique which is popular and makes use of easy photoshop tools is the Reflection Effect. It is used widely in logos, ads, etc., for text effects and images to create a blurry mirror-like effect, for example, for creating wallpapers of a place for a Travel and Tourism website with locations that have lakes and water bodies. This effect could be useful for graphic designing. However, it makes use of very few components like Motion and Gaussian Blur, Free transform, Selection tools and so on. Let’s try to create a few examples for us to learn about this effect.
Water Reflection Effect in Photoshop
This is one of the most commonly used reflection effects that can probably be identified quickly too. Many scenic pictures have all water reflections on them, and trust me, a lot of them are indeed Photoshop-ed!!
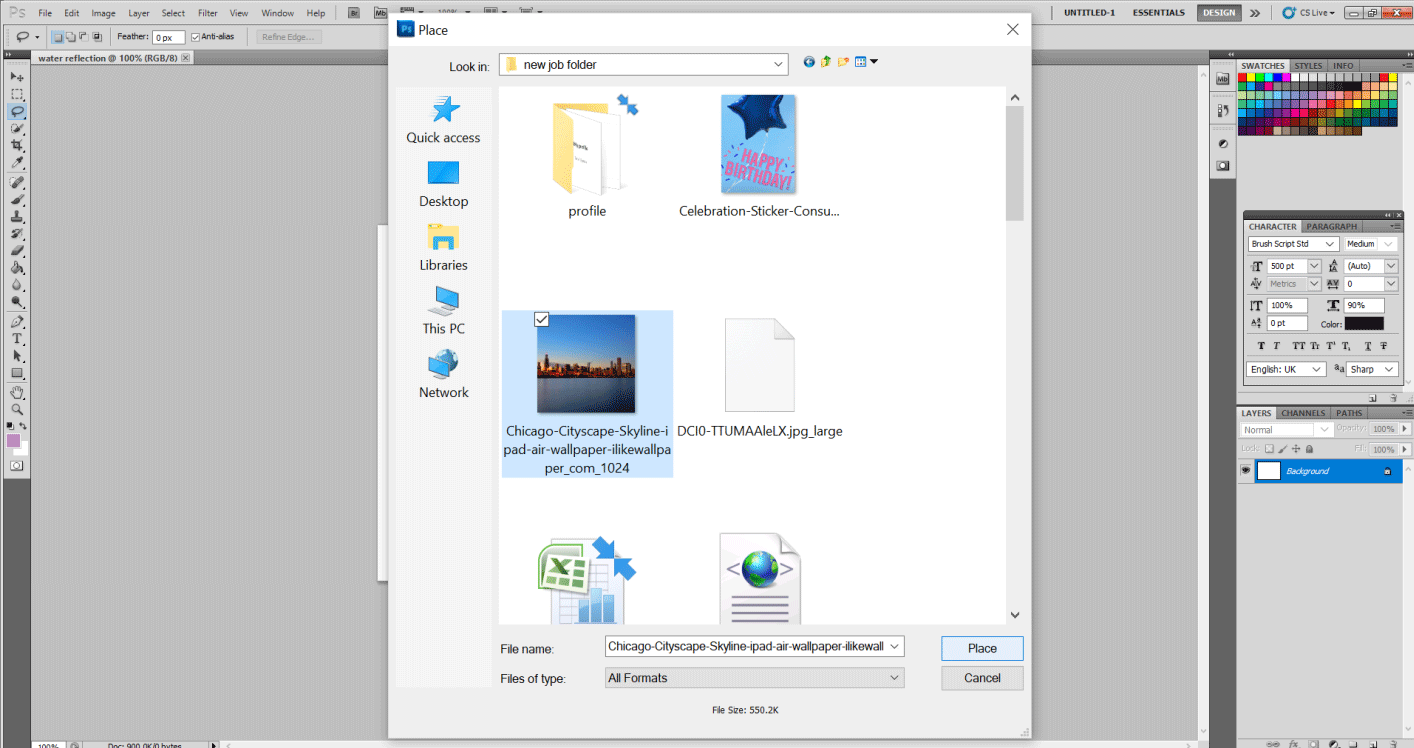
Step 1: First of all, grab the image of whose reflection needs to be created. Go to File, select the appropriate image and there we can edit all we want now.
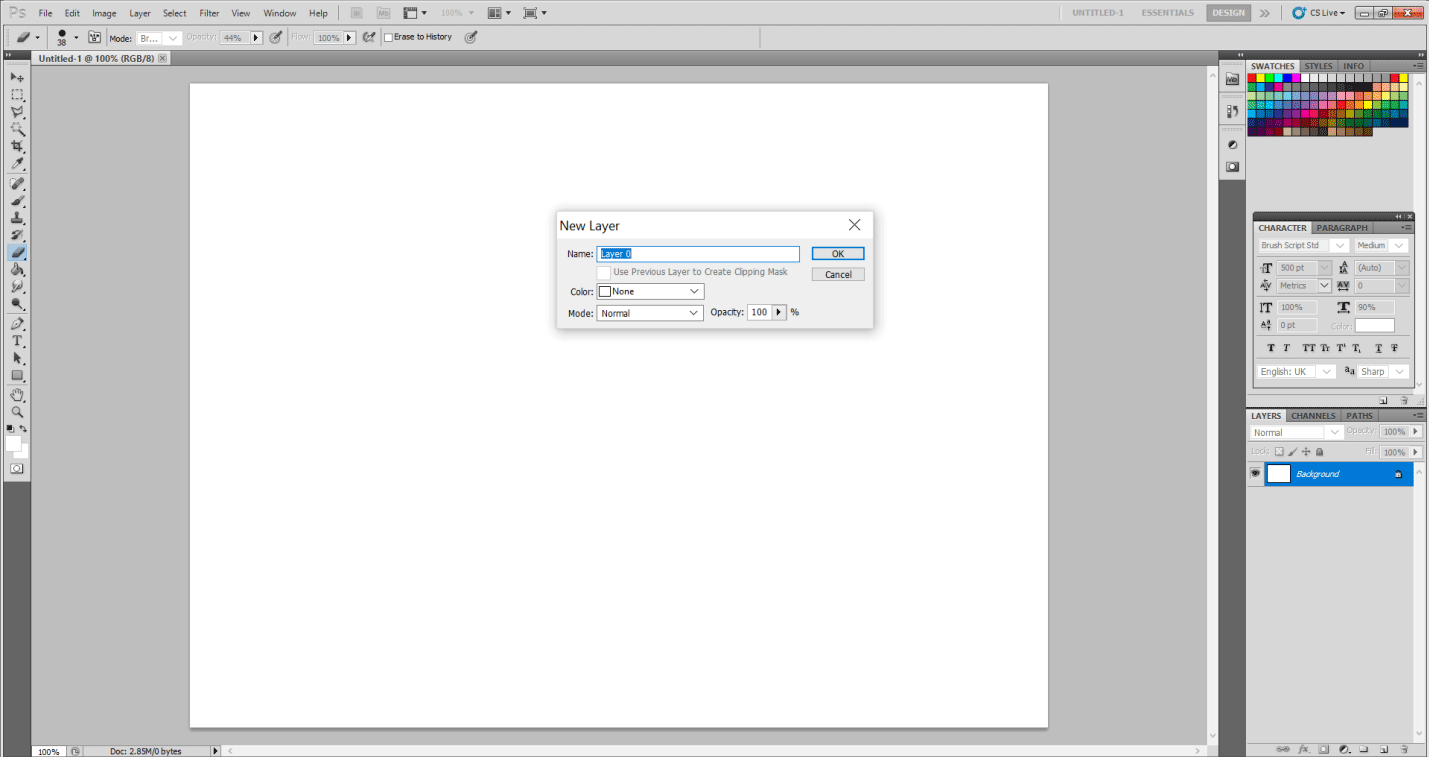
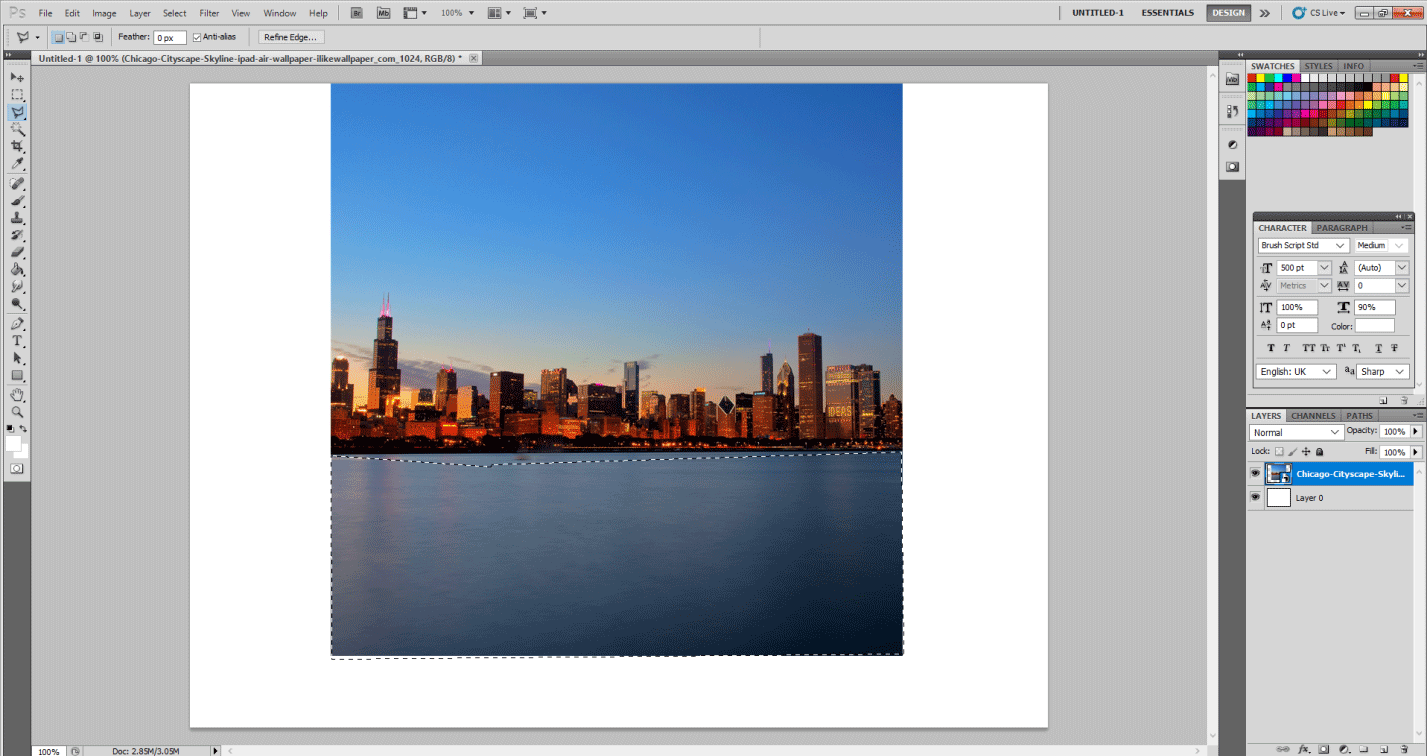
Step 2: I would suggest converting the layer first and converting it into the normal layer by double-clicking on the Background Layer first and giving it the name Layer 0.
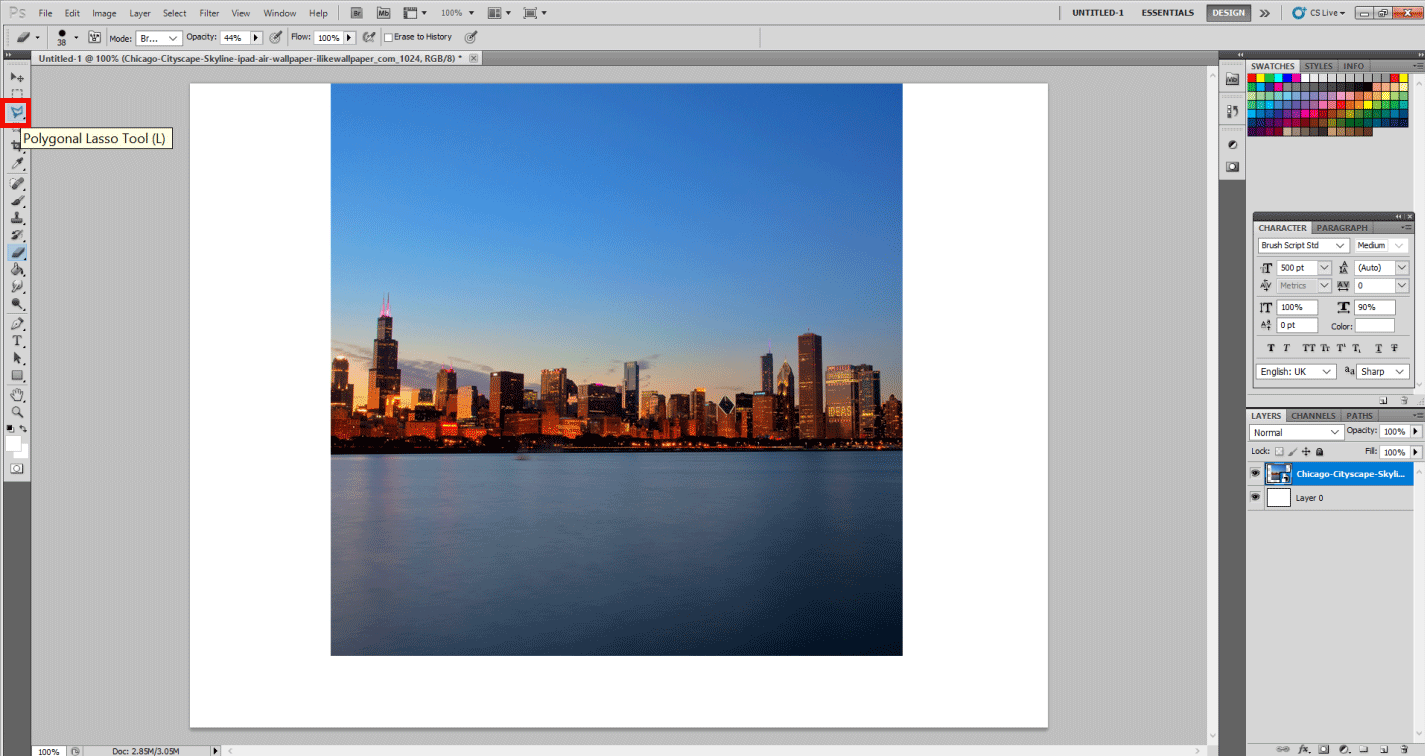
Step 3: Now select the layer with the image and, with the help of the Rectangular marquee tool or the Polygonal Lasso Tool, cut the water part.
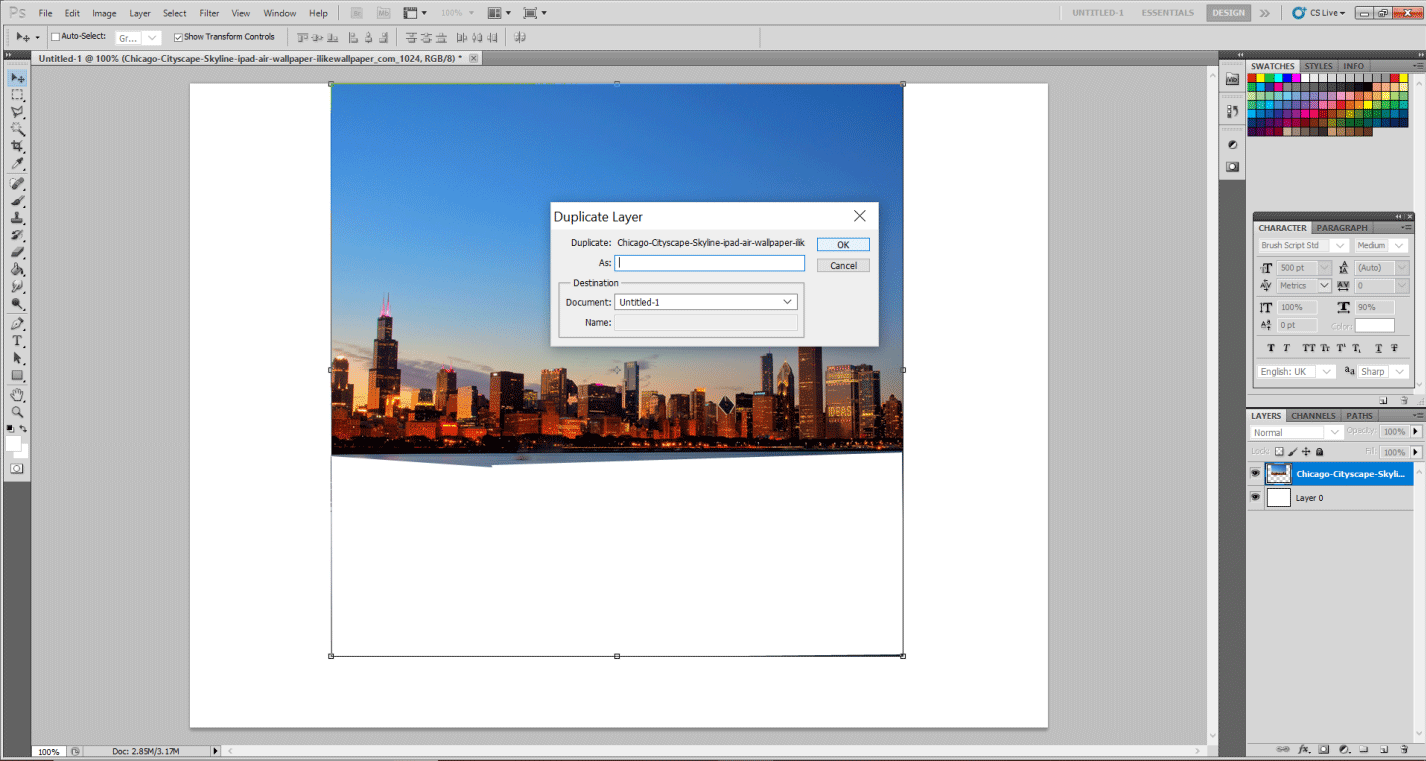
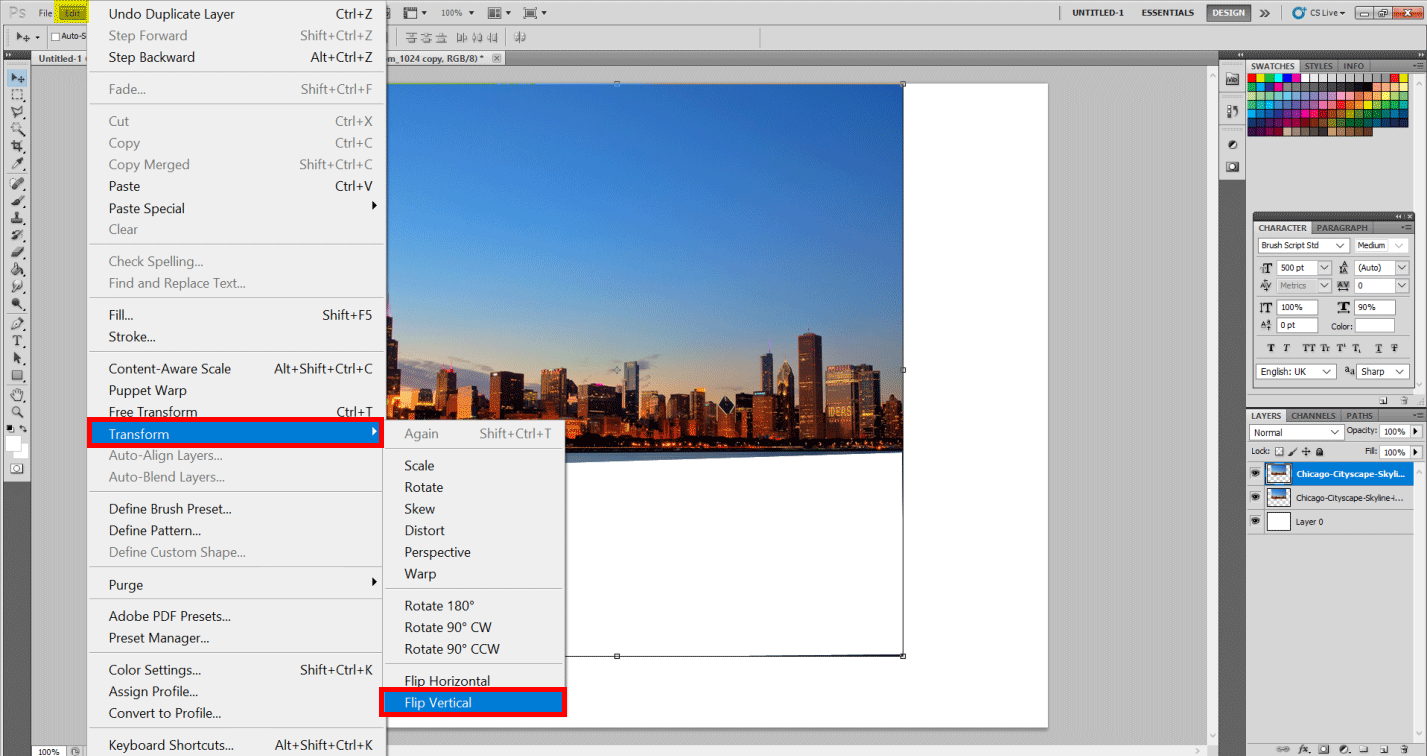
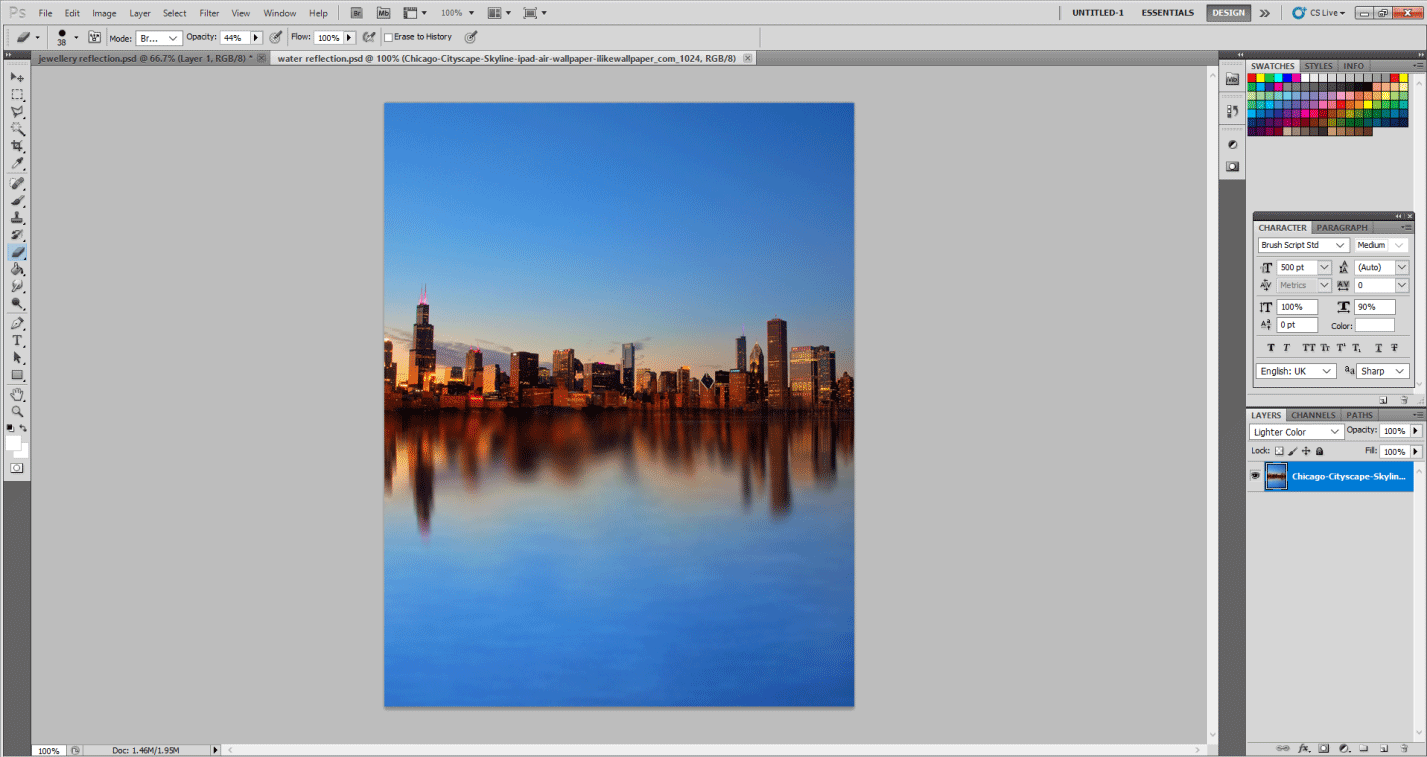
Step 4: Now duplicate the layer by selecting Duplicate Layer and select Edit and Transform, then Flip Vertical. You will see an upside-down image of the cut part. So by using the move tool, place it below our original image.

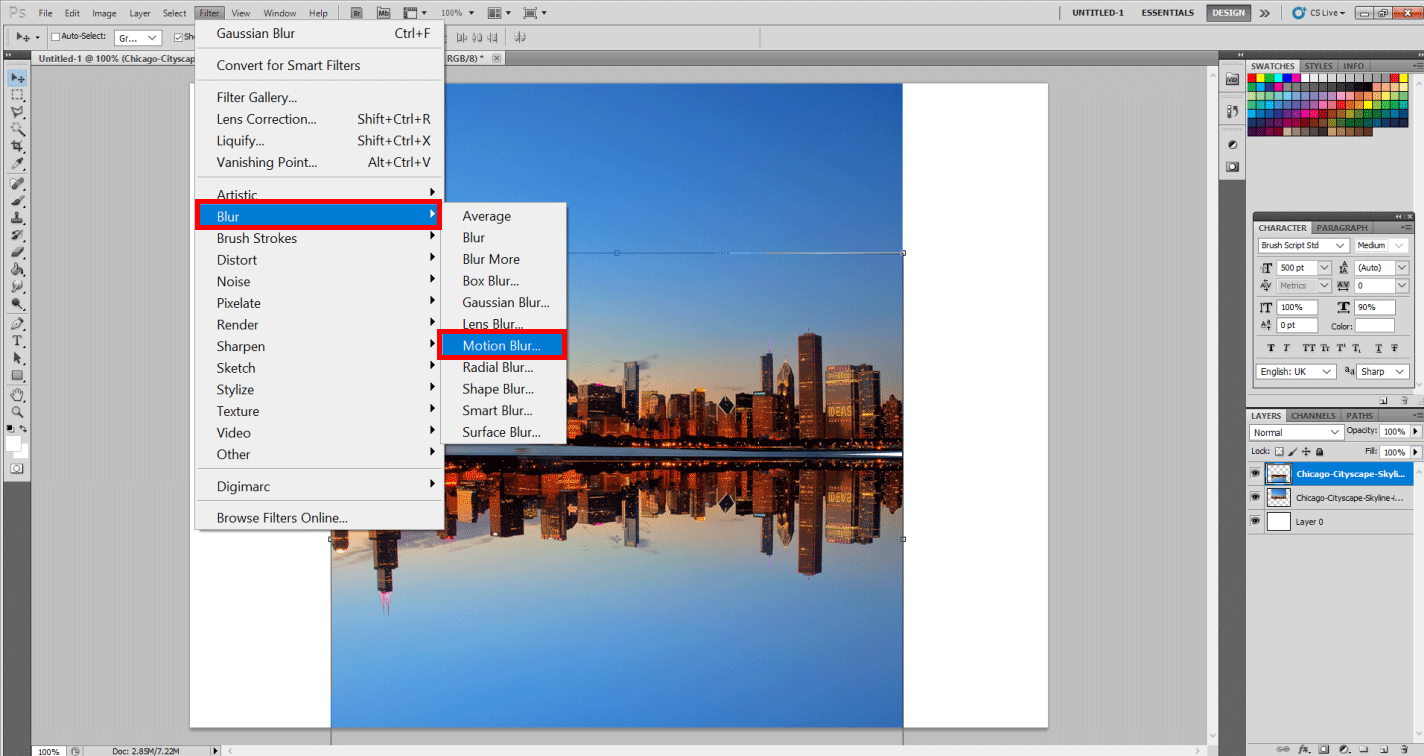
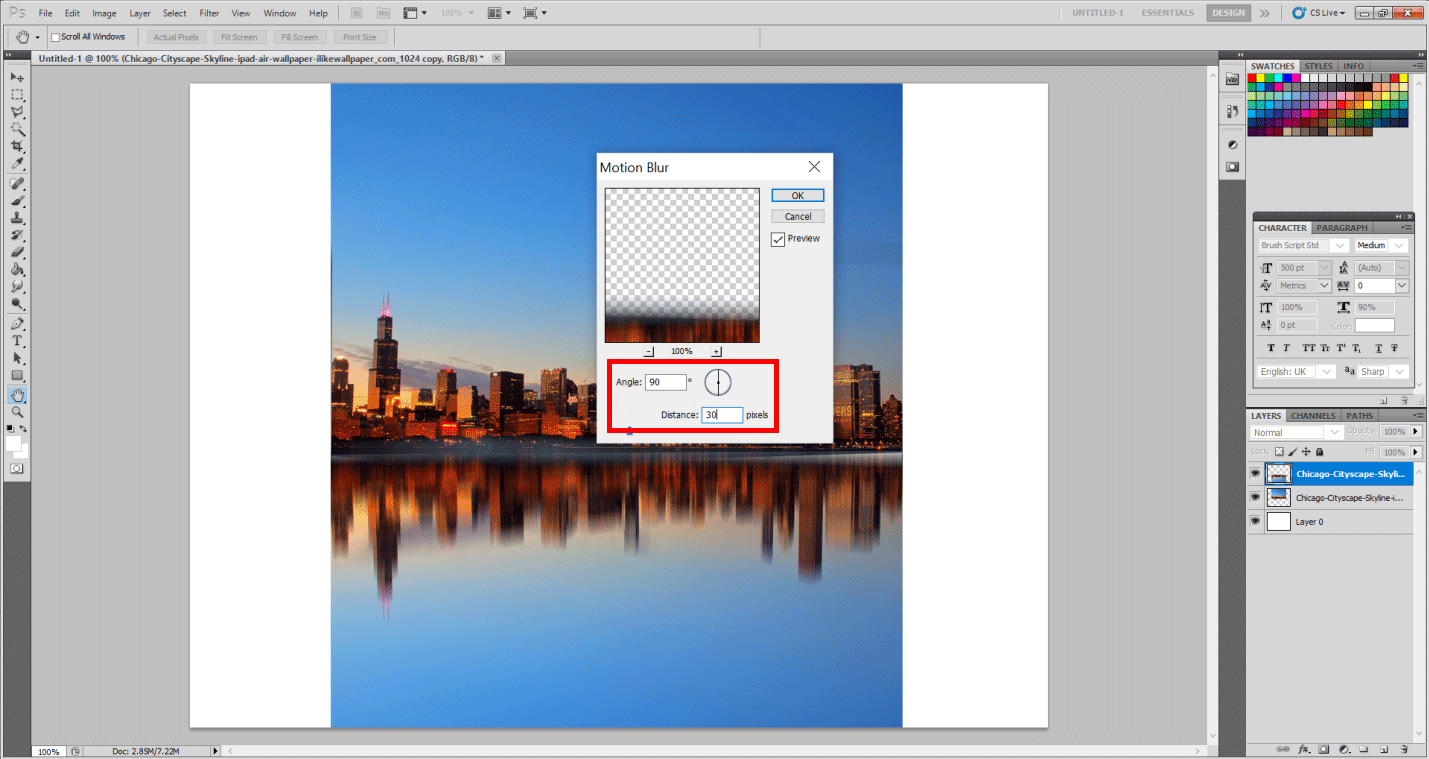
Step 5: Now, it’s time to create some water ripples. First, let the duplicate layer be selected. Now Select Filter> Blur>Motion Blur. And set the values in the following manner: Angle: 90 Degrees, Distance: 30 pixels. You will see something like this.
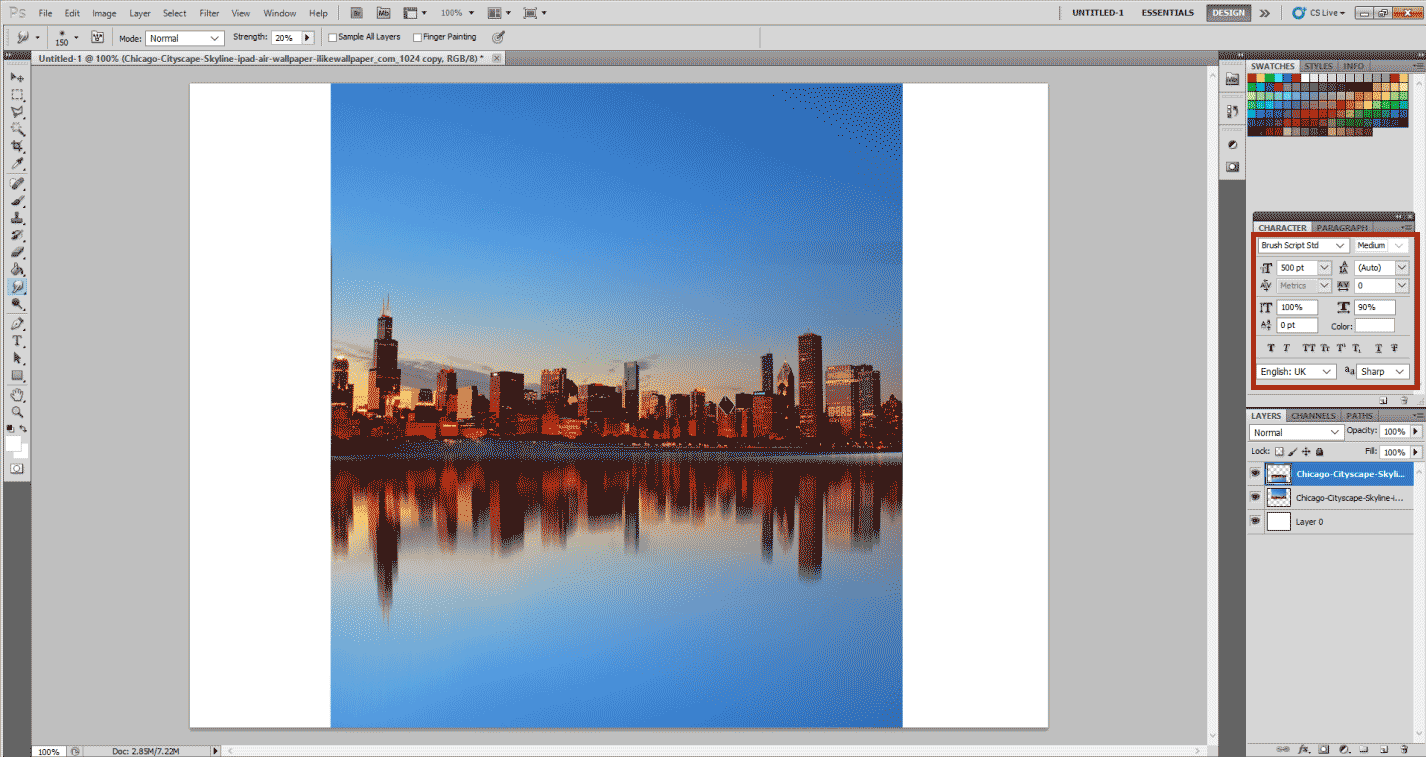
Step 6: Now it’s time to give the water some Smudgy effect. Hence grab the Smudge tool, and I experimented a lot, so I was finally comfortable with these values. You can create your own values depending upon the image you have selected to have water reflection in it. So set Brush size: 150, hardness: 0 and Strength: 20 percent.
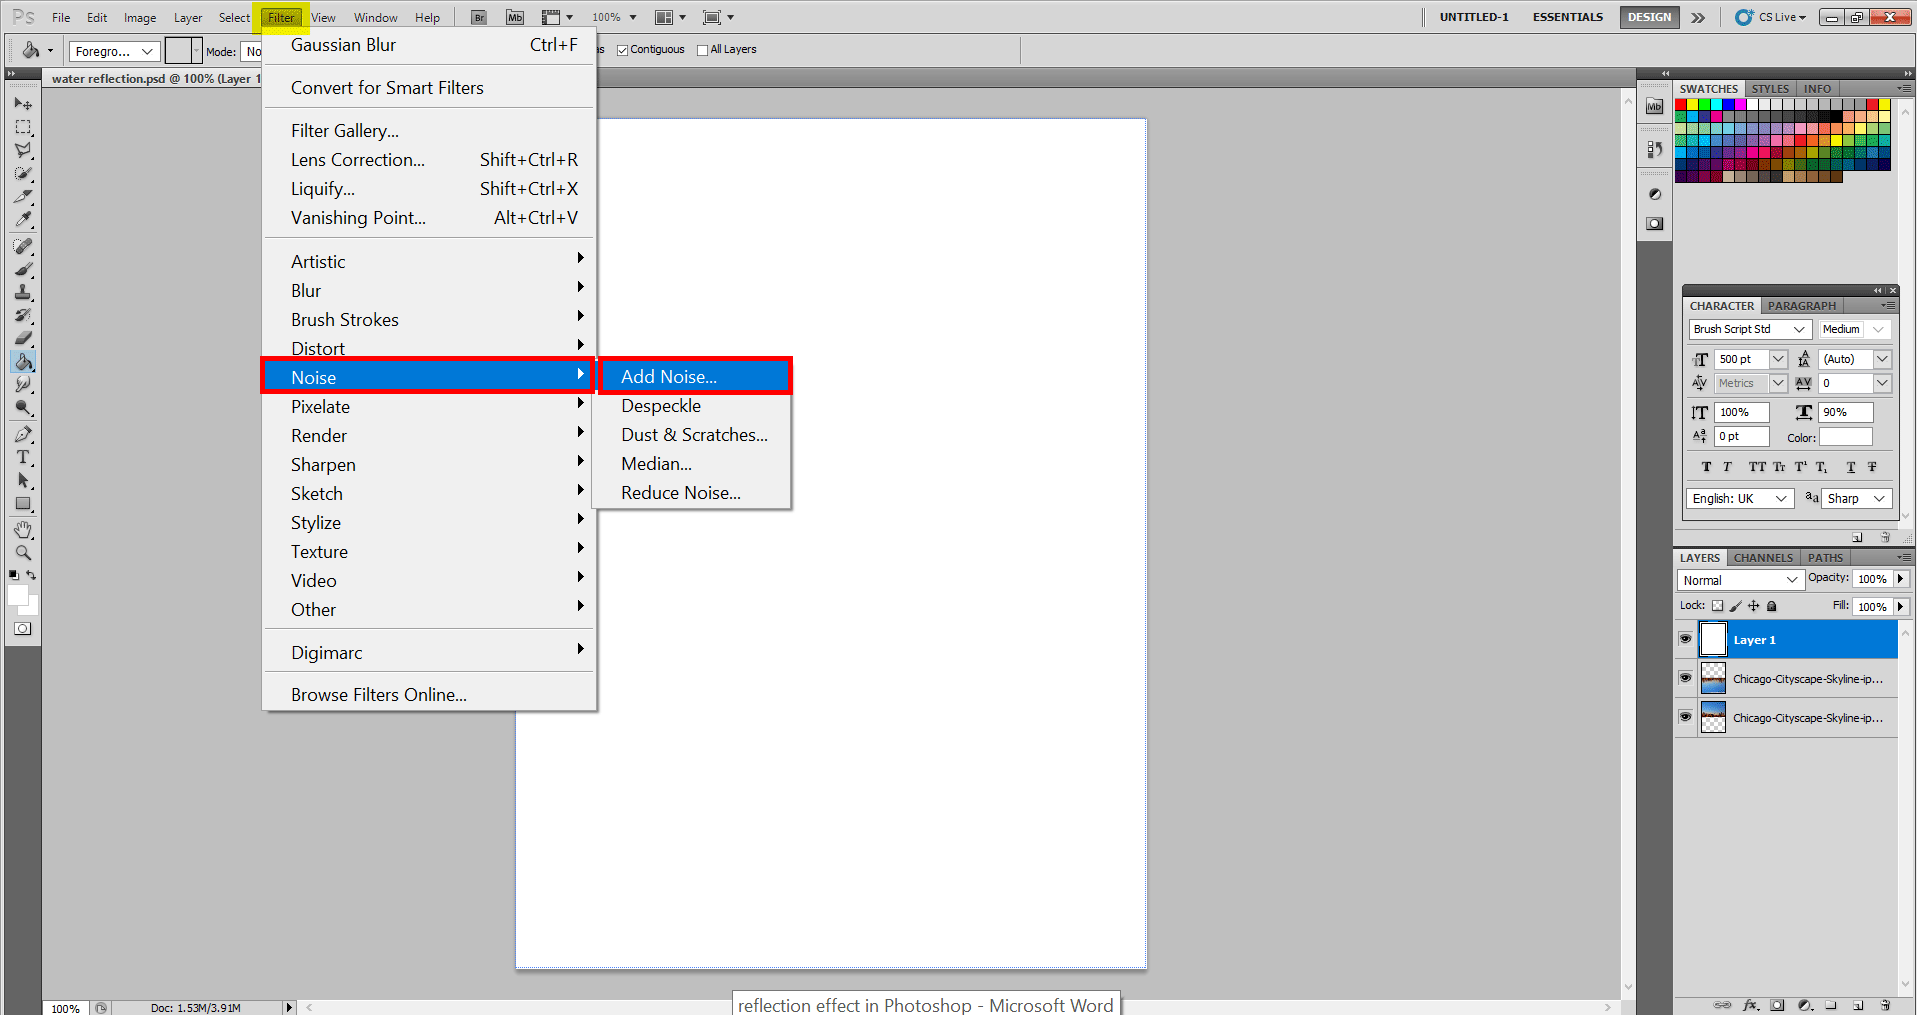
Step 7: Normally, one would be satisfied with what we have created, but let’s experiment a bit more and put more effects. First, let’s create a new layer and fill it with white colour using the Paint Bucket tool. Also, let us give it a Noise Filter to give the water waves a more natural rippled effect. So, go to Filter>Noise>Add Noise. Make sure you have selected the new Layer here. Now set the following values (again, these may vary as per image) Amount: 400 %, Distribution: Gaussian and check the Monochromatic button.

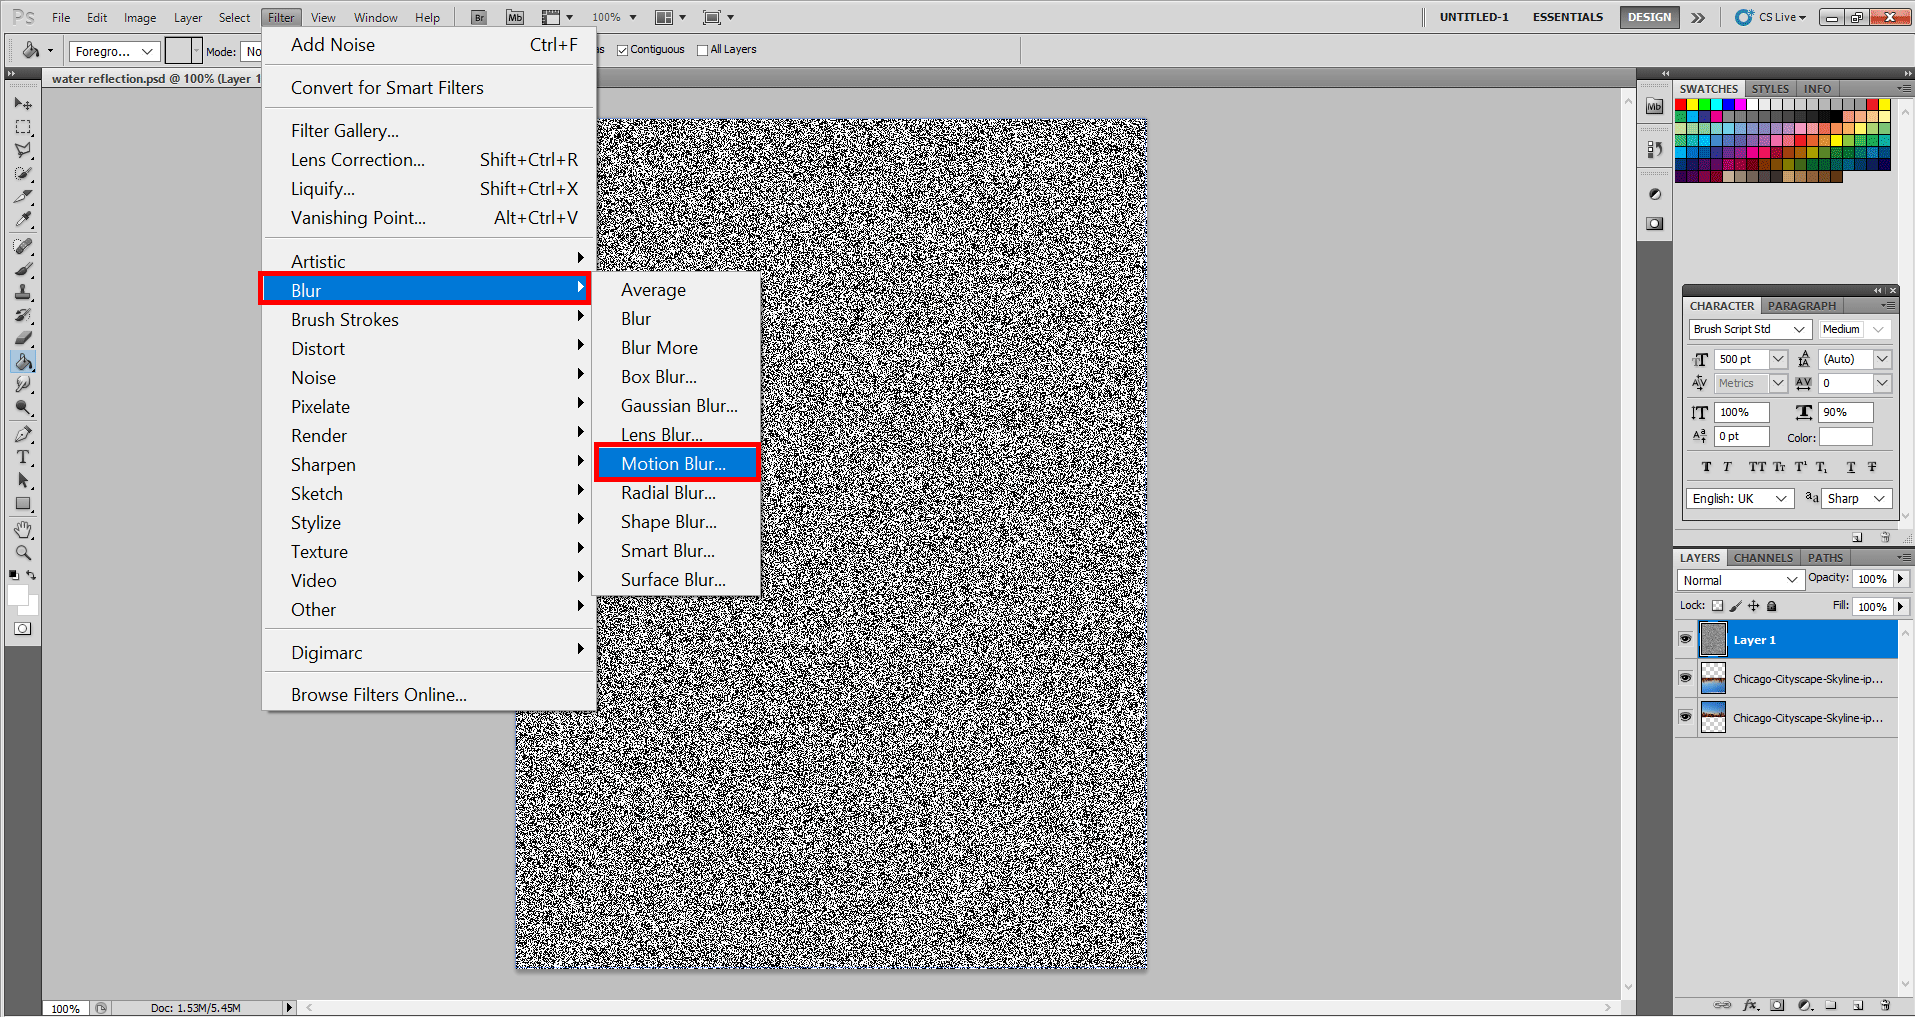
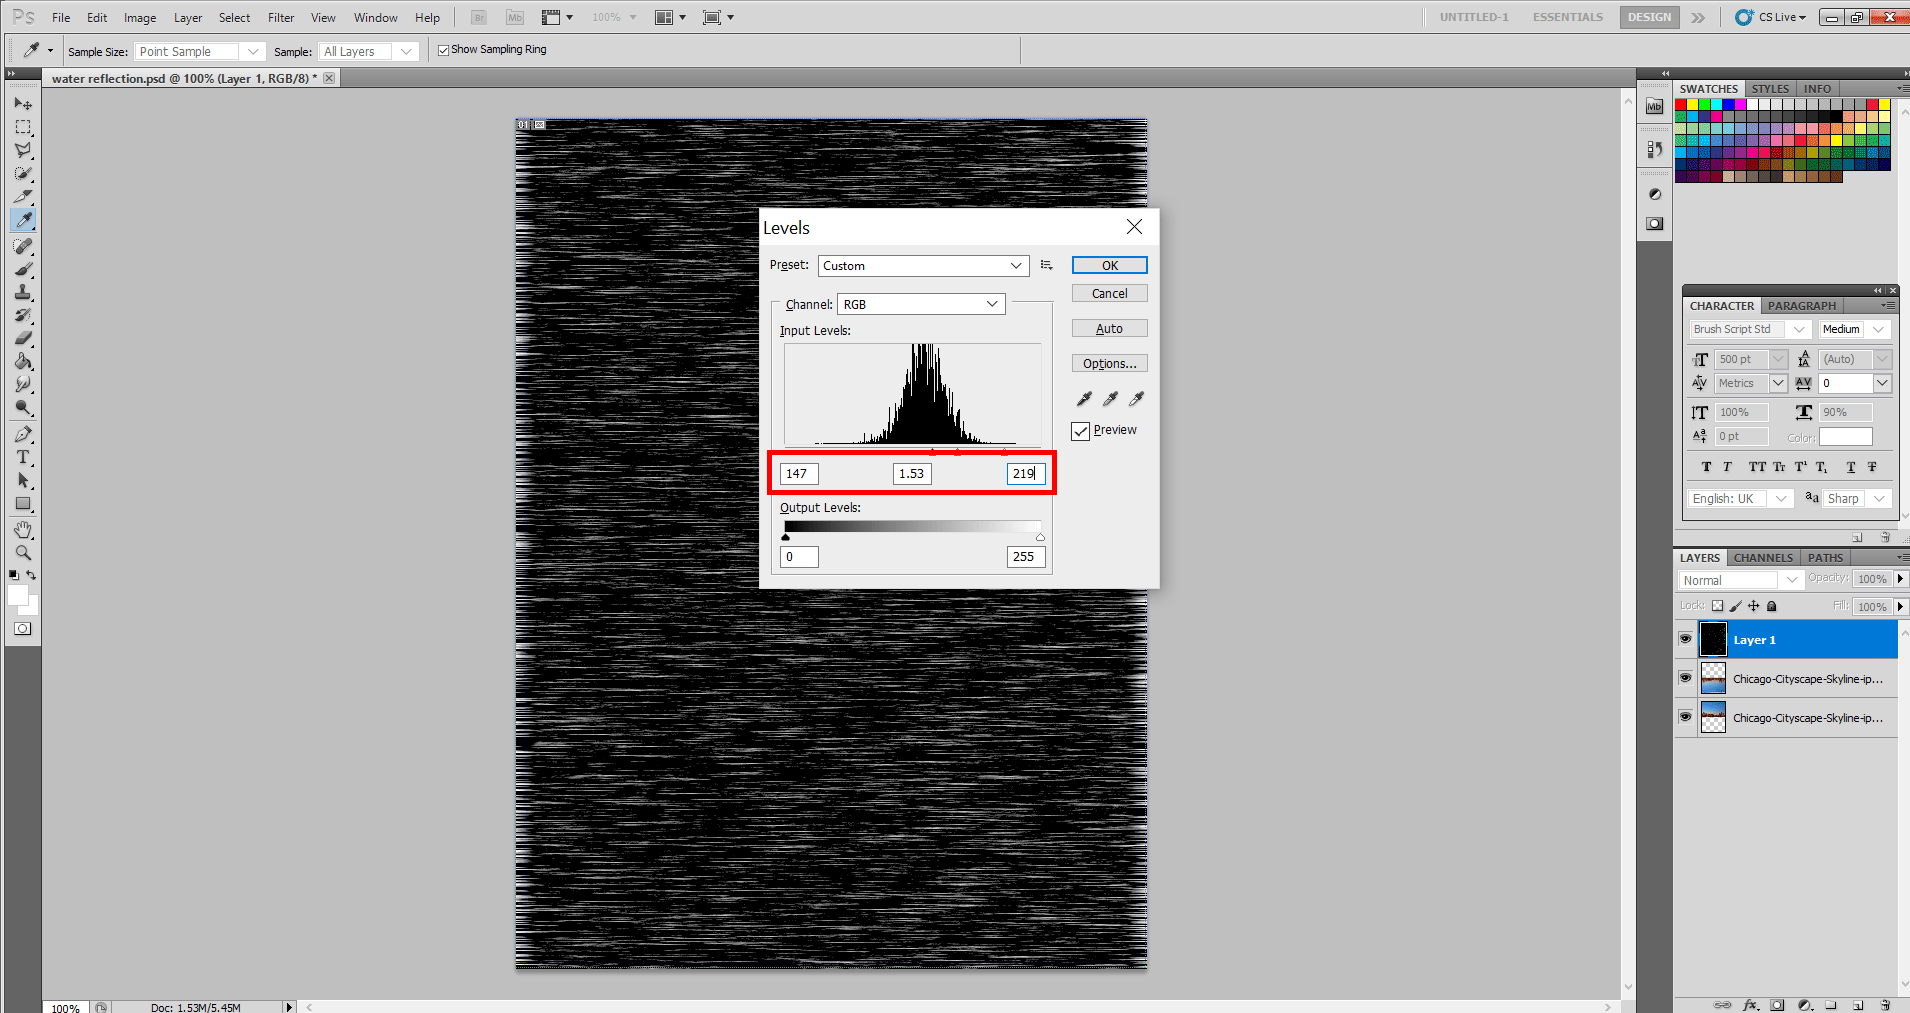
Step 8: Let’s add one more Filter. Go to Filter> Blur> Motion Blur. Now you can set the following values and experiment. Angle: 0 degrees, Distance: 40 px, and let us also add a bit of contrast in colors for better Blending options later. And also, see what happens if we use keys CTRL + L and inverse colors. So you can add and see the following, 1st tone: 147, mid-tone: 1.53 and last tone: 219.

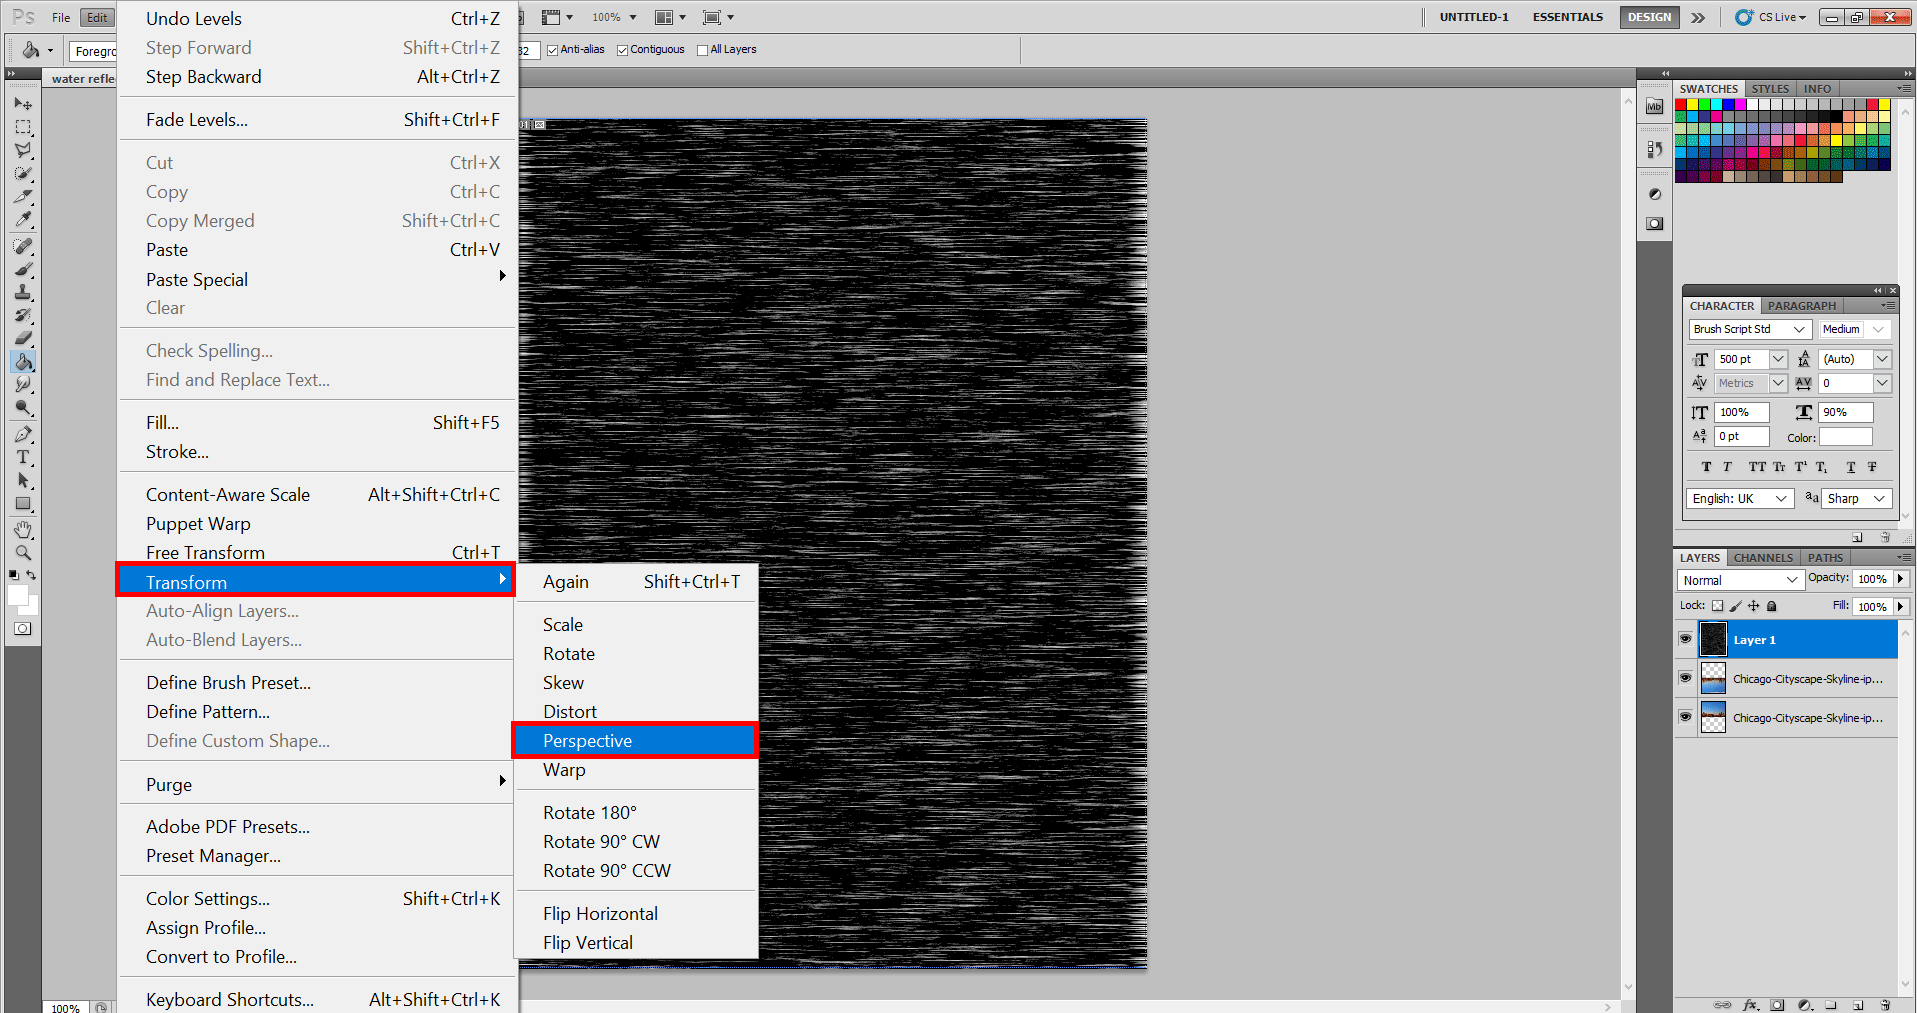
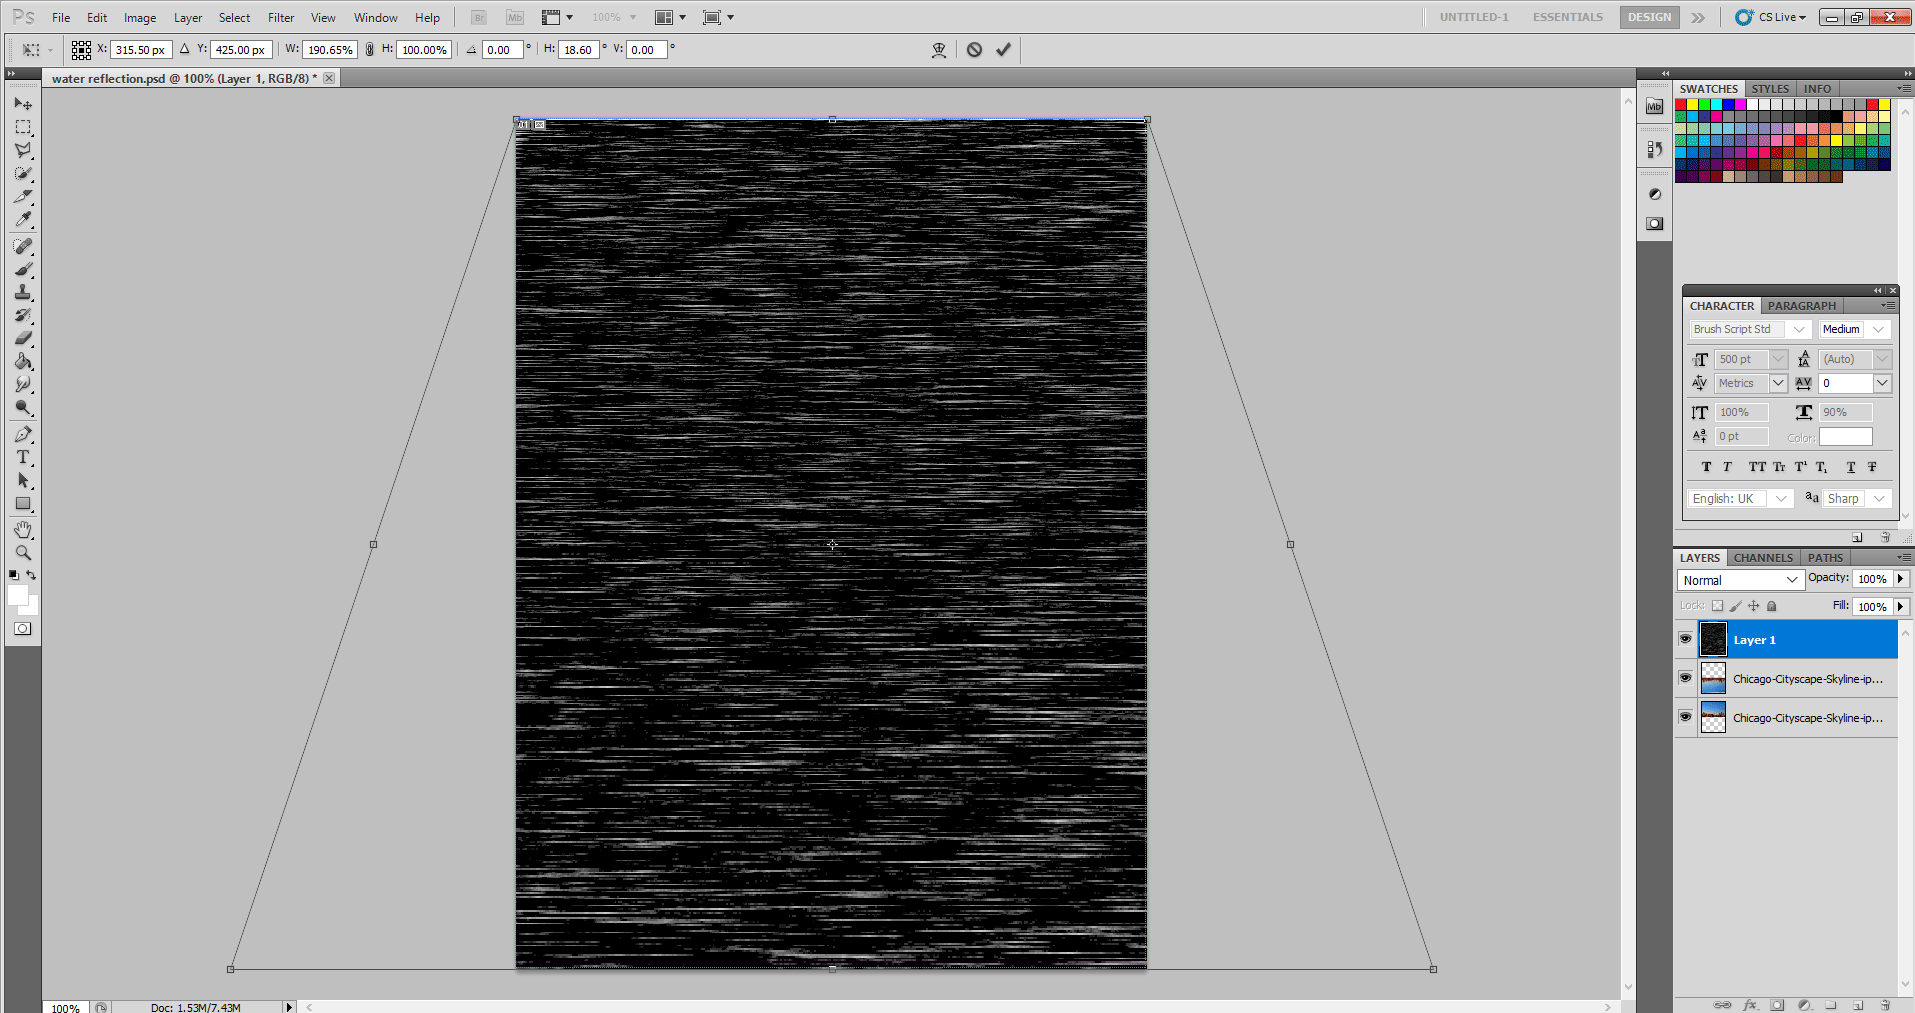
Step 9: Let us add perspective to give it a better view of the eye. So you can select the following Edit, Transform, then Perspective. Now simply drag any corner of the bottom with the mouse to the side as per your choice end.
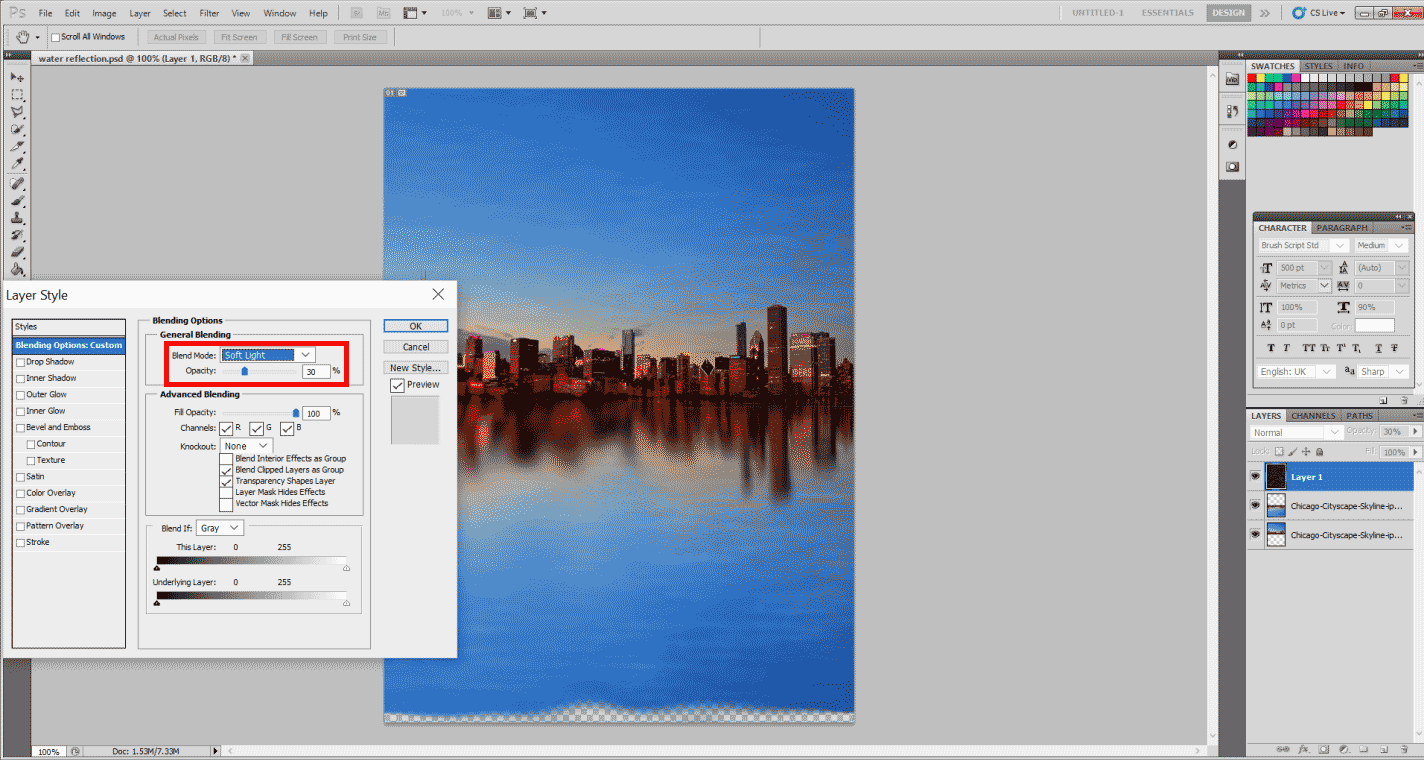
Step 11: Now, you can right-click on the layer and go to Blending Options. In that, set the following values. Opacity: 30 % and Blend mode: Soft Light. It will be something like this.

Step 12: And it is final!!!!… Please go ahead and make your own water reflection effects.

Jewellery Ad Reflection Effect
This might also be one the most common of all, but that’s I chose to do it so that the concept of reflection might get clearer to you. We will be using similar techniques here to make our piece of jewelry more appealing to the naked eye.
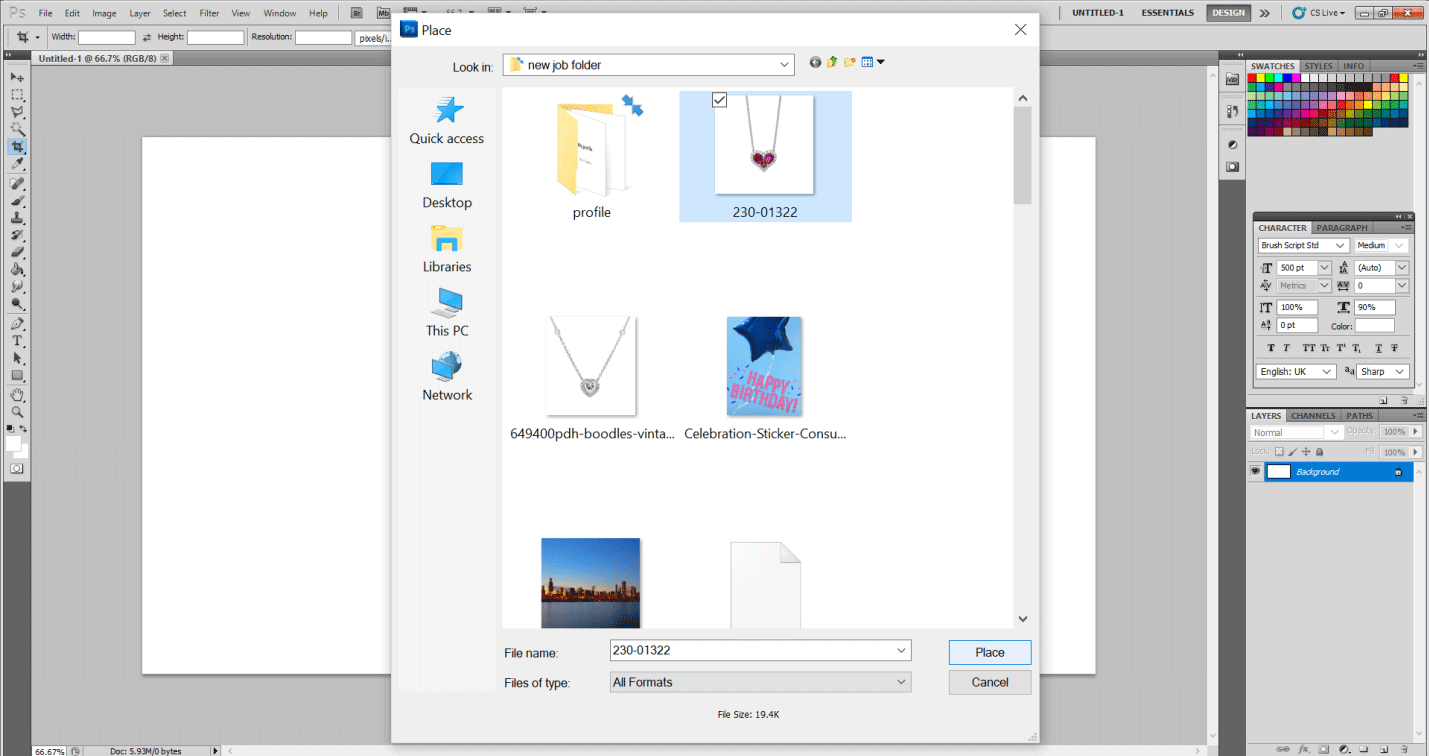
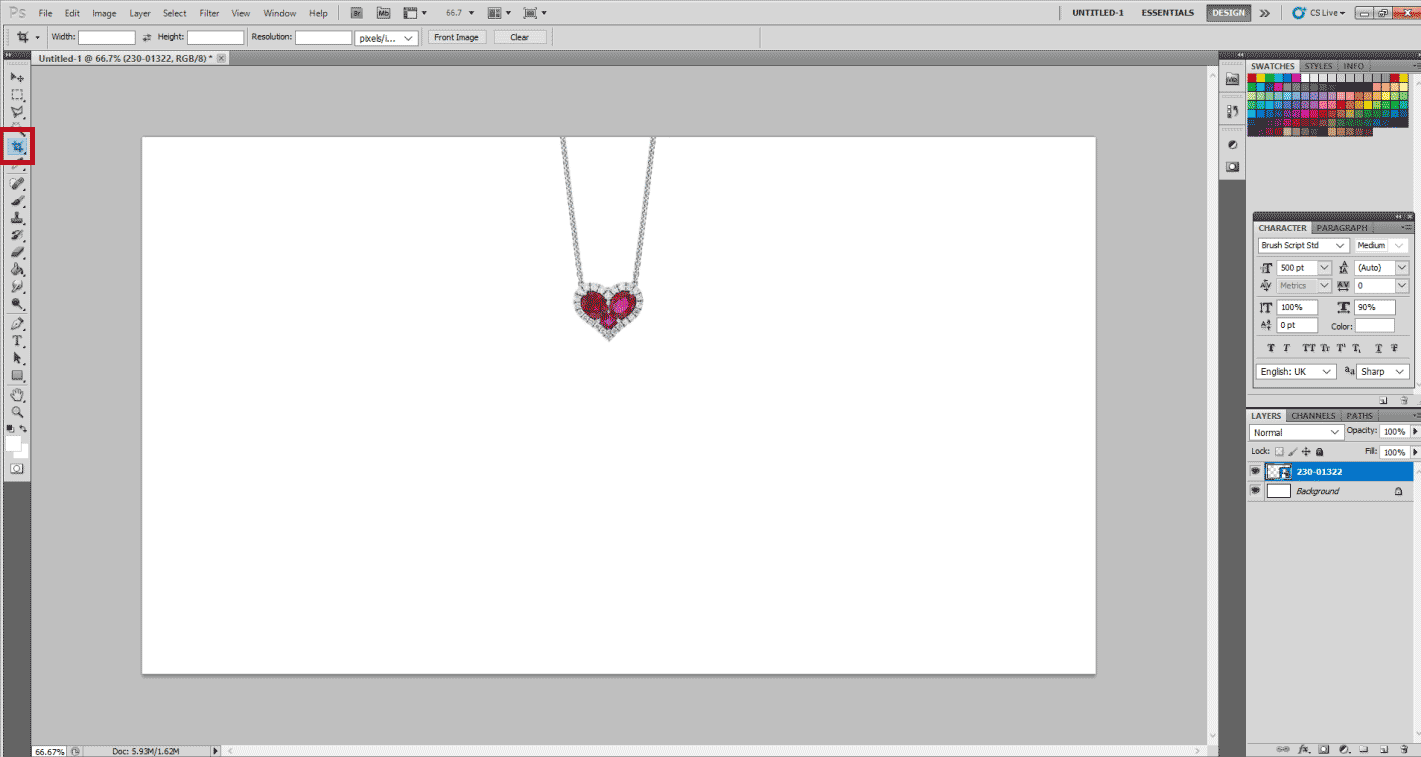
Step 1: Please go to File>Place and place the image that has to be edited first.
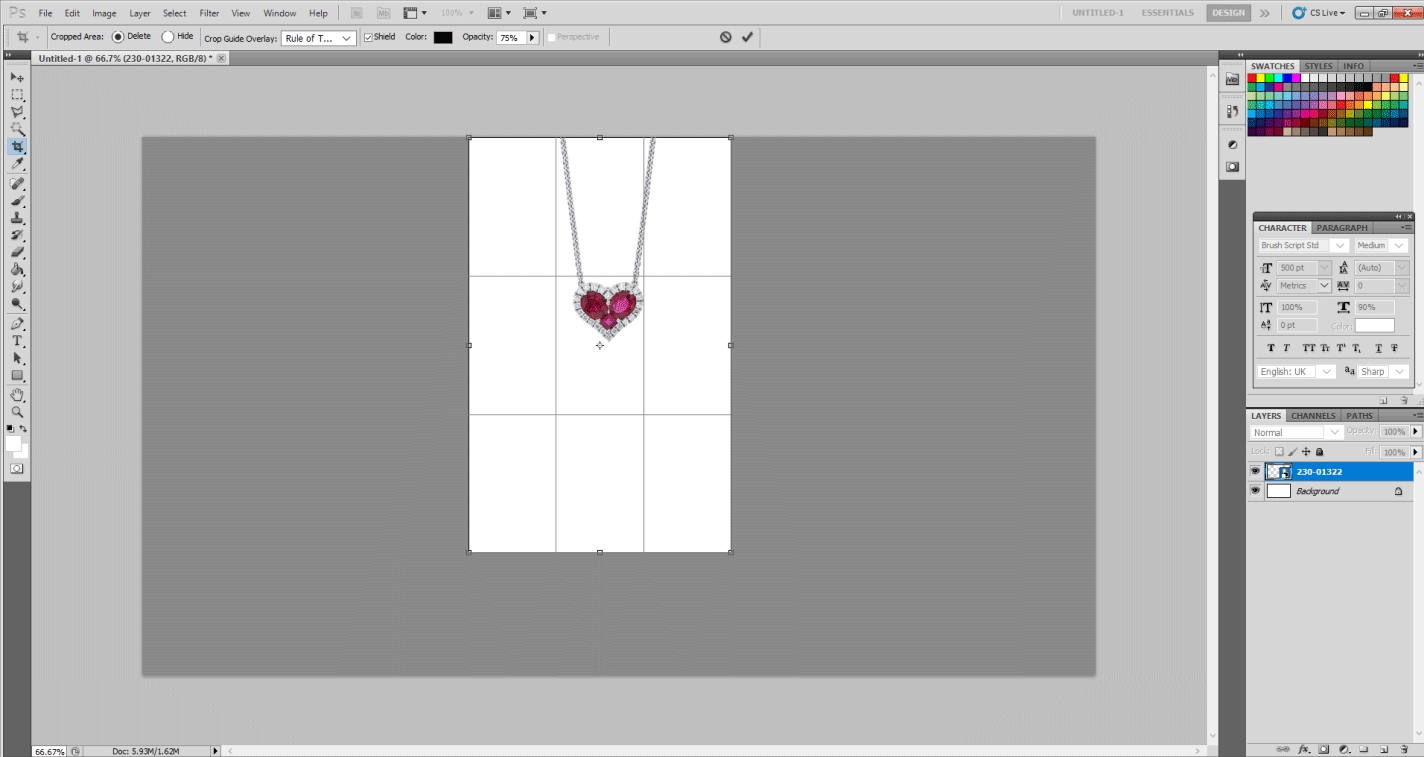
Step 2: Once that is done, I would suggest selecting the Crop tool based on my image and crop an excess part of the image so that we can make the reflection. Normally, if we do not have sufficient space for reflection, we can even use Image then Canvas Size and increase the size of the canvas below in order to give the reflection below.
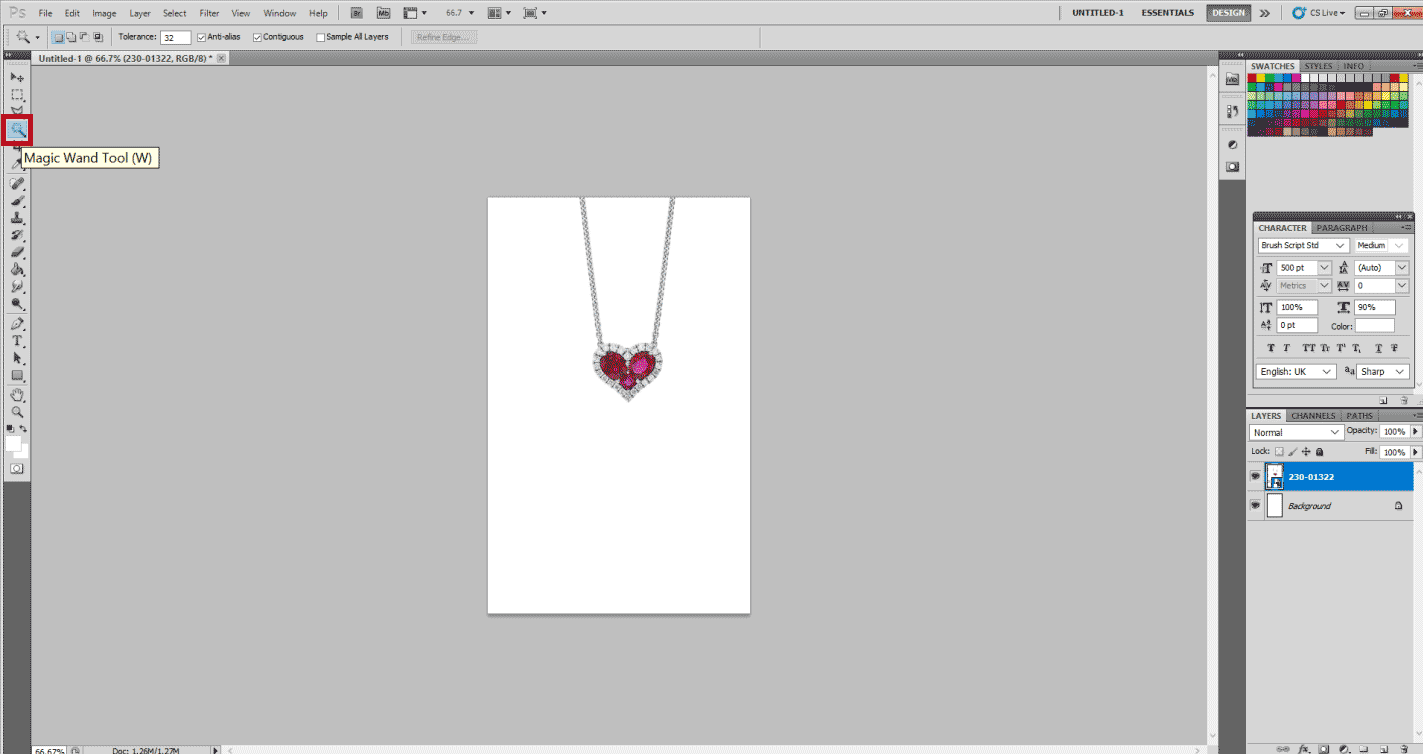
Step 3: Now, let’s make a copy of our jewellery piece. Select the Magic Wand Tool from the left. Now, with the Shift key’s help on the keyboard, please select the entire area except the jewellery, as shown below.

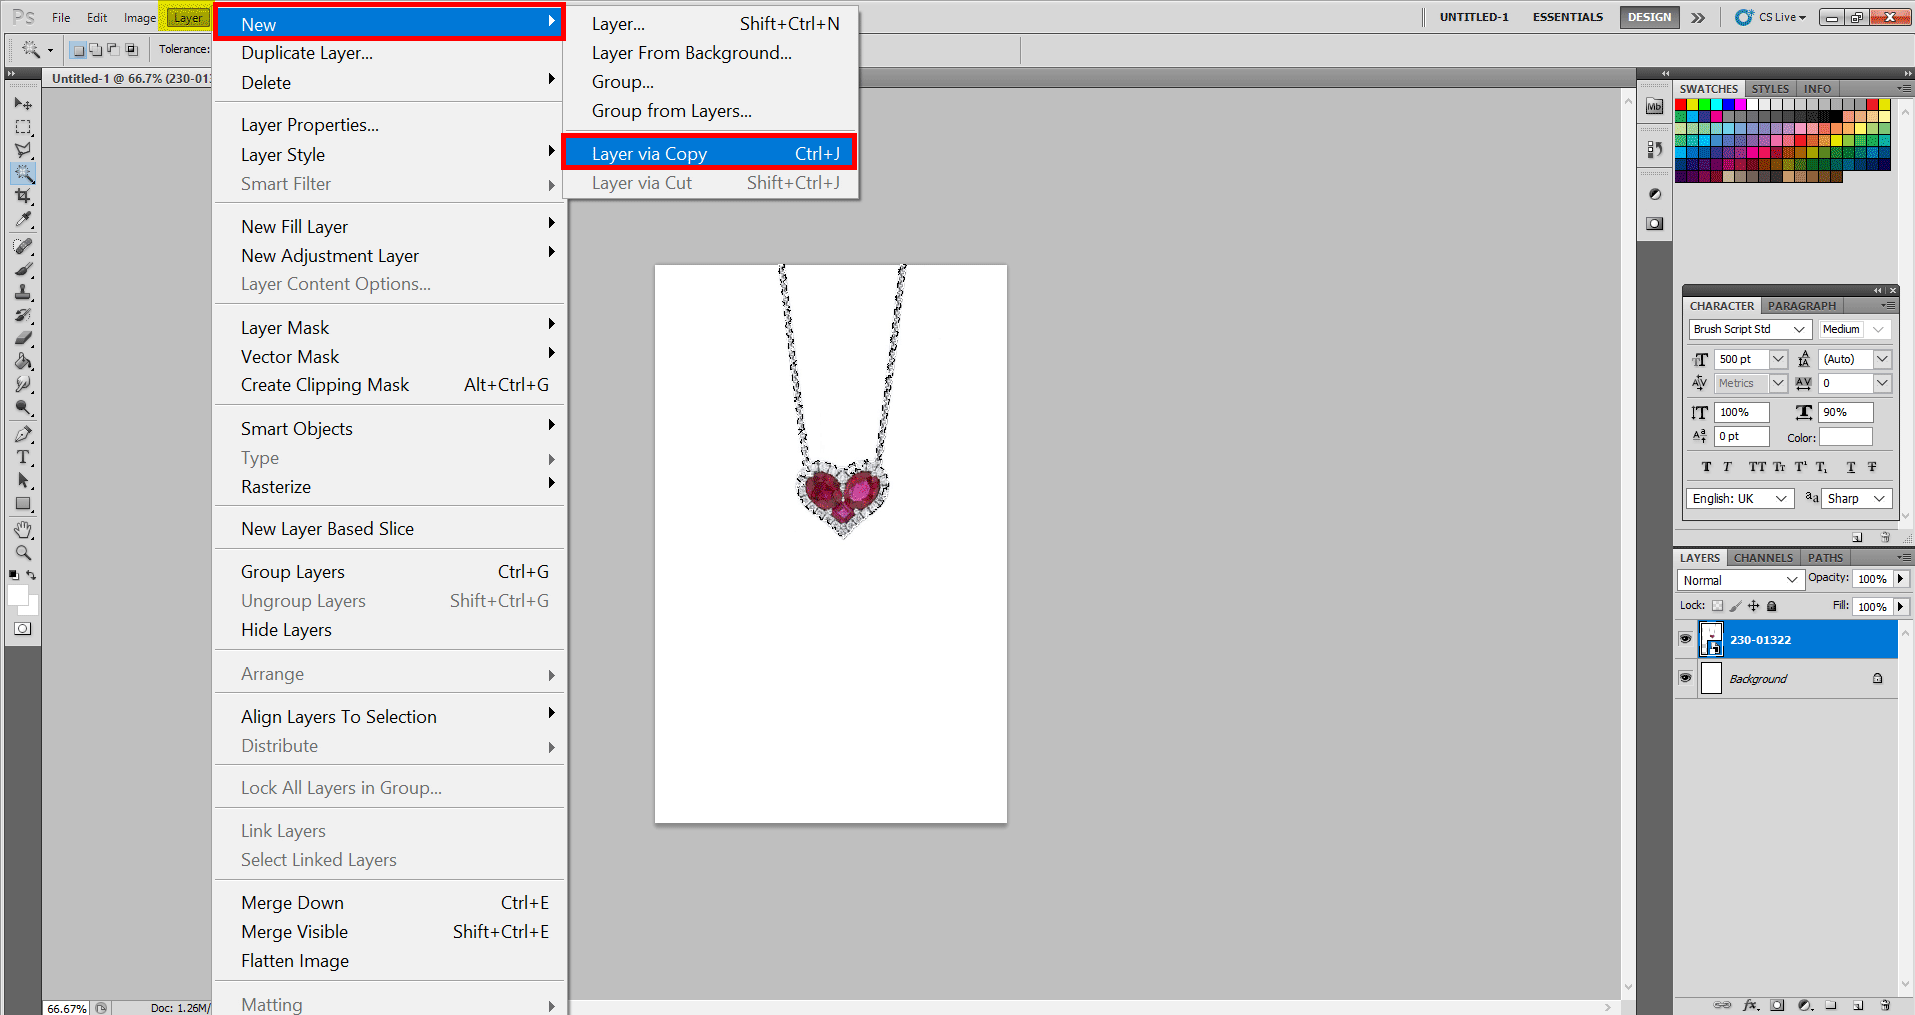
Step 4: Now go to Select>Inverse, and you will find that My piece of jewellery is selected instead. Now Go to Layer, click on New and then select Layer Via Copy. This will make a copy of the Jewelry.
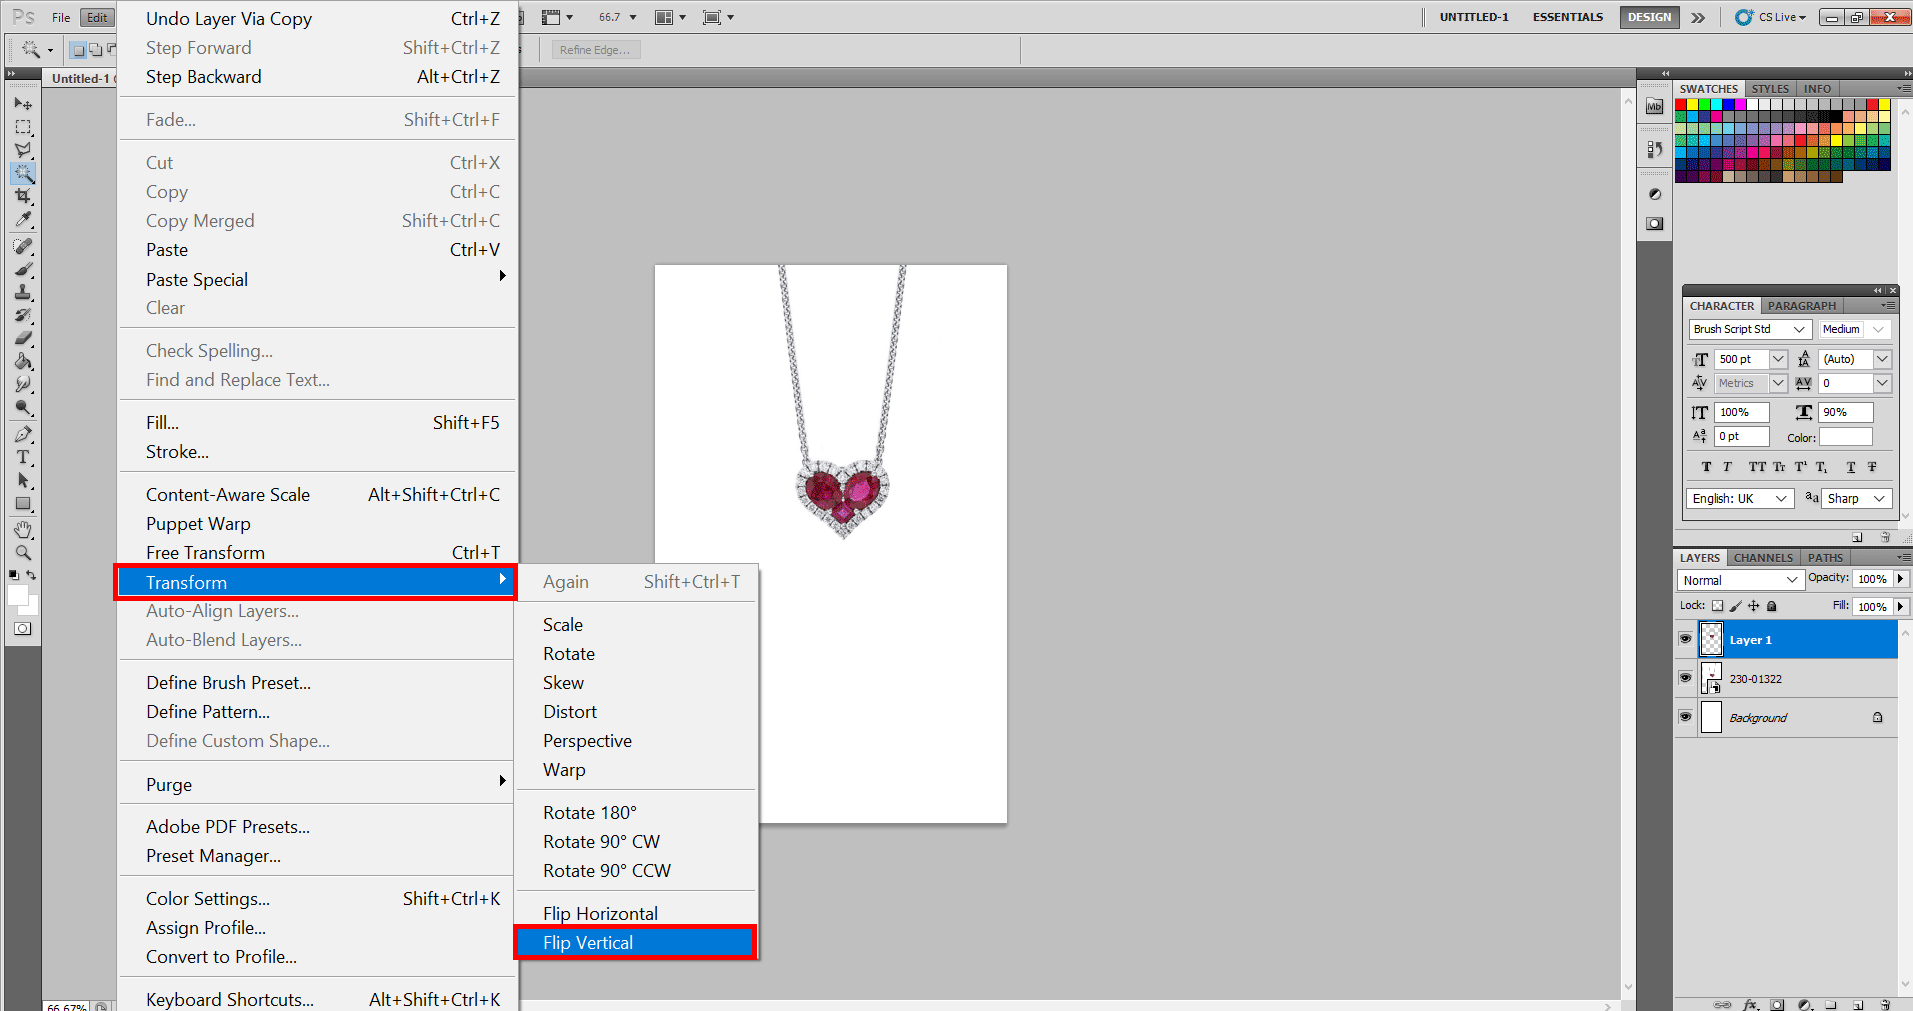
Step 5: Now go to Edit Transform and Flip Vertical. Now select Opacity to 30% and adjust as per your liking.
Step 6: Now, I believe in using the easiest way, and that is the Eraser tool. Please set the following values, and you can fade off the jewelry as per your liking. Hardness: 30 and brush: 38 px.
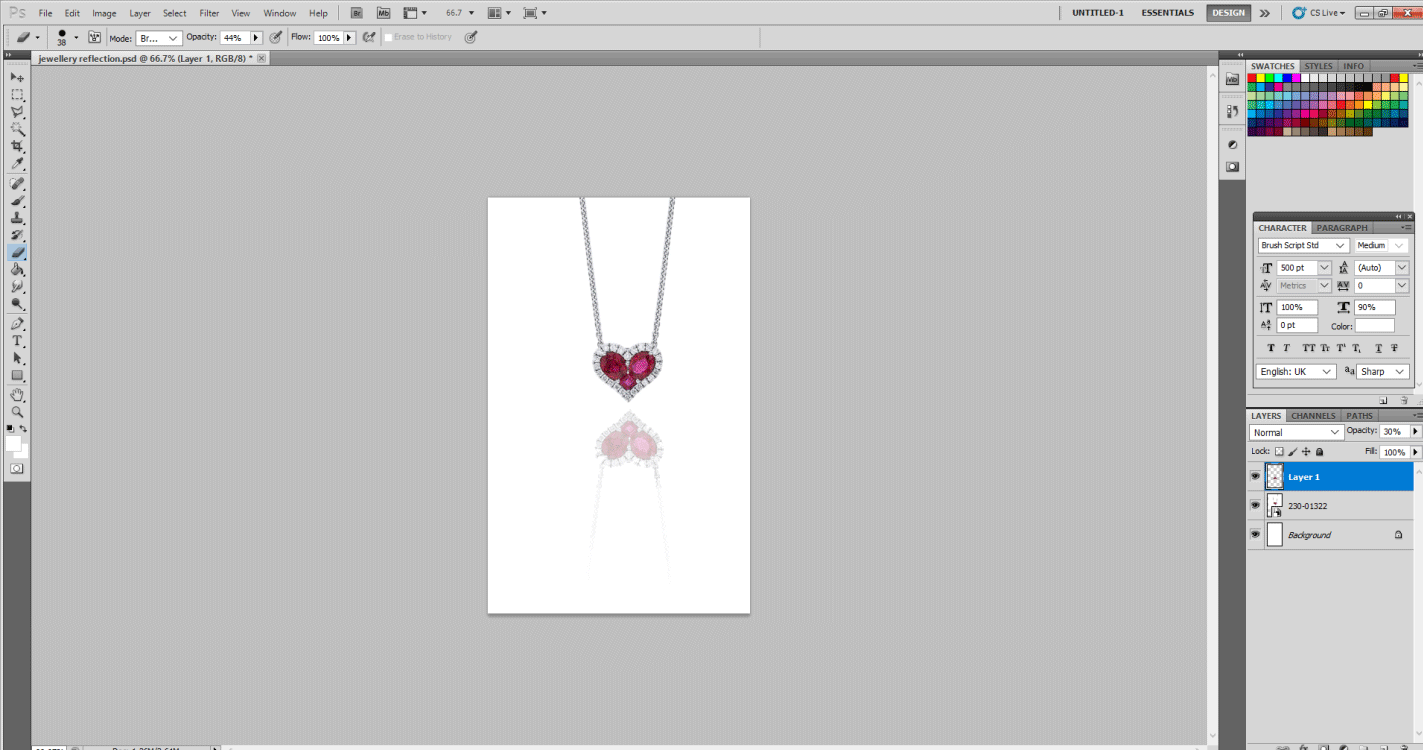
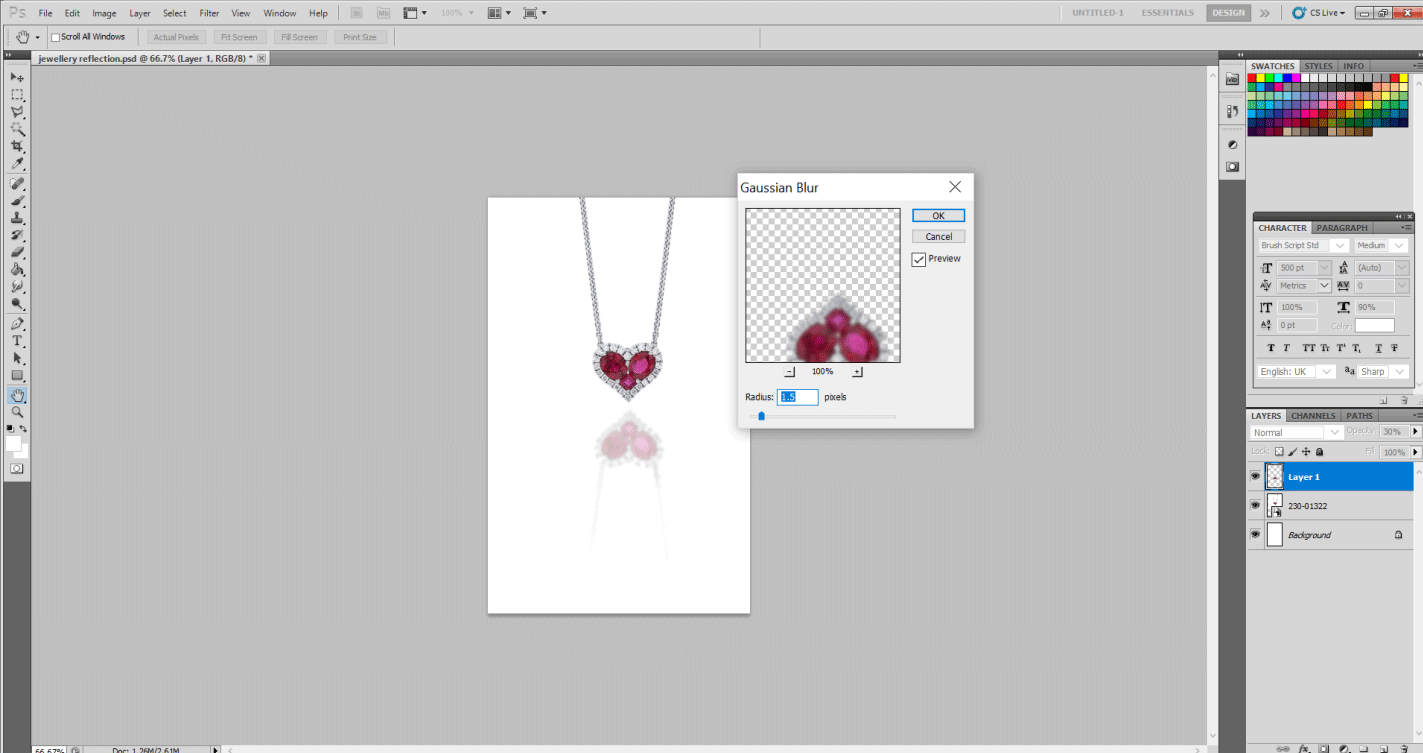
Step 7: You can even use this effect. Go to Filter>Blur, then Gaussian Blur. Set the radius to 1.5. Now your reflection looks natural.
You can even use this effect in the following areas. Any product Reflection ads also use this effect extensively, like Wine Glass or crockery. In-text effects for creating a reflecting effect etc.
Conclusion
It is often much easier to replicate in Photoshop than to catch one in film. Use these simple steps to create an interesting Photoshop reflection image to improve rather boring photography.
Recommended Articles
This is a guide to the Reflection Effect in Photoshop. Here we discuss the steps to create water and Jewelry ads and Reflection in after effects. You can also go through our other related articles to learn more –
