
Introduction to React Props
React is Library based on multiple components that separate the User Interface into several small reusable pieces. In many cases, these small components have to send data between them, and props help pass the data to the different components. Props stand for Properties and is a keyword used in React. These props pass the data between the different components. The major part to focus on in props is that the dataflow is unidirectional, which means that props pass the data one way from the parent to the child. Props are immutable, which means they are read-only, and the child components cannot change the data which comes from the parent to the child.
Syntax:
class Welcome extends React.Component {
render() {
return <h1>Hella, {this.props.name}</h1>;
}
}
How do Props work in React?
As we have discussed above that props are immutable, which means they are read-only and are also unidirectional. The data can be passed only through the parents to the child components, and the child components cannot change it. In React, props carry the data to the different components, and the data each prop contains cannot be changed in the application’s lifespan. Only props cannot make the app dynamic and interactive. To make the app more interactive to the user, we need to use state along with props.
States and props work great together. They work together to form the data model of the application. States help in the data, which can change on the basis of different user actions, and the props are used for the data, which can be immutable.
React Props Validation
Props Validation helps us in forcing the components for their correct use. It helps in the development of the website or application by avoiding the bugs and problems which can occur in the future when the app becomes larger and heavier. Props Validation even shows us how the different components can be used and enhance the readability of the codes.
In the example below, we have created the App component with all the props that we need. For props validation, App.propTypes is used. We will get a console warning if some of the props aren’t using the correct type that we have assigned. We will set App.defaultProps, after specifying validation patterns. We have developed a student data validation portal that validates a student’s name, roll number, attendance, and marks against specific data types. The name is validated as a string, roll number as a number, attendance as a boolean, and marks as a float. correct data for all the values, except marks obtained, so the validation against the marks obtained is “False.”
index.js
import React from "react";
import ReactDOM from "react-dom";
import PropTypes from "prop-types";
const App = props => {
return (
<div>
<h1>Student data validation (An Example of React Props Validation)</h1>
<table>
<tbody>
<tr>
<th>Student's Data</th>
<th>Information</th>
<th>Validation</th>
</tr>
<tr>
<td>Roll Number</td>
<td>{props.propNumber}</td>
<td>{props.propNumber ? "True" : "False"}</td>
</tr>
<tr>
<td>Student Name</td>
<td>{props.propString}</td>
<td>{props.propString ? "True" : "False"}</td>
</tr>
<tr>
<td>Present/Absent</td>
<td>{props.propBool ? "Present" : "Absent"}</td>
<td>{props.propBool ? "Present" : "Absent"}</td>
</tr>
<tr>
<td>Marks Obtained</td>
<td>{props.propFloat}</td>
<td>{props.propFloat ? "True" : "False"}</td>
</tr>
</tbody>
</table>
</div>
);
};
App.propTypes = {
propNumber: PropTypes.number,
propString: PropTypes.string,
propBool: PropTypes.bool.isRequired,
propFloat: PropTypes.float,
};
App.defaultProps = {
propBool: true,
propNumber: 1,
propString: "Rahul",
propFloat: ""
};
ReactDOM.render(<App />, document.getElementById("root"));
styles.css
.App {
font-family: Cambria
, Cochin
, Georgia
, Times
, 'Times New Roman';
text-align: center;
}
Output:

Examples to Implement React Props
Below are the examples mentioned:
1. Basic React Props
When we need fixed data in our component, we can just add props to a function in index.js and use it inside our component.
index.js
import React
, { Component } from 'react';
import ReactDOM from 'react-dom';
class Hello extends Component {
render() {
return <h1>Heyoo {this.props.name}!</h1>;
}
}
ReactDOM.render(<Hello name="Rahul" />,
document.getElementById('root'));
index.html
<div id="root"></div>Output:
![]()
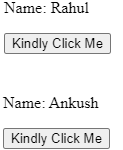
2. State and Props
The below example states how we can combine State and Props in our application. The State is set in the parent component and is passed down to the child component using props. We are setting this.props.updateData(this.state.name) used in child components.
index.js
import React from 'react';
import { render } from 'react-dom';
class ChildComponent extends React.Component {
state = {
name: 'Ankush'
}
update = () => {
this.props.updateData(this.state.name);
}
render() {
return (
<div>
<button onClick={this.update}>Kindly Click Me</button>
</div>
)
}
}
class ParentComponent extends React.Component {
state = {
name: 'Rahul'
};
updateData = (value) => {
this.setState({ name: value })
}
render() {
return (
<div>
<p>Name: {this.state.name}</p>
<ChildComponent updateData={this.updateData} />
</div>
)
}
}
render(<ParentComponent />, document.getElementById('root'));
index.html
<div id="root"></div>Output:
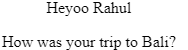
3. Default Props
In the example below, we have set default property values directly on the component constructor instead of adding them to the Parent component.
index.js
import React
, {Component} from 'react'
import { render } from 'react-dom'
const styles = {
fontFamily: 'times',
textAlign: 'center',
}
class App extends Component {
render(){
return (
<div style={styles}>
<p>Heyoo {this.props.name}</p>
<p>How was your trip to {this.props.city}?</p>
</div>
)
}
}
App.defaultProps = {
name: 'Rahul',
city: 'Bali'
}
render(<App />,
document.getElementById('root'))
index.html
<div id="root"></div>Output:
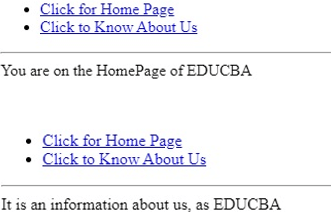
4. React Router Props
In the example below, inside the RouterNavigationSample function, we are setting props.
index.js
import React from "react";
import ReactDOM from "react-dom";
import { BrowserRouter as Router
, Route
, Link } from "react-router-dom";
import "./styles.css";
class NavigationComponent extends React.Component {
render() {
return (
<>
<ul>
<li>
<Link to="/">Click for Home Page</Link>
</li>
<li>
<Link to="/about">Click to Know About Us</Link>
</li>
</ul>
<hr />
</>
);
}
}
const Home = props => {
return <div>You are on the HomePage of {props.user}</div>;
};
const About = props => {
return <div>It is an information about us, {props.admin}</div>;
};
class RouterNavigationSample extends React.Component {
render() {
return (
<Router>
<>
<NavigationComponent />
<Route
exact
path="/"
render={props => <Home {...props} user="EDUCBA" />}
/>
<Route
path="/about"
render={props => <About {...props} admin="as EDUCBA" />}
/>
</>
</Router>
);
}
}
const rootElement = document.getElementById("root");
ReactDOM.render(<RouterNavigationSample />, rootElement);
styles.css
.App {
font-family: 'Times New Roman'
, Times
, serif;
text-align: center;
}
Output:
Conclusion
On the basis of the above article, we understood React props and Props Validation. This article also explained Props Validation. The different examples of React Props will help you to understand how Props can be used for the different requirements of the application.
Recommended Articles
This is a guide to React Props. Here we discuss an introduction, syntax, working, and React Props validation, along with programming examples. You can also go through our other related articles to learn more –

