Updated December 13, 2023
Introduction to Python Nmap Module
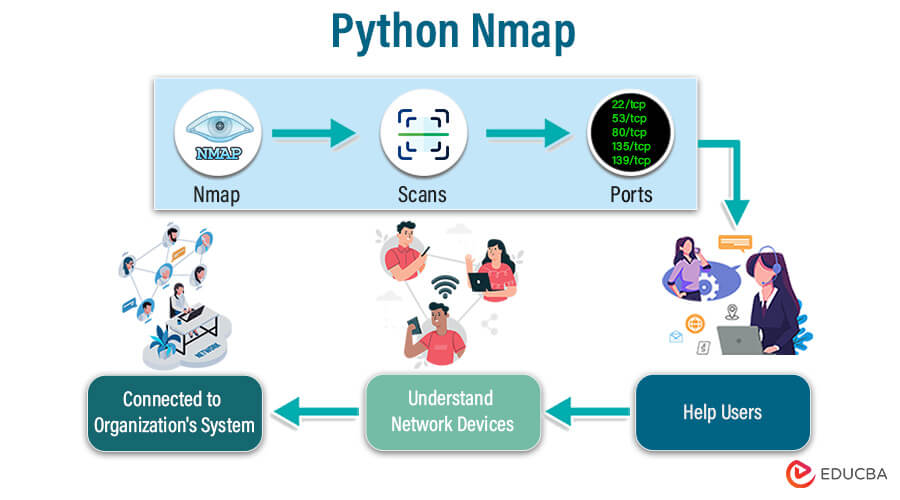
The Python Nmap module is a Python library that simplifies the interaction of users with the Nmap tool. Nmap tool is used where devices like laptops, PCs, printers, etc., are connected in a particular environment. Nmap scans the ports and helps to find which devices are connected to an organization’s central system, what activities are going on, whether there are any malpractices in terms of security, etc. This Python library automates all these processes and makes the work easier.
Table of Contents
Key Takeaways
- User-friendly – This library is easy to install and implement.
- Port scanners built using the Nmap module cover a wide range of ports.
- It scans multiple devices ranging from small home device networks to large organizations.
- The Nmap module helps identify open/closed ports, activities on a particular device, security issues, etc.
What is Nmap in Python?
Organizations use Nmap (Network Mapper) to scan ports to understand the complete network of devices connected to the organization’s system. Scanning ports allow users to gain insights into the network of connected devices. Now, users can build this port scanner using the Python library, also known as the Python Nmap module. When we run the program, the scanner will scan the ports automatically according to port ranges coded in the program.
How to Install Nmap Module in Python?
To install the Python Nmap module, just check for the Python and pip versions. Open your CMD and type below to check.
To check the Python version
python --versionTo check the pip version
python -m pip --versionAfter checking for Python and pip versions, install the Python Nmap module using the below command.
pip install python-nmapYou will get the following message after entering the command and clicking enter.
You have installed the Python Nmap module, which is ready for use.
Example to Implement Python Nmap Module
Below are the different examples of implementing the Nmap module in Python:
Example #1
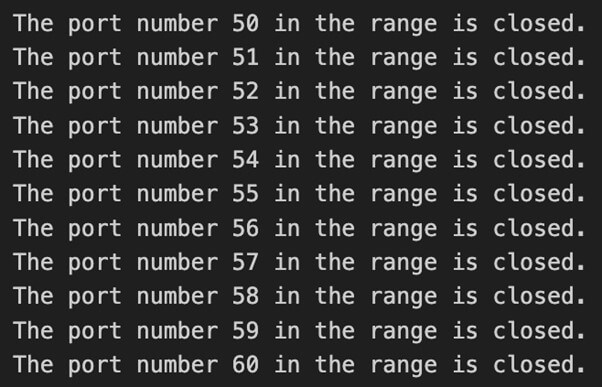
After installing the software, proceed to implement it in a real scenario by scanning a range of ports and verifying their status, determining whether they are closed or open. We will use the Nmap library and its functions, like PortScanner, scan, etc., to build the program and check the output.
Code:
#import Python Nmap Module
import nmap
#Set a range of ports for scanning
Initial_Port = 50
Final_Port = 60
#Setting target Host
Target_Host = '127.0.0.1'
#Use Portscanner function
Port_Scanner = nmap.PortScanner()
#Loop through the range of ports
for i in range(Initial_Port, Final_Port + 1):
    output = Port_Scanner.scan(Target_Host, str(i))
    port_state = output['scan'][Target_Host]['tcp'][i]['state']
    print(f'The port number {i} in the range is {port_state}')
Output
Explanation of the above steps:-
- Importing Nmap to use Nmap functionality.
- Setting the start and end points of ports in the port range.
- Defining a target host representing the local machine.
- .PortScanner() function creates a class.
- For loop is used to iterate through the port range to check whether ports are opened or closed.
- [‘scan’] – .scan() function returns a ‘scan’, which is a top-level key.
- [‘tcp’] – It is a subkey under ‘scan’.
- [‘state’] – It is a subkey under ‘tcp’.
Example #2
Scanning of ports with handling errors
Code:
#import Python Nmap Module
import nmap
#Define a list of common ports
Common_ports =[21, 22, 80, 443, 8080]
Initial_Port = 50
#Setting target Host
Target_Host = '127.0.0.1'
#Use Portscanner function
Port_Scanner = nmap.PortScanner()
#Loop through the range of ports
for port in common_ports:
output = Port_Scanner.scan(Target_Host, str(port))
port_state = output['scan'][Target_Host]['tcp'][port]['state']
    print(f'The port number {port} is {port_state}')
except nmap.PortScannerError as e:
print(f’Nmap scanning error: {e}’)
except nmap.PortScannerError as e:
print(f’Nmap scanning error: {e}’)
Output:
Explanation of error handling ( initial steps are similar to example one )
- The script loops through the try block as we run the code. But if the namp.PortScannerError. Occurs during execution; code inside the first except block will be executed.
- The second except block executes when the code encounters something unexpected.
Example #3
Code:
import nmap
# Define a range of IP addresses to scan
network_prefix = '192.168.1.'
start_ip = 1
end_ip = 10
# Create an instance of the PortScanner class
Port_Scanner = nmap.PortScanner()
try:
	# Loop through the range of IP addresses
	for ip in range(start_ip, end_ip + 1):
    	target_host = f'{network_prefix}{ip}'
    	# Perform a comprehensive scan (TCP SYN scan) on common ports
    	output = Port_Scanner.scan(target_host, arguments='-p 1-1000 -sS')
    	# Extract and print information about open ports and services
    	for host in Port_Scanner.all_hosts():
        	print(f'Scan results for {host}:')
        	for protocol in Port_Scanner[host].all_protocols():
            	ports = Port_Scanner[host][protocol].keys()
            	for port in ports:
                	service = Port_Scanner[host][protocol][port]['name']
                	state = Port_Scanner[host][protocol][port]['state']
                	print(f' Port {port}/{protocol} is {state} ({service})')
except nmap.PortScannerError as e:
	print(f'Nmap scan error: {e}')
except Exception as e:
	print(f'An unexpected error occurred: {e}')
Output:
Explanation ( Initial steps are similar )
Here, we are trying to scan a range of IP addresses. Scan from 1 to 1000 and provide the results indicating open ports and their corresponding services.
Here, the open is 80, and the corresponding service is “http”.
Conclusion
The Nmap is a powerful tool to check ports for various devices and their activities, and the Python Nmap module is a convenient library to use Nmap to build a versatile program that can scan a range of ports irrespective of the type of device or its size. It is easy to install, import, and implement. The script enables users to identify open/closed ports, monitor ongoing activities within the device, and detect potential security malfunctions. It generates a comprehensive report empowering users to take actions to enhance the security of the organization’s central system, where all connected devices are located. The Python Nmap module is one of the most used Python libraries, allowing users to use multiple functions to build a robust port scanner.
FAQ’s
Q1. Can the Python Nmap module scan ports on all three Operating systems (Windows, Linux, MacOS)?
Answers: Yes, the Python Nmap module can scan ports in all three Operating systems (Windows, Linus, MacOS)
Q2. What is the prerequisite required to install the Python Nmap module?
Answers: The system should have Python and pip installed.
Check whether Python is installed by running the code in CMD.
python --versionQ3. Does the Python Nmap module provide options for scanning time?
Answers: Yes, the Python Nmap module allows setting time for scanning. This can be achieved using the timing parameter (nmap -T<timing> <target_host>)
Recommended Articles
We hope this EDUCBA information on “Python Nmap” benefited you. You can view EDUCBA’s recommended articles for more information.


