
Introduction to Pen Tool In Illustrator
The Pen Tool is one of Illustrator’s important sketching tools, which helps produce both accurate and freehand artwork. It can also be used for editing vector artwork that already exists. It is considered to be the most solid tool in Adobe Illustrator. It permits the artist to produce forms with freehand curves, most of which are already existing, in reality, can be replicated by utilizing the pen tool. The usage of the pen tool needs to be a little more coordinated than utilizing other Illustrator tools.
With the help of the pen tool, you can produce all types of elements like curves, closed shapes, and straight lines, which you can then integrate into Illustrator:
1. Anchor Point: Anchor points can be used to manage the form of an object or a path. They are produced in an automatic way when shape tools are used. By using the pen tool, you can produce anchor points manually by clicking from point to point.
2. Direction Line: These lines can be called the handles you utilize on points curved to regulate the angle and depth of curved paths.
3. Closed Shape: When you produce a path, it turns into a closed shape when the start point connects with the endpoint.
4. Simple Path: A path comprises of one or more curved or straight sections. The anchor points mark the endpoints of the path segments.
5. Bezier Curve: Pierre Bezier originally created the bezier curve in the 1970s for CAM/CAD operations. You can manage the size and the depth of a bezier curve by utilizing direction lines.
How To Use Pen Tool In Illustrator?
You can select the pen tool from the left-hand side toolbar in Illustrator.
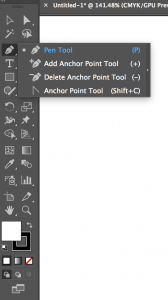
1. Pen Tool: The paths you produce by using the pen tool will contain handle points, which you can utilize to alter the form of vectors, and anchor points that remain in a fixed position when the form of a path is being balanced.
2. Add Anchor Point Tool: This tool can be used to include a new anchor point on a path. Extra anchor points permit you to modify the form of path segments between anchor points. For example, you can position the tool on the spot where you want to append the point, then click on the path.
3. Delete Anchor Point Tool: This tool can be used to eliminate an anchor point from a path. Deleting anchor points permits you to produce path segments that are longer between anchor points. You can position the tool on the anchor point you want to delete and click on it.
4. Anchor Point Tool: This tool can be used to transform an anchor point between a smooth point and a corner point. You can position the tool on the anchor point you want to transform and click on it.
Examples of using Pen Tool
Step 1: First, select the pen tool from the toolbar.
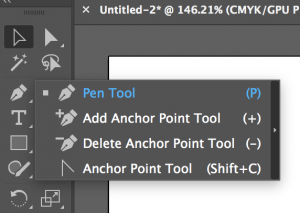
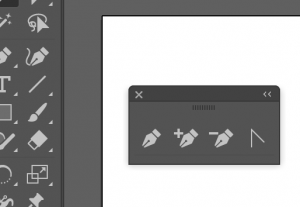
Step 2: To drag out all the other pen tools, you can click on the drag out the arrow in the pen tool as shown below.
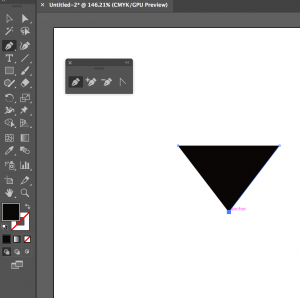
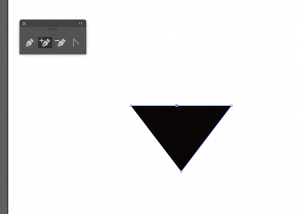
Step 3: Now, select the pen tool. To put the first anchor point, you just need to click once. By moving the mouse to the following position and then clicking again produces the second point. The two anchor points will be joined together. Continue doing it to produce a triangular shape.
Make sure there is no stroke, and you have a solid color for a fill.

Step 4: Now, complete the triangle by selecting a third anchor point and connect it. In total, we have three points now.
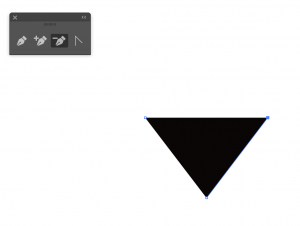
Step 5: Now, to add a point to this object, we can add it by selecting the add anchor point tool. Then we select a path in the object as shown below:
Now we have four points. By selecting the direct selection tool and clicking on the point that you created, and dragging it will change the shape of the object you created.
Step 6: You can change the Shape by direct Selection Tool
Now, if you want this object to have only three-point and remove the one you created, you can select the delete anchor tool and delete the point.
Step 7: Removing The Anchor Point Using The Delete Anchor Point. If you want your object to have a curve to it, you can do it using the anchor point tool(convert). Select one of the points, hold down and drag out. This produces a bezier curve.
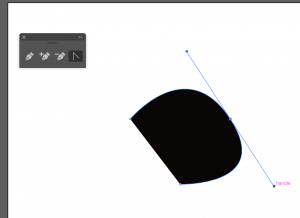
Step 8: Bezier Curve Using The Anchor Point Tool. You can create a bezier curve by using only the pen tool. Select the pen tool, press, hold down, and drag out. This creates a point which now has a bezier curve.
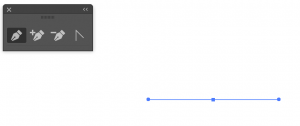
Step 9: A Point With The Bezier Curve. Now make a point directly below it and drag it out, which makes another bezier curve.
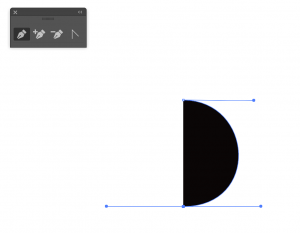
Now you can see the Completed Final Shape by using the Pen Tool.
Conclusion
The advantage of the pen tool is it gives you complete command over the curve. By sketching a complete bunch of points, you can hope for the curve to appear good. By manipulating the curve, you can get the outstandin1g details. It is considered as a vital tool for producing anything other than squares, circles, and other shapes like polygons. You can surely utilize the paintbrush or the pencil tool, but you cannot expect clear-cut, even and crisp shapes. The pen tool is very important because gradients, strokes, and blends all started with describing bezier paths and the application of features. It is the prime tool for sketching something that requires accuracy, for example, lettering or a map.
Even though there have been some significant improvements to the pen tool, it still remains a tool that is very complex and menacing for new graphic designers and artists. In order to make it more convenient, Adobe included various tools to assist in vector production. The pen tool still remains the chief production tool in Illustrator, but there are some extra tools that can be utilized to achieve the same outcomes when producing vector art.
Recommended Articles
This is a guide to Pen Tool in Illustrator. Here we discuss a basic concept, how to use the pen tool in Illustrator and its steps with Screenshots. You can also go through our other suggested articles to learn more –
