Creating a Multi-Vendor Marketplace in WordPress
Creating a multi-vendor marketplace in WordPress has never been easier. A marketplace is a platform where customers may compare, browse, and buy goods and services from a large number of sellers. Platforms like Amazon, Etsy, and eBay are great examples of how a marketplace should function.
With the right tools, you do not need coding skills or a large team to get started. Using WordPress along with a multi-vendor plugin like Dokan, you can quickly build a fully functional marketplace. You can control payments, allow many vendors to sell, manage commissions and delivery, and customize it to reflect your brand, all from a single, easy-to-use dashboard. In this guide, we will walk you through the step-by-step process of creating your marketplace, from installing Dokan and selecting a theme to adding products, inviting vendors, and promoting your platform to attract buyers.
Why Should You Create a Marketplace in 2025?
Online marketplaces are experiencing unprecedented growth, presenting significant opportunities for entrepreneurs and businesses. Global e-commerce sales are expected to reach $7.4 trillion by 2025, accounting for approximately 24% of total retail sales. Consumers are increasingly choosing online businesses that offer a large assortment of goods and services, as evidenced by this growth.
Why Buyers Prefer Marketplaces?
Consumers are gravitating towards marketplaces for several reasons:
- Variety and Convenience: Marketplaces offer a one-stop shopping experience, enabling buyers to browse multiple sellers, compare prices, and make informed purchasing decisions.
- Trust and Security: To increase trust and confidence in the buying process, well-known marketplaces often offer buyer protection policies, secure payment channels, and user ratings.
- Competitive Pricing: The presence of multiple sellers fosters competition, often leading to better prices and deals for consumers.
Benefits for Sellers
For sellers, marketplaces offer an accessible entry point into the e-commerce space:
- Reduced Overhead Costs: Sellers can avoid the costs of creating and managing their own e-commerce websites.
- Built-in Customer Base: Established marketplaces come with an existing customer base, reducing the effort required to attract new customers.
- Integrated Tools and Services: Many marketplaces provide tools for inventory management, payment processing, and marketing, streamlining business operations.
By starting your own marketplace, you are doing more than just developing a website; you are launching a vibrant company that connects buyers and sellers, capitalizes on a rapidly expanding market, and offers distinctive value propositions. With the right tools and strategies, you can carve out a space in the expansive eCommerce ecosystem and build a sustainable, profitable venture.
How to Create a Multi-Vendor Marketplace in WordPress with Dokan?
You can easily build a full-featured online marketplace using the Dokan multivendor plugin. Let us break it down step by step.
What is Dokan?
Dokan is a popular WordPress plugin for creating multi-vendor marketplaces, with over 50,000 active installations. It is built on WooCommerce, ensuring compatibility with WooCommerce features and themes. With minimal customization, you can get started quickly and easily.
Step 1: Install and Activate Dokan
Let us assume you have already set up and configured WooCommerce on your WordPress website. Adding Dokan is straightforward:
- Navigate to Admin Dashboard → Plugins → Add New. Click the search
- Type Dokan -> Install -> Activate.
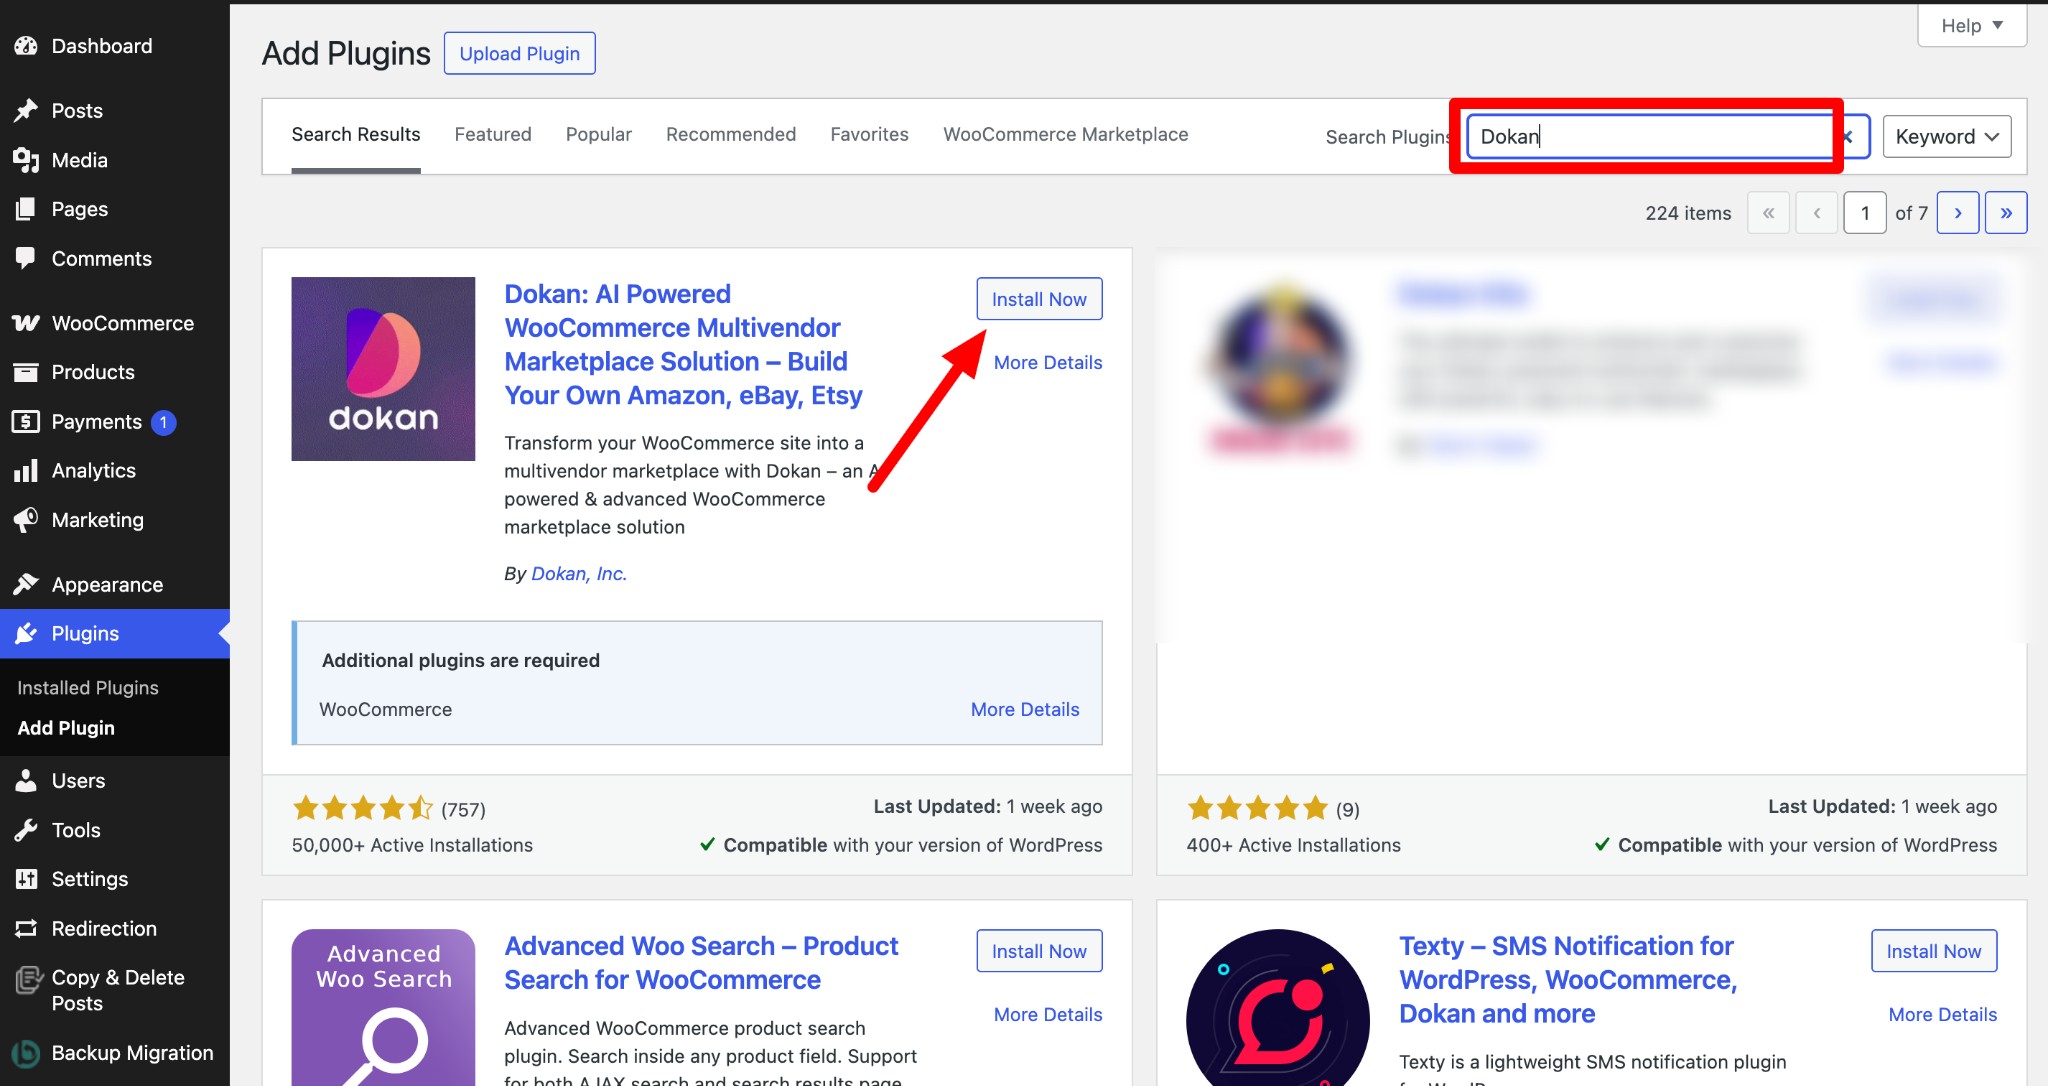
Dokan includes a setup wizard that helps configure your marketplace quickly.
Step 2: Choose a Dokan Compatible Theme
Selecting a compatible theme is the next step after installing the Dokan multivendor plugin. Any theme that works with WooCommerce will also work with Dokan. For convenience, you can use Dokan’s own theme, Dokani, which is built specifically for marketplaces.
To install a theme, go to WP Admin → Appearance → Themes and select a theme that is Dokan-compatible.
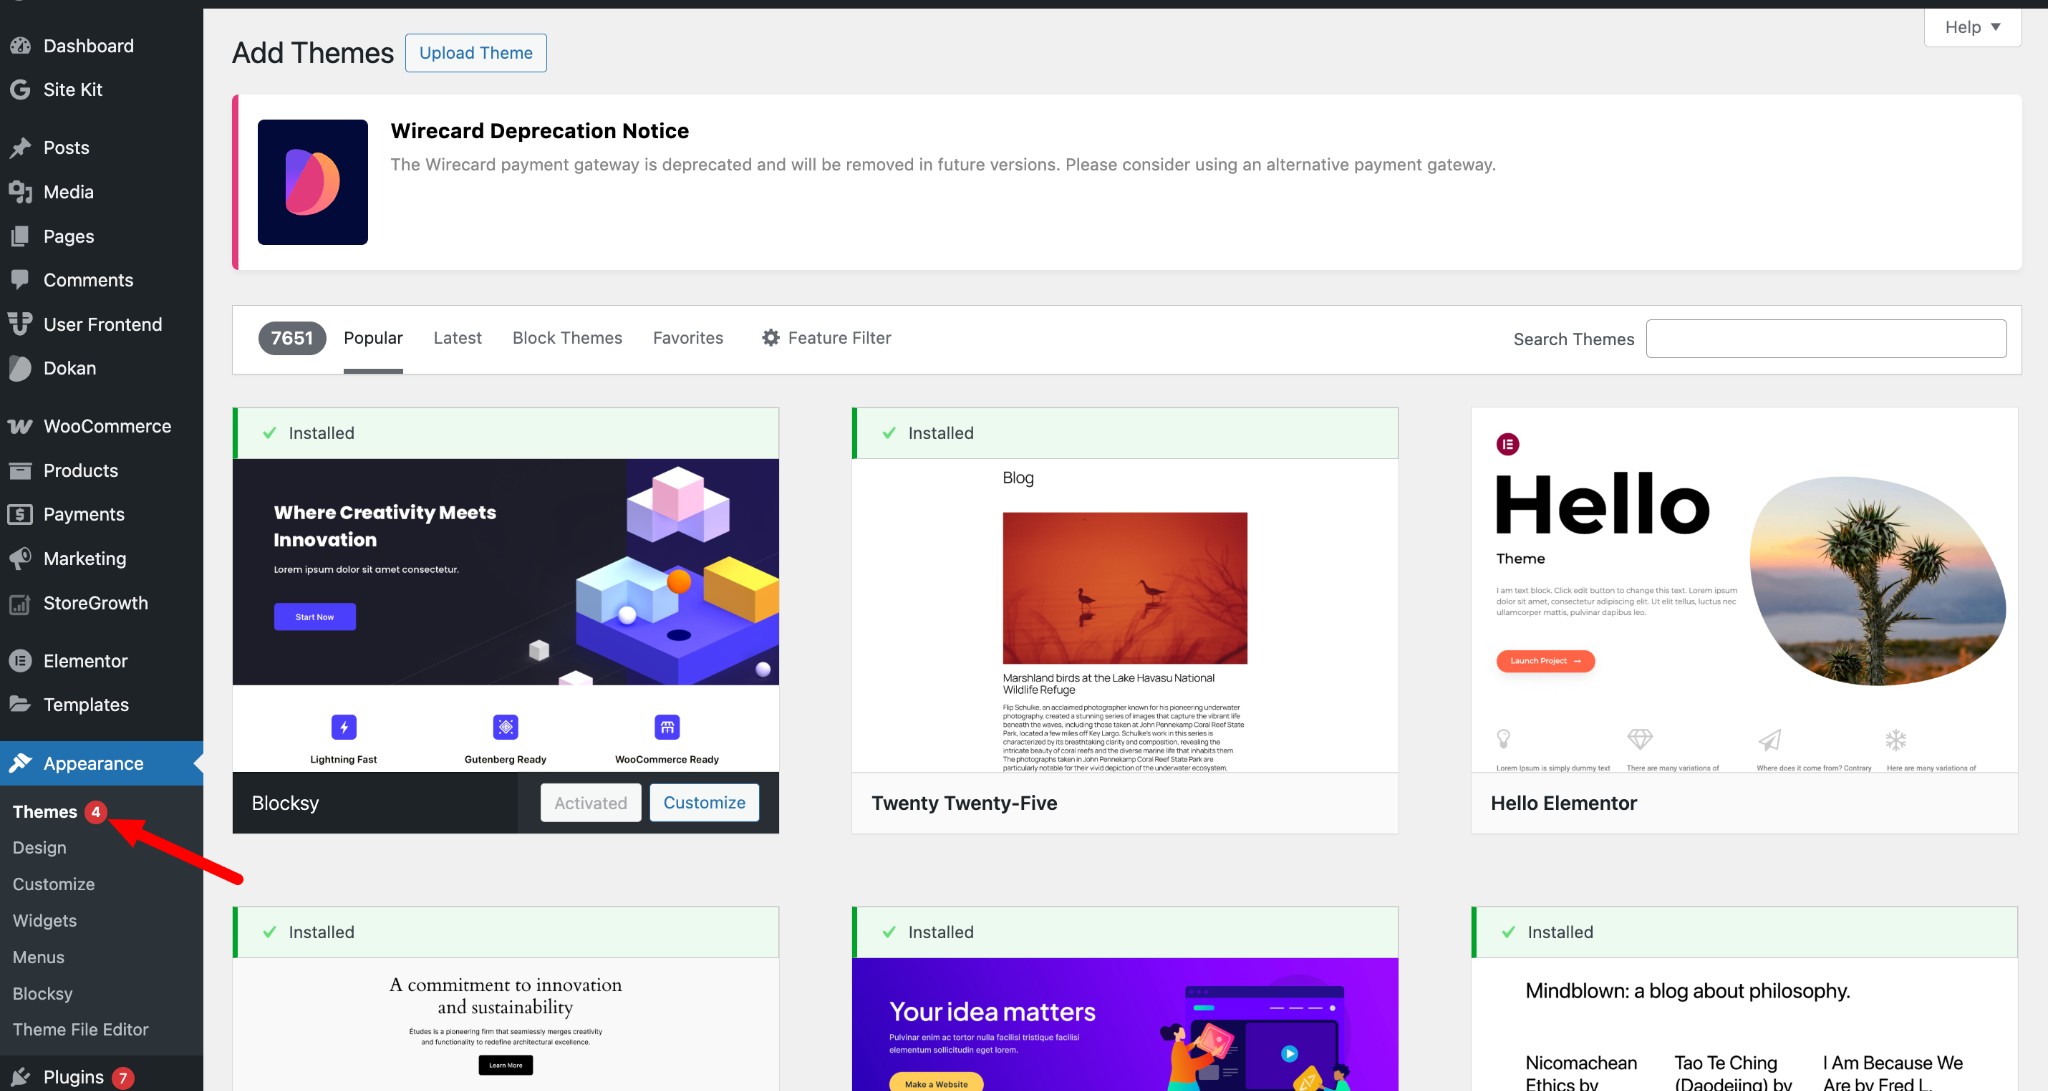
If you choose a different theme, you will need to customize it to ensure compatibility with your marketplace.
Step 3: Configure Dokan General Settings
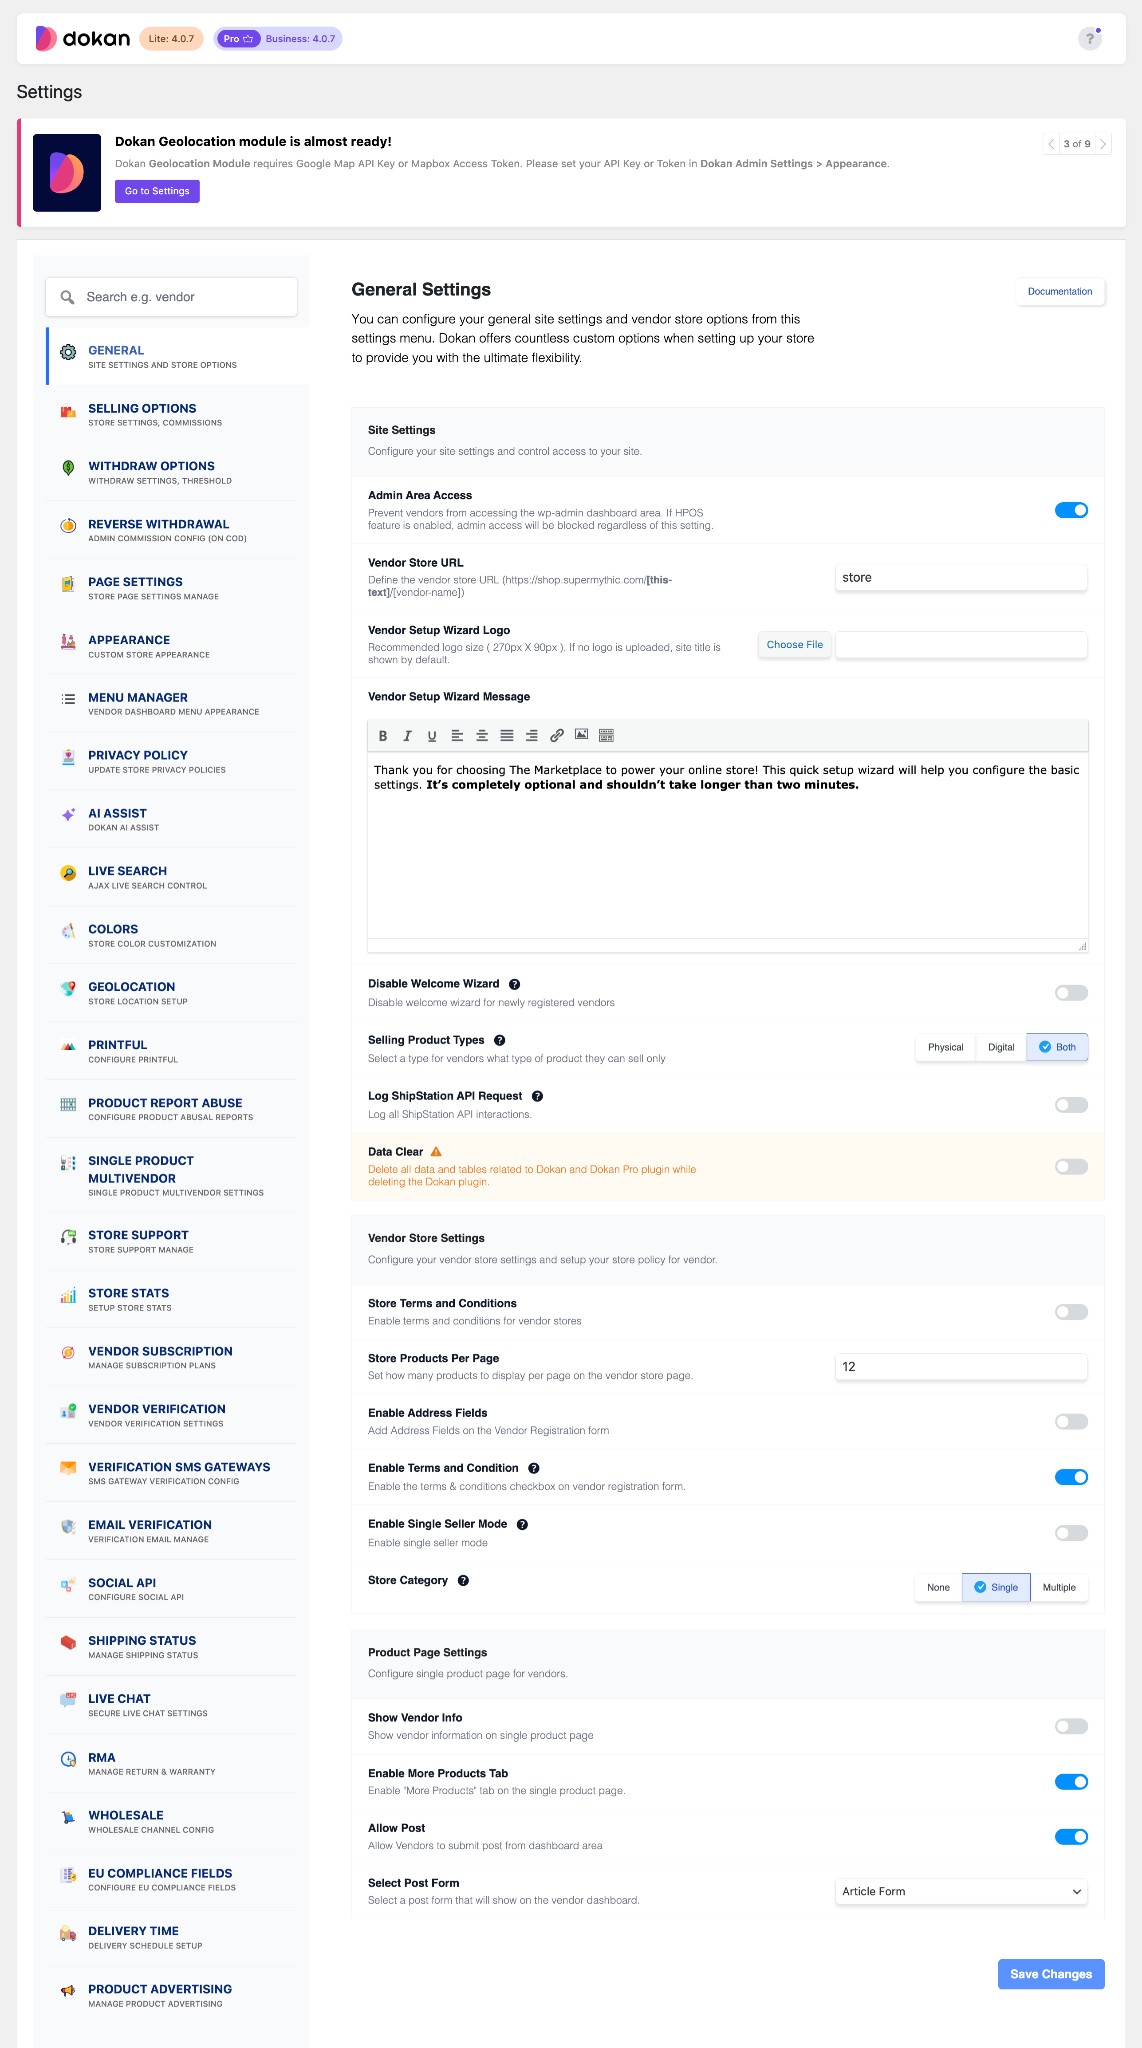
After activation, configure basic settings under WP Admin → Dokan → Settings. Here, you can:
- Set up your store’s terms and conditions
- Create store categories, allowing vendors to add different categories to their stores
- Enable payment gateways
- Configure withdrawal methods
- Allow vendors to upload new products
- Create new product tags
- Set product status
- Configure selling options
- Set a privacy policy
Click Save Changes after configuring your settings to apply your updates.
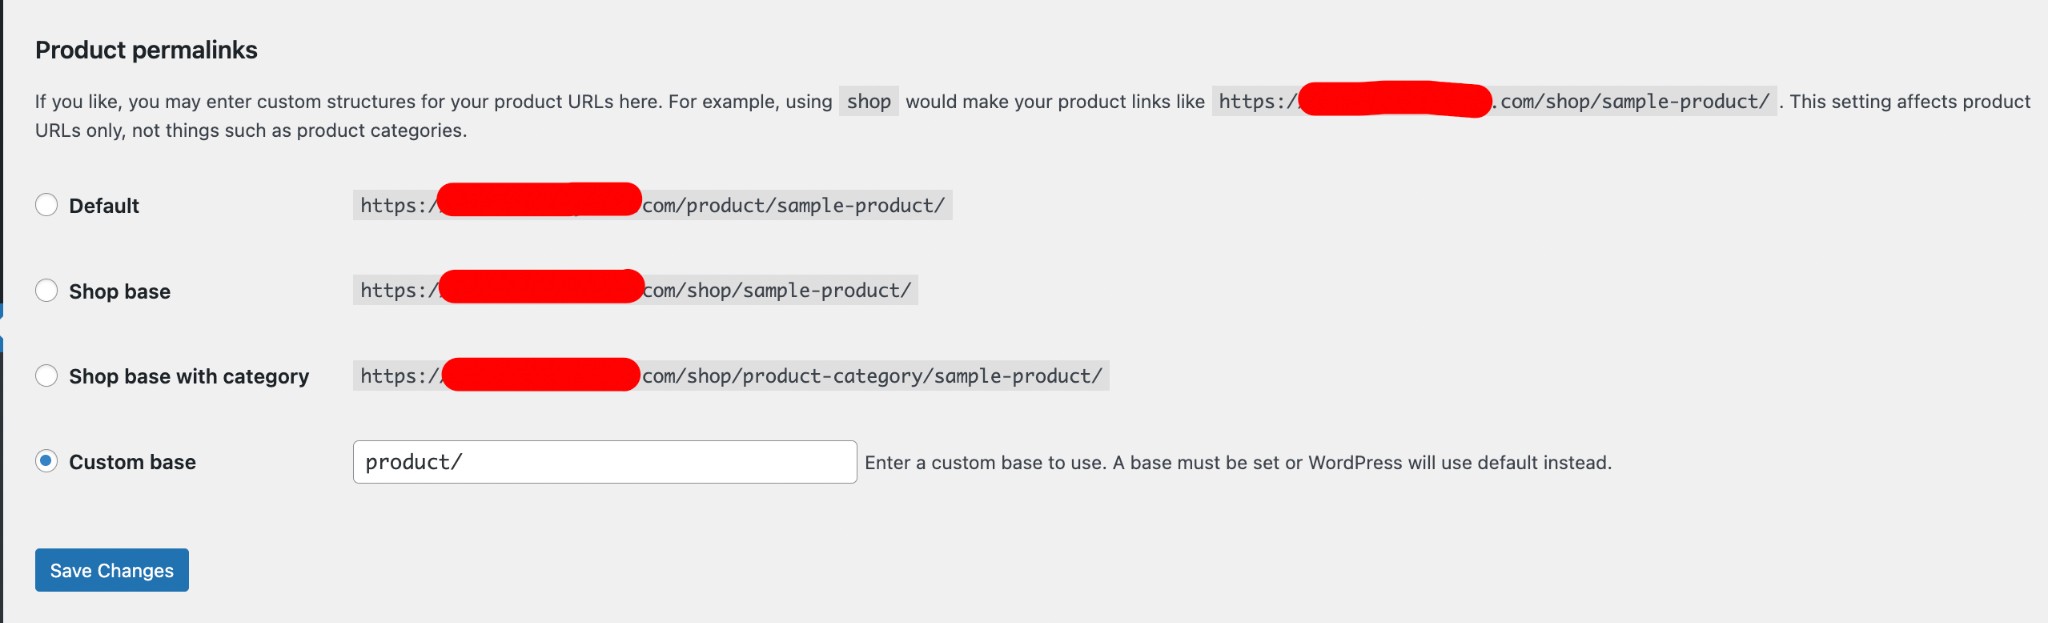
You also need to adjust your permalink settings to prevent 404 errors on some pages. Go to WP Admin → Settings → Permalinks → Product Permalinks, select the Custom Base option, and enter /product in the box. This will ensure your product pages have the correct URL structure.
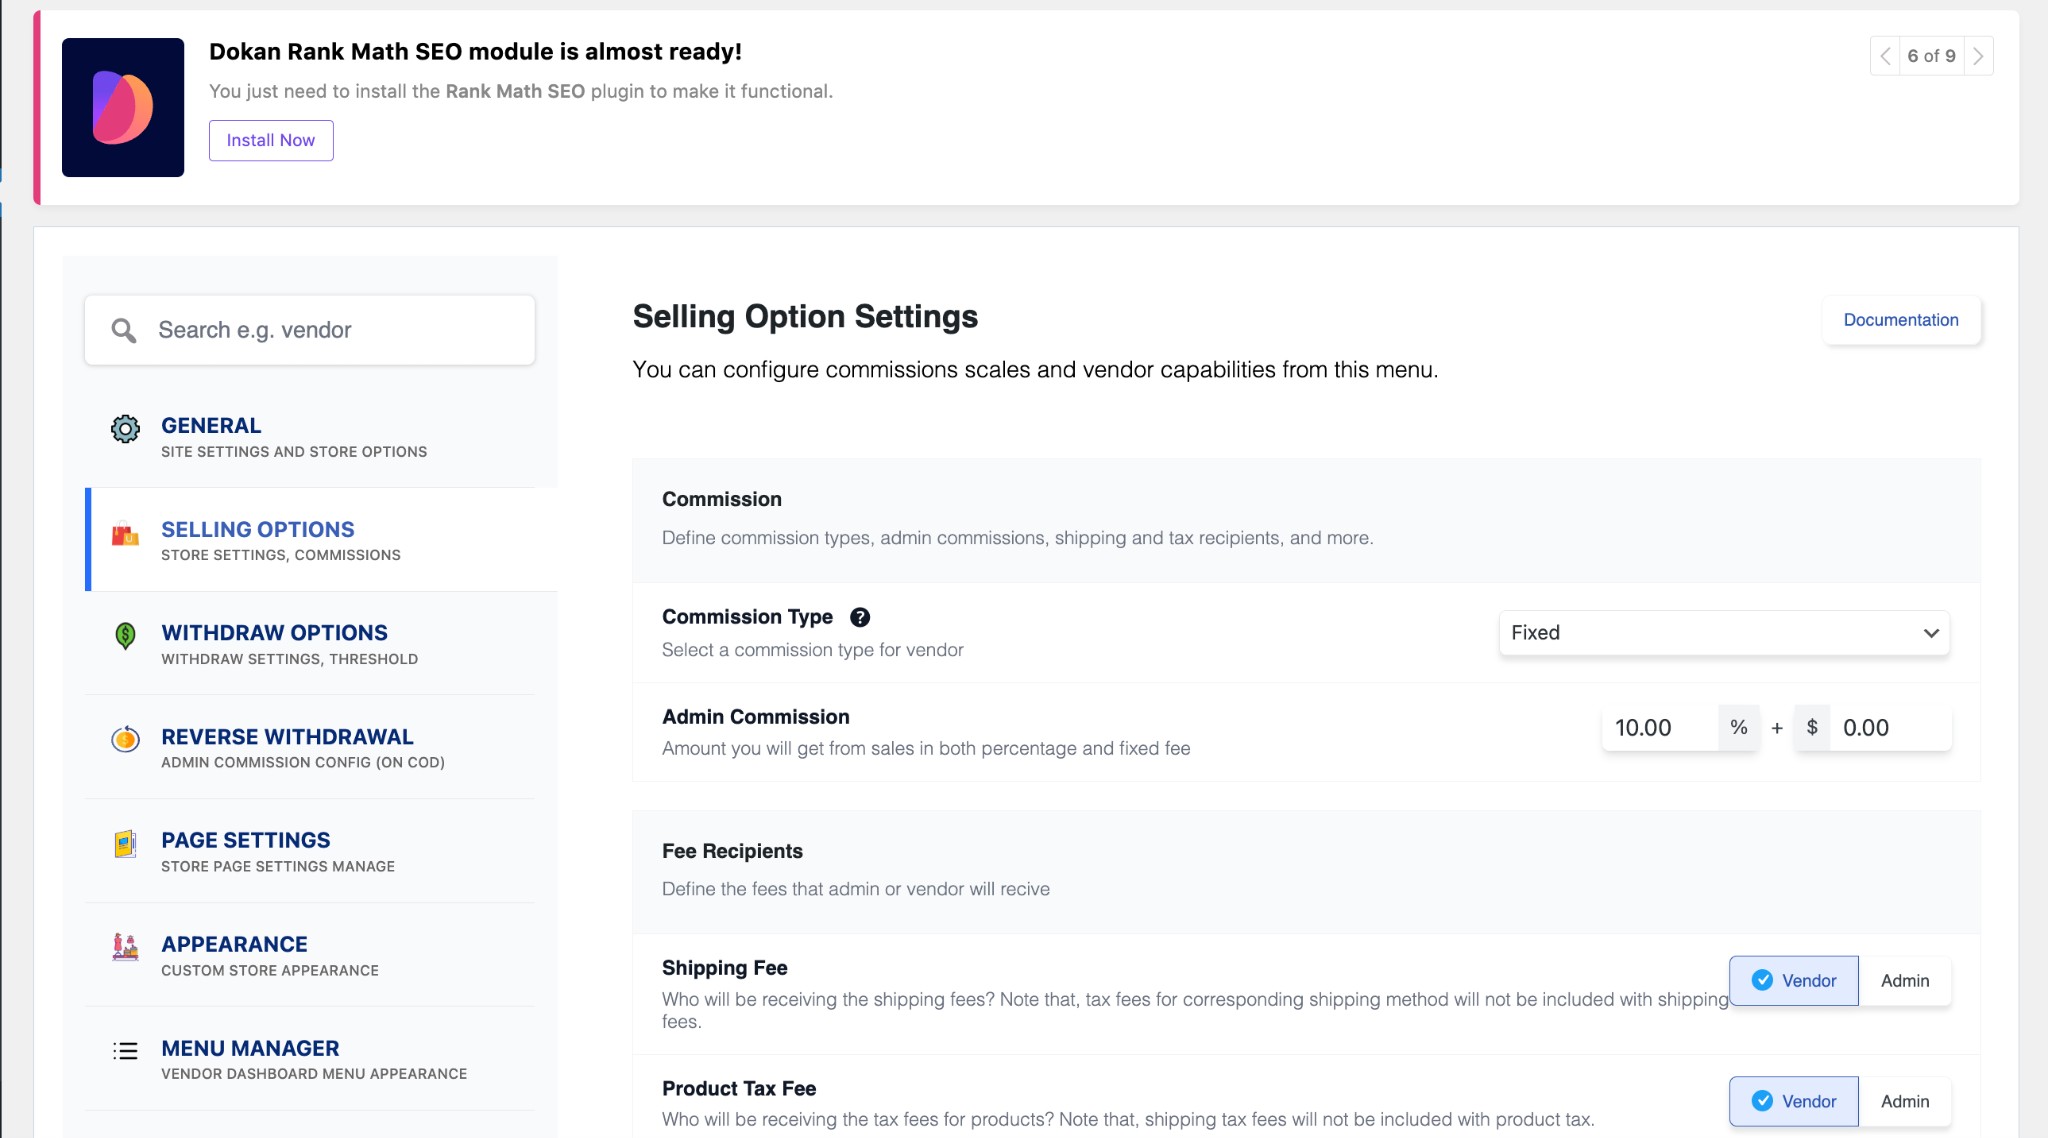
You also need to set your commission rate. To do this, go to WP Admin Dashboard → Dokan → Settings → Selling Options → Admin Commission.
You will have different options to set the commission as a percentage or a fixed amount. Dokan supports various types of vendor commissions, giving you flexibility in how you charge sellers.
Enable the Payment Gateways
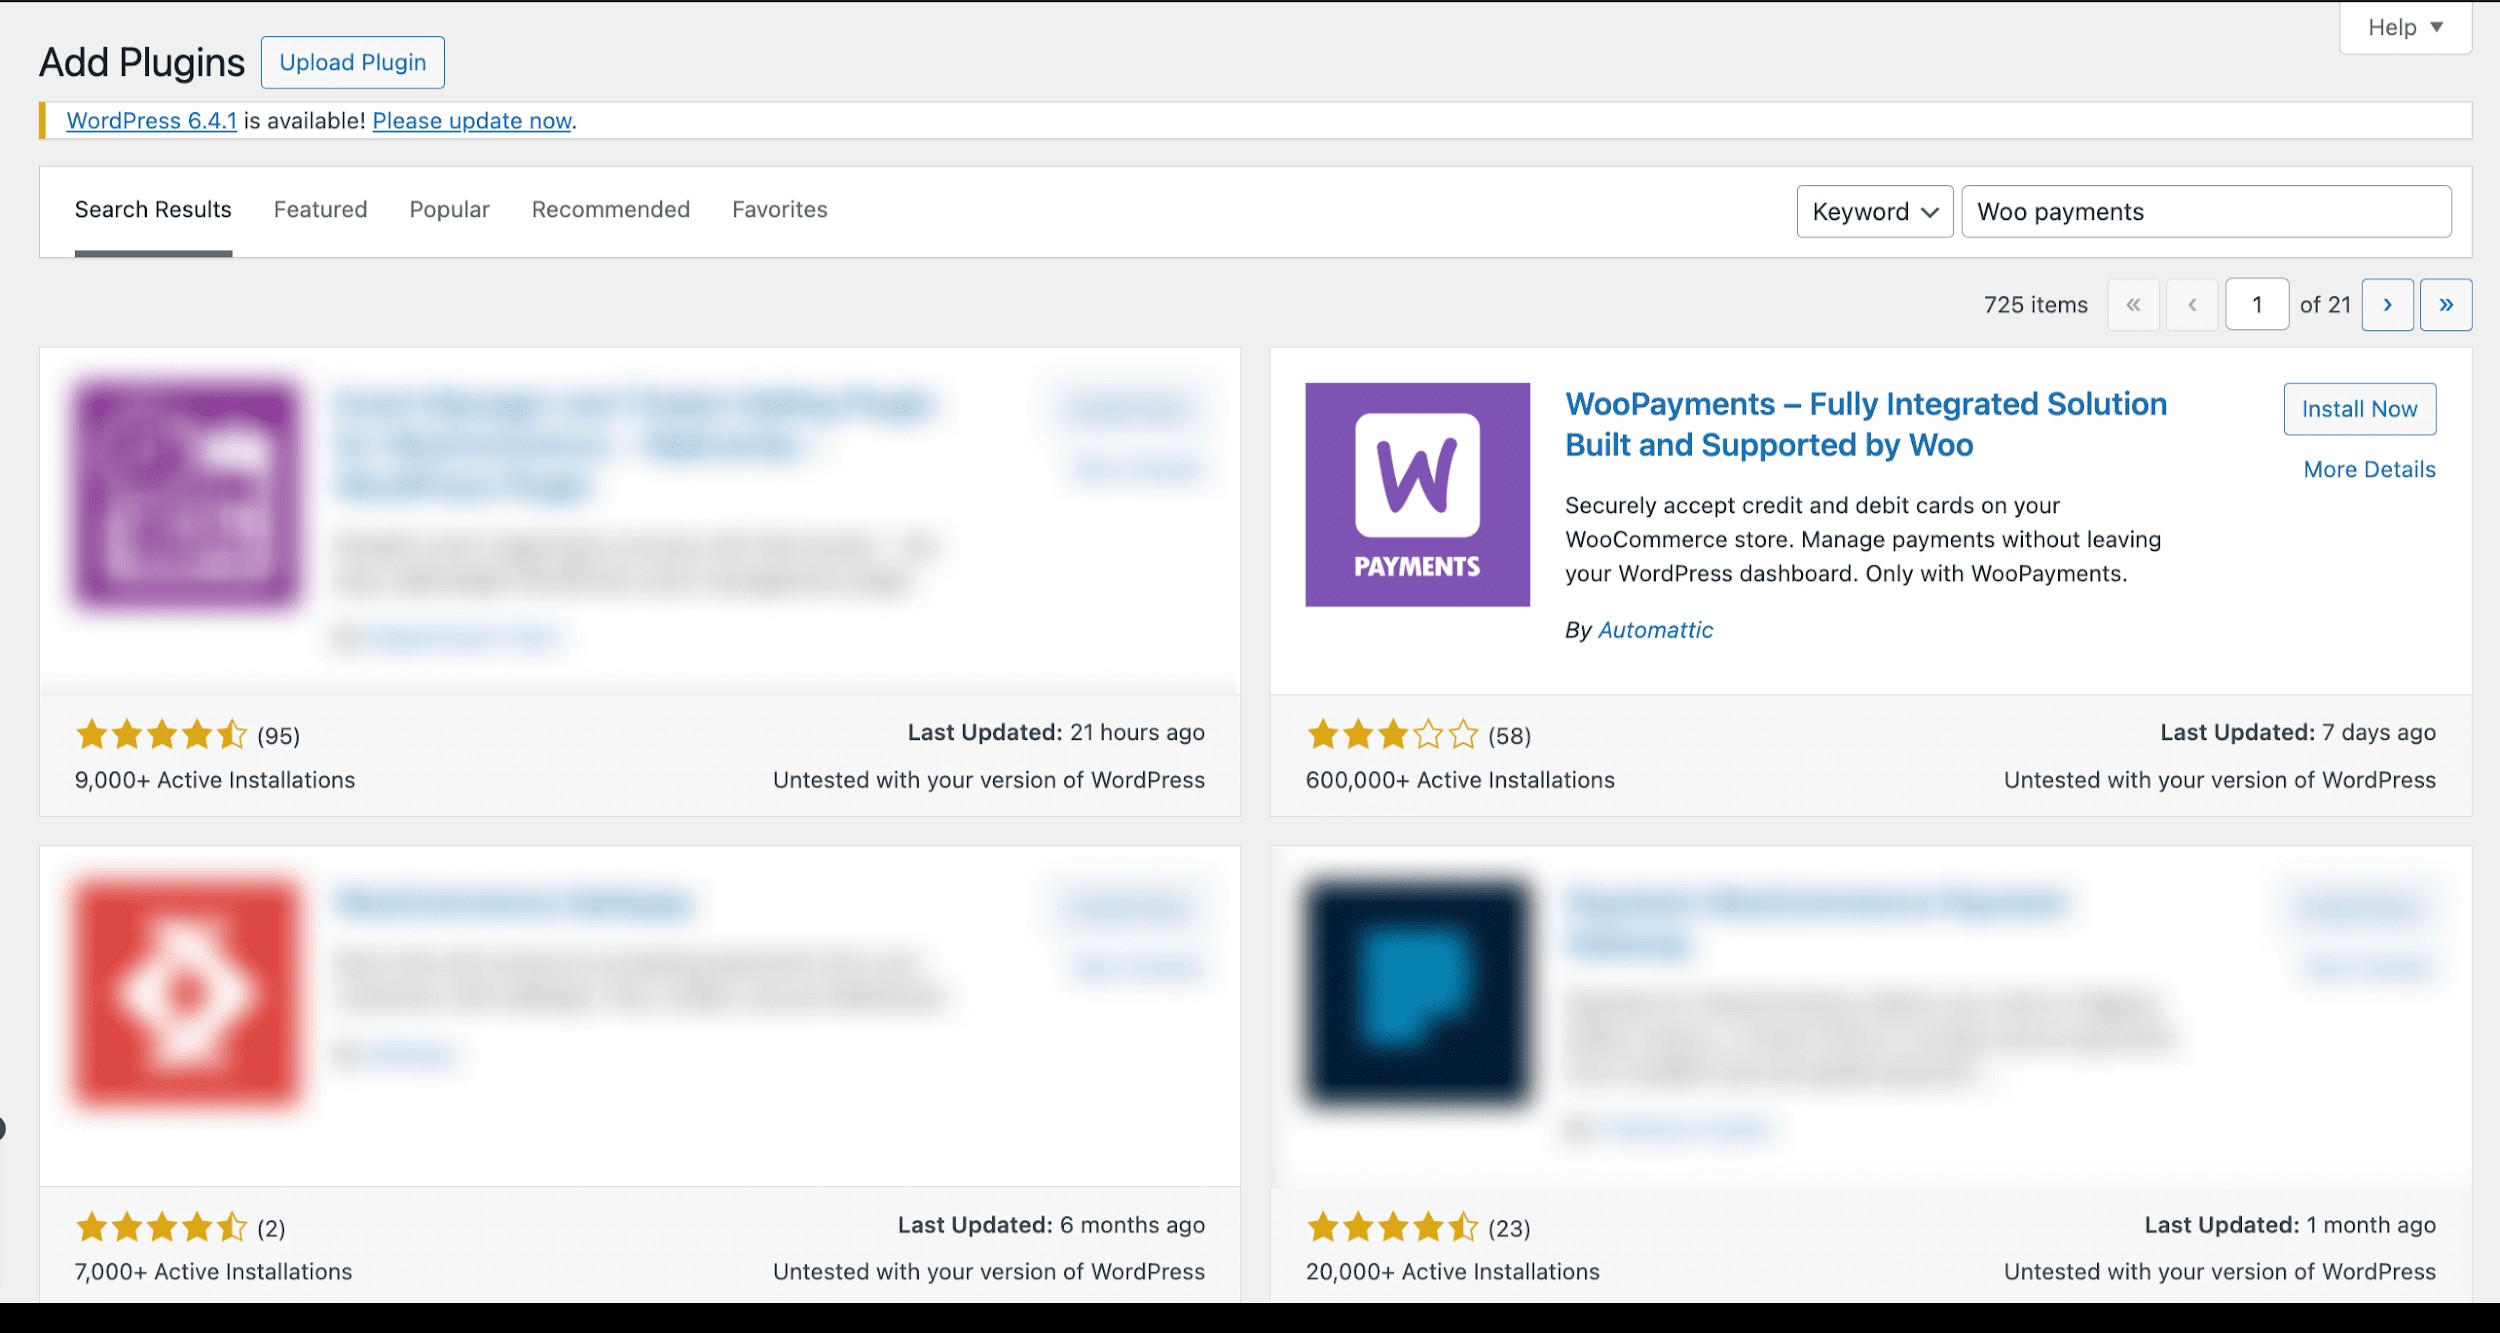
The Dokan multivendor plugin is compatible with all WooCommerce-compatible payment gateways, providing you with numerous options to process transactions on your marketplace. With the free version of Dokan, you can utilize basic payment methods, including check payments, bank transfers, and cash-on-delivery. Installing the WooPayments plugin, which supports a variety of payment methods, will enable you to accept more sophisticated payments, such as credit and debit cards.
However, you must install the Dokan Pro version if you want your marketplace to support adaptable payment methods, such as MOIP and Stripe Connect.
Enable Withdraw Methods for Vendors
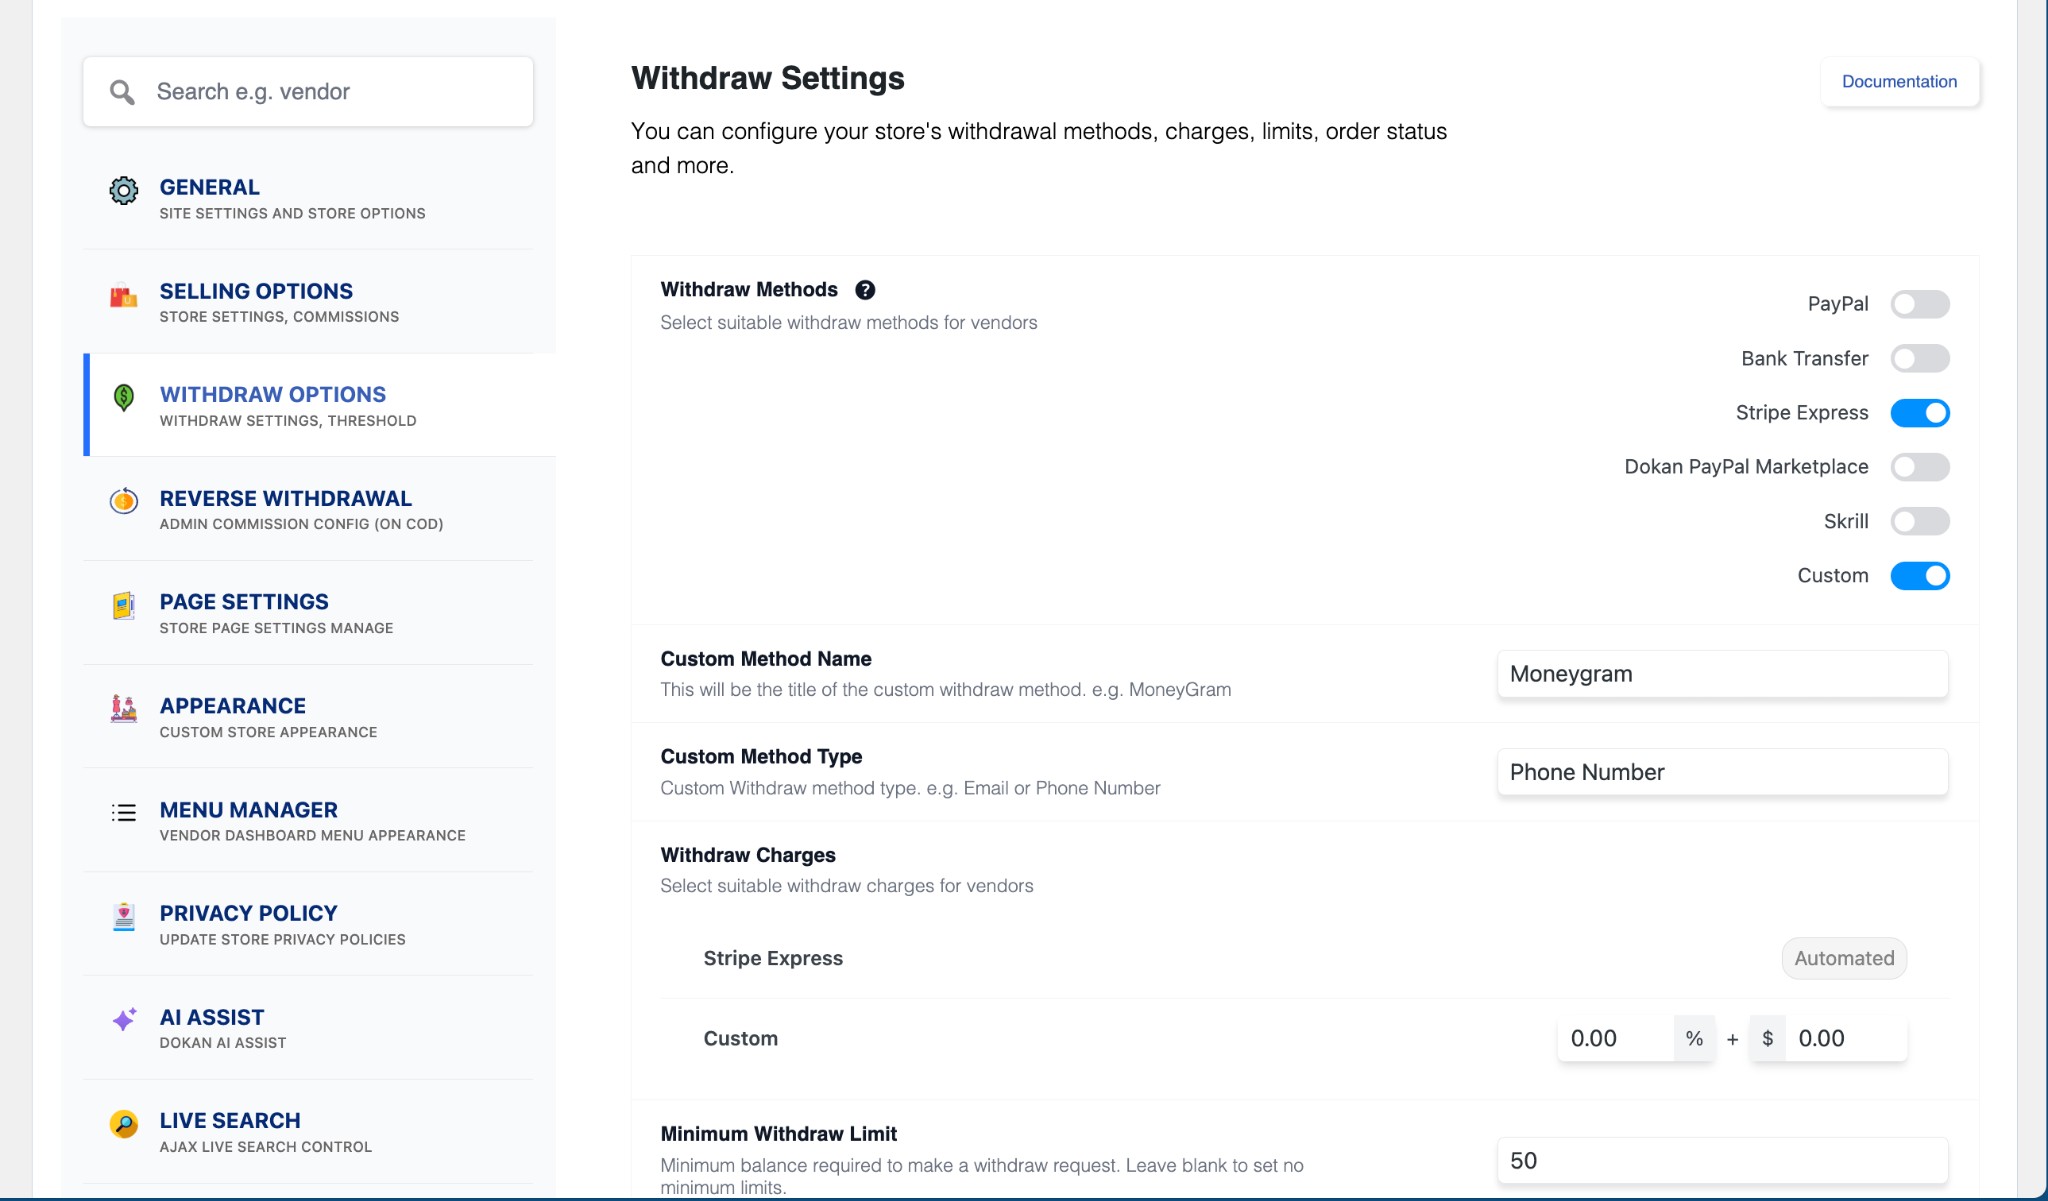
A reliable withdrawal system is essential for any online marketplace, and the Dokan multivendor plugin makes it simple to manage. To set it up, go to WP Admin → Dokan → Settings → Withdraw Options. Here, you can choose the withdrawal method and set the minimum balance a vendor must have before requesting a payout. This ensures vendors can access their earnings smoothly and efficiently.
Step 4: Upload Products and Set Up Admin Shop If You Want
This step is optional but allows you to sell products alongside other vendors:
- To start, go to Dokan → Vendors and enable selling by toggling the button.
- Then, add your products by going to WordPress Backend → Products → Add New.
This allows you to list your items on the marketplace, just like any other vendor.
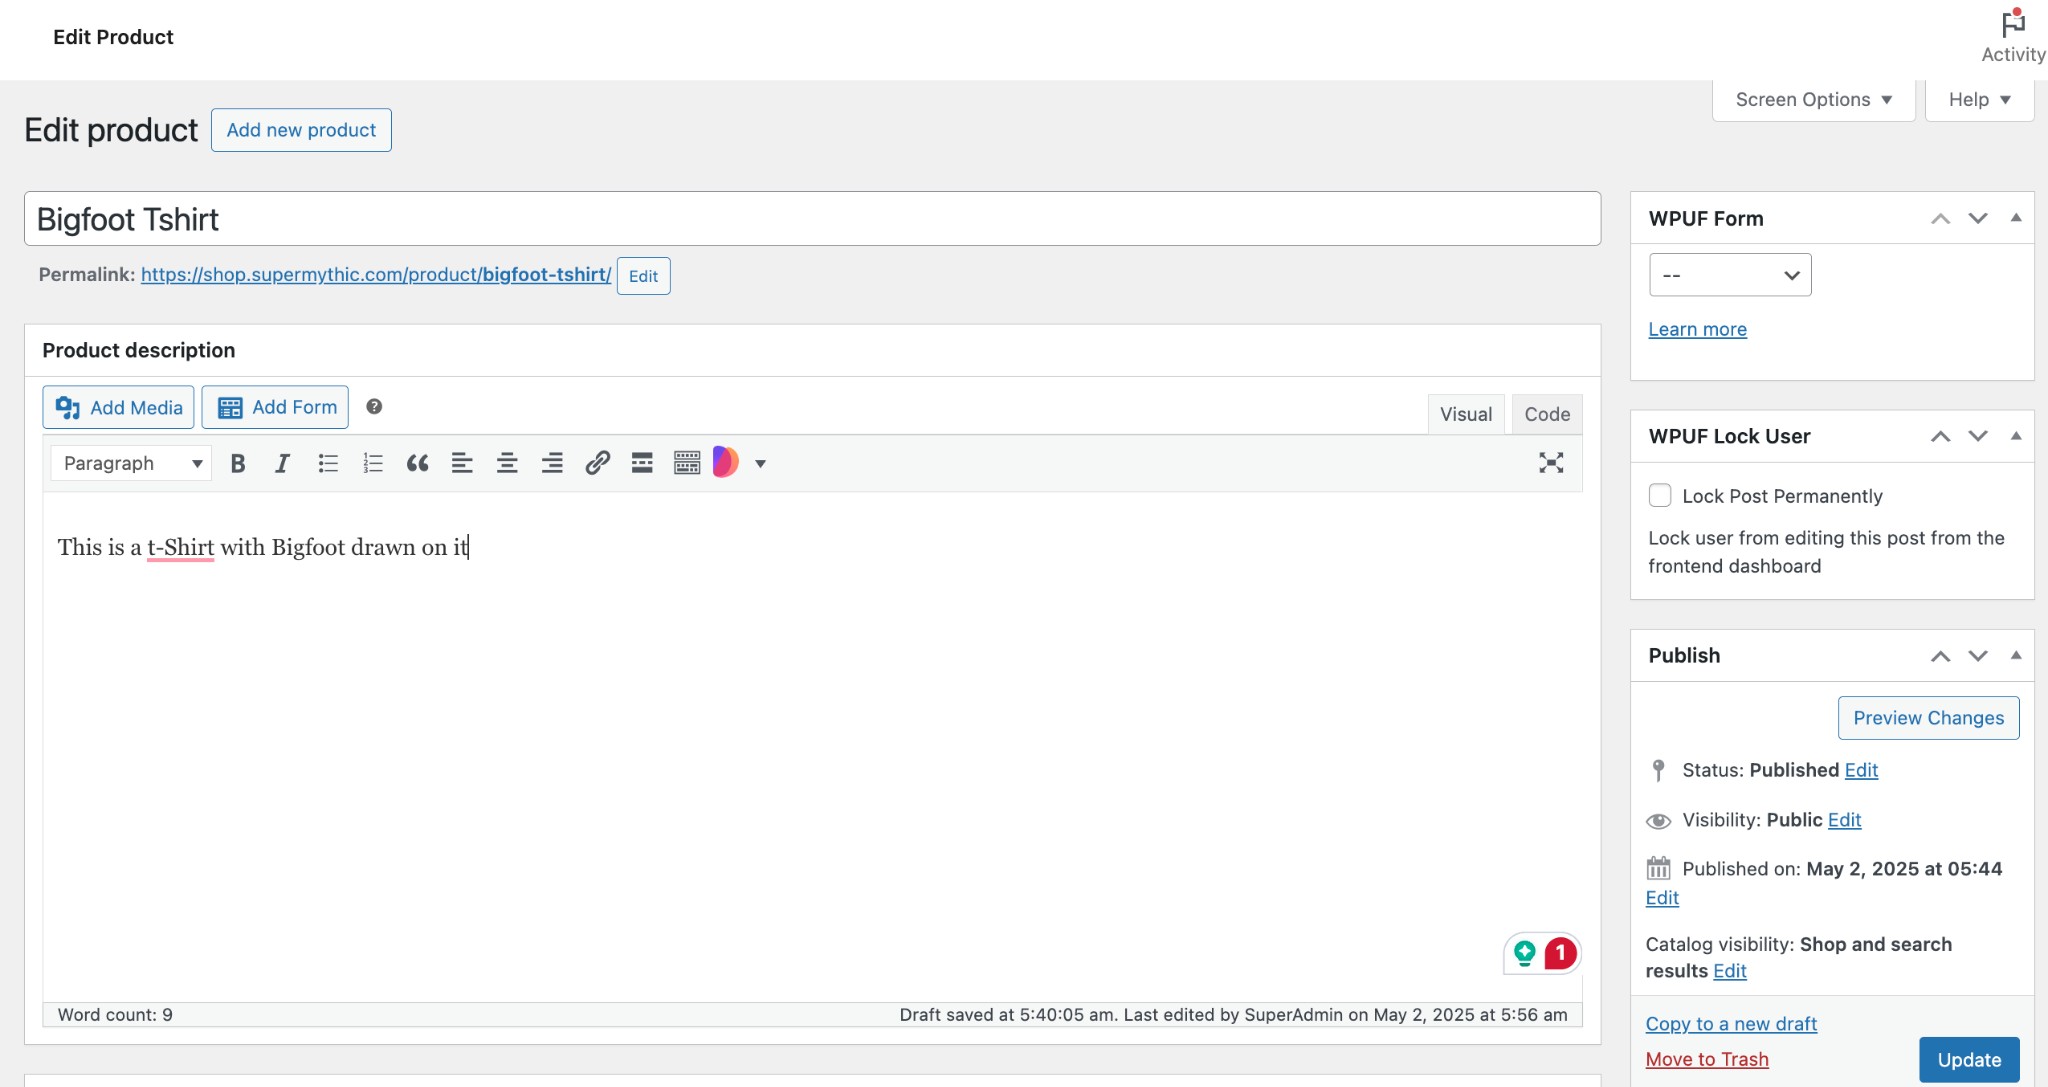
Vendors can also upload products from the front end via Vendor Dashboard → Products → Add New, including details like shipping, taxes, and product attributes.

From the product creation form, vendors can add features like shipping, taxes, and product qualities.
Step 5: Invite Vendors to Your Marketplace
Allow vendors to join your marketplace using Dokan’s default registration form. For a custom experience, create registration forms with the fields your marketplace requires.
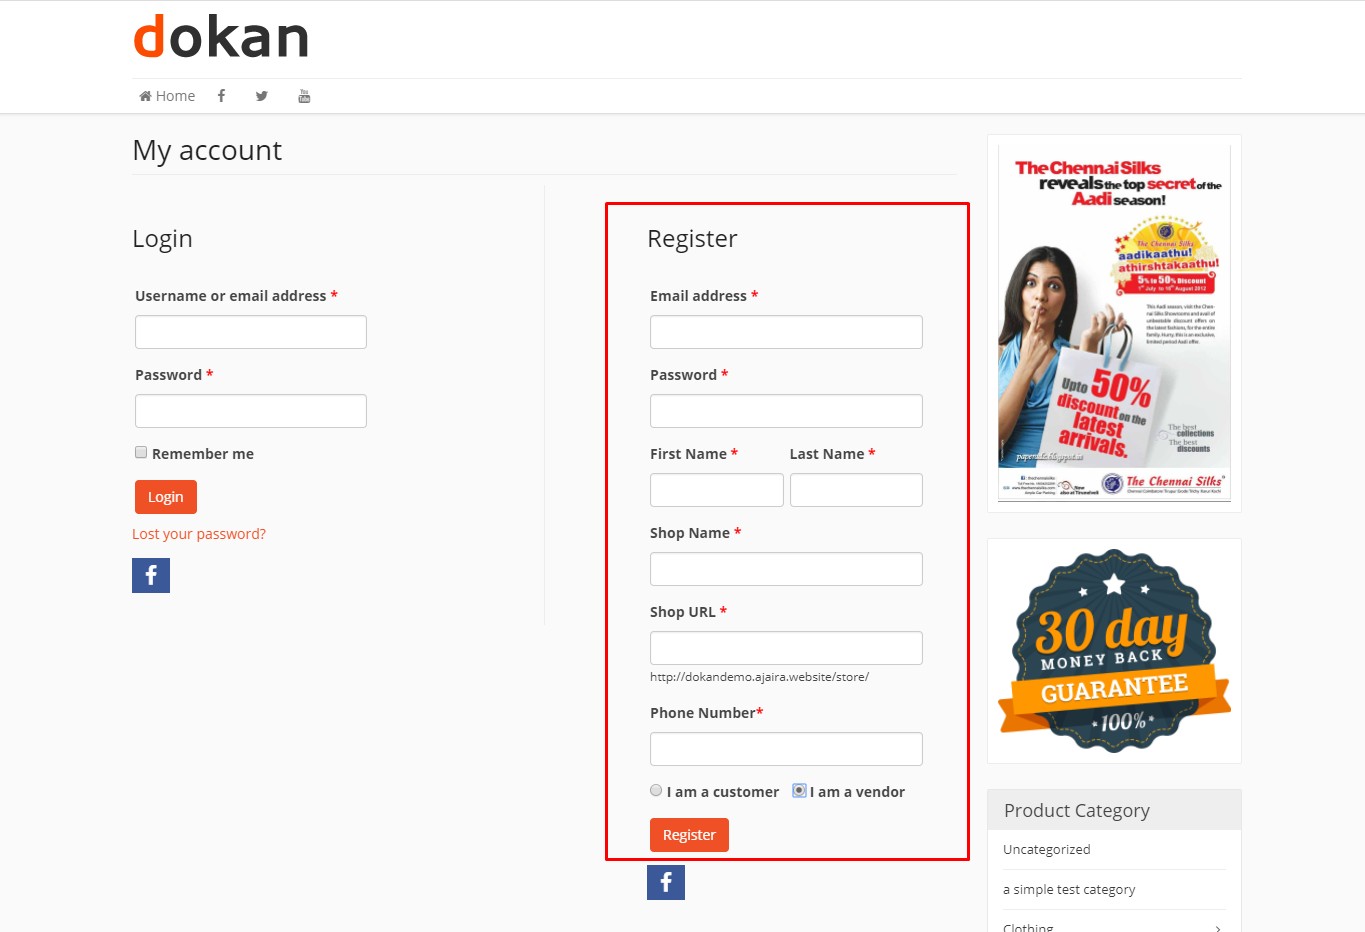
To let vendors start selling, go to Dokan → Vendors and toggle the selling status on. If you want vendors to add products, navigate to Dokan → Settings → Selling Options and enable ‘New Vendor Product Upload’. This allows vendors to upload and manage their products on your marketplace.
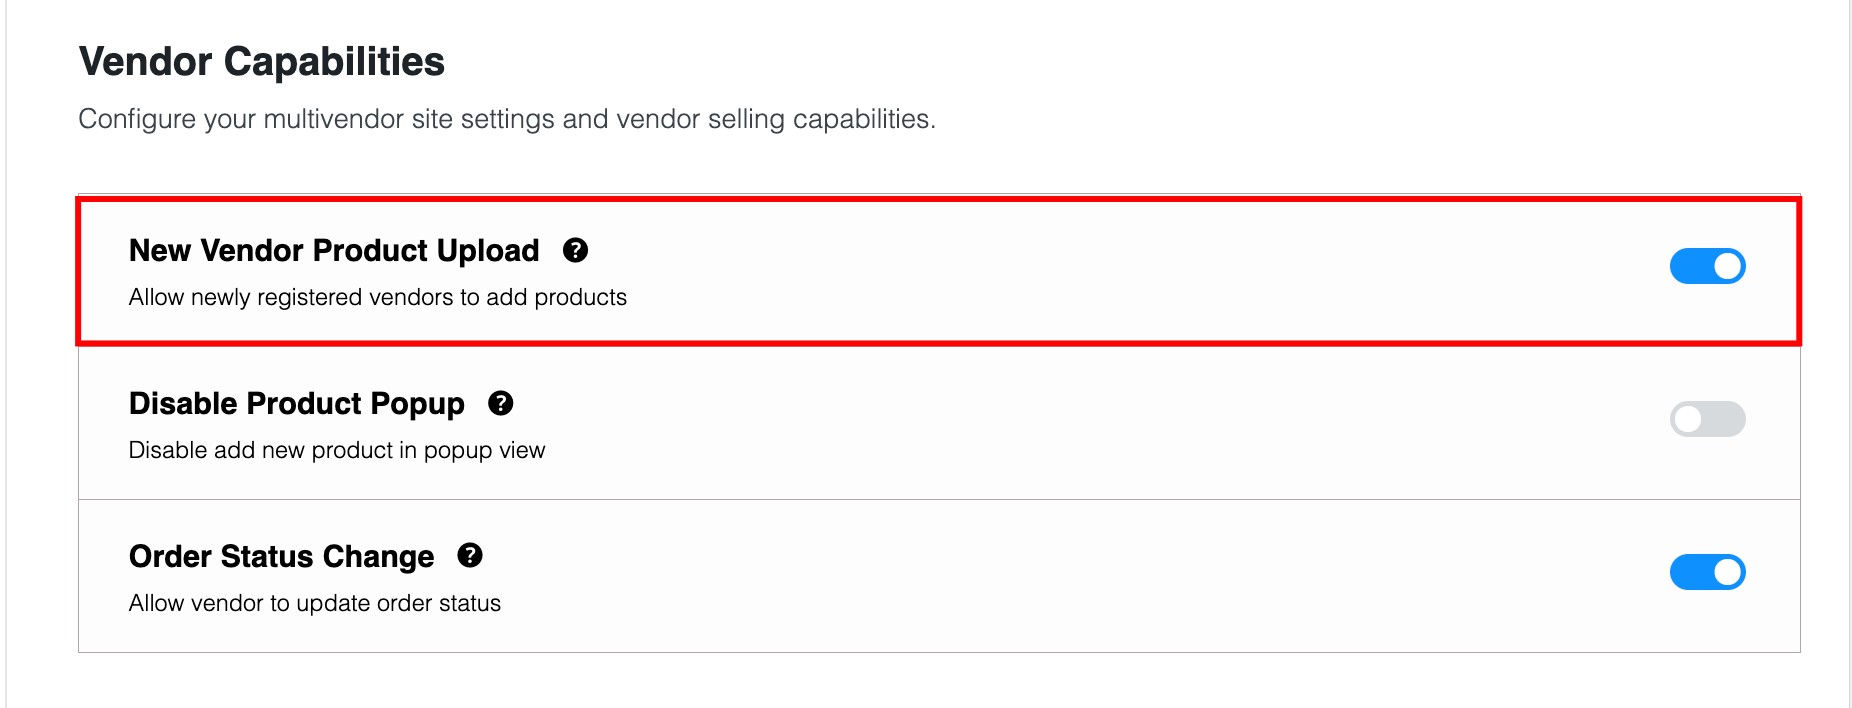
As demonstrated above for the admin shop, vendors can upload their goods from the front end.
How to Promote Your Marketplace?
Promoting your marketplace is key to attracting both buyers and vendors. Even a great platform can go unnoticed without marketing. A strong promotion strategy helps grow your audience, boost transactions, and build trust. In 2025, with online shopping and marketplaces expanding rapidly, leveraging multiple marketing channels is essential.
1. Social Media
Post consistently on Facebook, Instagram, Twitter, and LinkedIn—ideally 4–5 times a week. Highlight products, feature vendors, and share behind-the-scenes content. Use reels, carousel posts, and short videos to increase engagement. Track reach, likes, shares, and clicks using tools like Meta Business Suite or Hootsuite.
2. Content Marketing
Publish 1–2 blog posts per week targeting your marketplace niche. Examples include “Top Products for Summer 2025” or “How to Choose the Best Home Gadget.” Optimize for SEO and track traffic, bounce rates, and conversions with Google Analytics. Repurpose content into infographics or short videos for social channels.
3. Email Marketing
Send weekly or biweekly newsletters with product updates, deals, and new vendor launches. Segment your audience by behavior, location, or interests for more relevant campaigns. Track open rates, clicks, and conversions, and utilize automation to send welcome emails, recover abandoned carts, and promote special offers.
4. Paid Ads
Run targeted campaigns on Google, Facebook, and Instagram. Start with small budgets to identify high-performing ads, then scale. To target the most relevant users, utilize lookalike audiences, retargeting, and custom audiences. Track impressions, clicks, conversions, and ROI, and regularly optimize creatives.
5. Influencer Marketing
Partner with micro and mid-tier influencers (5k–50k followers) in your niche. Have them showcase products, review vendors, or create tutorials. Track traffic and sales via UTM links. Run campaigns monthly or around major sales events for maximum impact.
6. Affiliate Partnerships
Recruit bloggers, content creators, and niche websites as affiliates. Offer commission on sales they drive to your marketplace. Track performance using affiliate software and reward top performers to maintain motivation.
7. Community & Event Marketing
Participate in online communities, host webinars, or sponsor local events to expand your reach and engage with your audience. Share your marketplace’s story, showcase sellers, and provide value to the audience. This builds trust, awareness, and a loyal customer base.
Final Thoughts
Creating your own multi-vendor marketplace in WordPress is simpler than you might think. With Dokan, you can set up a platform where multiple sellers list products, manage orders, and grow their businesses; all without any coding. The marketplace industry is expanding rapidly, leaving opportunities for new platforms in almost every niche. By starting today, you can connect buyers and sellers, deliver value, and gradually build a platform that continues to grow over time. Your marketplace can become the go-to destination for your niche. Start small, stay consistent, and keep improving. The earlier you launch, the sooner you begin building a thriving community of buyers and vendors.
Frequently Asked Questions (FAQs)
Q1. How do I approve or manage new vendors?
Answer: You can review vendor applications and approve or reject them from the Dokan dashboard to maintain quality on your marketplace.
Q2. Can we set different commission rates for each vendor?
Answer: Yes. Dokan allows you to configure commissions as a percentage or fixed amount and assign different rates to different vendors.
Q3. How can vendors manage their own products?
Answer: Each vendor gets a dedicated dashboard to add, edit, or remove products, track orders, and manage their store settings.
Q4. Can I create product variations, such as size or color?
Answer: Yes. Vendors can list products with multiple variations, including color, size, or other attributes, making it easier for customers to select the right option.
Recommended Articles
We hope this comprehensive guide to creating a Multi-Vendor Marketplace in WordPress helps you launch and grow your online platform. Check out these recommended articles for more tips, strategies, and insights to enhance your marketplace success.
