
Introduction to Lens Flare in After Effects
After Effects is video editing software in which we can make different types of animation by using some important features of this software, Lens Flare is an important feature of this software. We can give the effects of light when it passes through any lens on any composition. We have some lists of parameters of Lens Flare through which we can make a very effective combination of lens flare effect for any composition. So let us start our learning in this software and get understand the parameters of lens flare features of After Effects software.
How to Use Lens Flare in After Effects?
We will understand Lens Flare with an example in this article and learn about how to make custom lens flare. Before starting our article about this context, let us have a quick look at the User Interface of this software for our better understanding.
Step 1: At the top, we have two main ribbons first is the Menu bar, and the second is Toolbar; below this, we have three sections that are Project panel, Composition window, and Parameters tabs; at the end of the workings screen, we have two sections that are Layer panel and Timeline panel. You can make your working screen by adjusting the panel at your desired place on the User screen.

Step 2: Now, let us have a new composition. For new composition, go to the top of the working screen and click on ‘Composition Menu’ of the Menu bar. A drop-down list will be open, click on the ‘New Composition’ option of this drop-down list or press the Ctrl + N button from the keyboard.

Step 3: Or you can click on the ‘Create a new Composition’ tab of the Project panel of this software.

Step 4: Or you can right-click anywhere in the Project panel area. A drop-down list will be open; click on ‘New composition’ of this drop-down list.

Step 5: A composition setting box will be open. Make your desired setting in this composition setting box and press the Ok button of this dialog box.

Step 6: Now, let us make a solid layer. For the solid layer, go to the Layer menu of the Menu bar, a drop-down list will be open, click on the New option and then click on the Solid option of a new drop-down list or press Ctrl + Y button from the keyboard.

Step 7: Or you can make a right-click in the Layer section of the software. Go to the new drop-down list option and then choose the Solid option from the new drop-down list.

Step 8: Now the Solid setting box will be open, make your desired settings in this dialog box, name it as ‘Lens flare’, and press the Ok button of this box.

Step 9: Now go to the Effect menu of the Menu bar. Go to the Generate option in the drop-down list and click on the Lens Flare option in the new drop-down list.

Step 10: The parameter section of Lens Flare will be open in the Effect controls panel next to the Project panel of this software.

Step 11: Here, we have three options of lens type. You can choose any of them according to you.

Step 12: We can adjust the center of this lens from the Flare center option of Lens flare. Click on the plus icon of this option, and a center setting handle will become on the composition window screen in the form of plus sing.

Step 13: You can also set the brightness of the lens by decreasing and increasing the value of the Flare Brightness option of Lens Flare.

Step 14: You can increase the value of Flare brightness up to 300%.

Step 15: You can blend the lens effect with the solid layer by changing the value of the ‘Blend with Ori’ option of the Lens Flare.

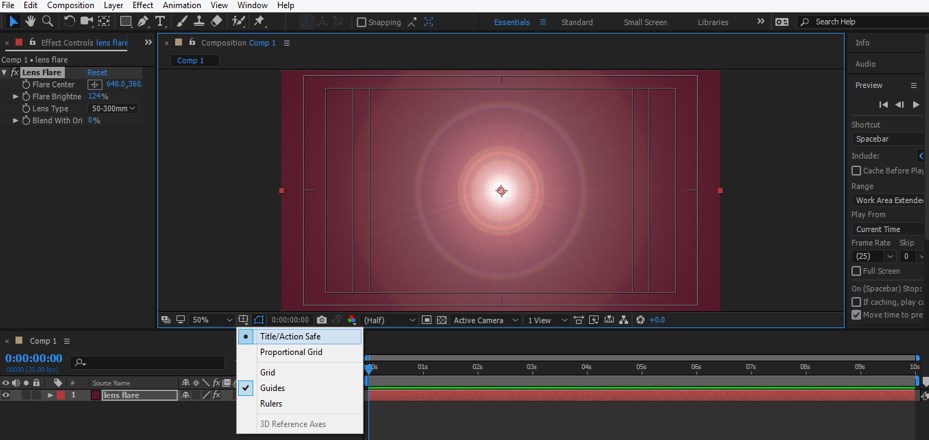
Step 16: Now, let us take all the focus of lens flare at the center by movie plus sing of Flare center option of Lens flare.

Step 17: Now, make the window section active for making our work easy by click on the ‘Title/Action Safe’ option of this list.
Step 18: Now, let us make adjustments in the color of this lens effect. For making color correction go to the Effect menu of the Menu bar and click on the Color Correction option of the drop-down list, then click on the Curves option of the new drop-down list.

Step 19: Here, we can adjust any color in the lens section from the list. Let us click on the Green option of the list.

Step 20: Now, you can move the curve according to you for changing the color in the layer section.

Step 21: Now can adjust more than one color from the list, or you can choose RGB color mode for making color correction in the lens section.

Step 22: Now, let us make another solid layer. Go to the Layer menu and click on the ‘New’ option, then click on the Solid option for the solid layer.

Step 23: Now, make the setting in the Solid settings box and name it as ‘Strikes’. Now press the Ok button of this dialog box.

Step 24: Now, take the Ellipse tool from the tool panel of this software and make an ellipse like this which will work as a mask layer.

Step 25: Now go to the Layer menu and click on the Solid Settings option.

Step 26: Now, change the color of this ellipse layer mask according to which suits your lens.

Step 27: Now click on Add option of this solid layer.

Step 28: Now, set the values of the Mask Feather option of this Mask so that it will give you a lens-like effect.

Step 29: Now again, go to the Effect menu, then go to the Stylize option and choose the Glow option from the new drop-down list.

Step 30: In this way, you can make a customize lens effect like this.

Step 31: Now, let us make a duplicate of this strikes layer by pressing Ctrl + D keys and decreasing these masks’ size.
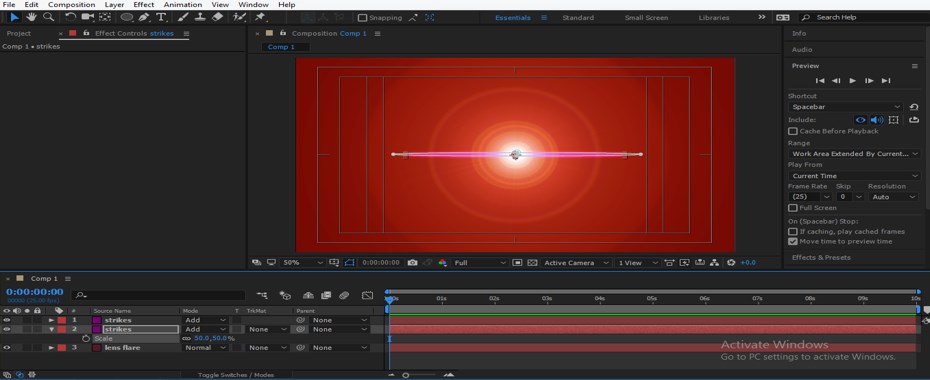
Step 32: Now adjust these strikes like this for giving a lighting effect on this lens flare effect.

In this way, you can use lens flare in After Effects software and get the best result in your composition.
Conclusion
Now, after going through this article, you can understand ‘what is lens flare’ and utilize this feature for your project work of After Effects software. You can get expertise in the Lens Flare feature of this software by practicing on the parameters of this feature.
Recommended Articles
This is a guide to Lens Flare in After Effects. Here we discuss the Introduction and steps to create lens effect in after effects. You can also go through our other related articles to learn more –
